This guide introduces a suite of custom LoRA models specifically designed to work with Qwen Edit, inside Scenario’s “Edit With Prompts“ interface. Each LoRA includes a description of its primary purpose, guidance on how to prompt it, and a link to its corresponding repository on Hugging Face.
The base model, Qwen Image (aka Qwen-Image-Edit 2509), is a major update in the Qwen-Image series. It supports multi-image editing (1–3 inputs), delivers more consistent single-image edits (including people, products and text), and offers native compatibility with ControlNet conditions such as depth maps, edge maps and keypoints.
By layering specialized LoRA models on top of the Qwen-Image-Edit base model, Scenario enables creators to perform highly targeted editing workflows (such as virtual camera movement, texture application, scene coherence, and product-to-background integration) with significantly greater precision and creative control.
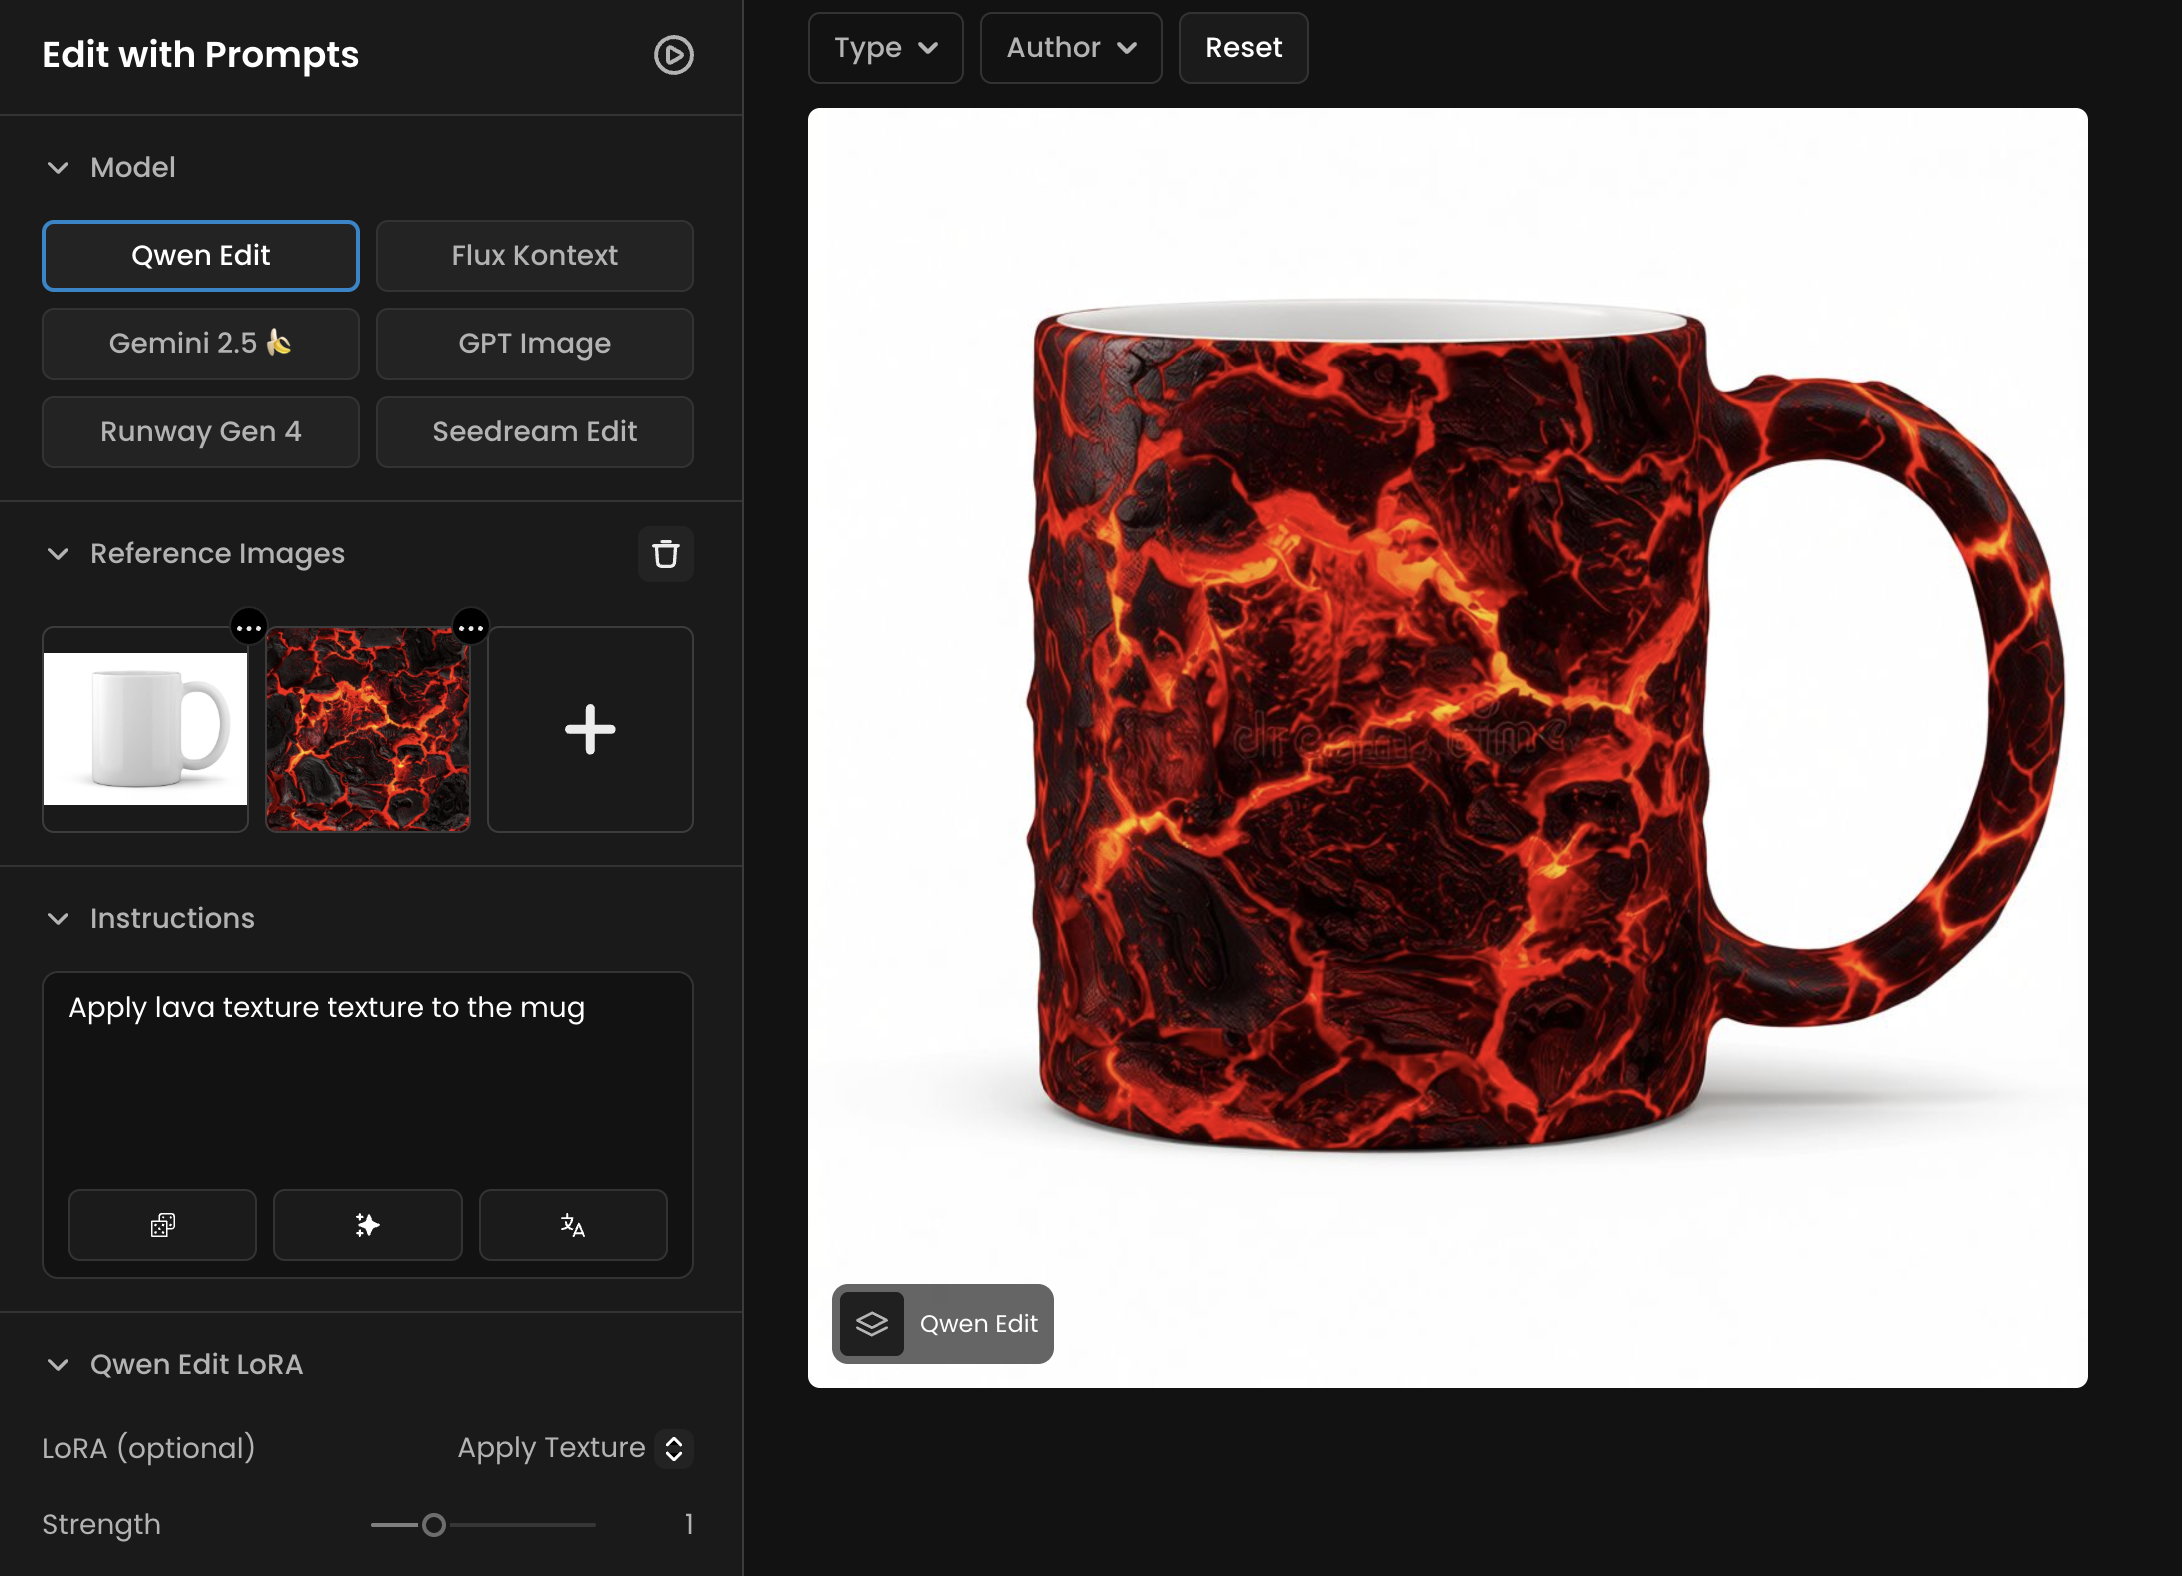
An example of the Apply Texture Qwen Edit LoRA: “Apply lava texture to the mug
Using Qwen Edit LoRAs in Scenario
To use a LoRA with Qwen Edit in your generation platform:
Go to Edit With Prompt: https://app.scenario.com/edit-with-prompts
Select “Qwen Edit” model
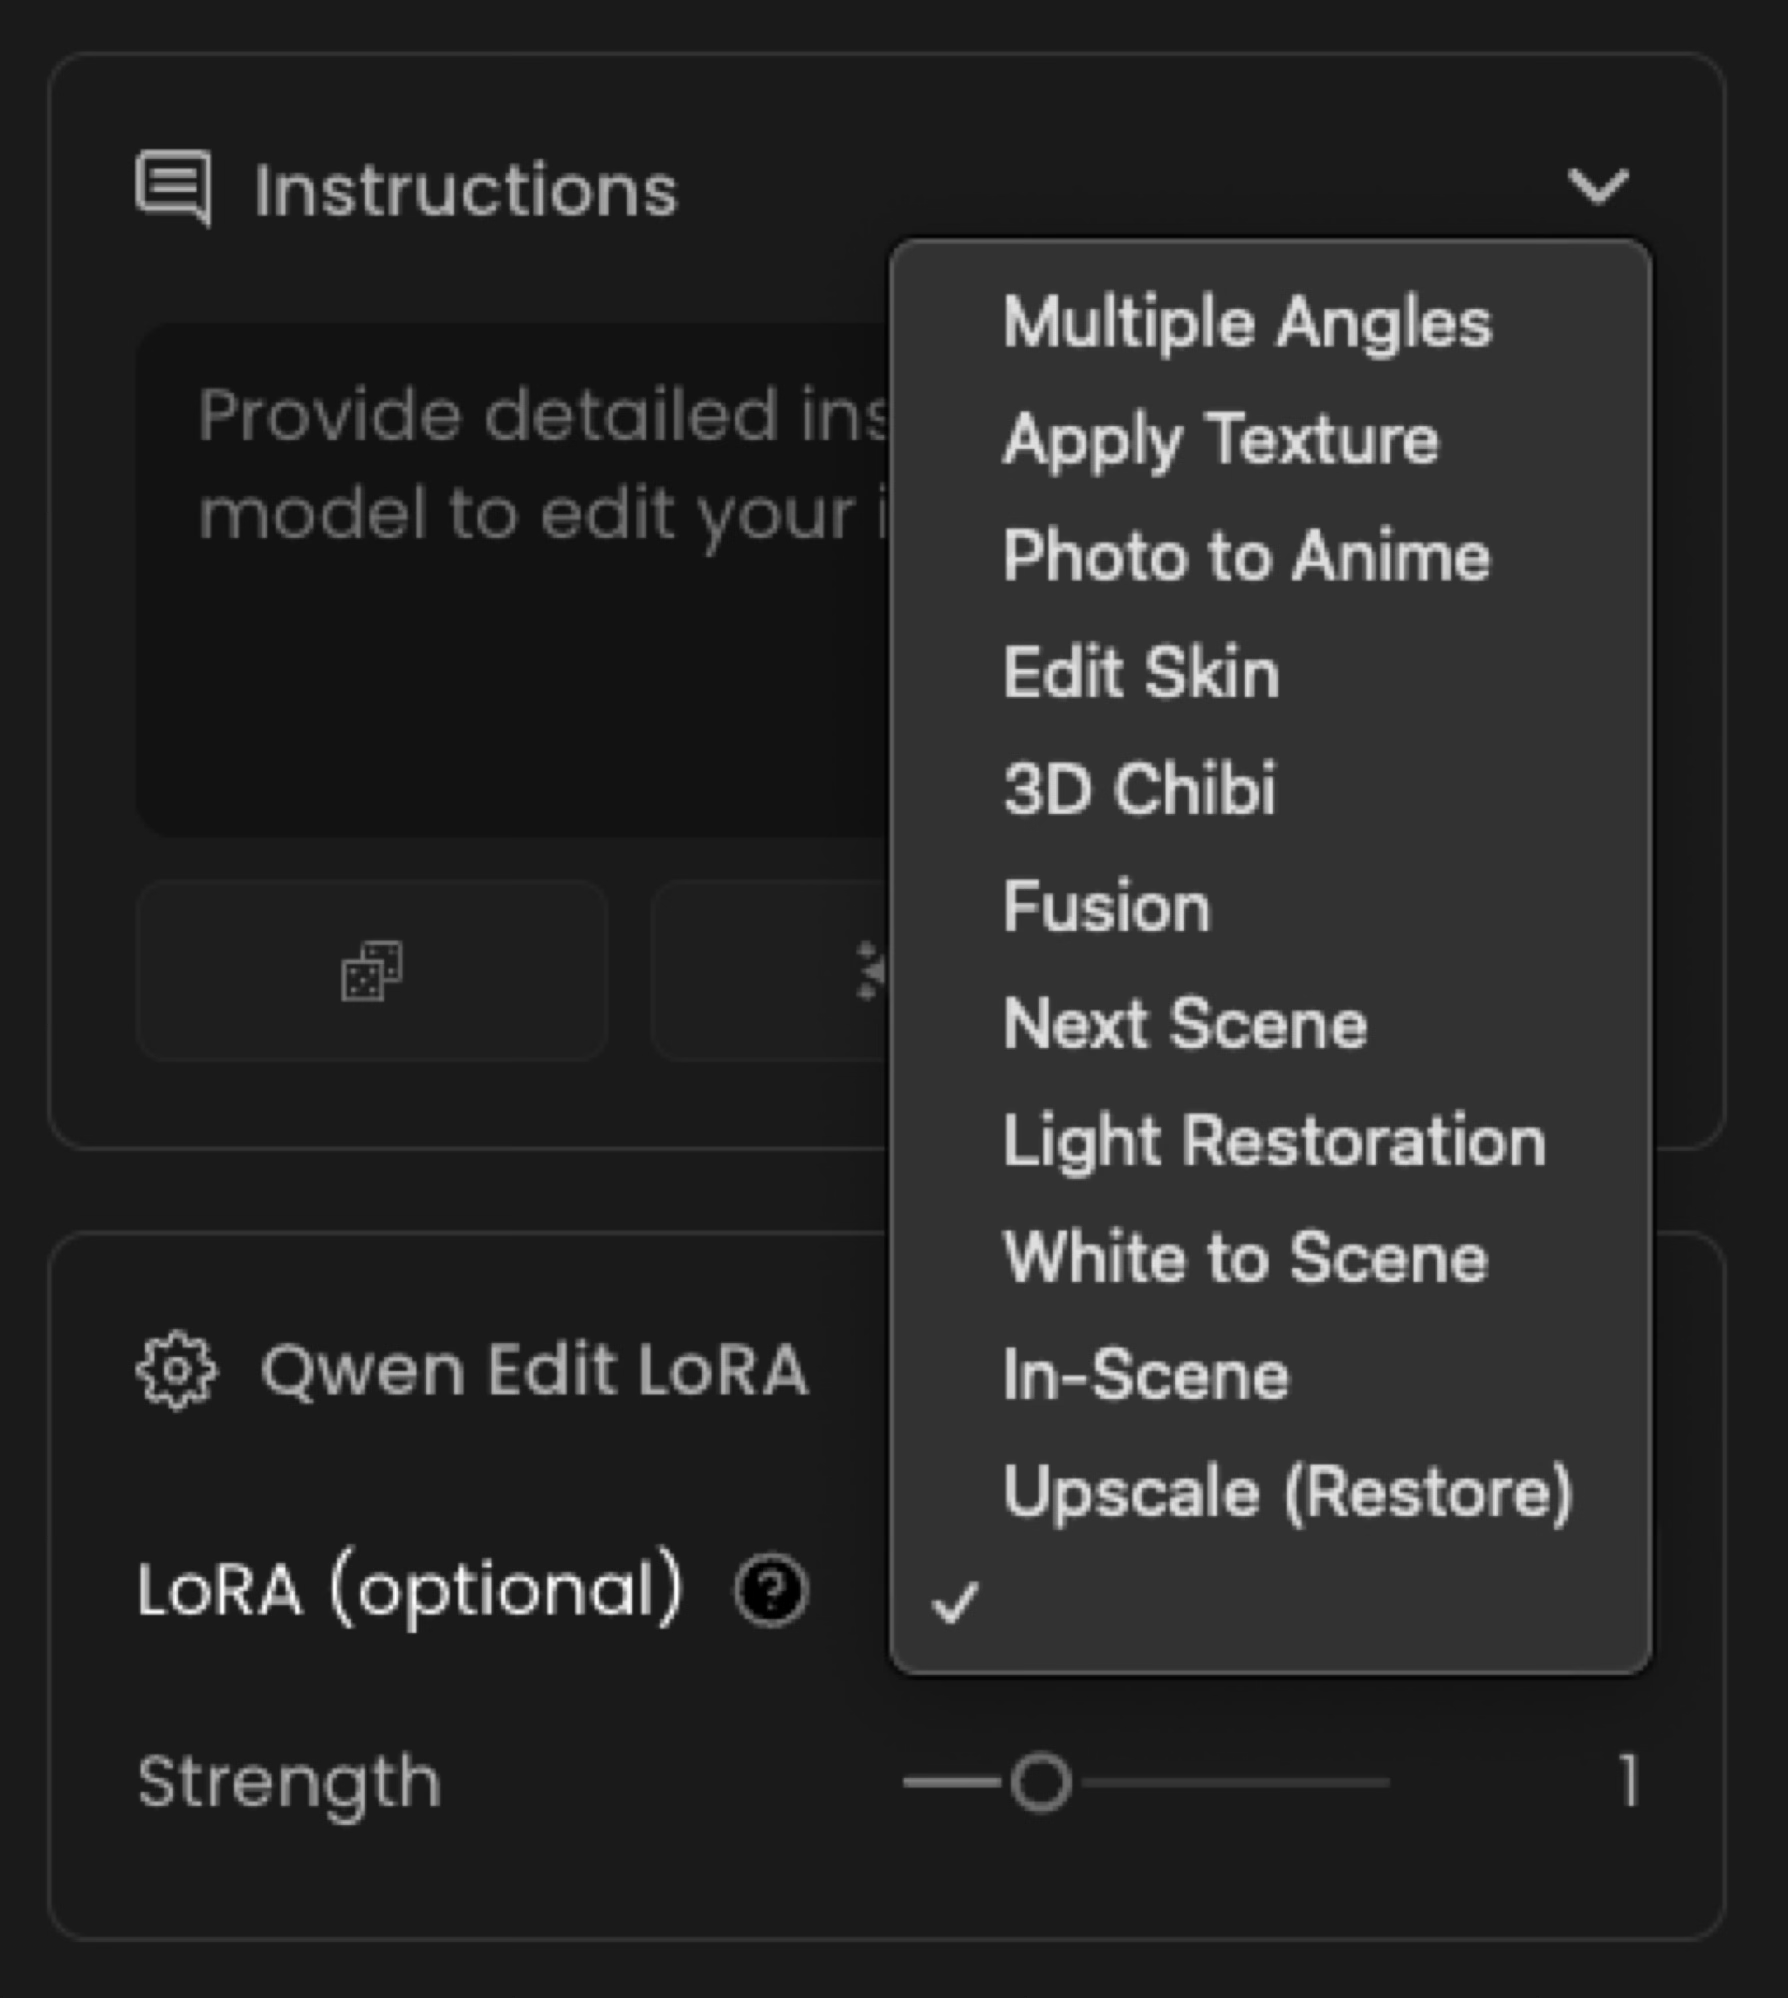
Choose a LoRA in the LoRA panel on the left, from the list of available model (Multiple Angles, Apply Texture, Photo to Anime, etc.).
Paste the correct instruction for that LoRA into the Instructions field of your prompt. (All required instructions are provided in the sections below.)
Multiple Angles
Note: this specific “Multiple Angles” model is also available on Scenario via a dedicated page, leveraging custom slider controls: https://app.scenario.com/models/model_qwen-edit-multiangle. More info on this page (link)
HF: dx8152/Qwen‑Edit‑2509‑Multiple‑angles
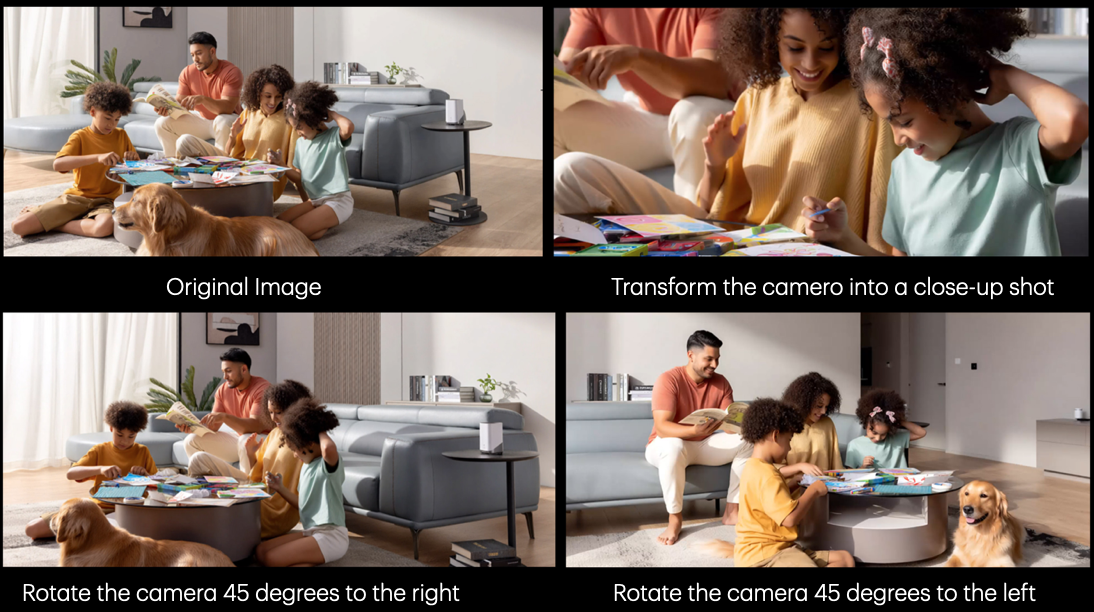
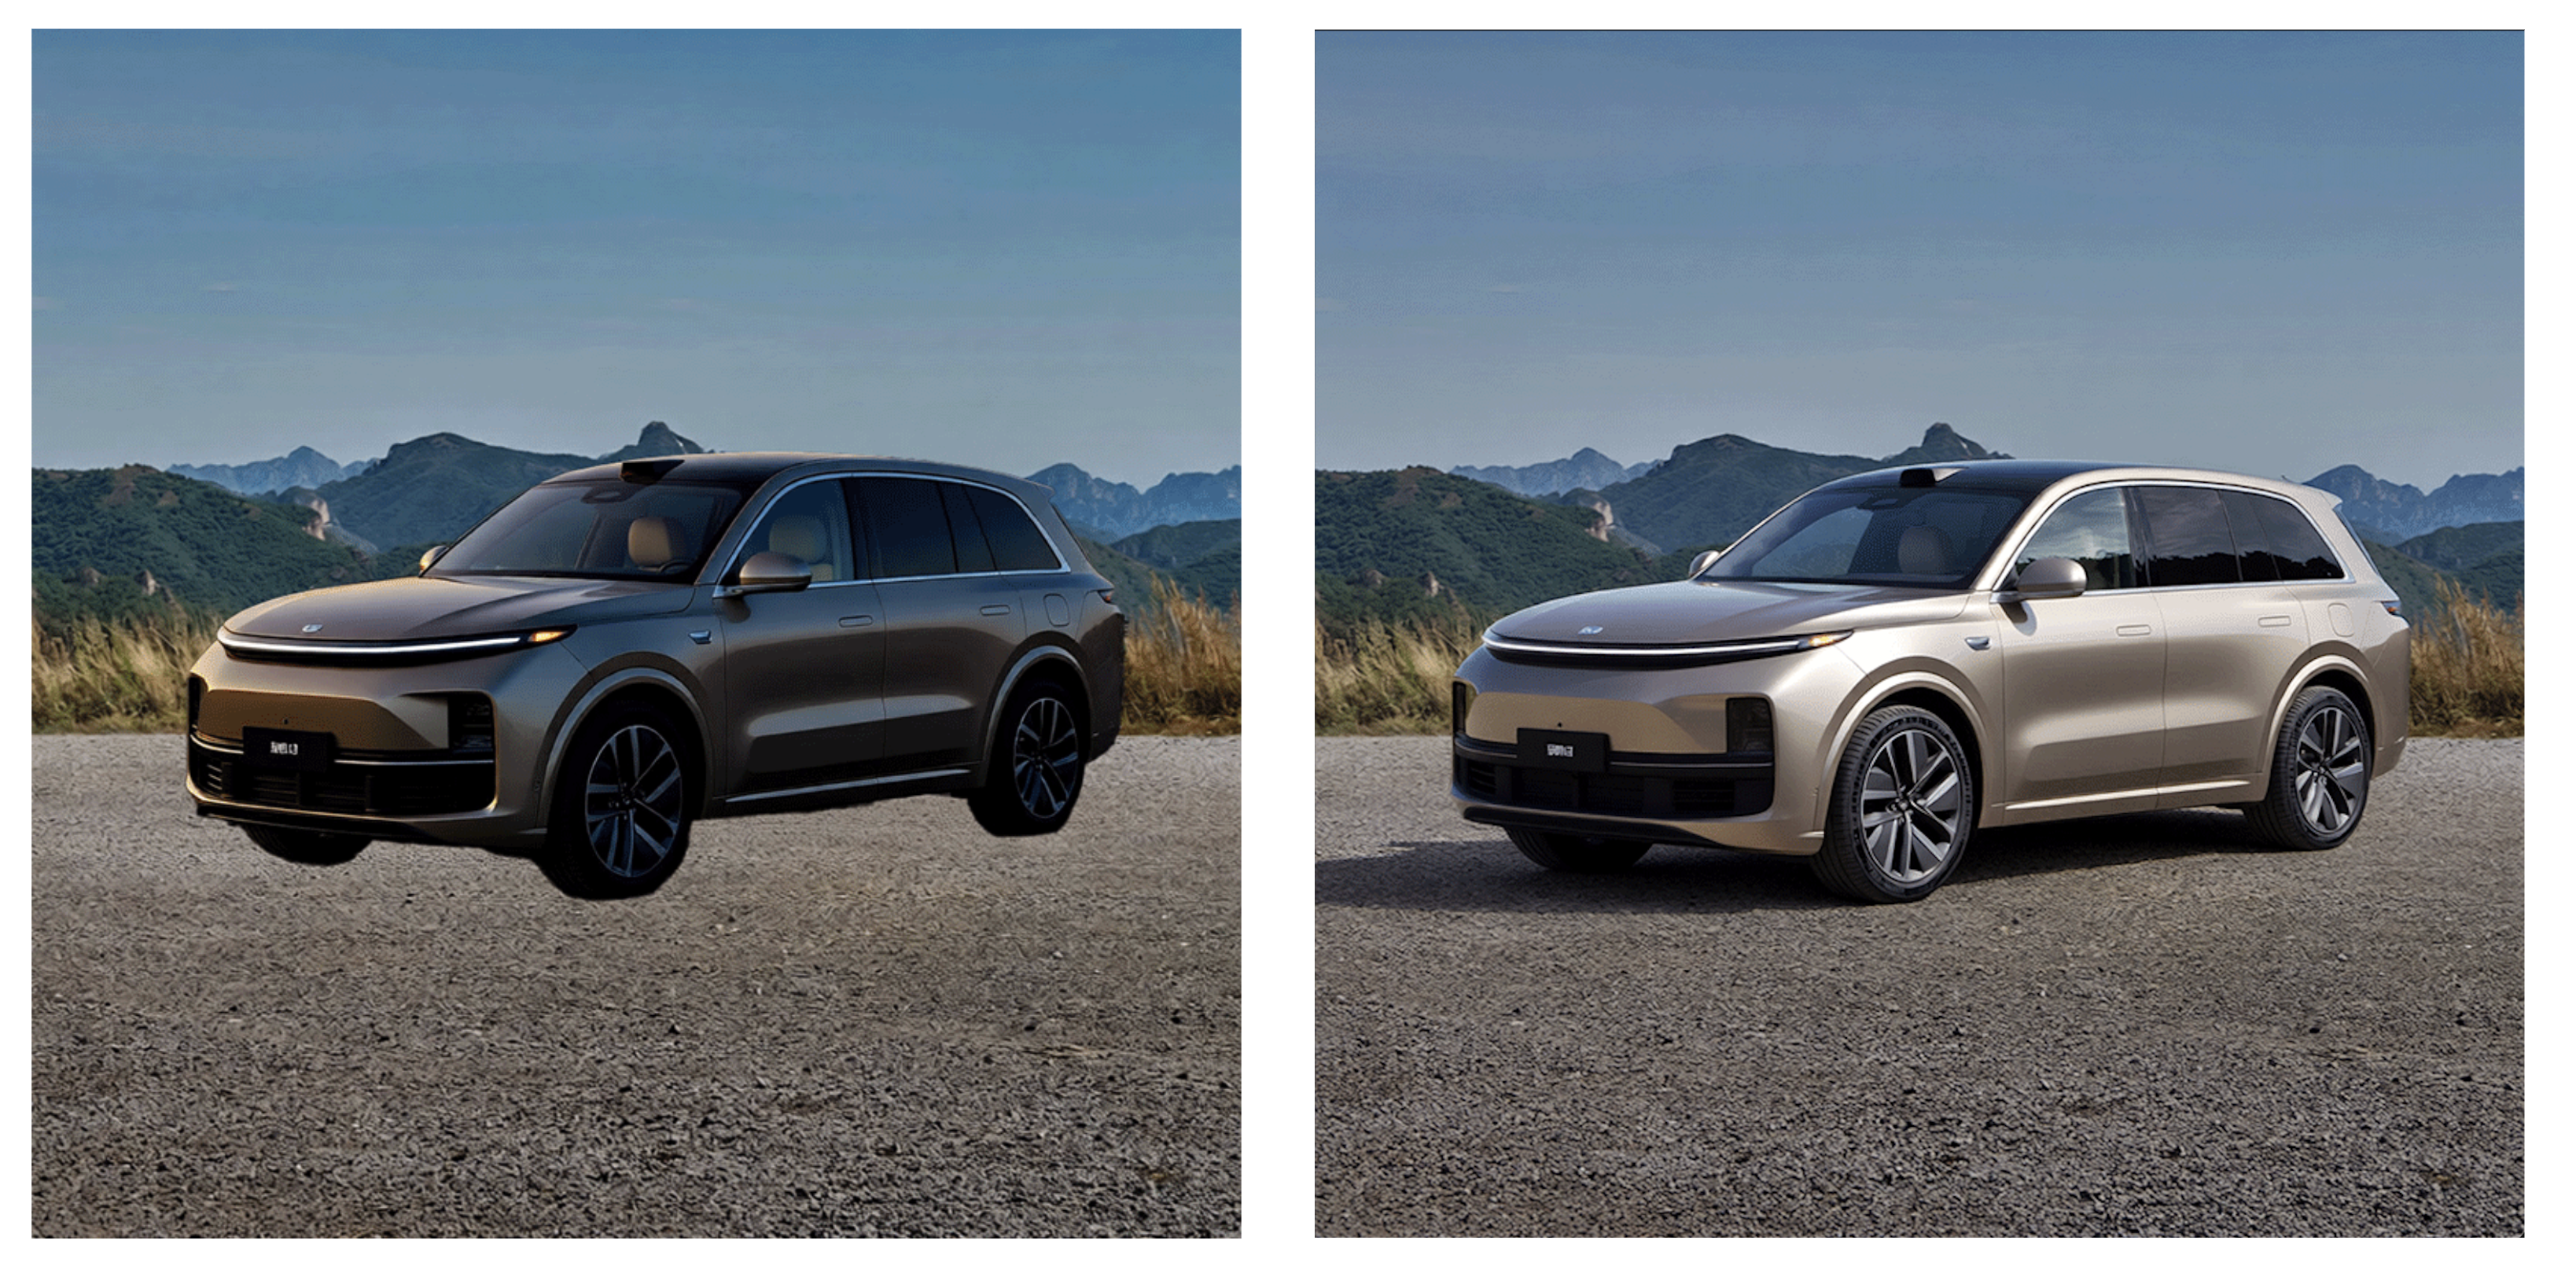
This LoRA enables Qwen-Image-Edit to behave like a virtual camera operator. It has no special trigger words: simply describe the camera motion or lens you want. The model can move the camera forward or backward, left or right, up or down, rotate the view by 45°, and switch between wide-angle and close-up lenses.
“Move the camera forward and tilt it downward to create a top‑down view.”
“Rotate the camera 45 degrees to the left and switch to a wide‑angle lens.”
Behind the scenes, the LoRA modifies the model’s latent camera parameters while preserving object identity and overall scene consistency.
Example: The sample output on the model card demonstrates how this LoRA can change the viewpoint of the same object across different camera positions.
Apply Texture
HF: tarn59/apply_texture_qwen_image_edit_2509
Applies a specified texture to an object, building, or game asset. Originally inspired by a commercial need for applying consistent stylistic textures across multiple assets.
Apply {texture description} texture to {target}.
For example:
“Apply wood siding texture to building walls”
“Apply salmon texture to leaves and stems”
The phrase “Apply … texture to …” is required to activate the LoRA. The model can also apply recursive textures, such as applying a texture of “a woman holding a sign” directly onto a sign surface.
Example:
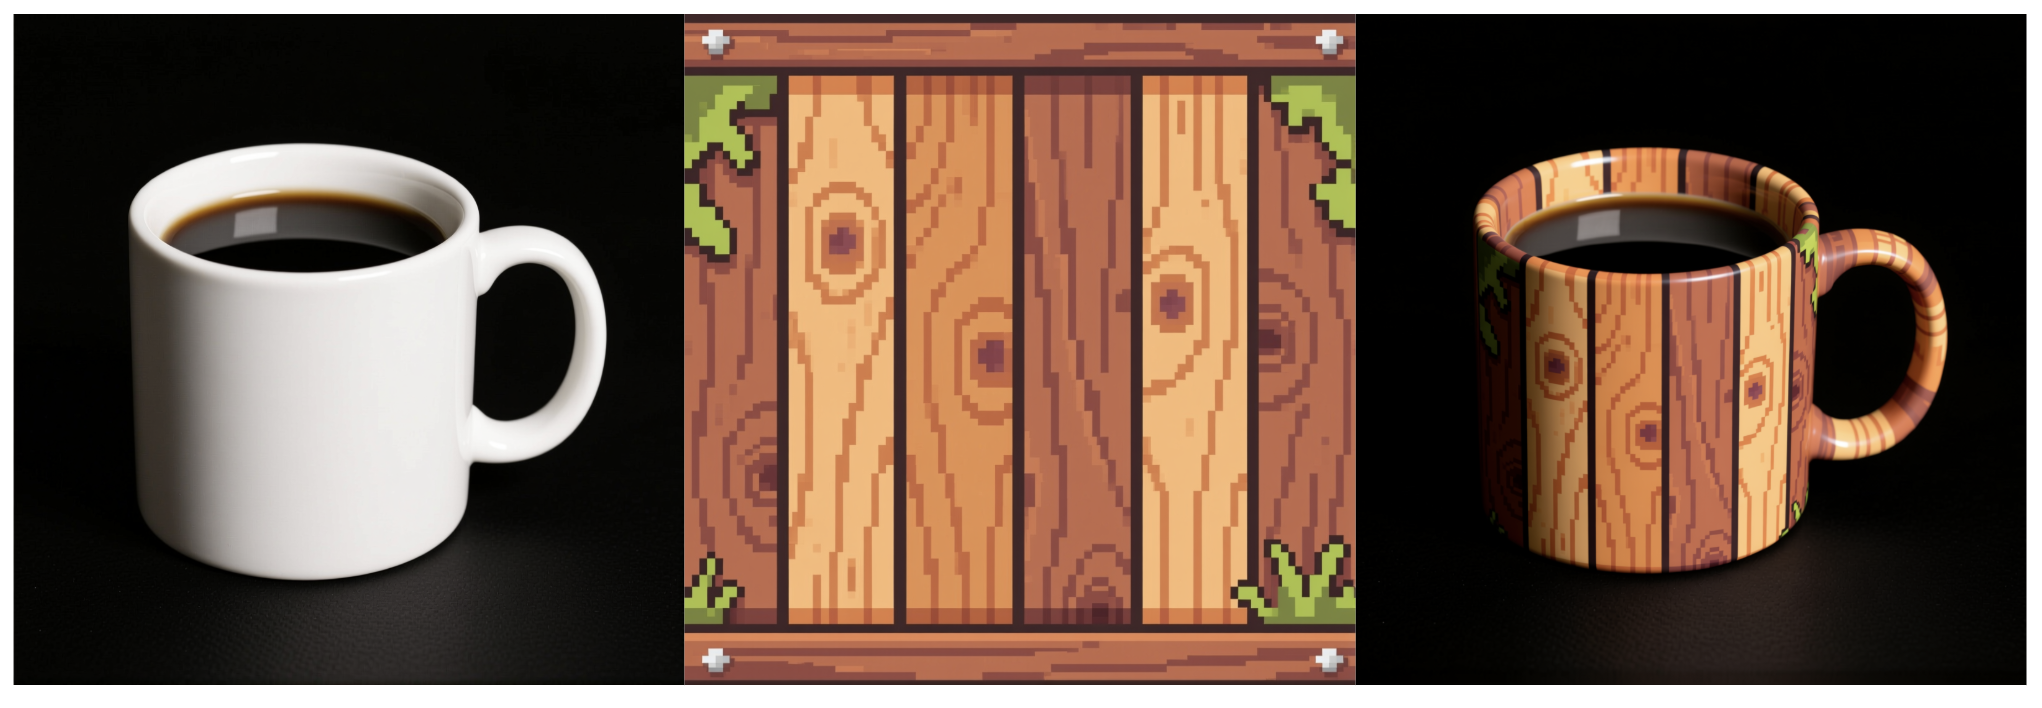
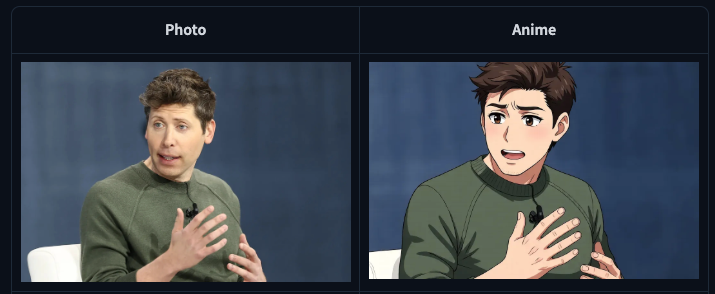
Photo to Anime
HF: autoweeb/Qwen‑Image‑Edit‑2509‑Photo‑to‑Anime
This Qwen Edit LoRA transforms photographs—portraits or scenes—into an anime-style illustration. The LoRA is fine-tuned on Qwen-Image-Edit-2509 and works best with high-resolution portraits or clean images. Just prompt with a simple instruction such as:
Transform into anime
Because this LoRA applies a strong anime stylization—especially to faces—it works best with clear, well-lit headshots and simple backgrounds. The Hugging Face model card provides several before-and-after samples showing how photos are transformed into anime illustrations.
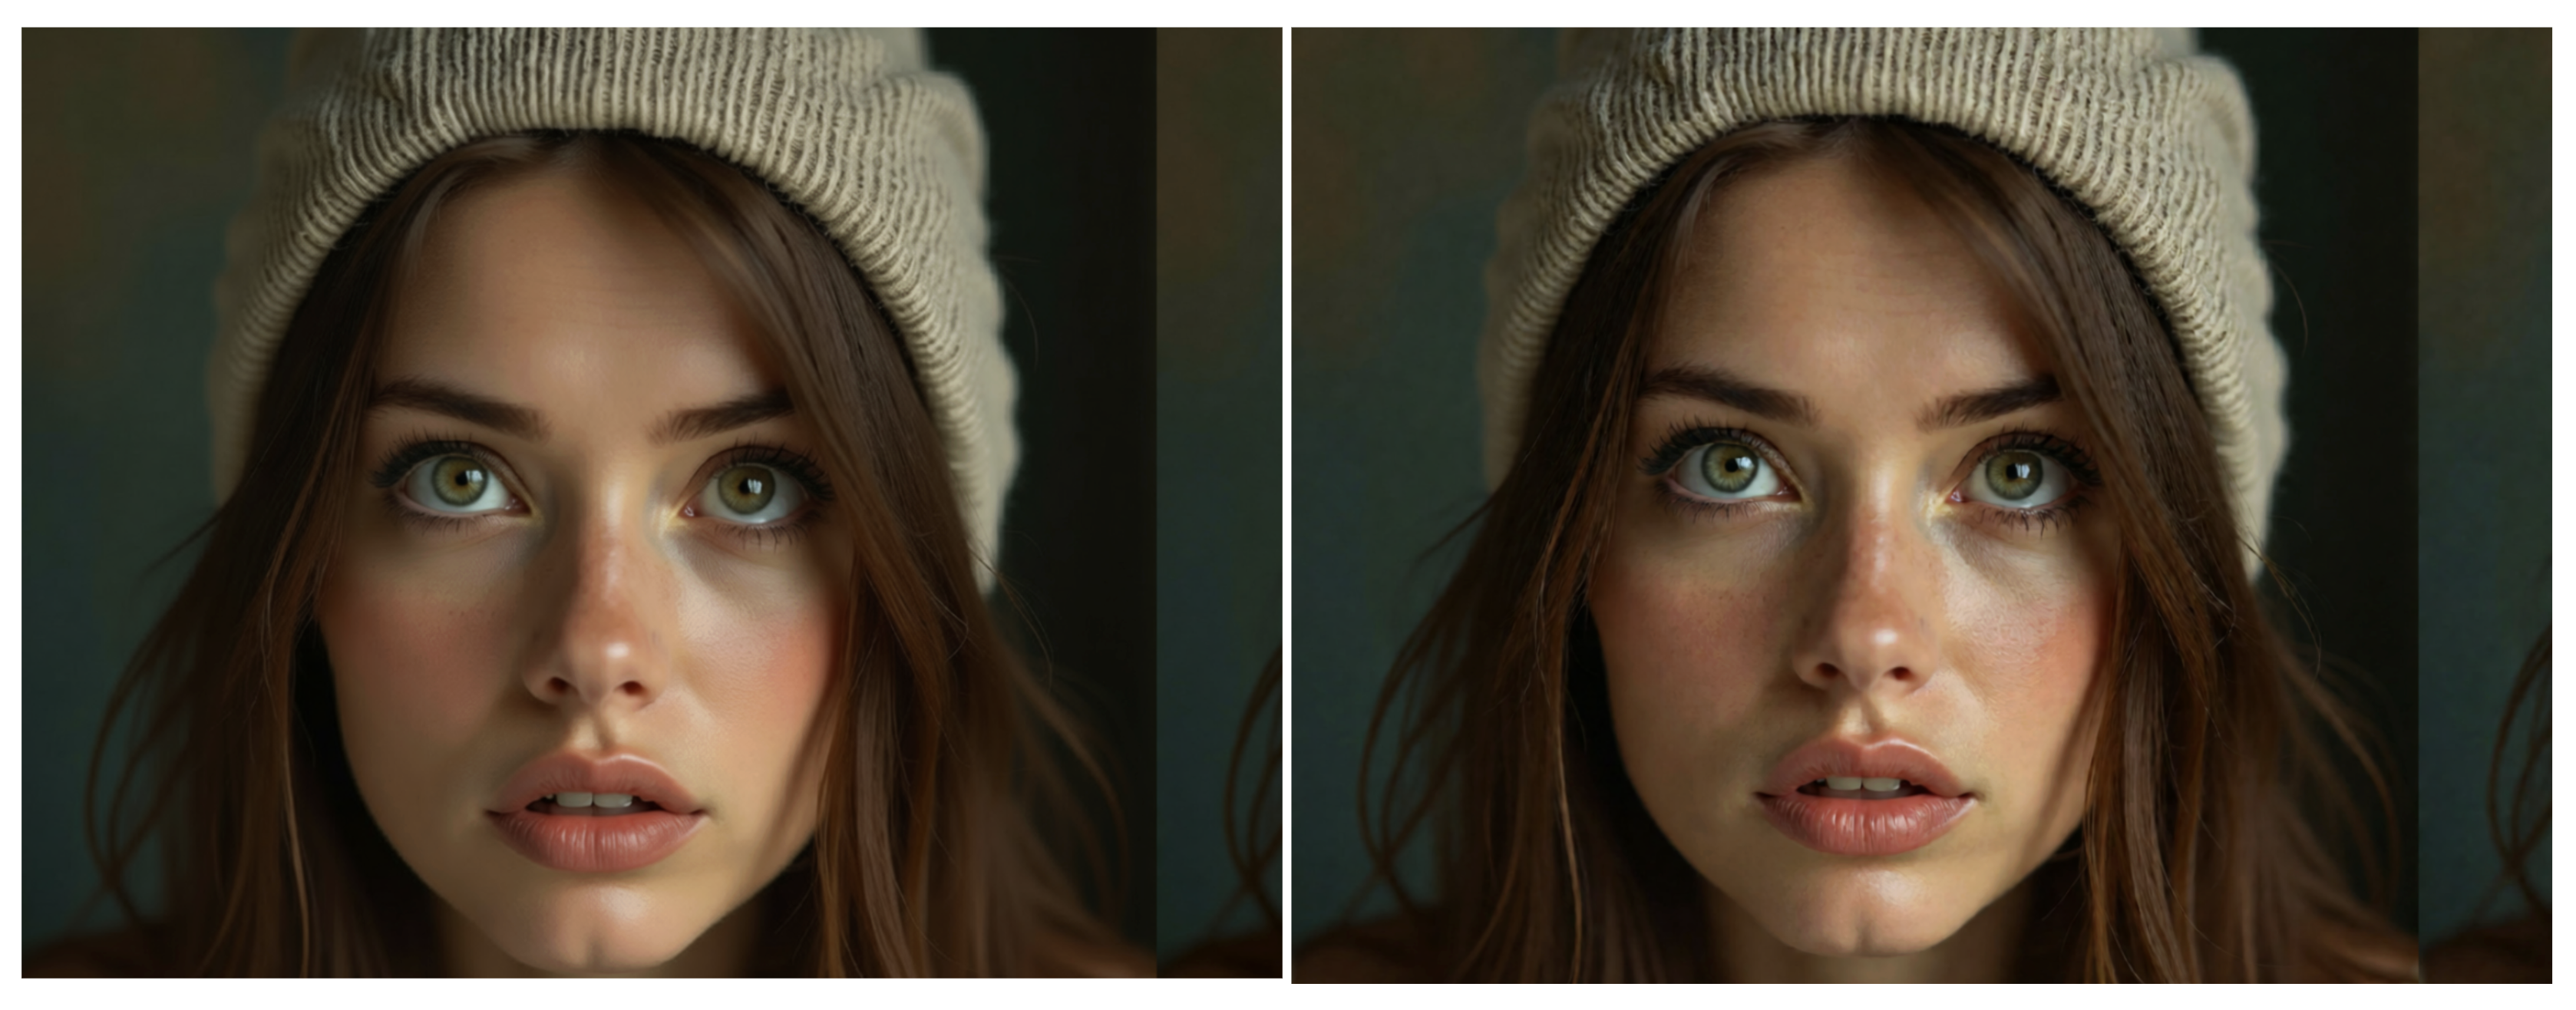
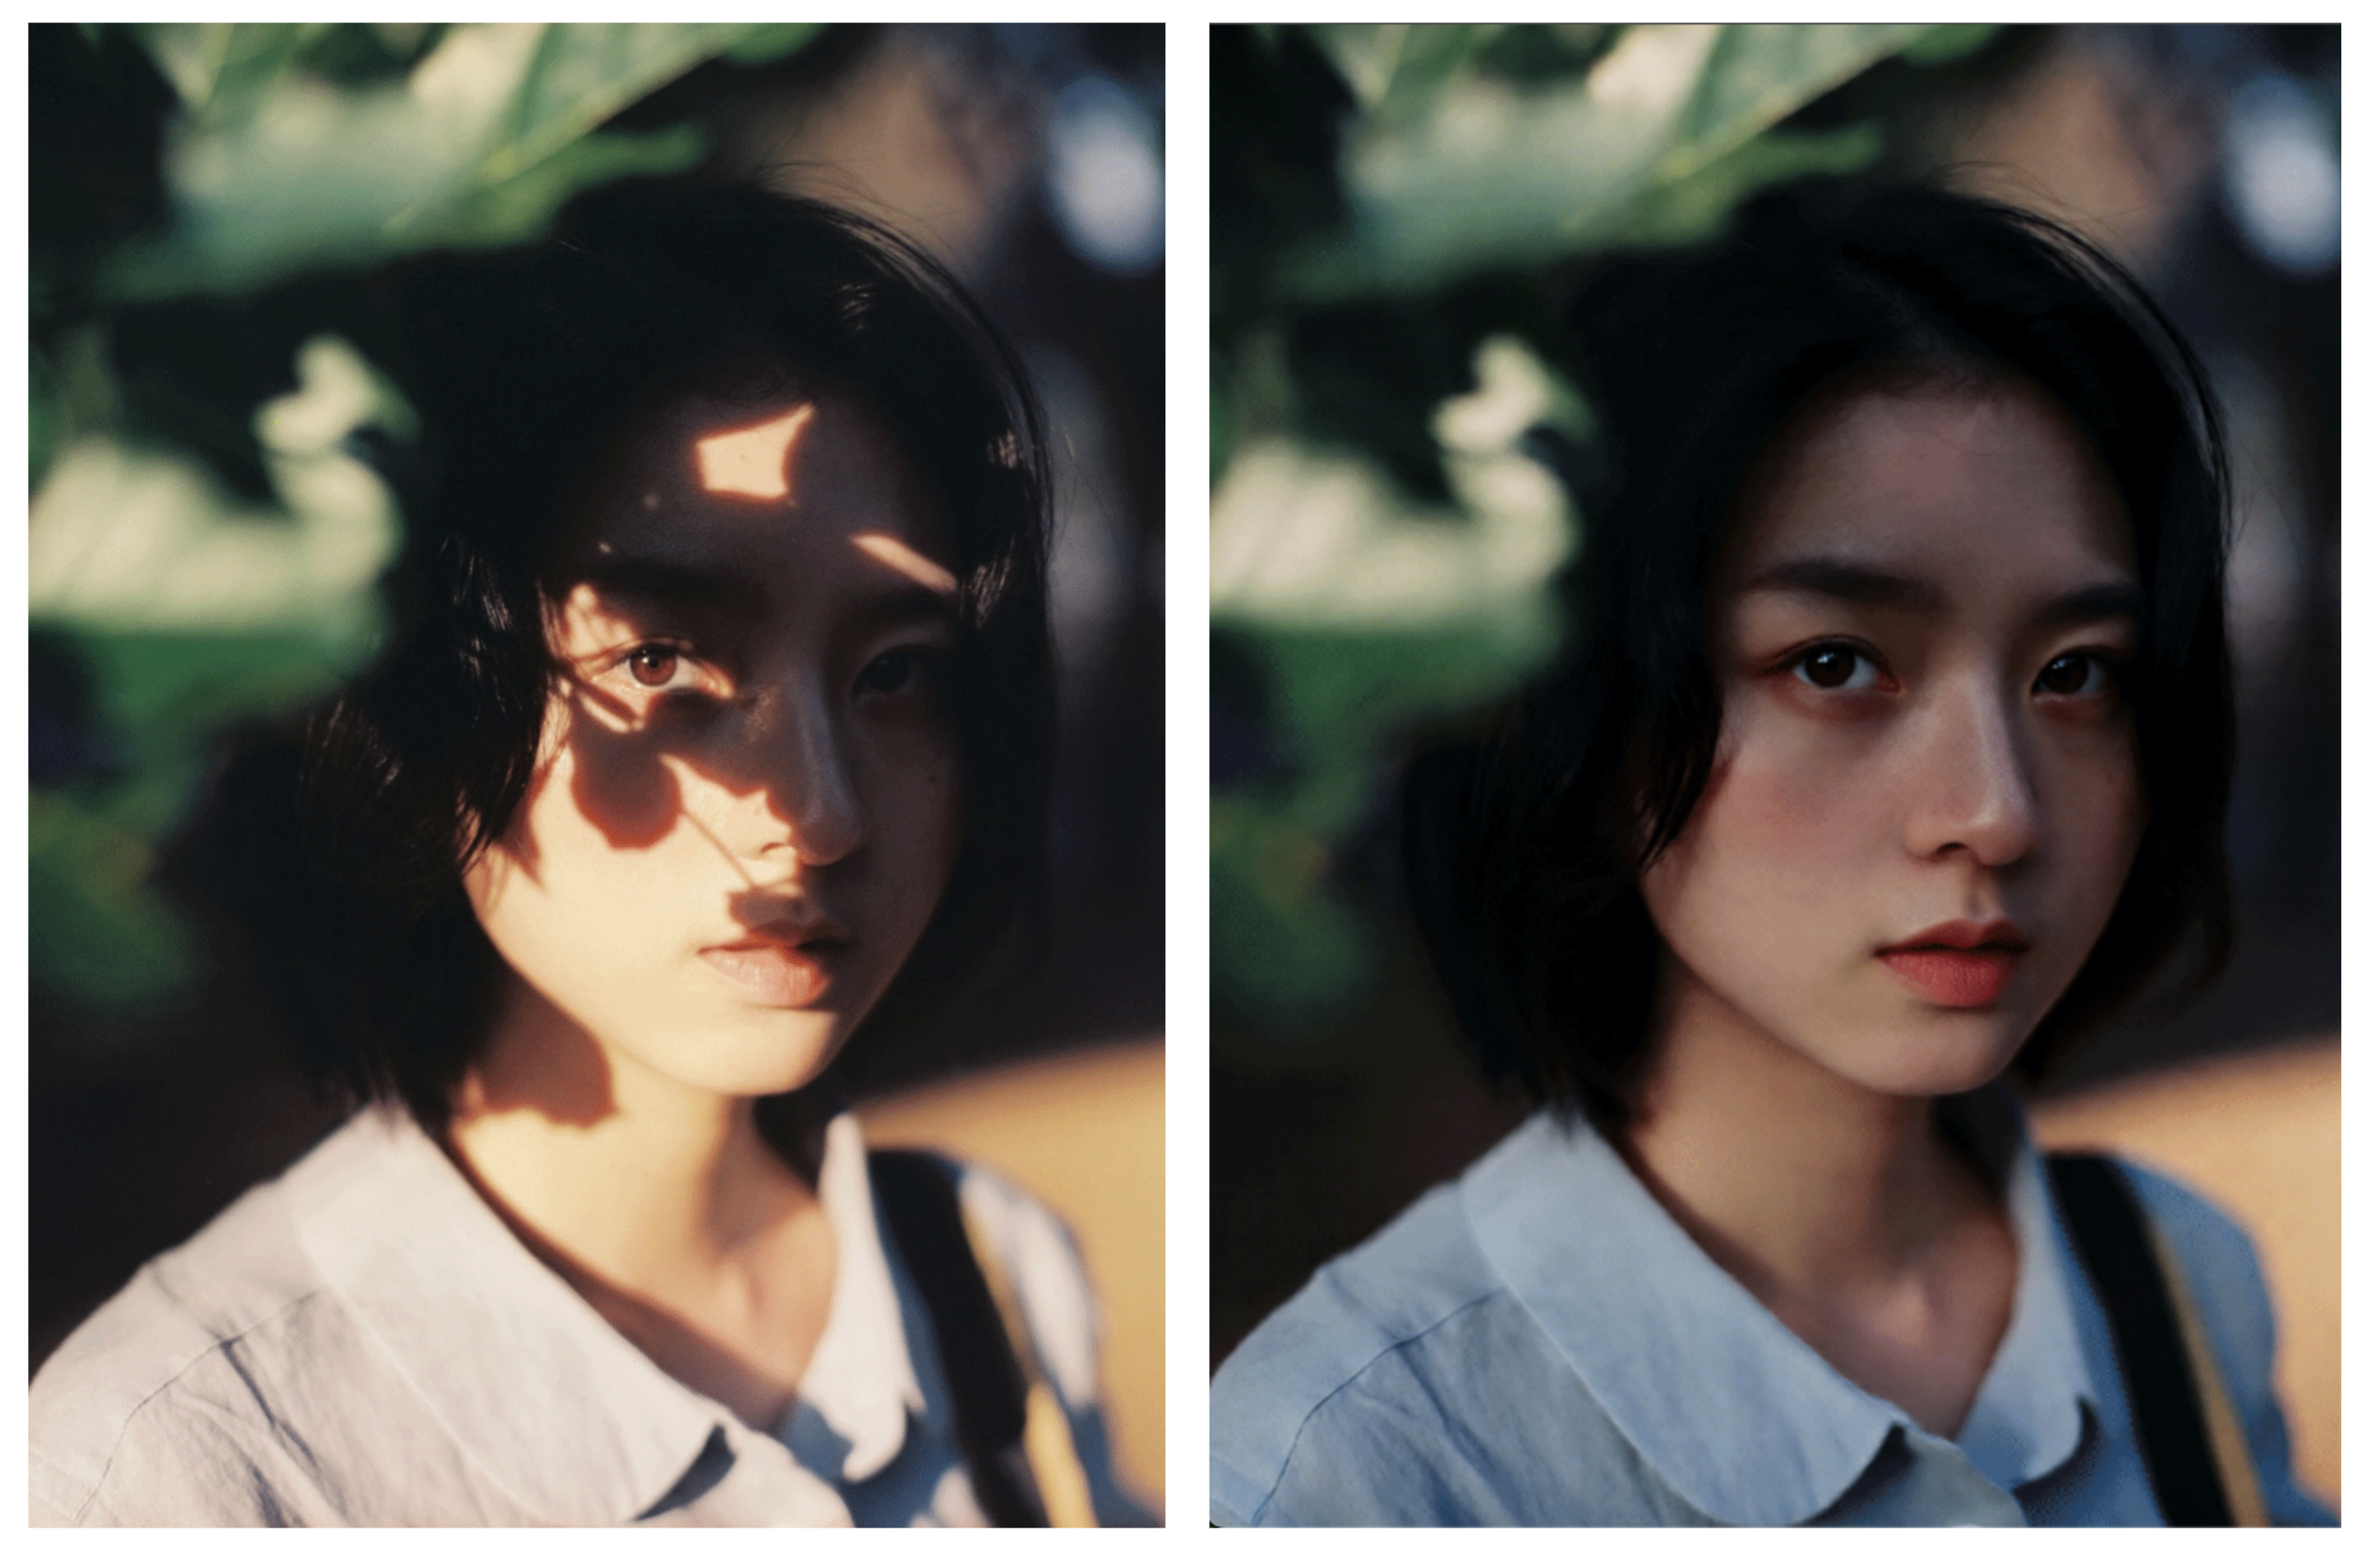
Edit Skin
Edit Skin is a specialized LoRA for enhancing the realism of human skin. It adds pores and subtle surface texture to faces and bodies, resulting in a more natural appearance compared with the base model. A LoRA strength of 1.0–1.5 is recommended (the examples use higher values for demonstration purposes). This LoRA is particularly useful for digital artists, photographers, and AI creators who want to improve the realism of portraits.
How to prompt:
“make the subject’s skin details more prominent and natural”.
You can vary the phrasing slightly, but including this clause helps the model apply the LoRA. Keep in mind that this LoRA focuses on skin details and will not alter other aspects of the image.
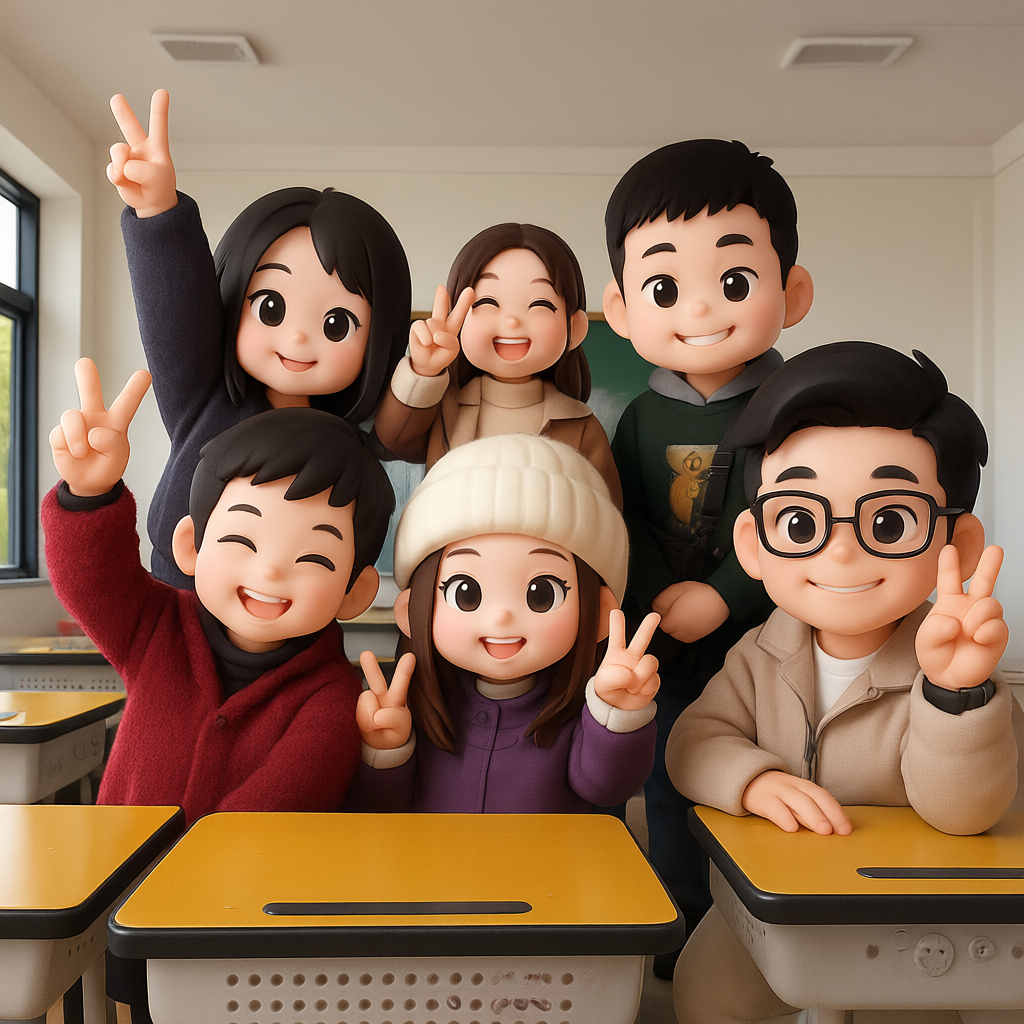
3D Chibi
HF: rsshekhawat/Qwen‑Edit‑3DChibi‑LoRA
This LoRA generates stylized 3D chibi characters with a detailed, three-dimensional look. Trained on the Qwen-Image-Edit-2509 base model, it specializes in producing high-quality 3D Chibi-style images. To use it, enable the LoRA and include a prompt such as:
Convert this image into 3D Chibi Style.
The key trigger phrase is “3D Chibi Style.” You can also specify clothing, pose, or accessories, and the model will reinterpret the subject accordingly in chibi form.
Fusion
HF: dx8152/Qwen‑Image‑Edit‑2509‑Fusion
The Fusion Qwen Edit LoRA is designed to blend a product or object seamlessly into a new background. It adjusts perspective, lighting, and overall visual alignment so the object appears naturally integrated within the scene.
To use it, use the prompt:
Fuse the image, correct the product’s perspective and lighting, and make the product blend into the background.
These phrases should be included along with a description of the scene you want to place the object into. Example:
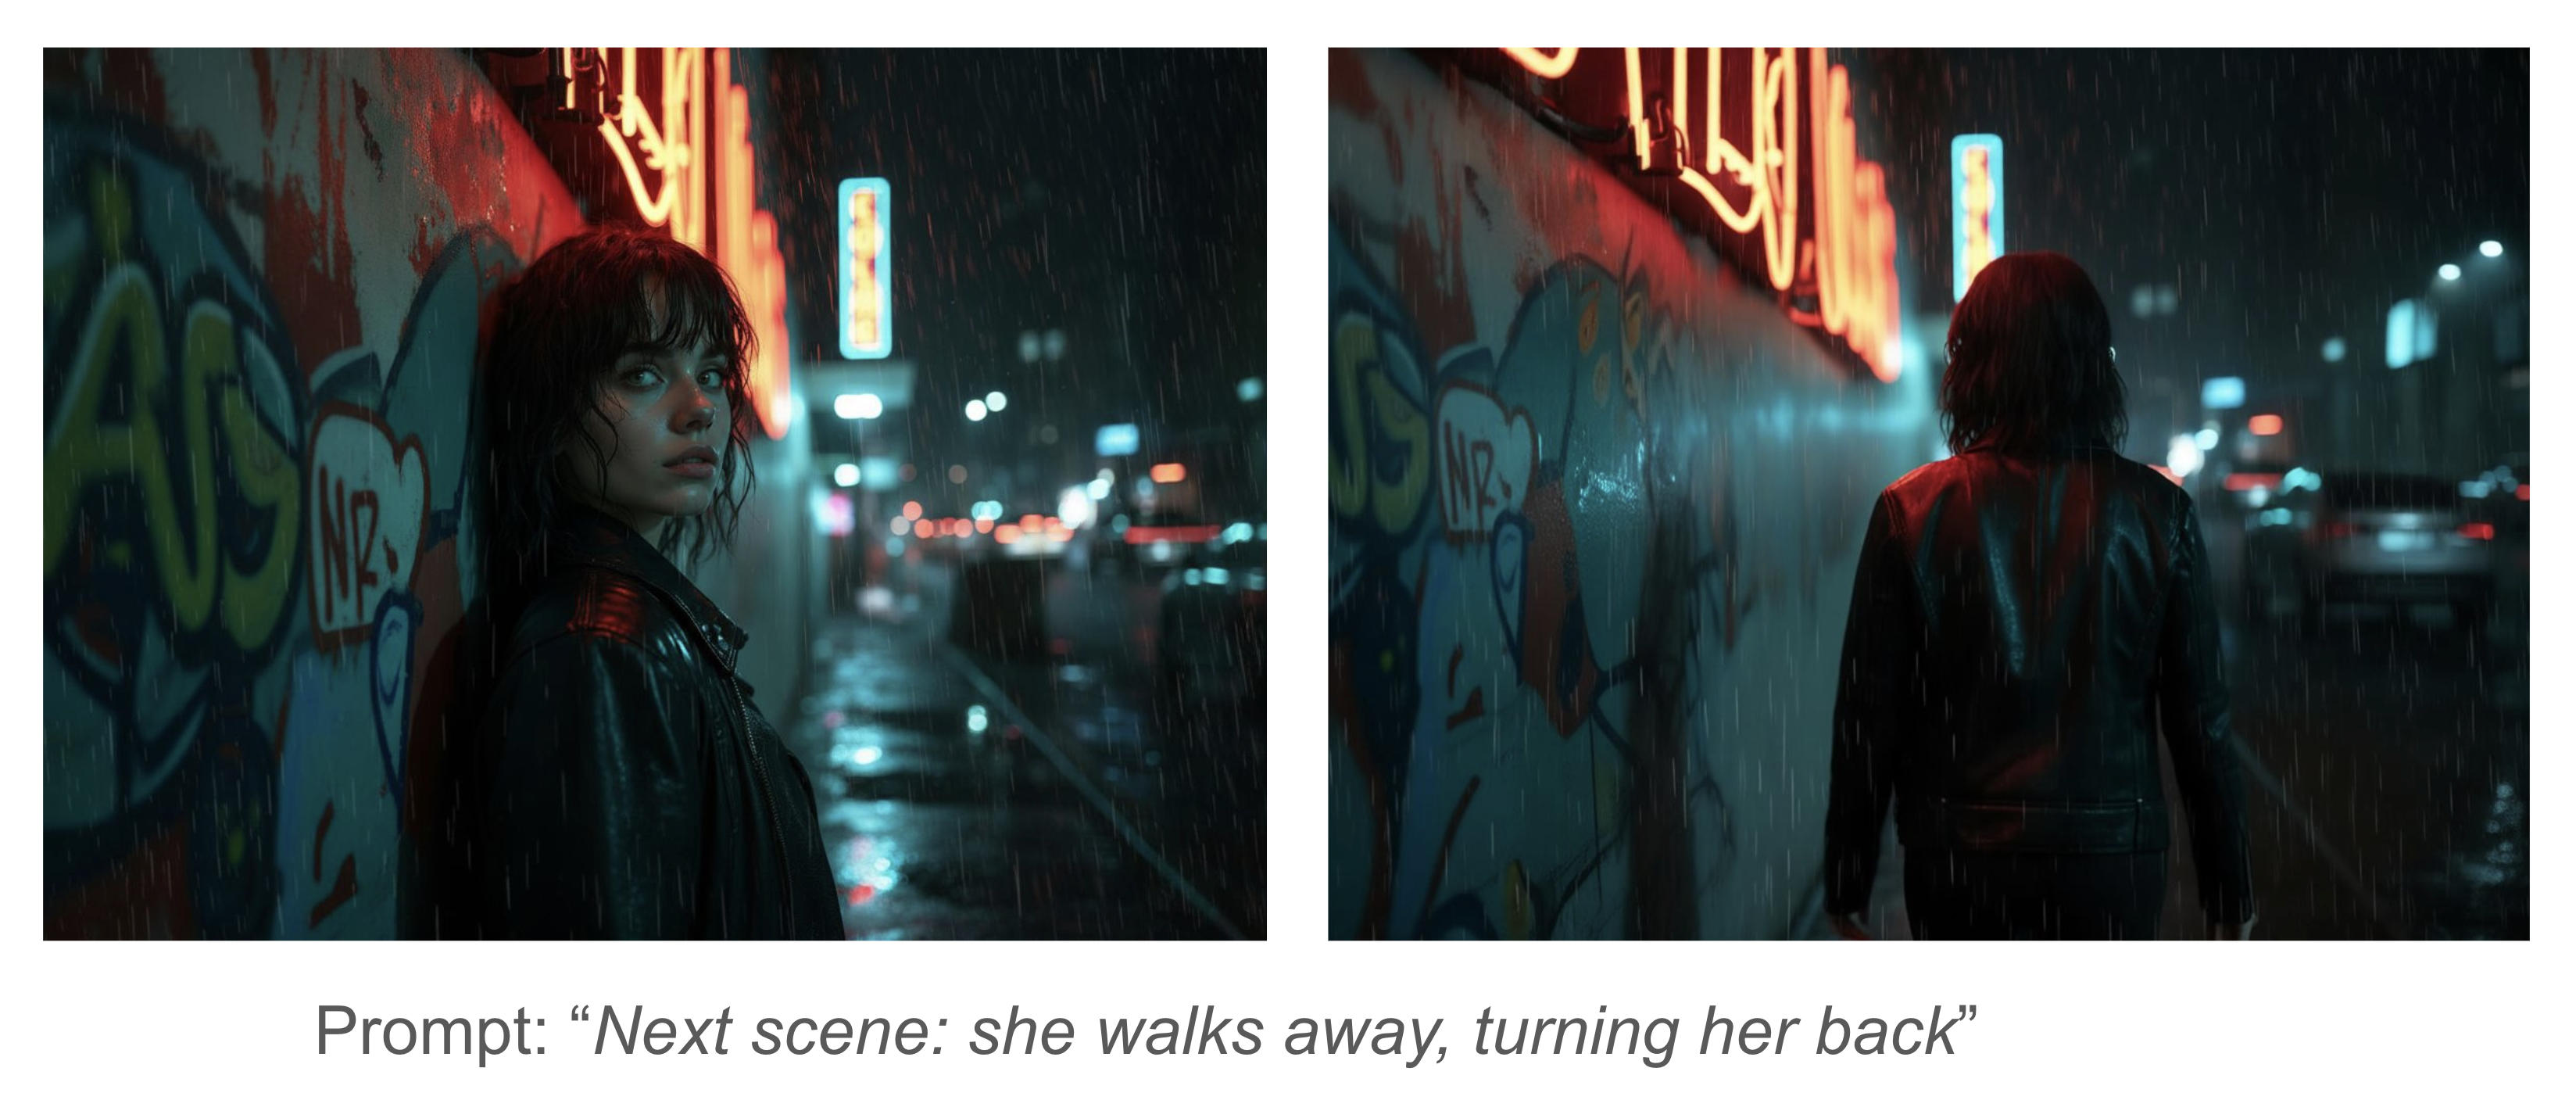
Next Scene
HF: lovis93/next‑scene‑qwen‑image‑lora‑2509
This LoRA brings cinematic storytelling continuity into AI image generation workflows.
Each output frame functions as the "Next Scene" in an evolving visual narrative, maintaining compositional coherence while introducing organic transitions such as:
Camera movement: Dolly shots, push-ins, pull-backs, and tracking moves
Framing evolution: Wide to close-up transitions, angle shifts, reframing
Environmental reveals: New characters entering frame, expanded scenery, spatial progression
Atmospheric shifts: Lighting changes, weather evolution, time-of-day transitions
How to use it:
Set the LoRA strength to 0.7–0.8.
🚨 Begin your prompt with “Next Scene:” followed by a description of the shot.
For example:
“Next Scene: The camera moves slightly forward as sunlight breaks through the clouds, casting a soft glow around the character’s silhouette in the mist.”
"Next Scene: The camera pulls back from a tight close-up on the airship to a sweeping aerial view, revealing an entire fleet of vessels soaring through a fantasy landscape."
"Next Scene: The camera tracks forward and tilts down, bringing the sun and helicopters closer into frame as a strong lens flare intensifies."
"Next Scene: The camera pans right, removing the dragon and rider from view while revealing more of the floating mountain range in the distance."
The author recommends starting with the intended camera movement, specifying lighting or atmosphere changes, and chaining generations together to build storyboards. This LoRA is ideal for multi-frame workflows—such as cinematic sequences or AI video pipelines—but it is not intended for single-image portraits.
Light Restoration
HF: dx8152/Qwen‑Image‑Edit‑2509‑Light_restoration
Light Restoration removes harsh or overly strong lighting from an image and then re-illuminates it with soft, natural light. The author explains that creating lighting-focused LoRA datasets typically requires matching pairs of “lit” and “no-light” photos—a process that is both difficult and time-consuming. This LoRA avoids that requirement by allowing you to start from a lit image, remove the strong light, and generate a clean, natural-looking “no-light” version.
To use it, include a prompt such as:
Remove the shadows and re‑illuminate the picture with soft light
Example: The LoRA removes strong shadow and adds gentle lighting.
White to Scene
HF: dx8152/Qwen‑Image‑Edit‑2509‑White_to_Scene
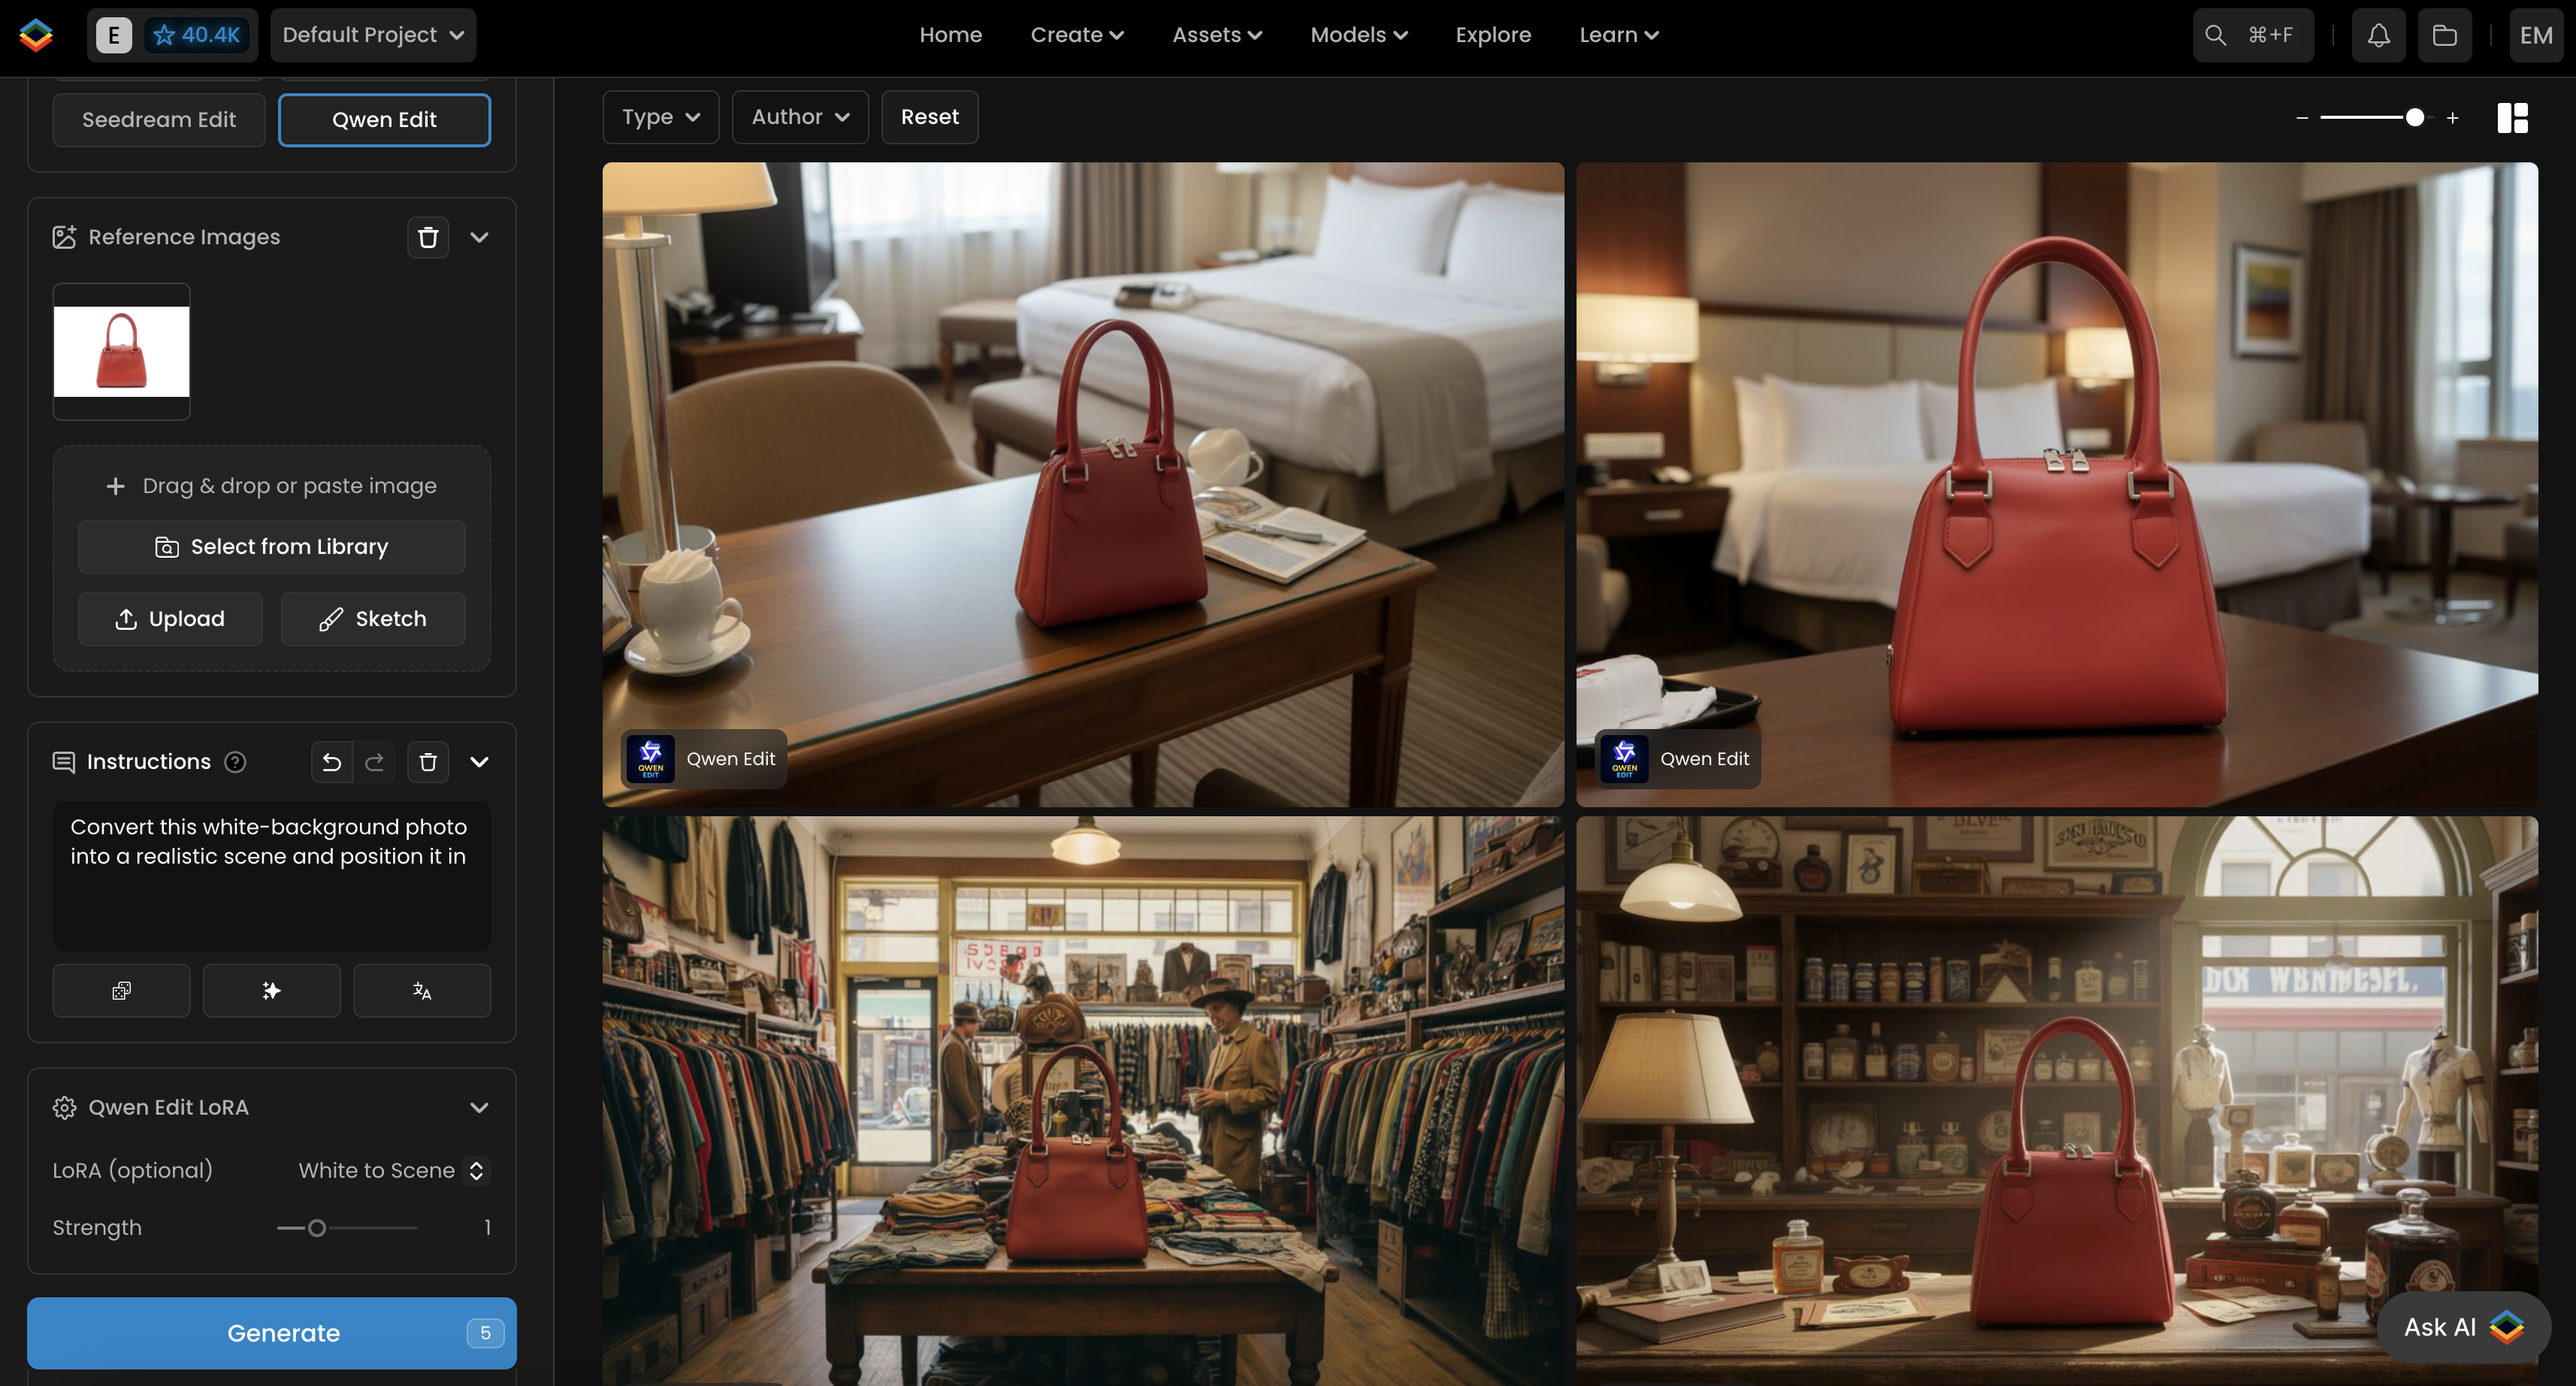
This LoRA converts white-background product shots into realistic, context-appropriate scenes. To activate it, begin your prompt with “Convert white-background picture to a scene”, then describe the environment you want the product placed in. The model takes care of blending the subject into the new setting by adjusting lighting, shadows, and perspective so the result looks naturally integrated.
To use it, include a prompt such as:
Convert this white-background sofa photo into a realistic scene and position it in (describe scene)
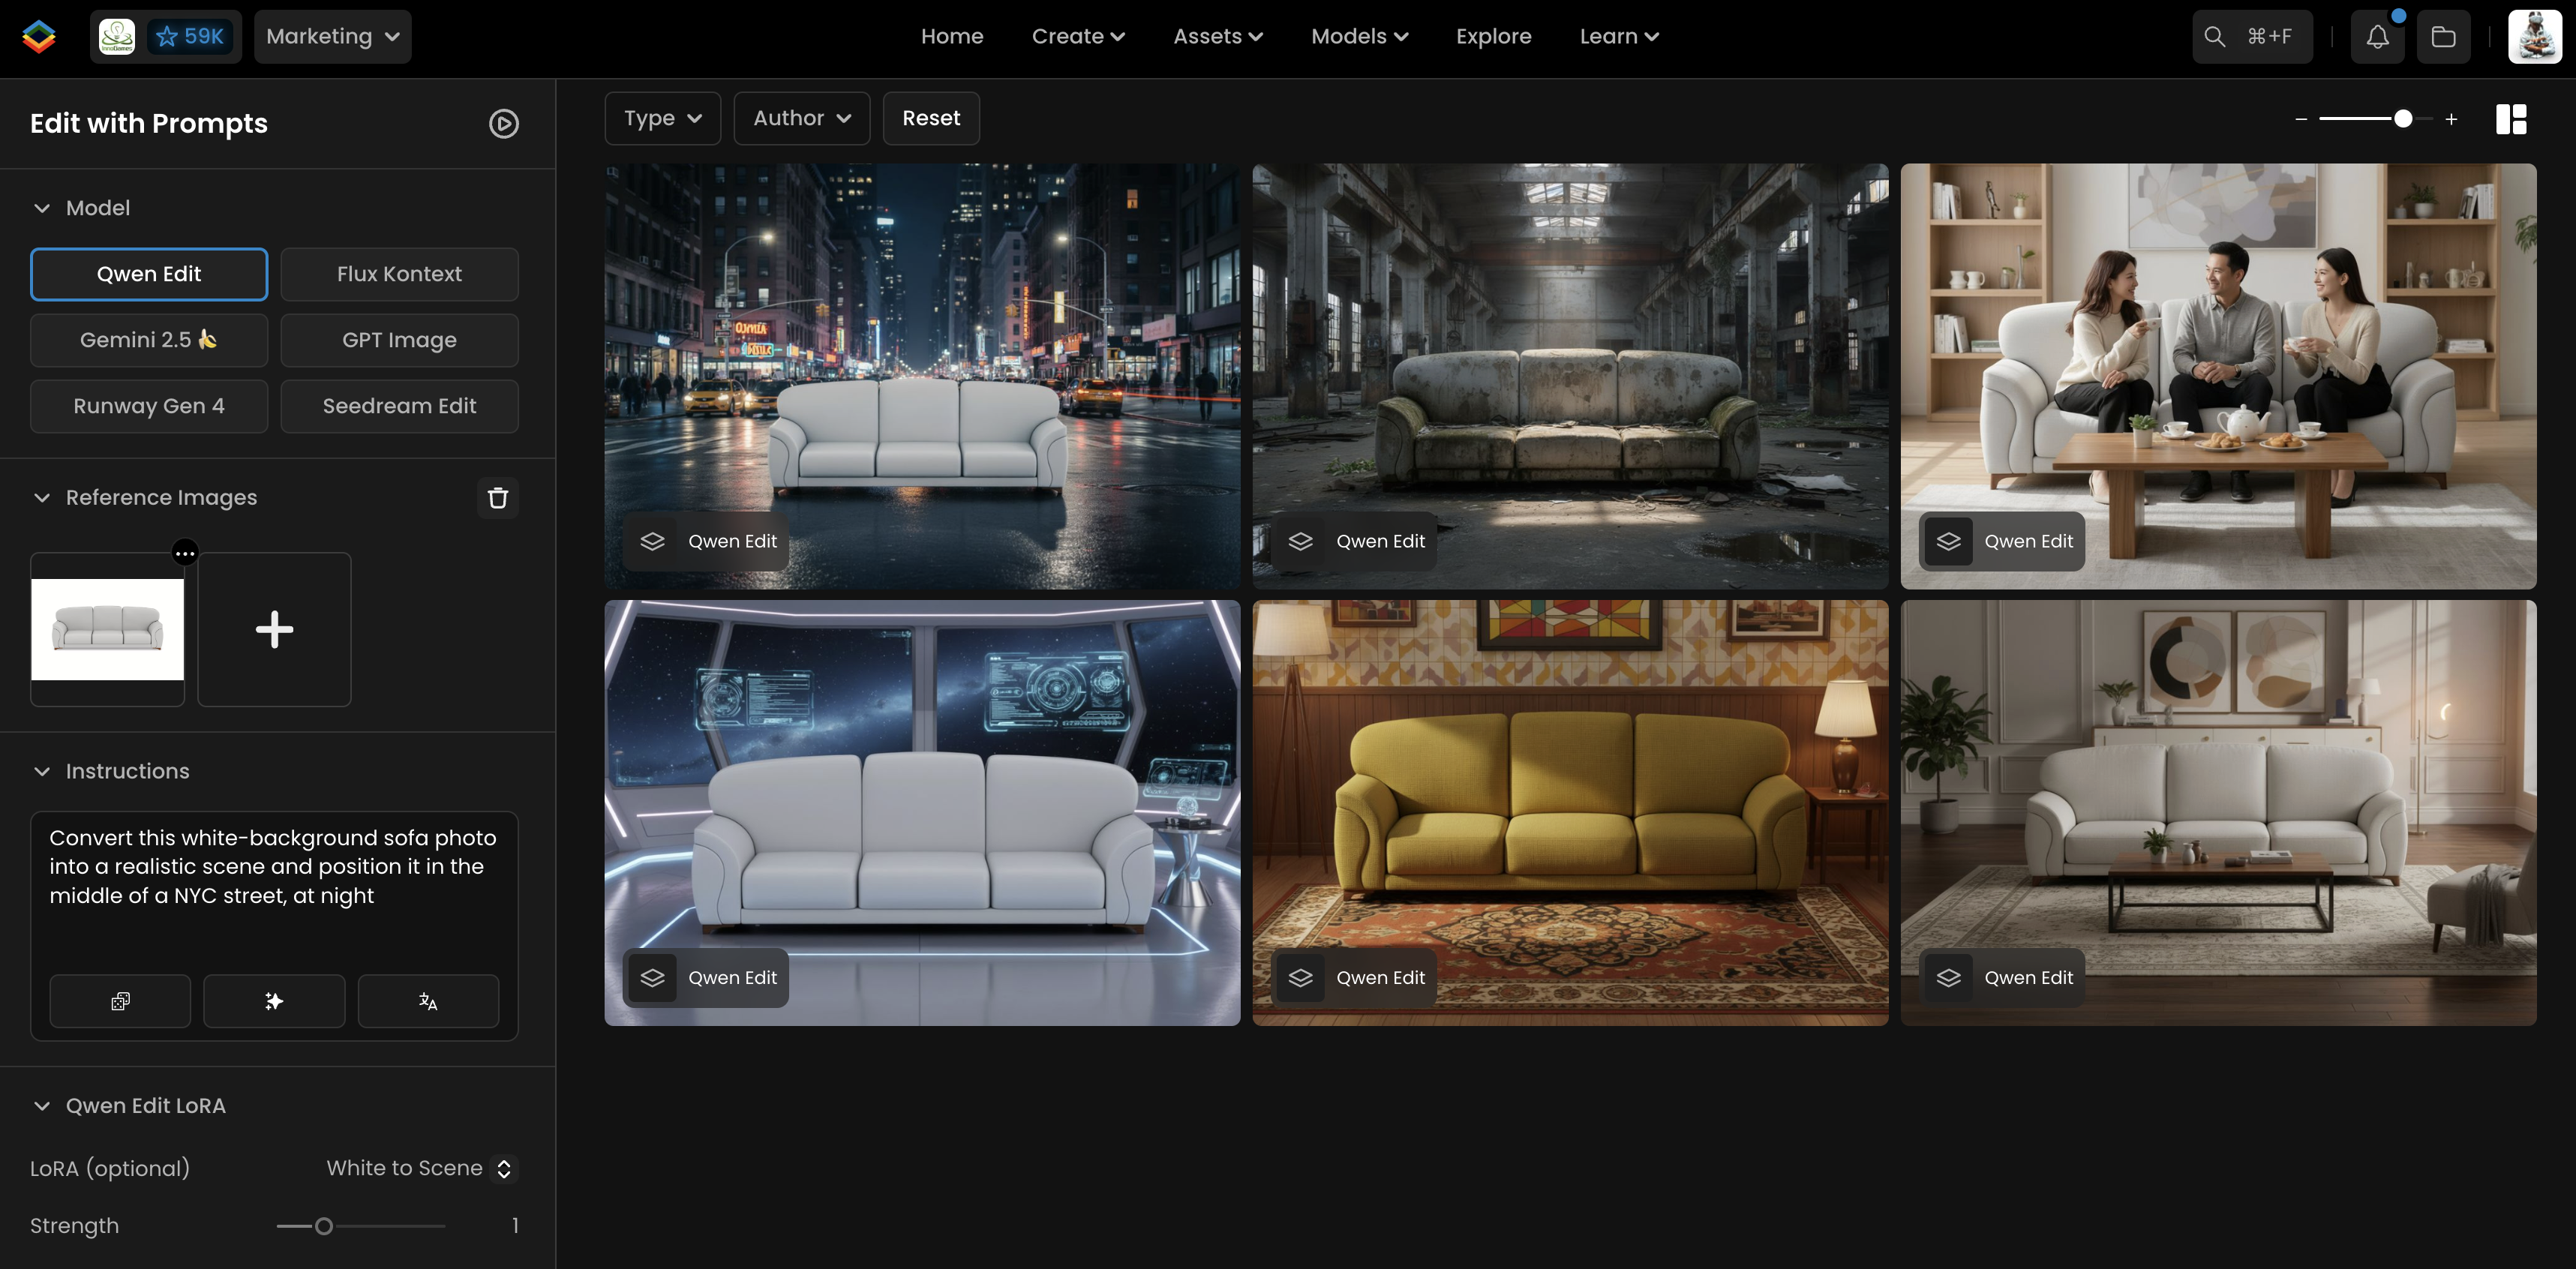
The LoRA then integrates the subject into the specified environment, adjusting lighting, shadows, and overall color balance so the composition looks natural. It is often paired with the Lightning LoRA for improved quality and cleaner scene integration.
Example: a sofa photographed on a white background can be seamlessly composited into a lifestyle scene.
In‑Scene
HF: flymy‑ai/qwen‑image‑edit‑inscene‑lora
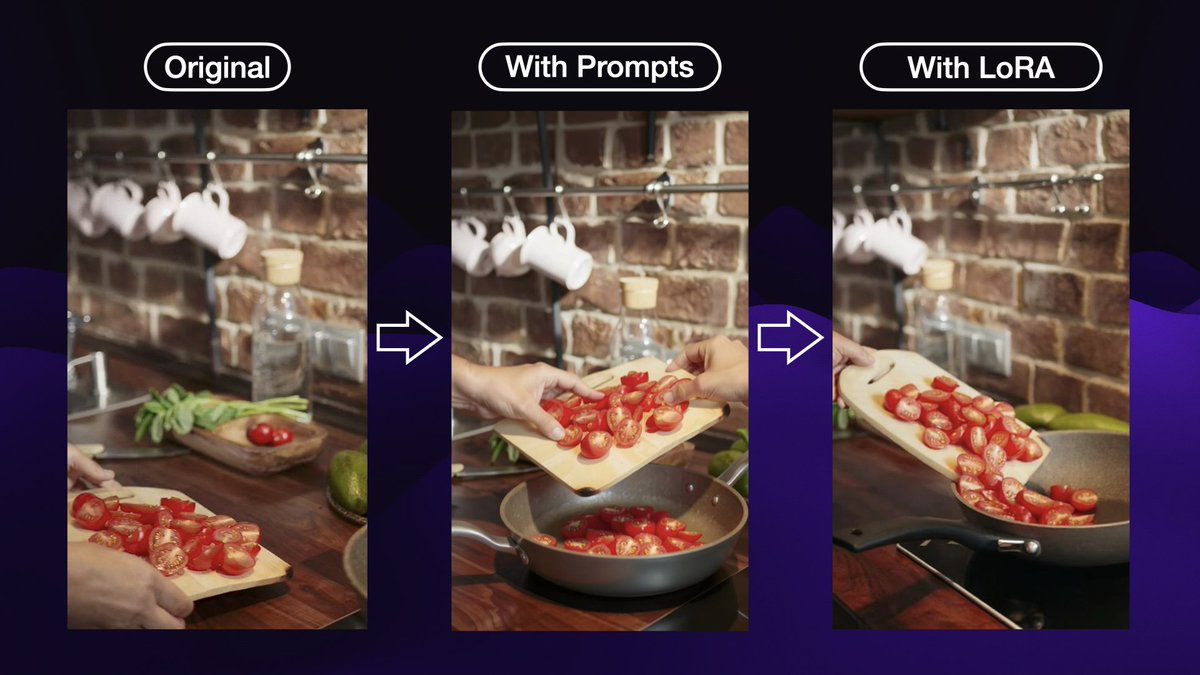
In‑Scene is an open‑source LoRA by FlyMy.AI that specializes in editing within the same scene. It enhances control over scene composition, object positioning and camera perspective and maintains coherence during edits. Internally it focuses on scene coherence, object positioning, camera perspective, action sequences and contextual editing.
To use this LoRA, provide a prompt describing the shot and action. The model card gives the following example:
Make a shot in the same scene of the left hand securing the edge of the cutting board while the right hand tilts it, causing the chopped tomatoes to slide off into the pan; camera angle shifts slightly to the left to centre more on the pan.
This LoRA is particularly useful for multi‑step cooking demonstrations, manufacturing processes or any scenario where you need to edit an object while preserving the original scene.
Example: The image below compares outputs without and with the In‑Scene LoRA. The LoRA‑edited output maintains spatial relationships and correctly positions the moving objects.
Upscale (Restore)
HF: vafipas663/Qwen‑Edit‑2509‑Upscale‑LoRA
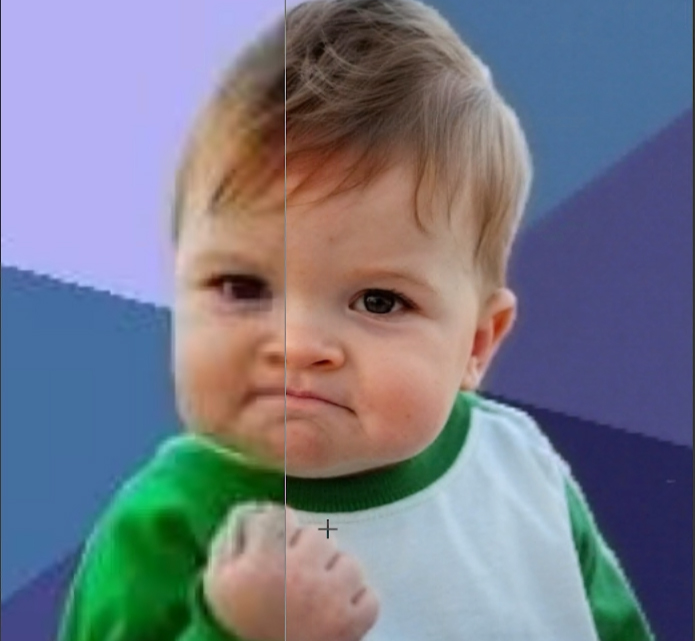
Upscale improves image quality by recovering details lost to low resolution, oversharpening, noise, blur and compression. It was trained on a filtered subset of the Unsplash‑Lite and UltraHR‑100 K datasets and is designed to recover from severe degradations including low resolution (up to 16×), 50 % noise, Gaussian blur, JPEG artifacts and motion blur. The LoRA is still under development, and the author notes that multiple checkpoints are being tested.
How to use: Begin your prompt with “Enhance image quality,” followed by a detailed description of the scene.
Because the LoRA was trained on photographic imagery, it is not suited for 2D art or illustrations.
Example: The following photo showcases the LoRA’s ability to recover fine details from a degraded input.
Multi‑Angle Lighting
HF: https://huggingface.co/dx8152/Qwen-Edit-2509-Multi-Angle-Lighting
Multi‑Angle Lighting is an experimental LoRA that adds directional relighting capabilities to Qwen Image Edit. The creator notes that it was trained on a small dataset, so the current version is only a proof‑of‑concept. The LoRA takes two input images: Figure 1 is the image you want to relight, and Figure 2 is a luminance map or reference image containing the desired light direction. The recommended prompt is:
Relight Figure 1 using the luminance map from Figure 2 (light source from the front)
Only the phrase inside the parentheses needs to change; valid directions include front, left front, left, left rear, rear, right rear, right, right front, above or below. When used correctly, Multi‑Angle Lighting reprojects the lighting from the second image onto the first, producing different shadows and highlights without altering the underlying subject.
InSubject
HF: https://huggingface.co/peteromallet/Qwen-Image-Edit-InSubject
InSubject fine‑tunes Qwen Image Edit to preserve subjects when making edits. The base model sometimes distorts faces or loses unique features when changing poses, clothing or accessories; InSubject addresses this by learning to maintain identity and proportions. It excels at targeted edits that leave the main subject intact. To use it, adopt the prompt template:
Make an image of [subject description] in the same scene [new pose/action/details]
Including “in the same scene” tells the model to keep the original background and lighting while altering the subject’s pose or action. For example:
“Make an image of the woman in the same scene seated on a low pink ottoman, adjusting the buckle on one of her matching blue heels…”
Strengths of this LoRA include preserving subject identity, proportions and anatomical accuracy during edits. It may struggle with very complex multi‑subject scenes, dramatic lighting changes or extreme pose alterations. A conceptual illustration below conveys the idea of editing a subject while keeping their identity intact.
Try‑On (Alpha)
HF: https://huggingface.co/FoxBaze/Try_On_Qwen_Edit_Lora_Alpha
Try‑On is an alpha‑stage LoRA developed by Fox & Baze Research for multi‑reference clothing try‑on. It takes a top image of a subject and multiple bottom images of garments, then outputs a stylised image where the subject is wearing all the garments The model is designed for fashion editing rather than general image manipulation and may not generalise to unrelated tasks.
For best results:
Use high‑quality, full‑body shots for the subject and clear images of each garment.
Stick to recommended resolutions such as 832×1248 or other ratios listed by the author.
Prompting is straightforward, just ask the model to style the subject with all clothing items in the bottom row. Example prompts include:
“Style the woman in the top of the image, with every article of clothing on the bottom”
“Style the man in the top of the image, with every article of clothing on the bottom”
Because this LoRA is still in alpha, it struggles with more than five garments and does not work well when combined with very low‑step Lightning LoRAs. A conceptual illustration below visualises the idea of an AI layering multiple garments onto a person.
Face Swap
HF: https://huggingface.co/Alissonerdx/BFS-Best-Face-Swap/tree/main
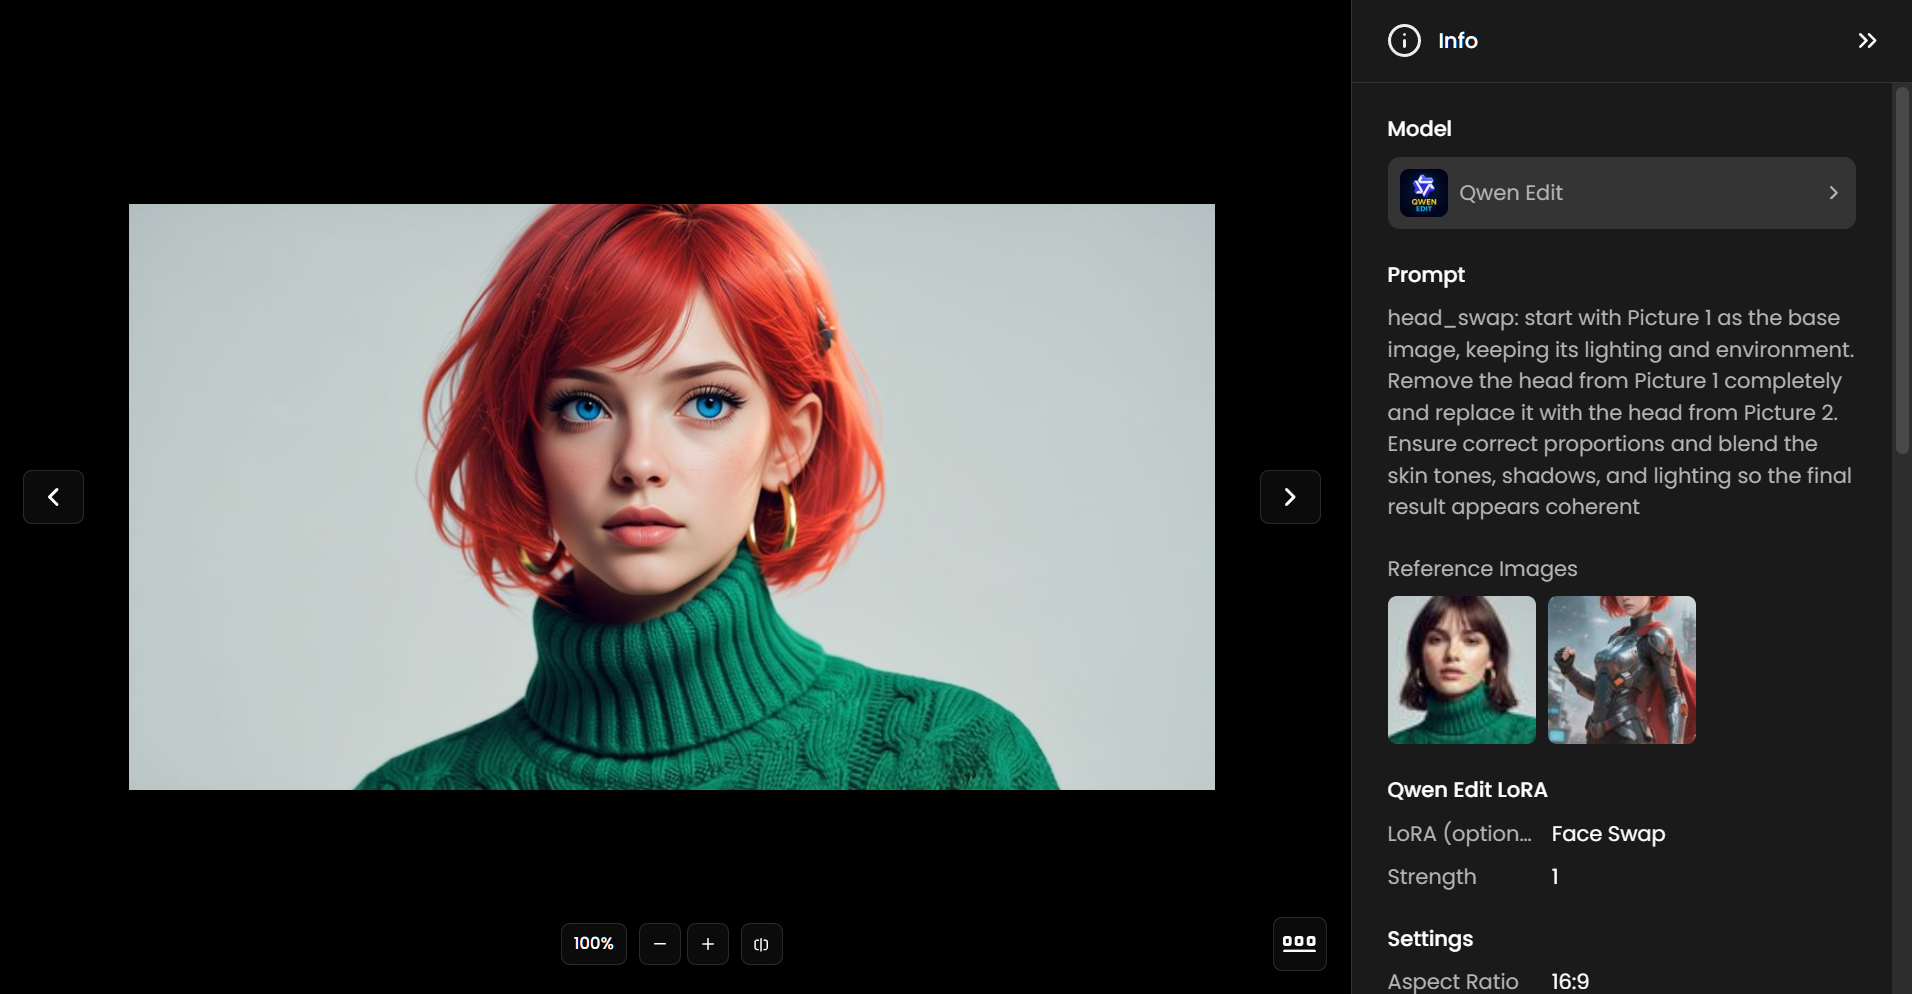
Purpose and versions: The BFS LoRA series was created to perform high‑fidelity face and head replacements with smooth tone blending and consistent lighting.
Input structure: You pass the body image first and the face image second.
Prompt guidelines: Each version comes with its own suggested phrasing:
“head_swap: start with Picture 1 as the base image, keeping its lighting and environment. Remove the head from Picture 1 completely and replace it with the head from Picture 2. Ensure correct proportions and blend the skin tones, shadows, and lighting so the final result appears coherent”
For best results:
The aspect ratio must be the same as the first image.
Material Transfer
A LoRA trained for material transfer using Qwen Image Edit 2509. The LoRA takes a subject/environment as the first control image and a reference image as the second control image.
Prompt guidelines:
change materials of image1 to match the reference in image2
Reference Types:
A material board

Shaderball

Flat texture

Another subject/environment

Extract Materials
HF: https://huggingface.co/oumoumad/Qwen-Edit-2509-Extract-materials
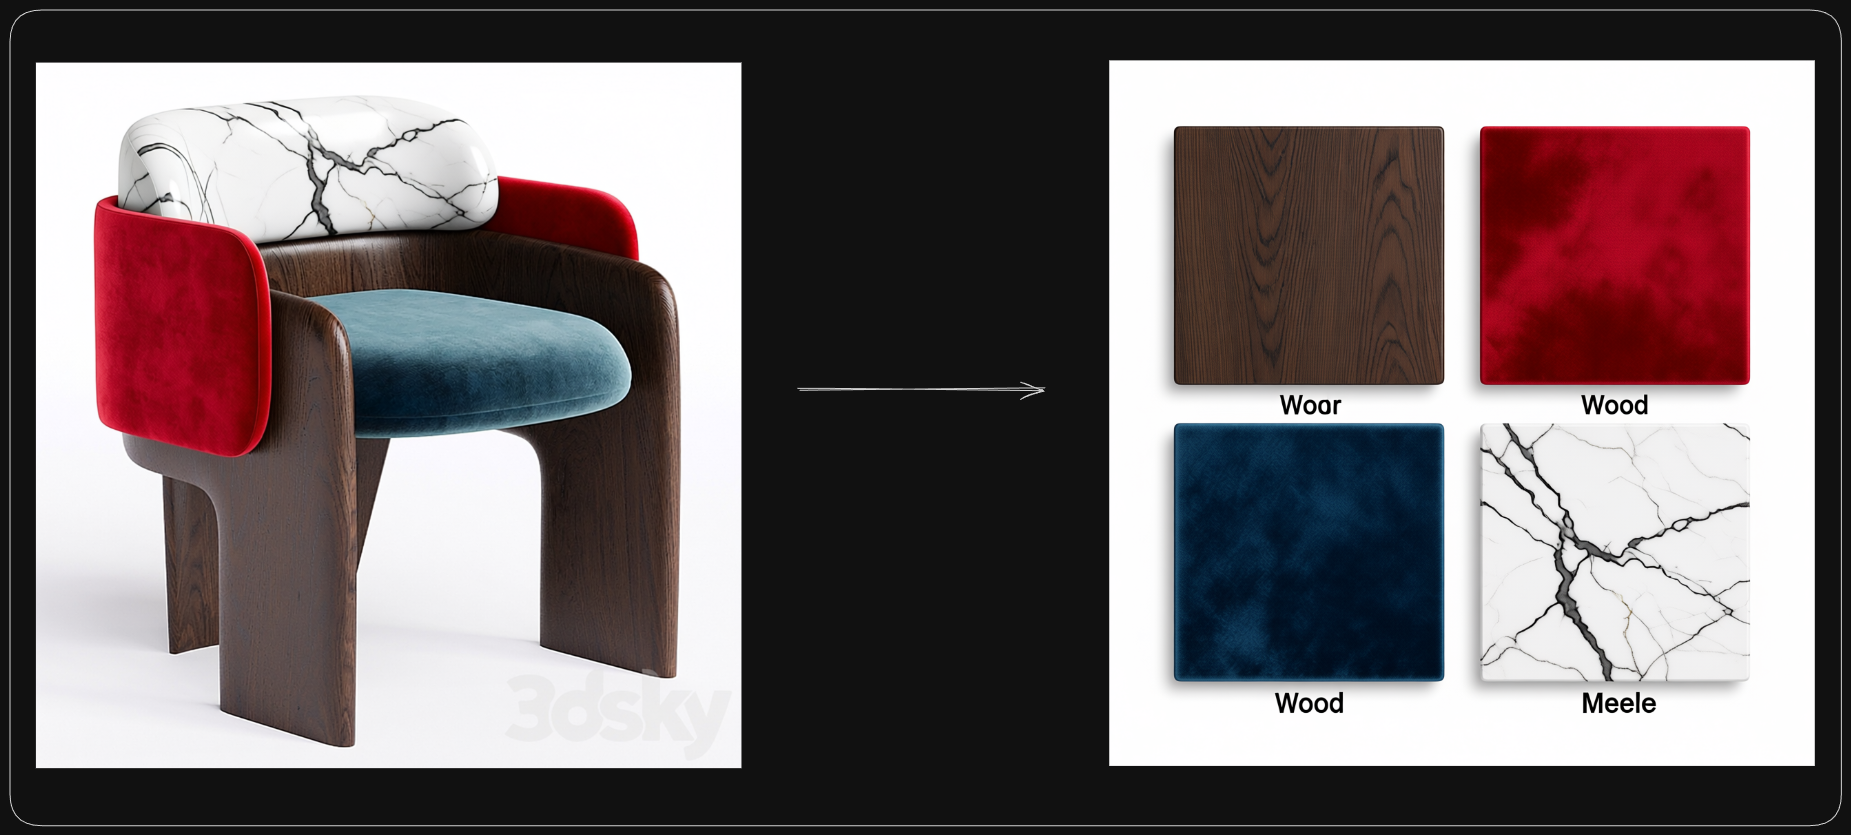
A LoRA trained to extract materials from an image and present them as samples in a board.
Prompt guidelines:
Extract material
To improve your chances of getting what you want, you can add more details to the prompt, for example "Extract material, 4 samples : wood, blue/red velvet, white marble"
Was this helpful?