Animate an Isometric Building Transformation
Last updated: April 9, 2026
Note: Newer Workflows Available
The Isometric Building Transformation workflow described in this article remains fully functional. However, for improved efficiency and consistency, we now recommend using newer models that handle structural evolution and consistency natively.
Models like Nano Banana Pro and Seedream 4.5 often achieve similar or better results with fewer steps, simplifying the creation of consistent frames for animation.
Recommended Guides:
- Gemini 3.0 Pro Image: The Essentials
- Seedream 4: The Essentials
Learn how to generate, edit, and animate a modular isometric building in Scenario - step by step- from a static structure to a dynamic transformation sequence.
Overview
This video workflow demonstrates how to create a controlled animation of an evolving isometric structure using Scenario’s creative suite: from initial generation to frame-by-frame transformation and final video output.
You’ll learn how to:
Use a custom trained model (LoRA) to generate consistent versions of isometric buildings
Inpaint structural changes across multiple frames, using the same LoRA
Animate the transformation using a video model like PixVerse v4.5 or v5 which supports first/last frame control
This technique is great for game assets, UI visualization, architectural design, and motion concepts in an isometric style.
At the time, this workflow was created using Pixverse v4.5, but we now recommend Pixverse v5, which offers superior quality while maintaining the same capabilities.
Step 1: Generate a Base Structure
Start with a custom-trained LoRA model. In this case, this custom model outputs highly consistent blue/yellow isometric structures - perfect for modular designs.
Use the “Generate“ tool and select your custom model.
Prompt example: “isometric modular building, 5 floors, blue and yellow, clean lighting”
Choose the most visually solid, readable 5-floor variant as your base image.
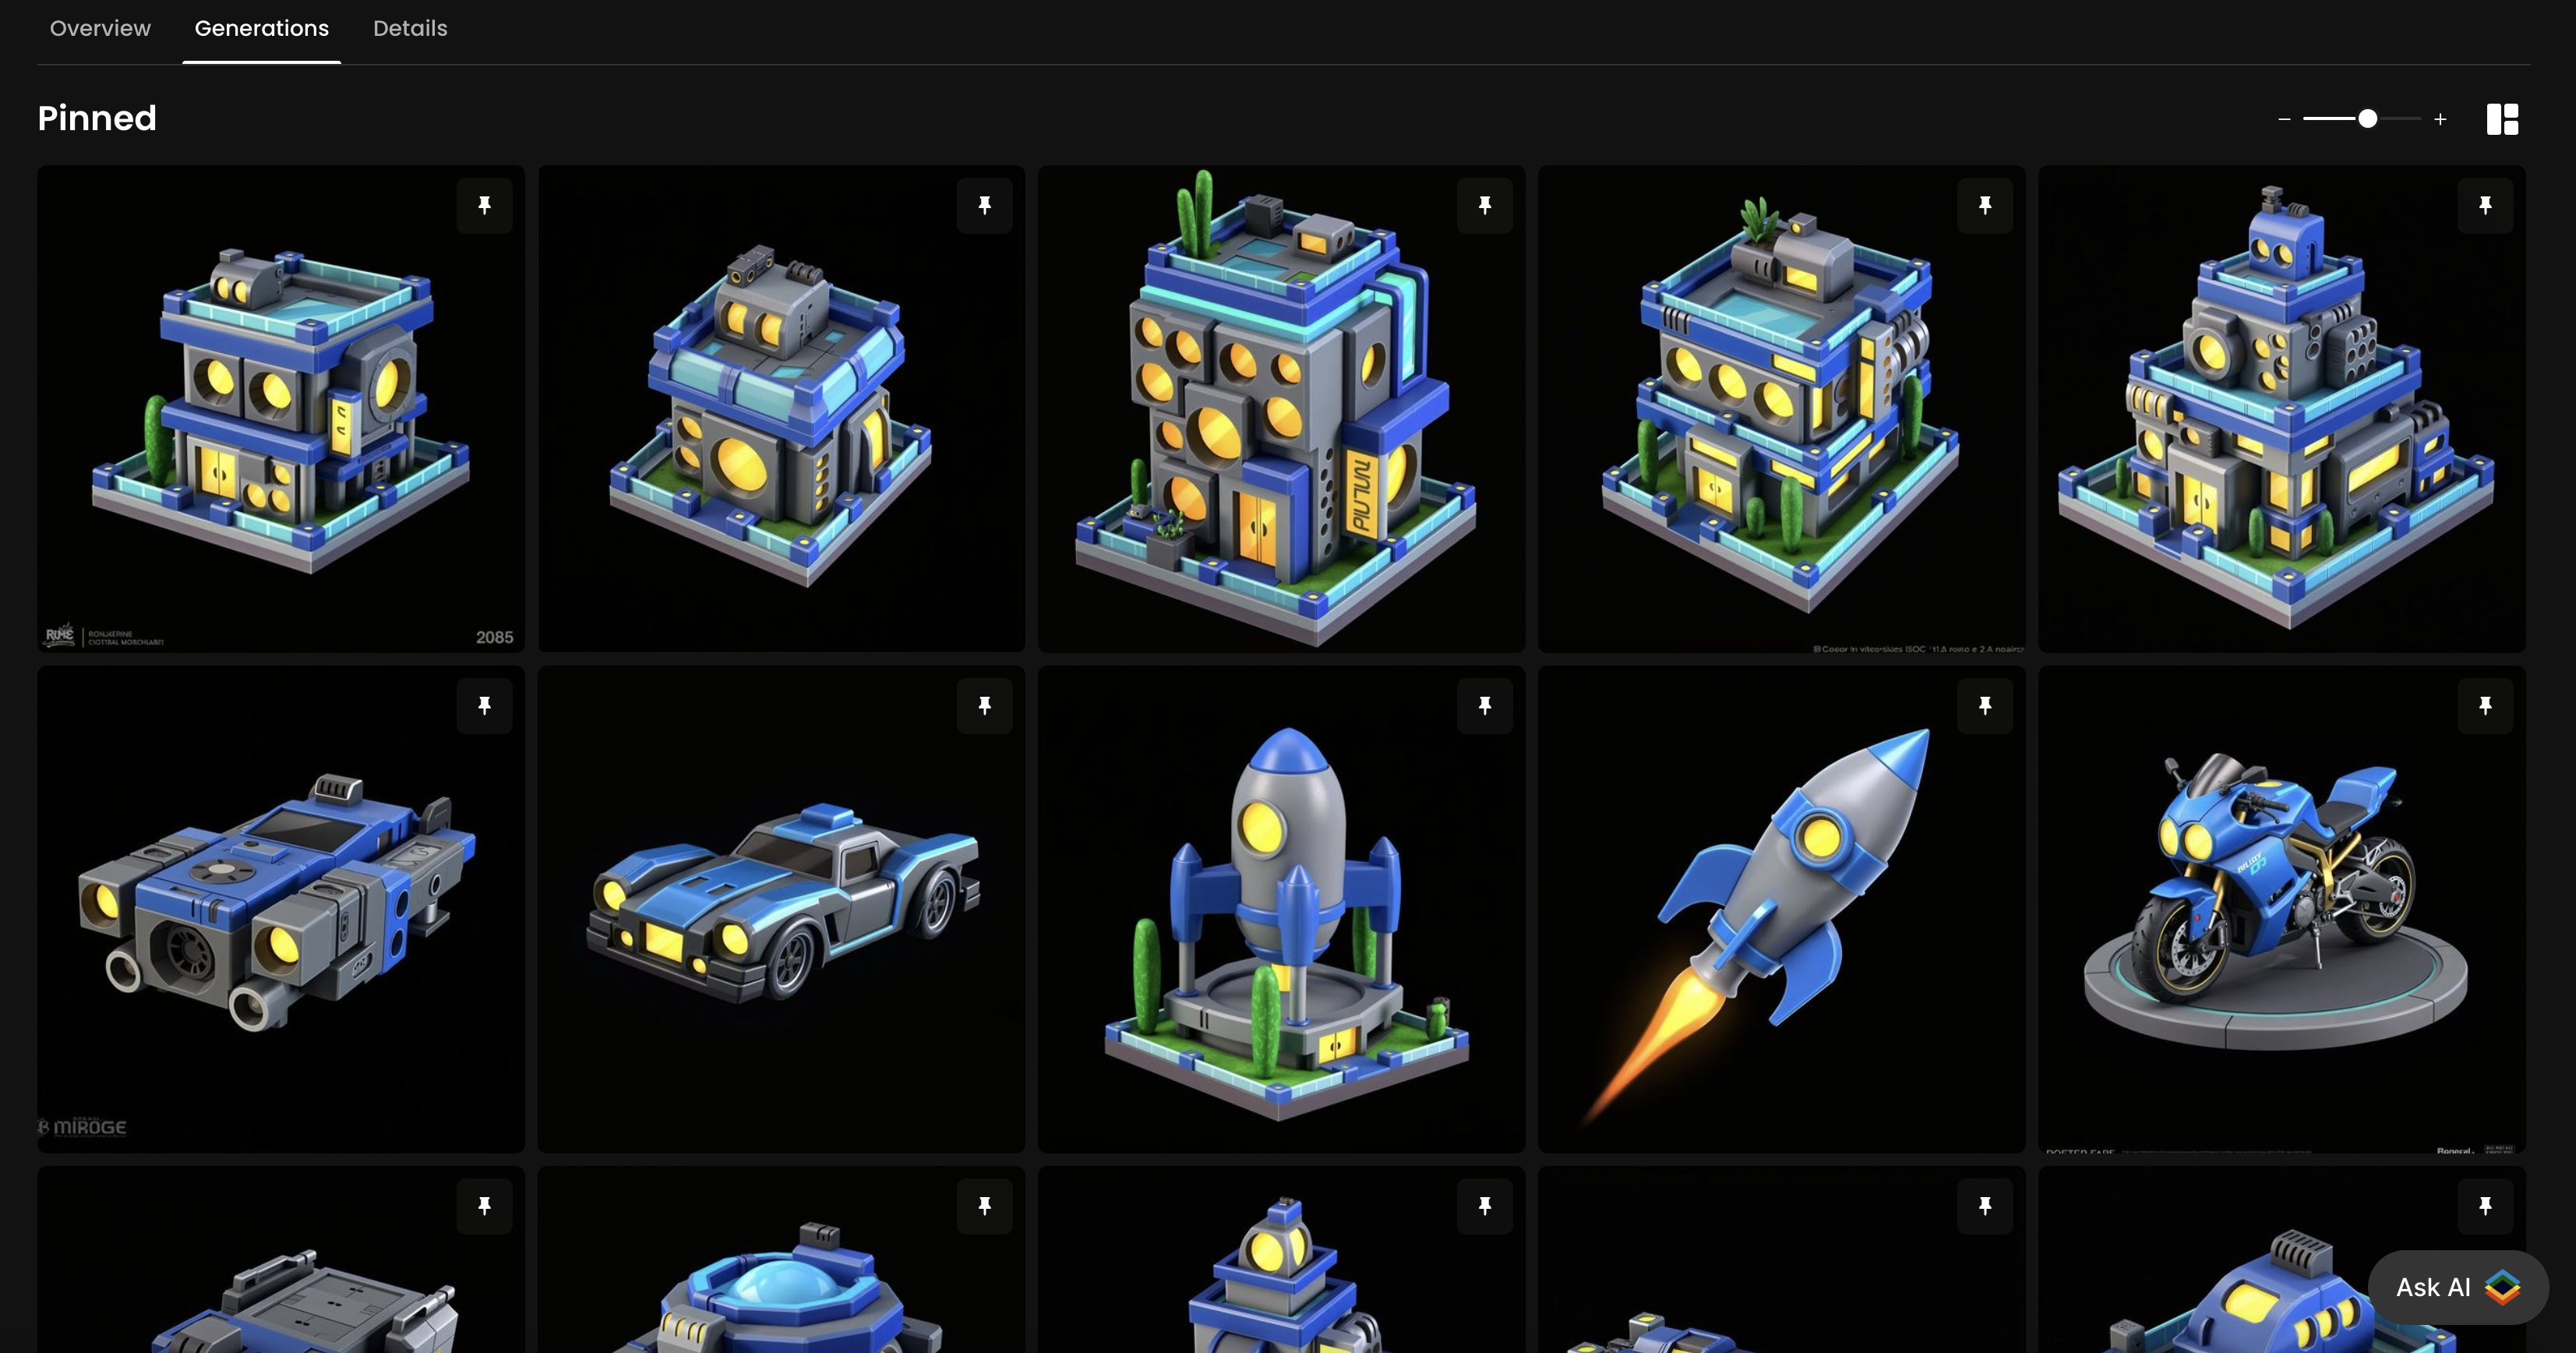
The use of a consistent LoRA ensures that proportions, lighting, and stylistic elements remain intact across multiple variations.
Step 2: Inpaint to Create Each Stage
Using the same LoRA model, create intermediate frames by progressively removing building floors.
Open the original image in Create > Retouch (AI Canvas).
Use the sketch & masking tools to cover (erase) one floor at a time, top-down.
Prompt with your original style (or leave blank) to polish the sketch
Generate and select the cleanest, most aligned version.
Repeat the process until you have all 4 stages:
5 floors → 4 floors → 3 floors → 2 floors…
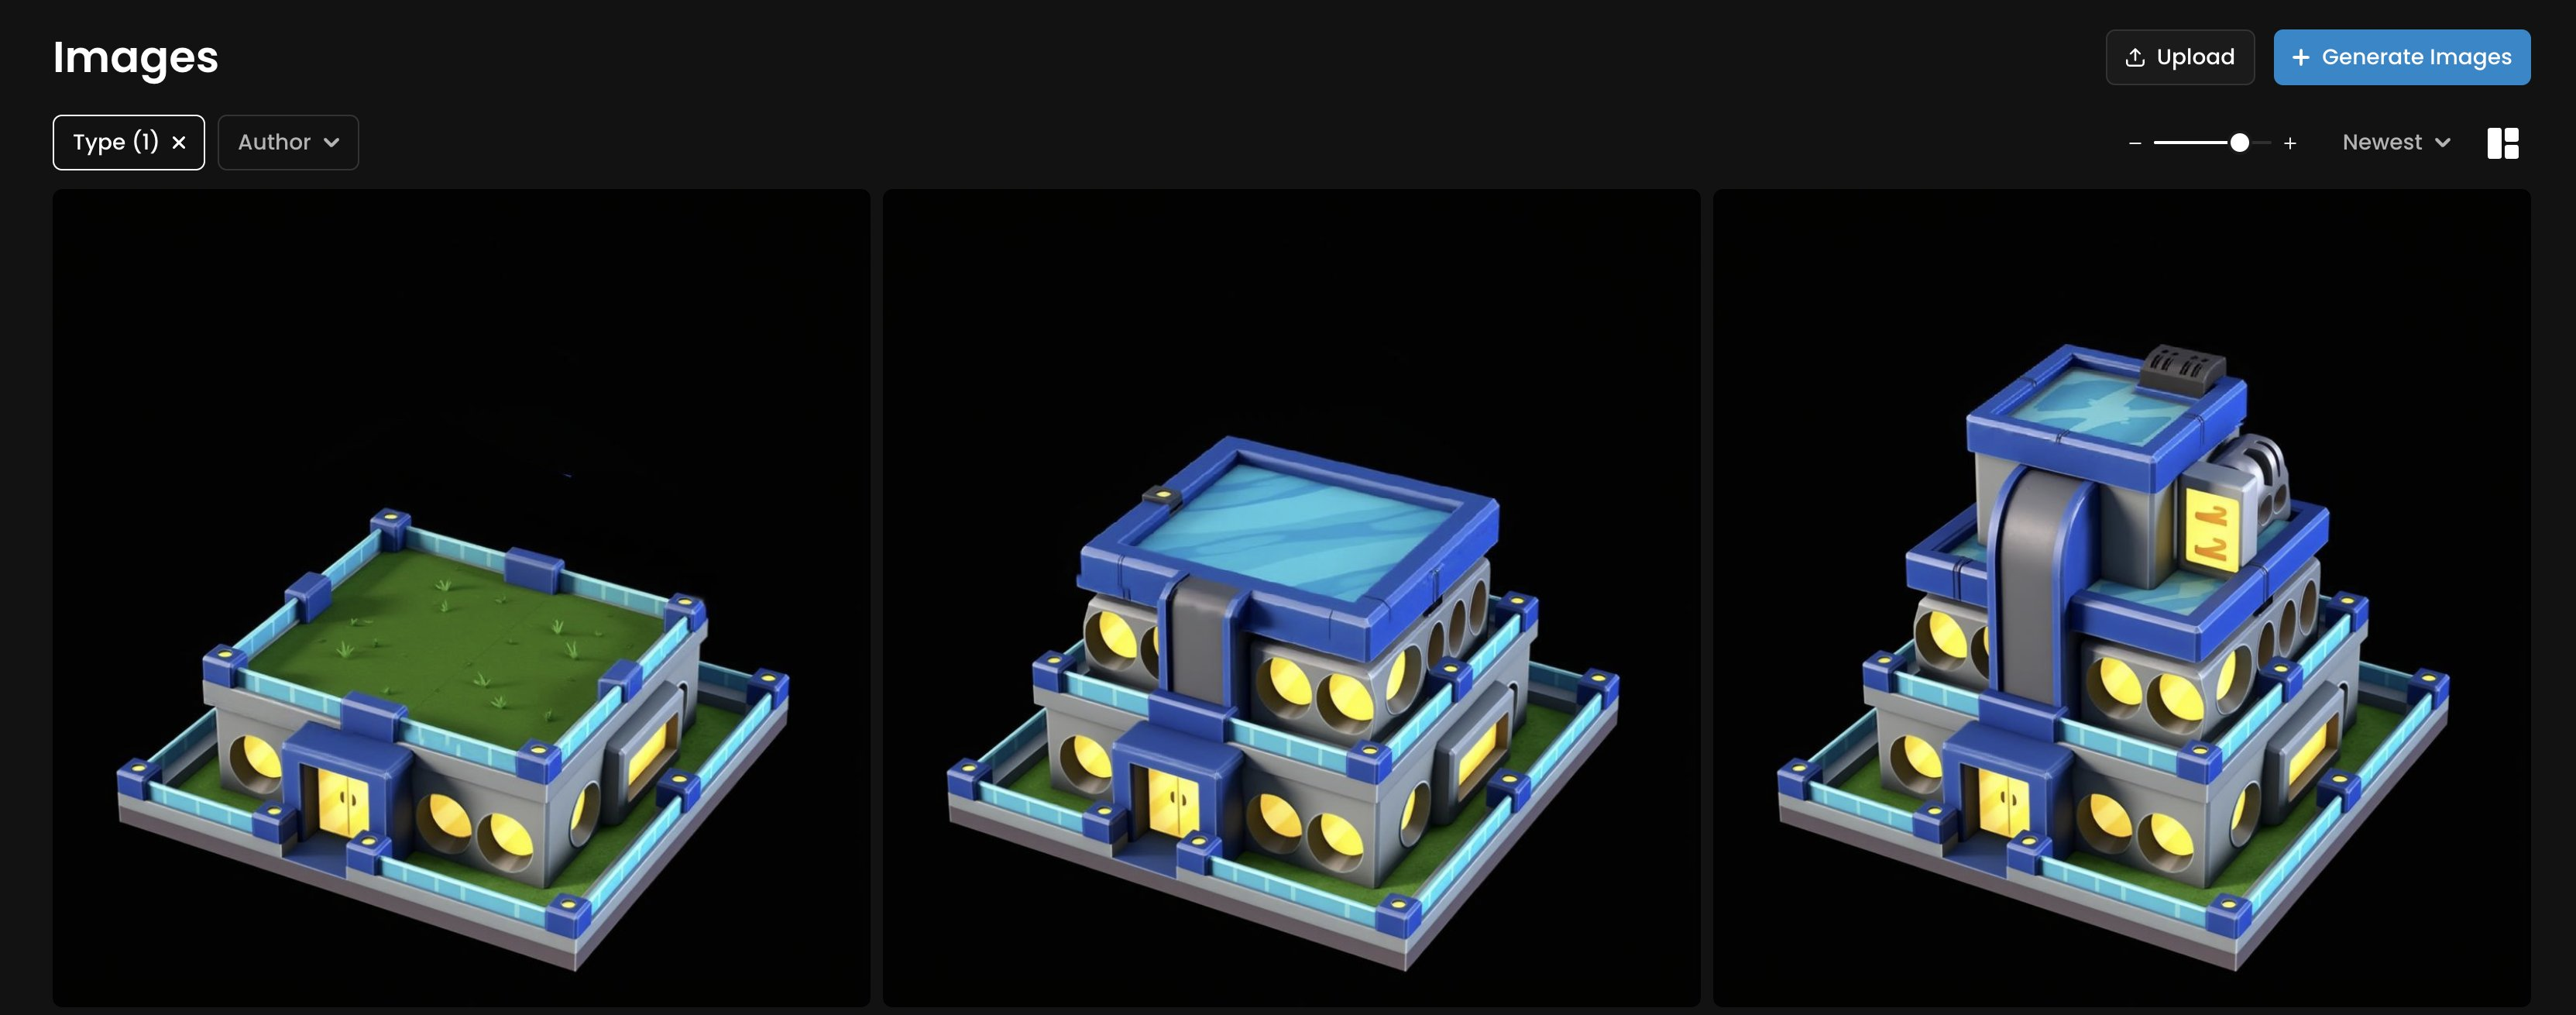
This iterative inpainting method ensures good structural alignment and visual continuity between each frame.
Step 3: Animate with PixVerse (First/Last Frame)
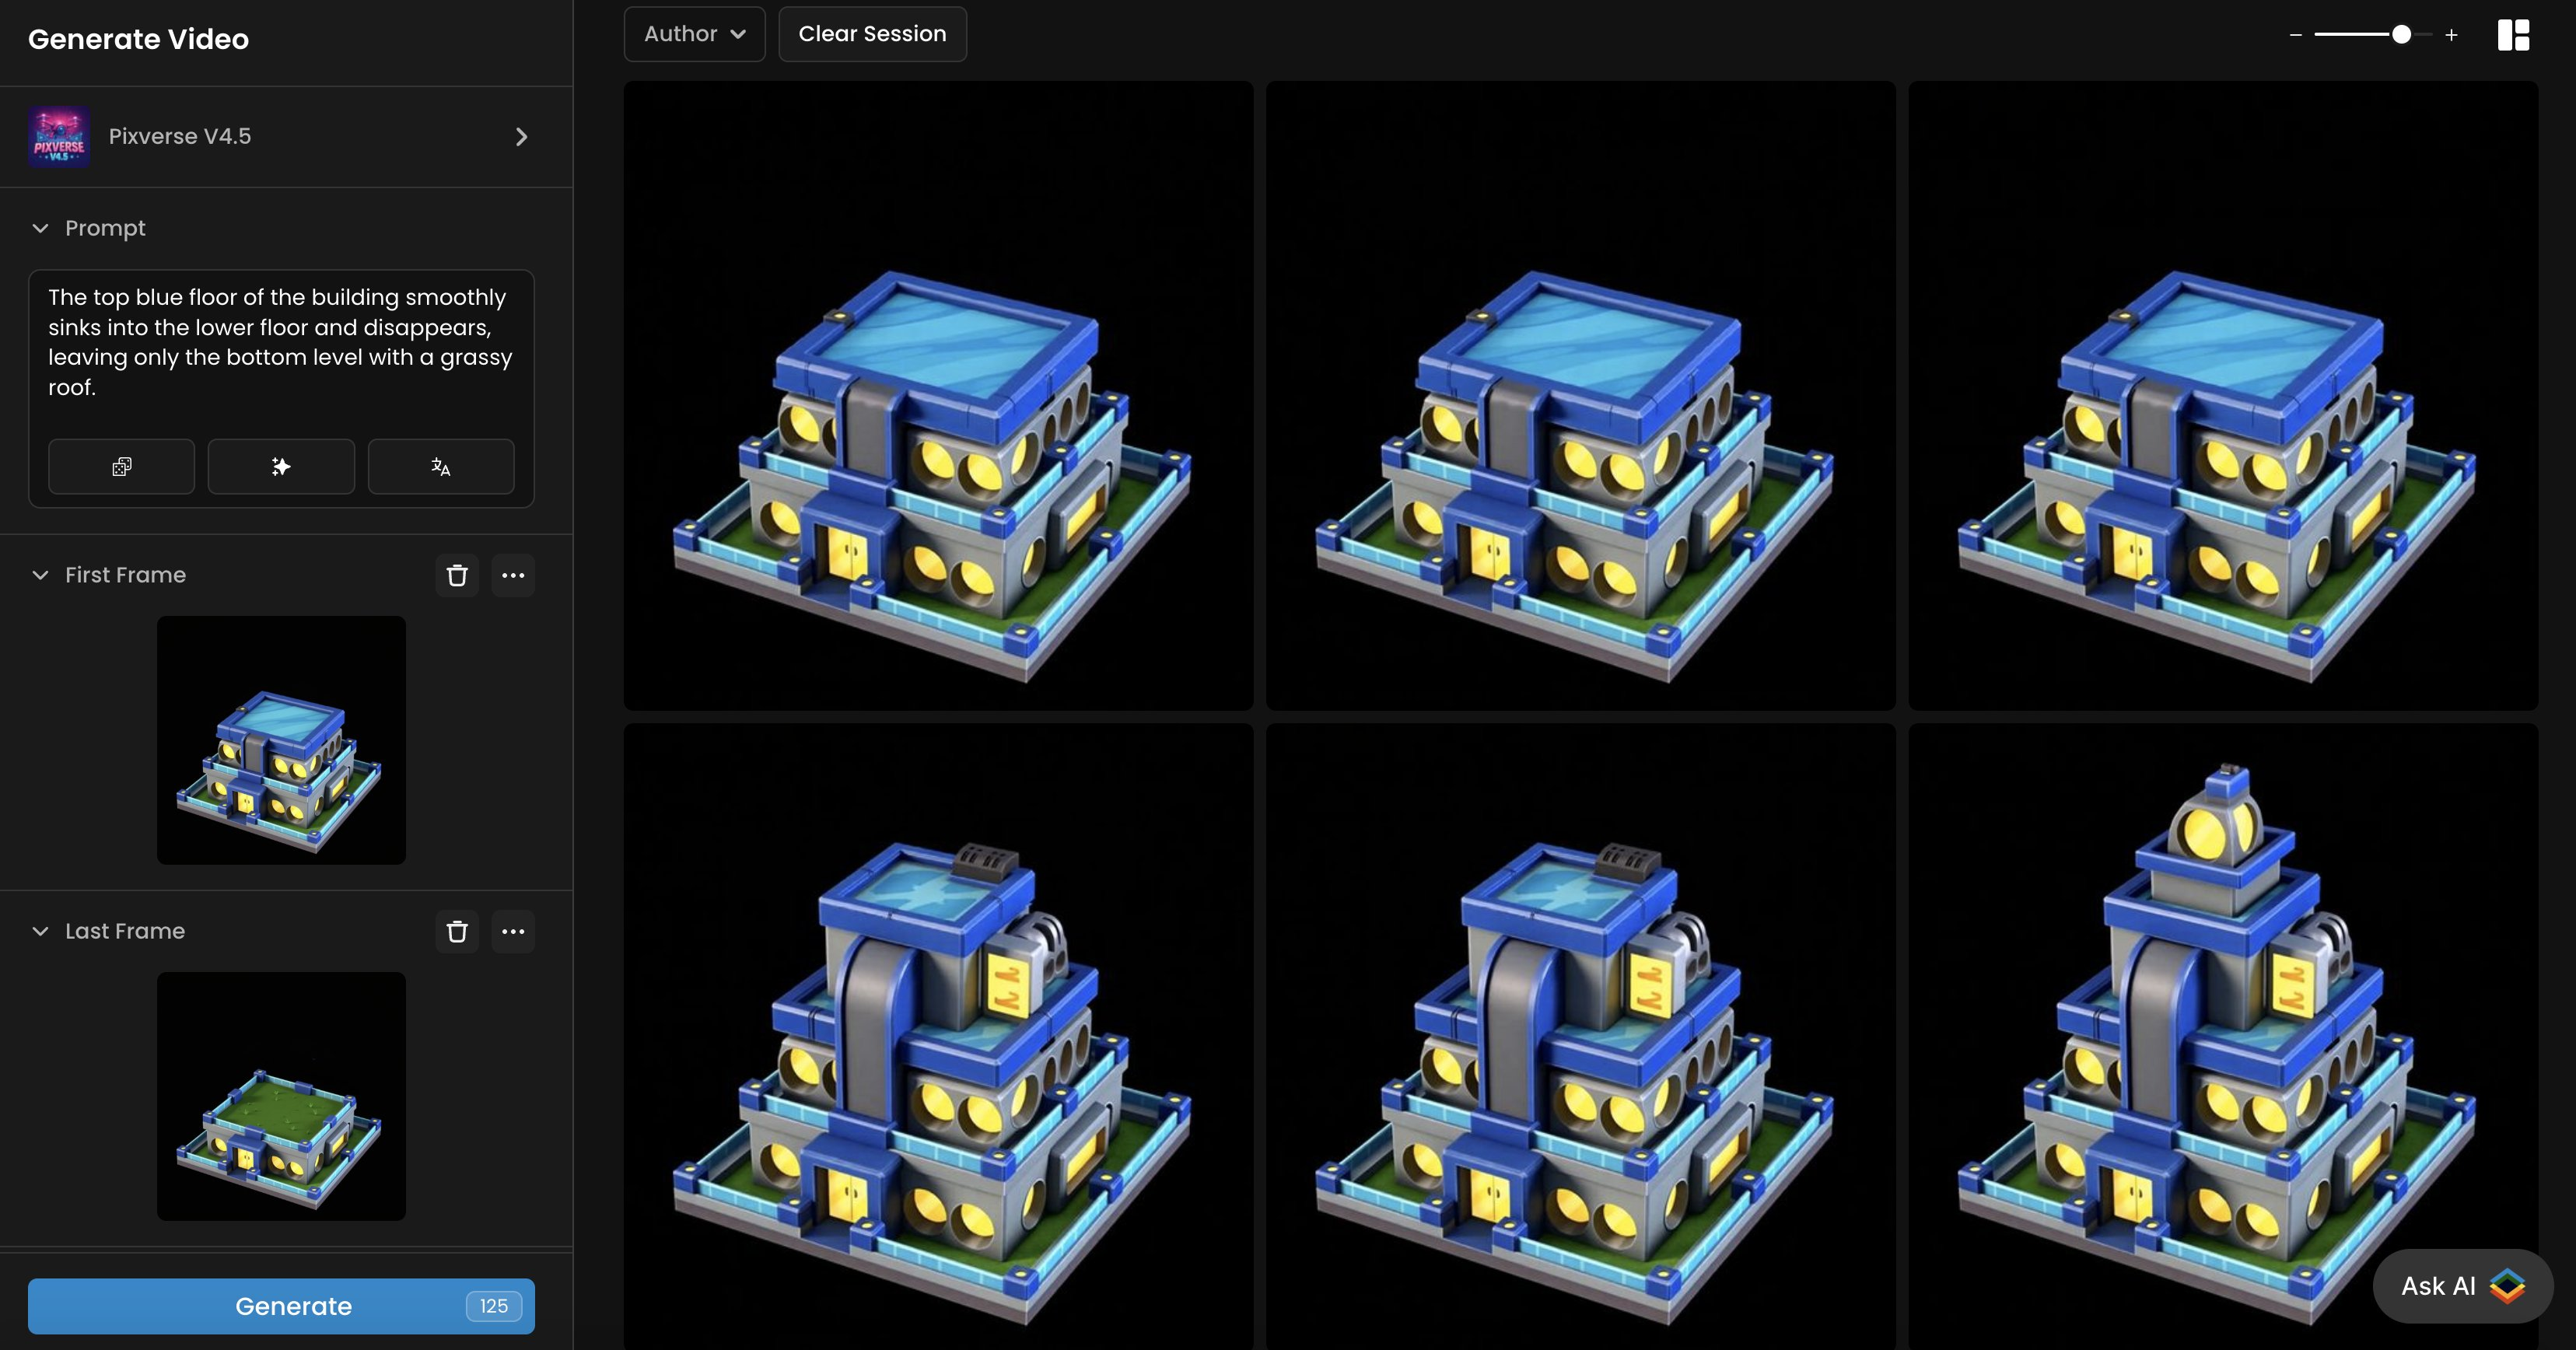
Now that you have your 4 static frames:
Open the Video tool and select Pixverse v4.5 (or the latest v5), or any model that supports First/Last Frame mode, to create smooth and controlled transitions.
Use the final image (floor N+1) as the starting frame, and an earlier image as the ending frame (floor N)
Prompt example: “The top blue floor of the building smoothly sinks into the lower floor and disappears, leaving only the bottom level with a grassy roof.”
Generate multiple sequences:
5 → 4 floors
4 → 3 floors
3 → 2 floors
Tip: For best results, this workflow starts by animating the collapse of the building—then simply reversing the video to show it being built. This approach produced smoother, more consistent transitions. PixVerse v4.5 and v5 outperformed other models in maintaining style consistency and delivering fluid motion throughout the sequence.
Tools Used
Model Training: app.scenario.com/models/new
Canvas (Retouch): app.scenario.com/canvas
Video Generation: app.scenario.com/videos (PixVerse v4.5)
Tips & Recommendations
Always use the same LoRA or video model throughout the entire process to maintain alignment.
Inpainting from the top down is the simpler method (vs. bottom up)
Use Prompt Agent (Prompt Spark) to auto-generate good, detailed video prompts.
Conclusion
With just three tools on Scenario, plus a style consistent model, you can go from a static isometric structure to a polished transformation sequence. Simply generate consistent frames in a guided process, then combine them into controlled video generation, frame-by-frame. Scenario gives you creative precision without the overhead of traditional animation workflows.
Whether you’re visualizing architectural logic, designing evolving game elements, or just exploring AI-driven motion, this workflow gives you full control over structure, style, and movement—every step of the way.