The Isometric Tile generation workflow described in this article remains fully functional. However, for improved efficiency and consistency, we now recommend using newer models that handle isometric perspectives and structural details natively.
Models like Nano Banana Pro and Seedream 4.5 often achieve similar or better results with fewer steps, simplifying the creation of cohesive game assets.
Recommended Guides:
- Gemini 3.0 Pro Image: The Essentials
- Seedream 4: The Essentials
Introduction
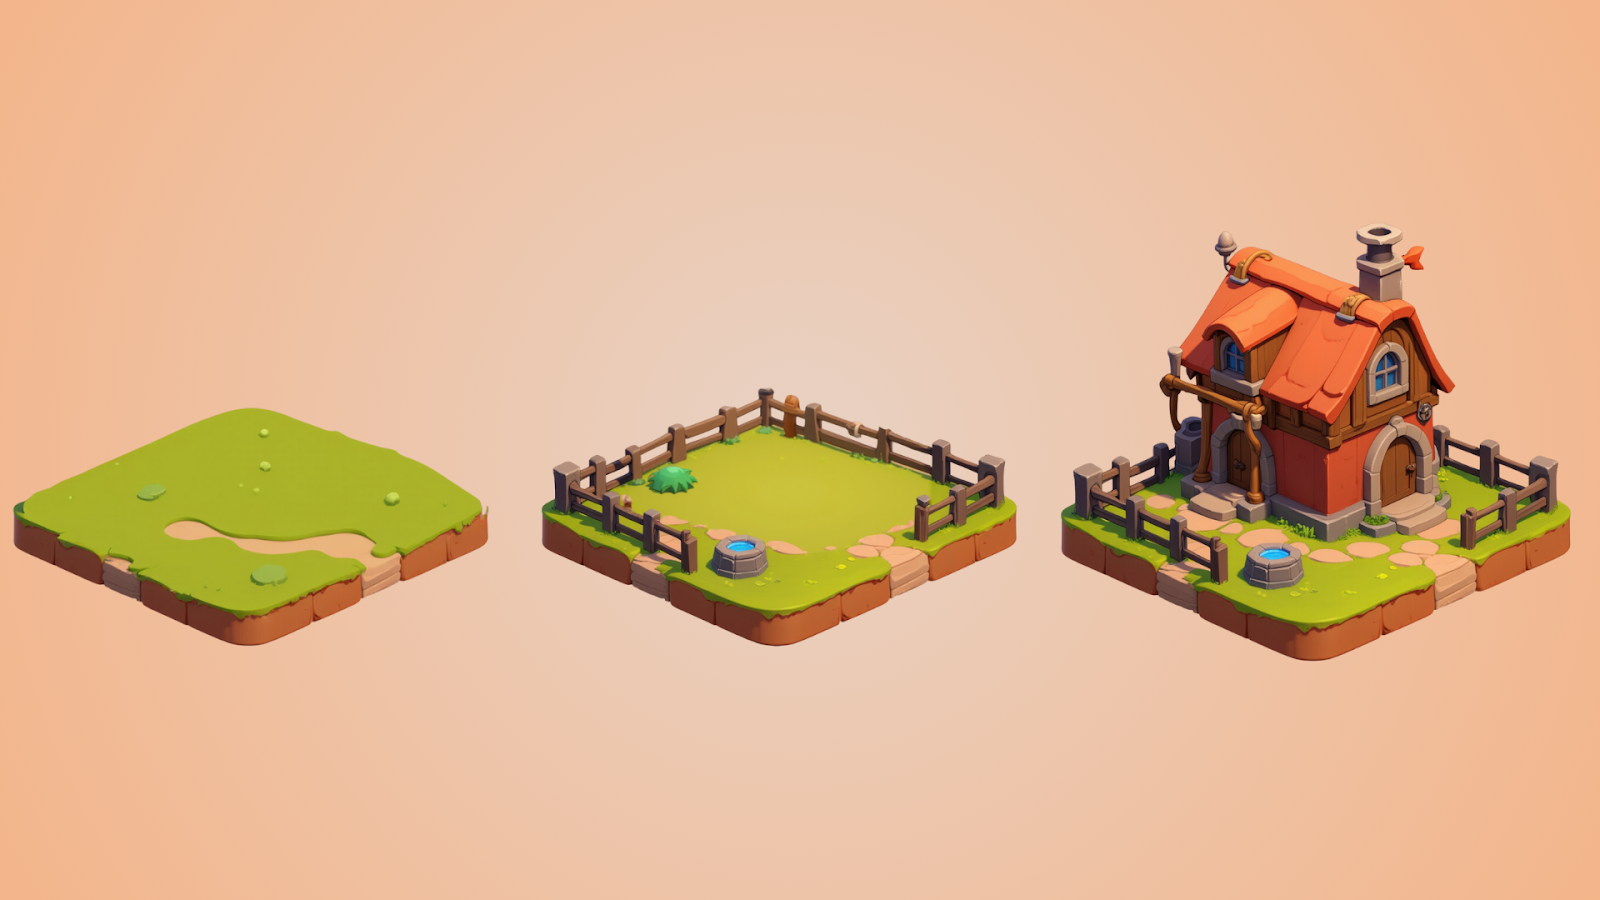
This guide walks you through using Scenario Canvas to design and refine isometric assets, perfect for creating cohesive game environments. Whether you're building new structures from scratch or enhancing existing designs, this workflow applies to landscapes, interiors, characters, and props, giving you full control over each element while maintaining a consistent isometric perspective.
Starting Your Isometric Project
Begin by setting up your Canvas environment:
Open Scenario Canvas by clicking "New" from the left menu. This loads a blank canvas where you can build your isometric asset from the ground up. Alternatively you can also access the Canvas by opening your generated image and clicking "Retouch" from the ellipsis menu.
Select a model that aligns with your aesthetic goals. This choice will define the look of all your generations and edits, so select one that matches your project's visual direction.
If you're working within a specific game style, choose a model that complements that visual direction.
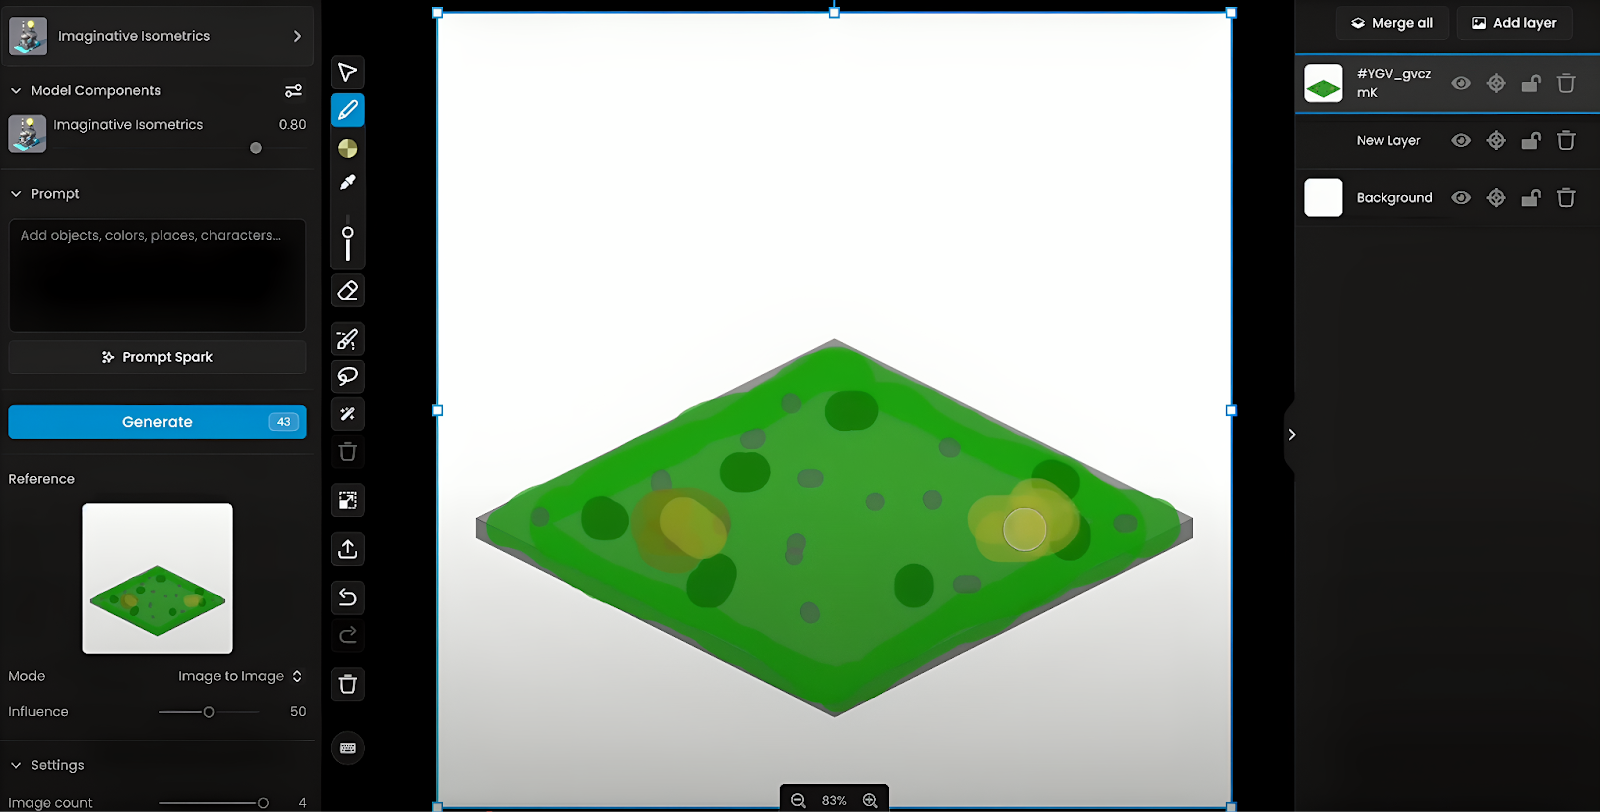
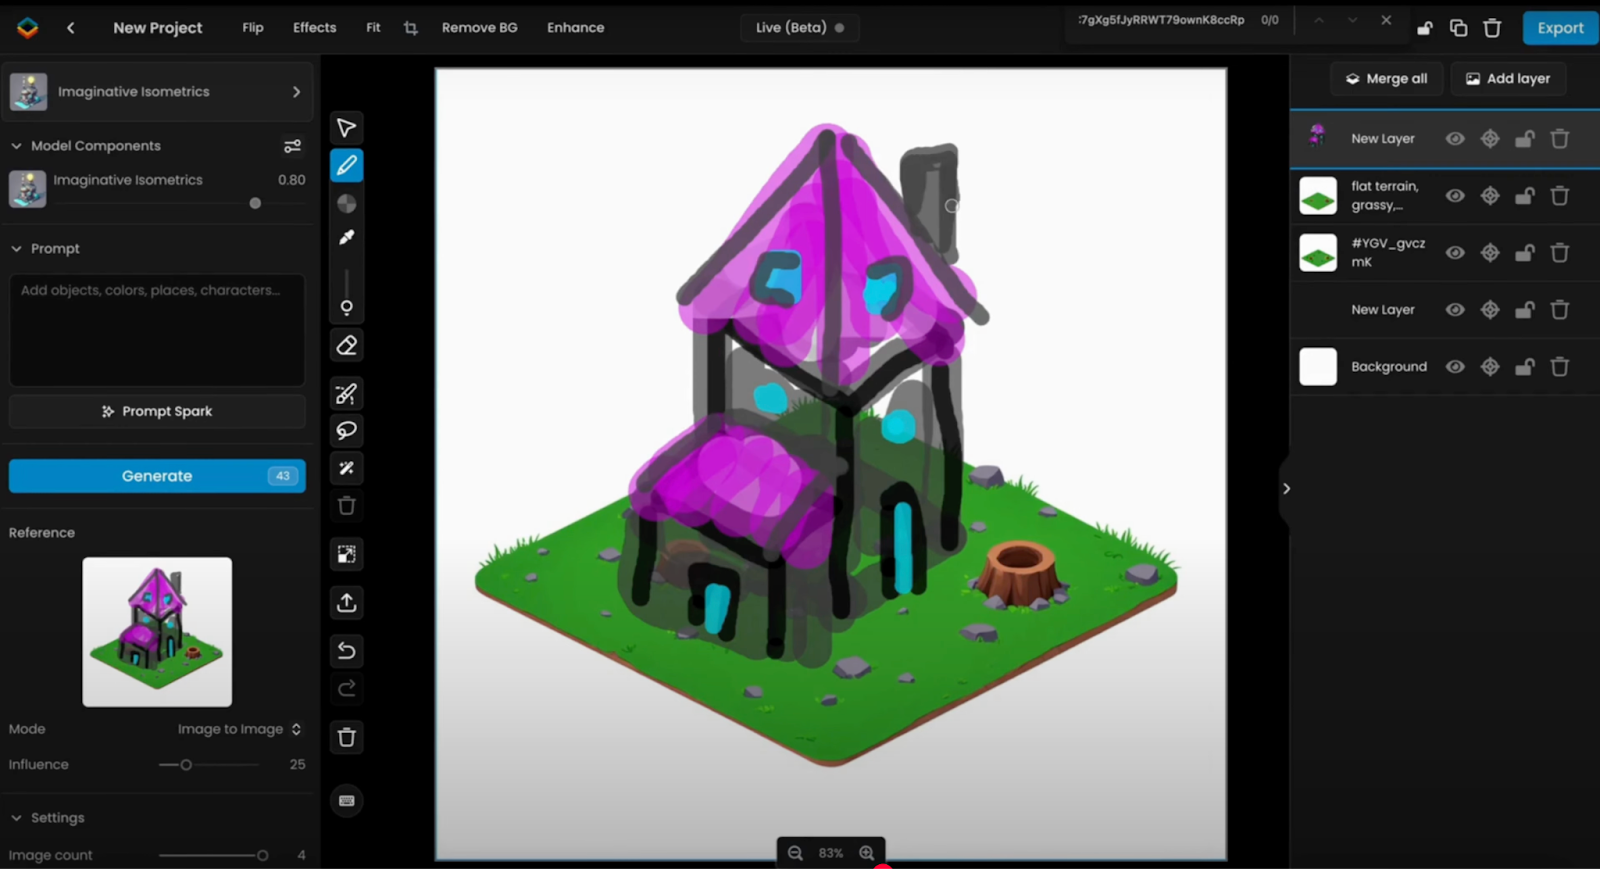
Step 1: Sketching the Base Asset
Create a foundation for your isometric tile:
Use the Sketch Tool to outline the base of your asset. This could be the ground plane or foundation for a building.
If you're working with a predefined tile system, you can import an existing tile as a reference and sketch over it to maintain grid alignment with your project.
Even a rough outline is sufficient, the AI will interpret your sketch and generate a refined version based on the selected model.
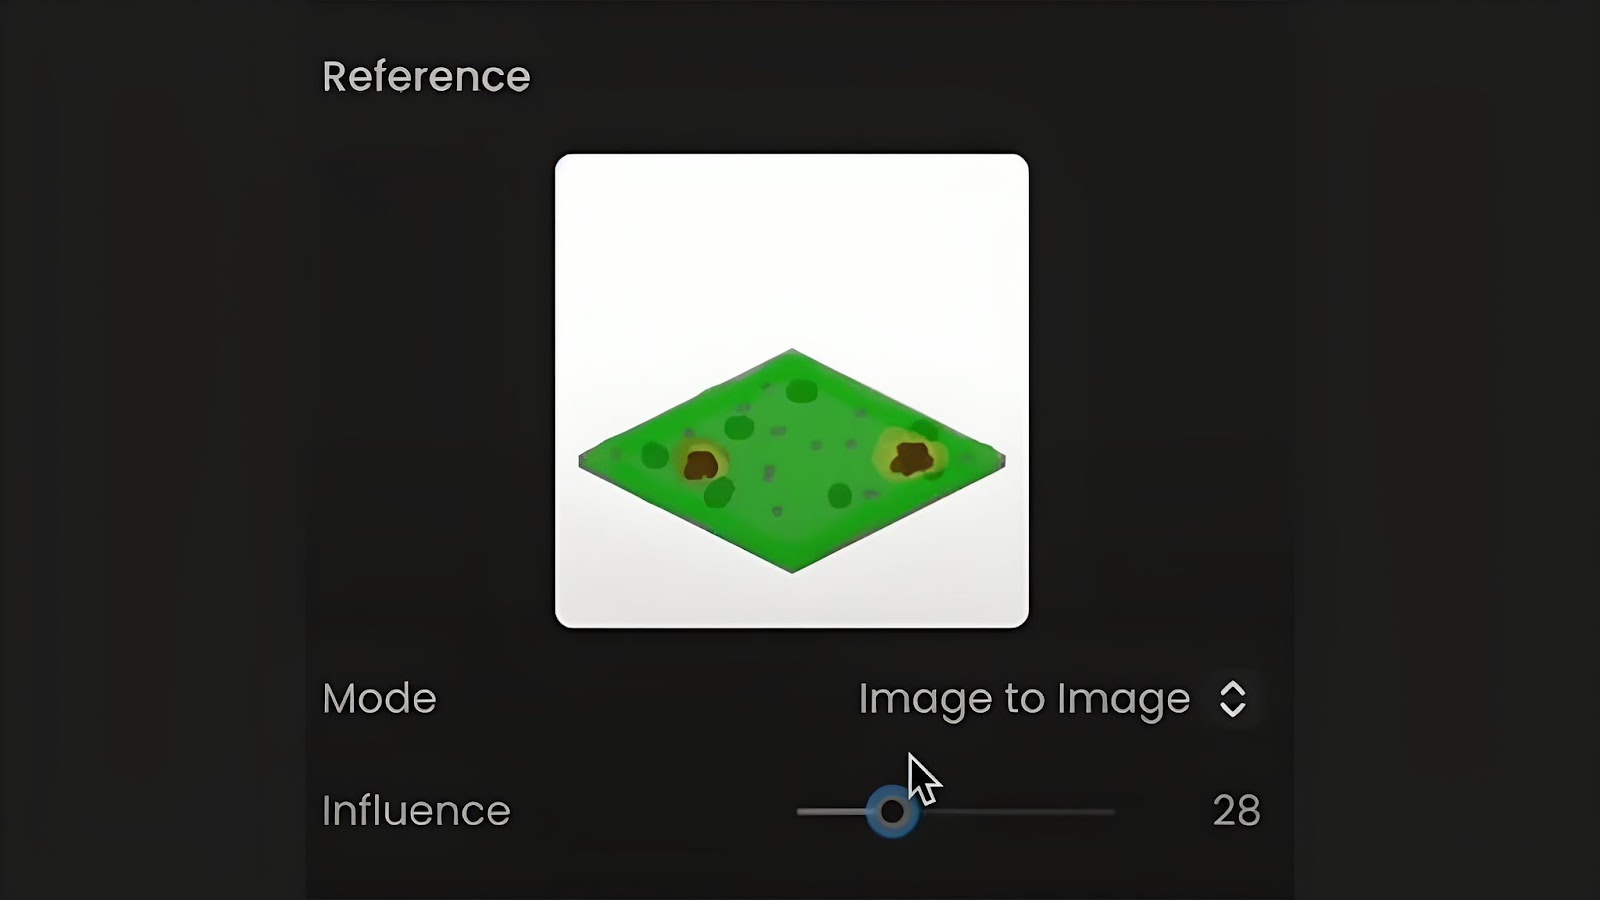
Step 2: Generate the Base Tile
With your sketch complete, generate your first tile: set Image-to-Image Influence between 20-30 for optimal control. This range should provide a good balance, allowing the AI to follow your sketch structure while adding appropriate texture and detail.
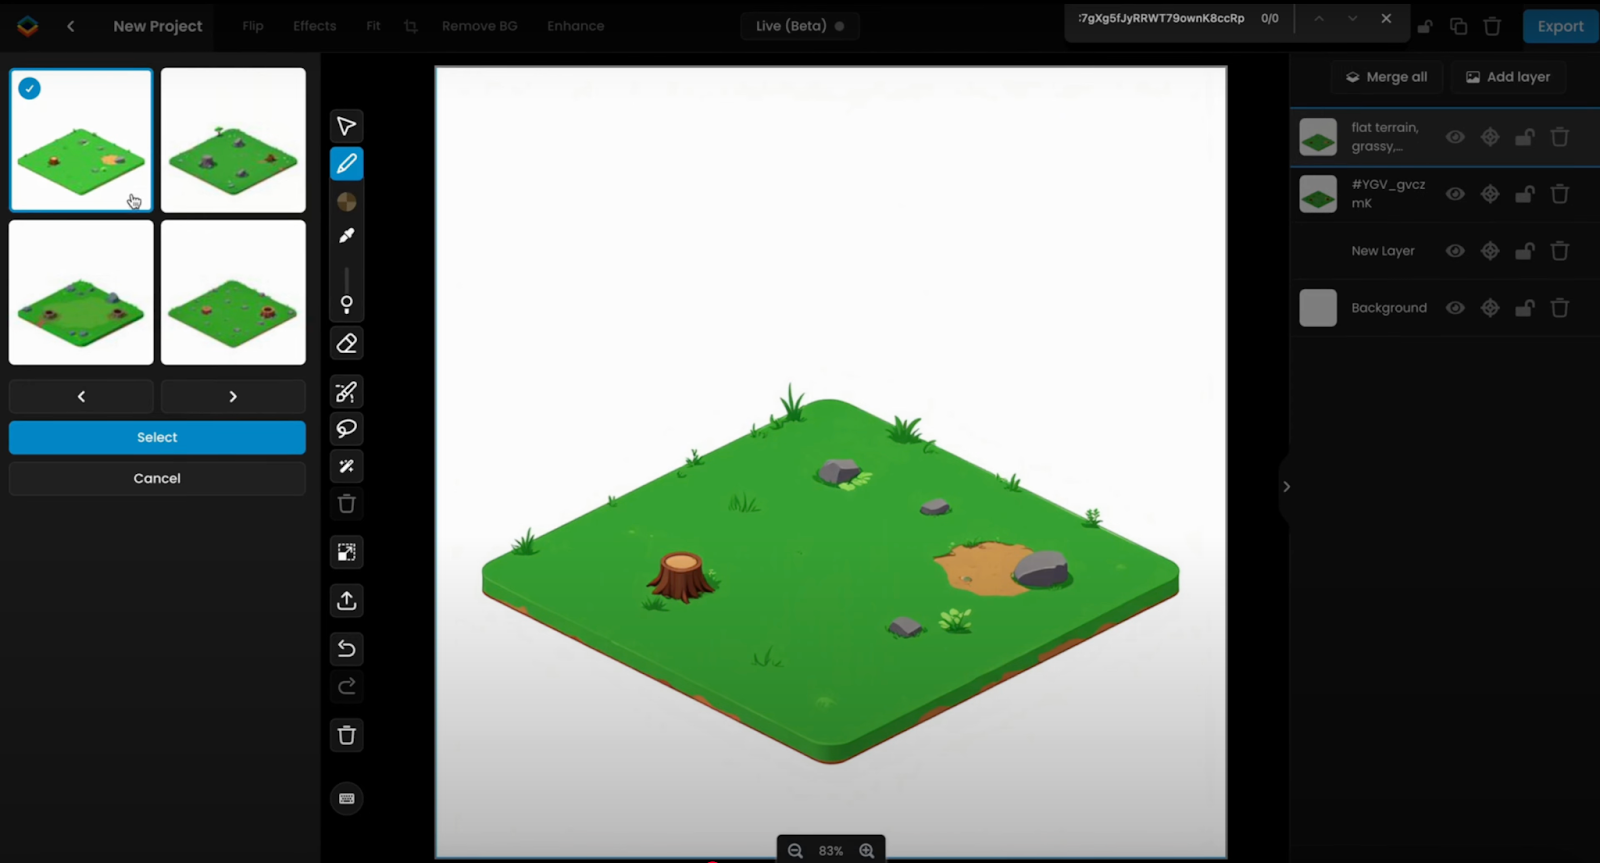
Enter a descriptive prompt for your tile, such as "stone-paved ground with moss growing between cracks" or "grass and dirt with cobblestone edges."
Click "Generate" to render your sketch based on the selected model and prompt.
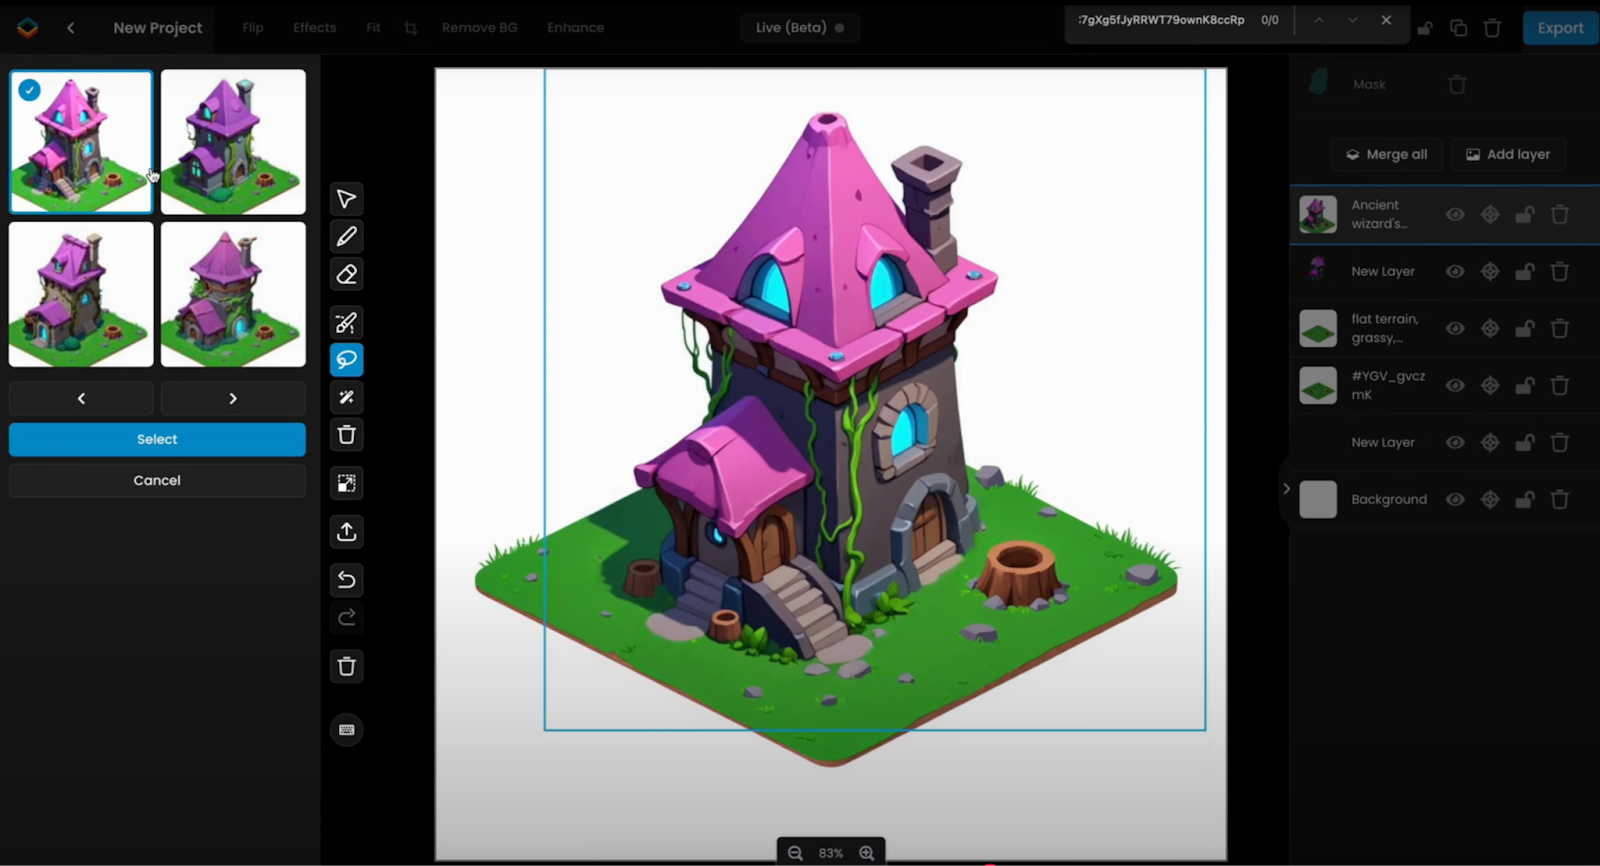
Review the outputs in the left panel and select the one that best matches your design vision.
Step 3: Add Layers for Structure & Details
Once your base tile is complete, build up your isometric asset:
Add a new layer by clicking "Add Layer" in the right panel. This allows you to incorporate structural elements like walls or doors without affecting the base design.
Layers give you the flexibility to reorder, hide, export, or merge elements as needed, maintaining a non-destructive workflow.
Step 4: Generate Additional Elements
For each new component of your isometric asset:
Use the Sketch Tool to draw structural elements on your new layer. For example, outline walls or decorative features.
Mask the area you want to refine using the selection tools.
Adjust Image-to-Image Influence to control how closely the AI adheres to your sketch, higher values for precise structural elements, lower values for more creative interpretations.
Enter a descriptive prompt for the specific element, such as: "A medieval wooden roof with curved beams and weathered tiles" "Stone walls with ivy growing along the edges" "Glass-paneled modern doors with metal handles"
Click "Generate" and select your preferred outcome from the results.
Repeat this process for additional elements like windows or surrounding props, adding new layers as needed.
Step 5: Refine & Customize Details
Polish your isometric asset with additional details:
Create targeted sketches for smaller elements like fences, or any other variations.
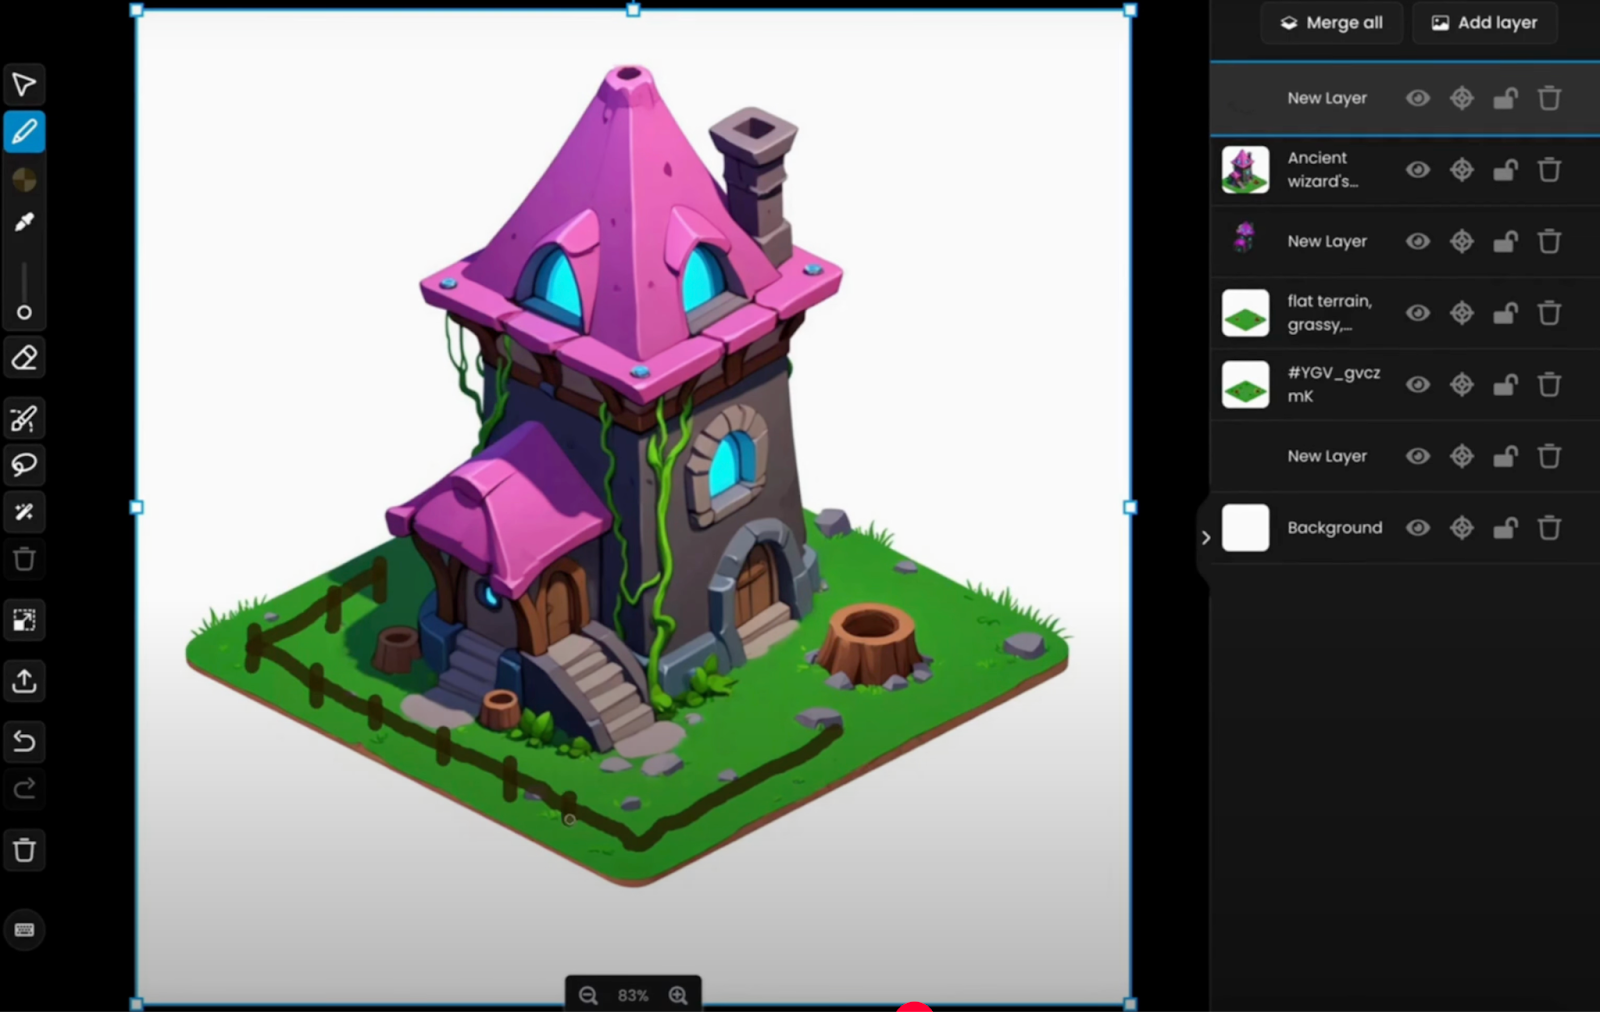
Mask specific areas that need refinement and set appropriate influence levels for precise control.
Generate variations for these details, gradually building up a complete cohesive isometric asset.
If needed, refine textures or materials by adjusting influence settings and prompt details. Focus on maintaining consistent lighting direction and shadow placement to preserve the isometric perspective.

Removing Unwanted Elements
If you need to remove parts of your design:
Use the Color Picker (C) to match background tones of the area surrounding the unwanted element.
Use the Eraser tool to remove the unwanted object from its layer.
Apply a mask over the erased area.
Adjust Image-to-Image Influence and either:
Leave the prompt blank for a seamless fill-in based on surrounding content
Enter a new prompt for a different replacement
Click "Generate" to update the asset.
Finalizing & Exporting Your Asset
Once your isometric building or environment is complete:
Use the Layers Panel to review all components and ensure they work together harmoniously.
Reorder and merge layers as needed for the final presentation.
Click "Export" to download the final asset or save it to your gallery.
Consider saving your isometric assets to a dedicated Collection for easy access and organization.
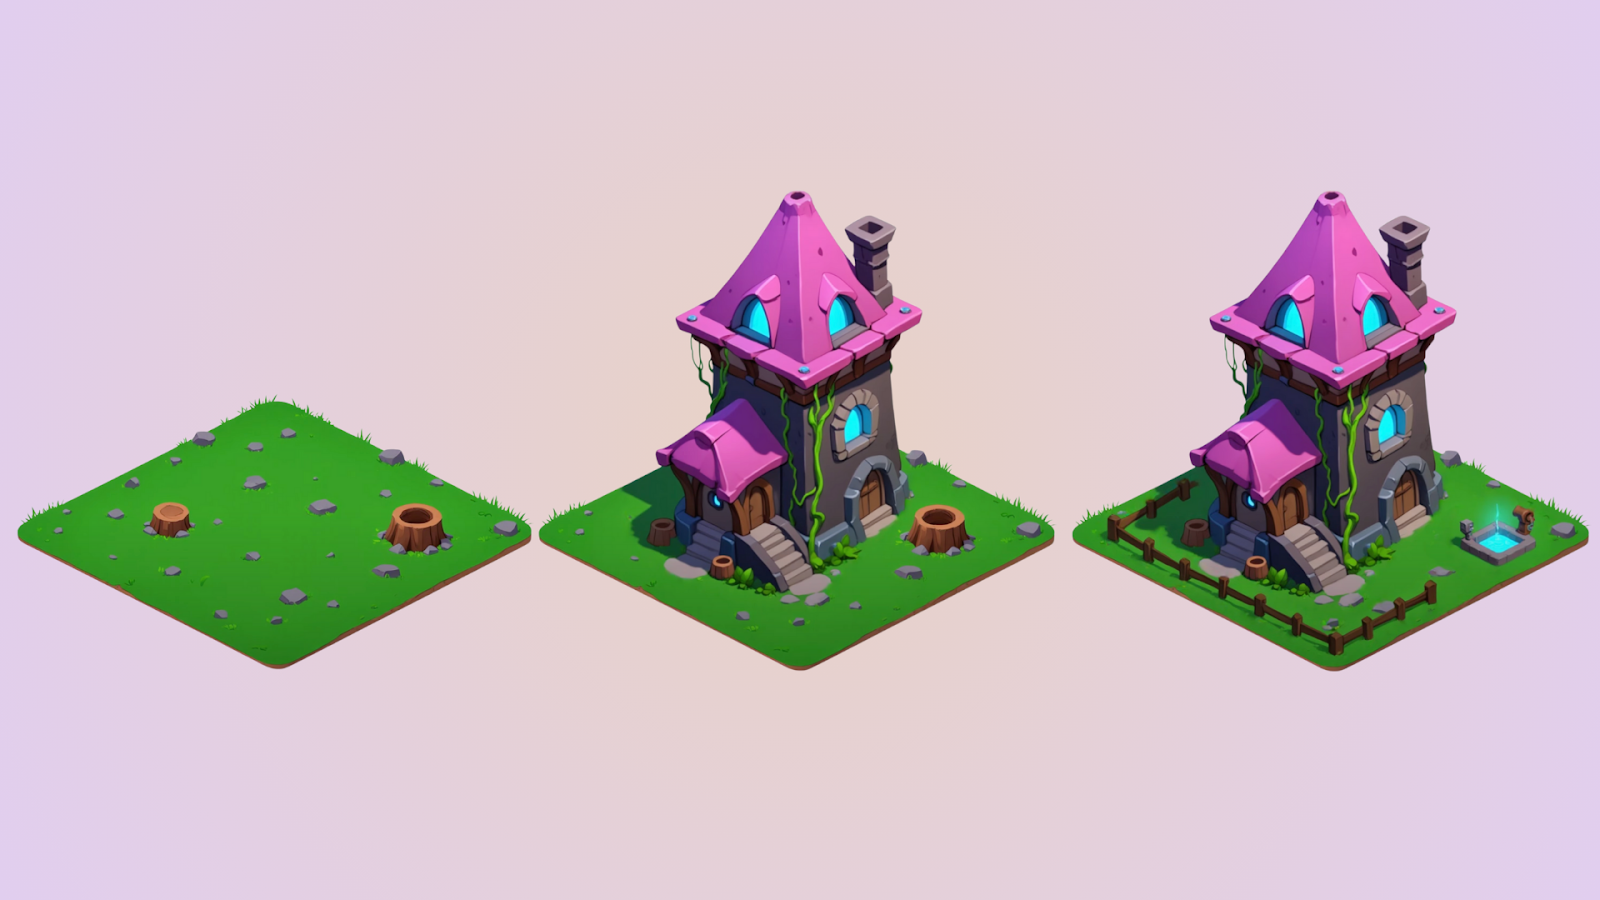
Final Notes
With Scenario Canvas, you can efficiently design and refine isometric assets while maintaining style consistency across your project. The approach gives you maximum control over each element while preserving the isometric perspective that's essential for this style of illustration.
When creating multiple related assets, maintain consistent lighting direction and stylistic elements to ensure they work together seamlessly in your final implementation. By developing a library of isometric assets using this workflow, you can quickly assemble complex environments. Learn more in our Isometric Assets With Canvas tutorial.
Access This Workflow Via API
Upload an Image: Scenario API Documentation - POST /assets
Image-To-Image Generation: Scenario API Documentation - POST /generate/img2img
Was this helpful?