Custom Workflows
Last updated: July 9, 2026
Build exactly what you need
Platform Workflows are great starting points, but the real power unlocks when you build your own.
Custom Workflows let you design pipelines tailored to your exact creative process. Chain any combination of models and tools. Create once, reuse forever. Turn complex multi-step tasks into a single click.
This is where Workflows becomes truly yours.
Your First Workflow
When you create a new workflow, the editor already starts with the basics in place, so you can focus on understanding how things connect and expand from there.
Start Fresh
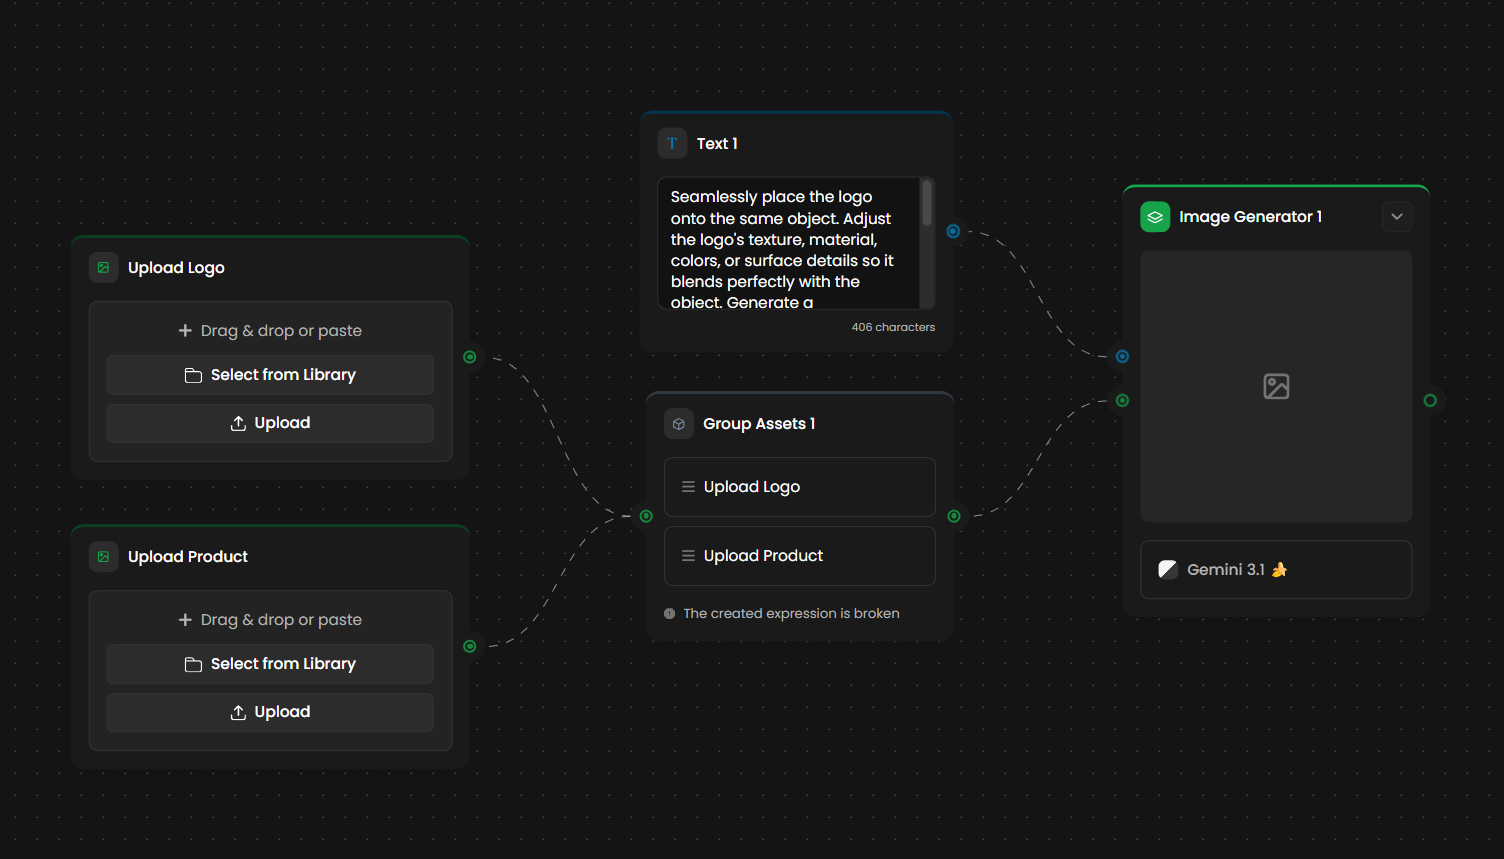
Open the editor with a new workflow. You will see that a Text node and an Image Generator node are already added and connected by default.Understand the Connection
The Text node provides the prompt that feeds directly into the Image Generator. This connection defines how your creative instruction is passed to the model.
In addition to text, you can also connect reference images to the Generator to guide the output visually.Select a Model
Click on the Image Generator node and choose a model, such as Flux 2, Gemini, or one of your custom models.Extend the Workflow
You can enrich the pipeline by adding new nodes. For example, you might generate a video from the image, apply post-processing, or branch the workflow to test multiple variations.Run
Click Run Workflow to see the result and watch your idea come to life.
That’s it. You’ve just built a pipeline.
Now imagine extending it by adding an Upscaler, then a Background Remover, and finally a Video Generator. Each node takes the output of the previous one as its input, allowing the workflow to grow step by step. Your creative vision, fully automated.
Connecting Nodes
Building is intuitive, but data types matter.
Drag & Drop: Pull a wire from a node's Right side (Output) to another node's Left side (Input).
Color Guides: Inputs and outputs are color-coded to help you connect the right nodes. You generally connect matching colors: Green for Images, Blue for Text, Yellow for Video, Red for 3D, and Purple for Audio.
Multiple Connections: A single node, such as an Image Generator, can accept multiple inputs. For example, you can connect several reference images to guide and influence the final result.
LLM Generator
The LLM Generator node acts as the intelligent "brain" of your pipeline, providing advanced text generation, visual analysis, and complex logic processing. By integrating this node, you can automate decision-making or generate dynamic content within your workflow using state-of-the-art models like GPT and Gemini, supporting both text & vision inputs.
Learn more: Powering Workflows with the LLM Generator Node
Advanced Techniques
Once you master the basics, use these nodes to build professional-grade pipelines.
Prompt Builder
Don’t write one long prompt. Build it.
How it works:
Combine multiple text inputs into a single prompt.Use case:
Create a Weapon Generator with separate text nodes for [Weapon Type], [Element], and [Style]. Changing only the [Element] from Fire to Ice updates the entire prompt instantly.
Tools
Apply effects and transformations.
How it works:
Tools nodes let you apply image or video operations such as effects, layout adjustments, or post-processing steps.Use case:
Add a Grid Layout, apply visual effects to a video, or preprocess images before sending them to another generator, all without breaking the pipeline.
Group Assets
Perfect for organization and batching.
How it works:
Bundles multiple nodes into a single data stream.Use case:
Connect eight frames of an animation run cycle into a Group node before sending them to a Grid Layout tool or downloading them as a set.
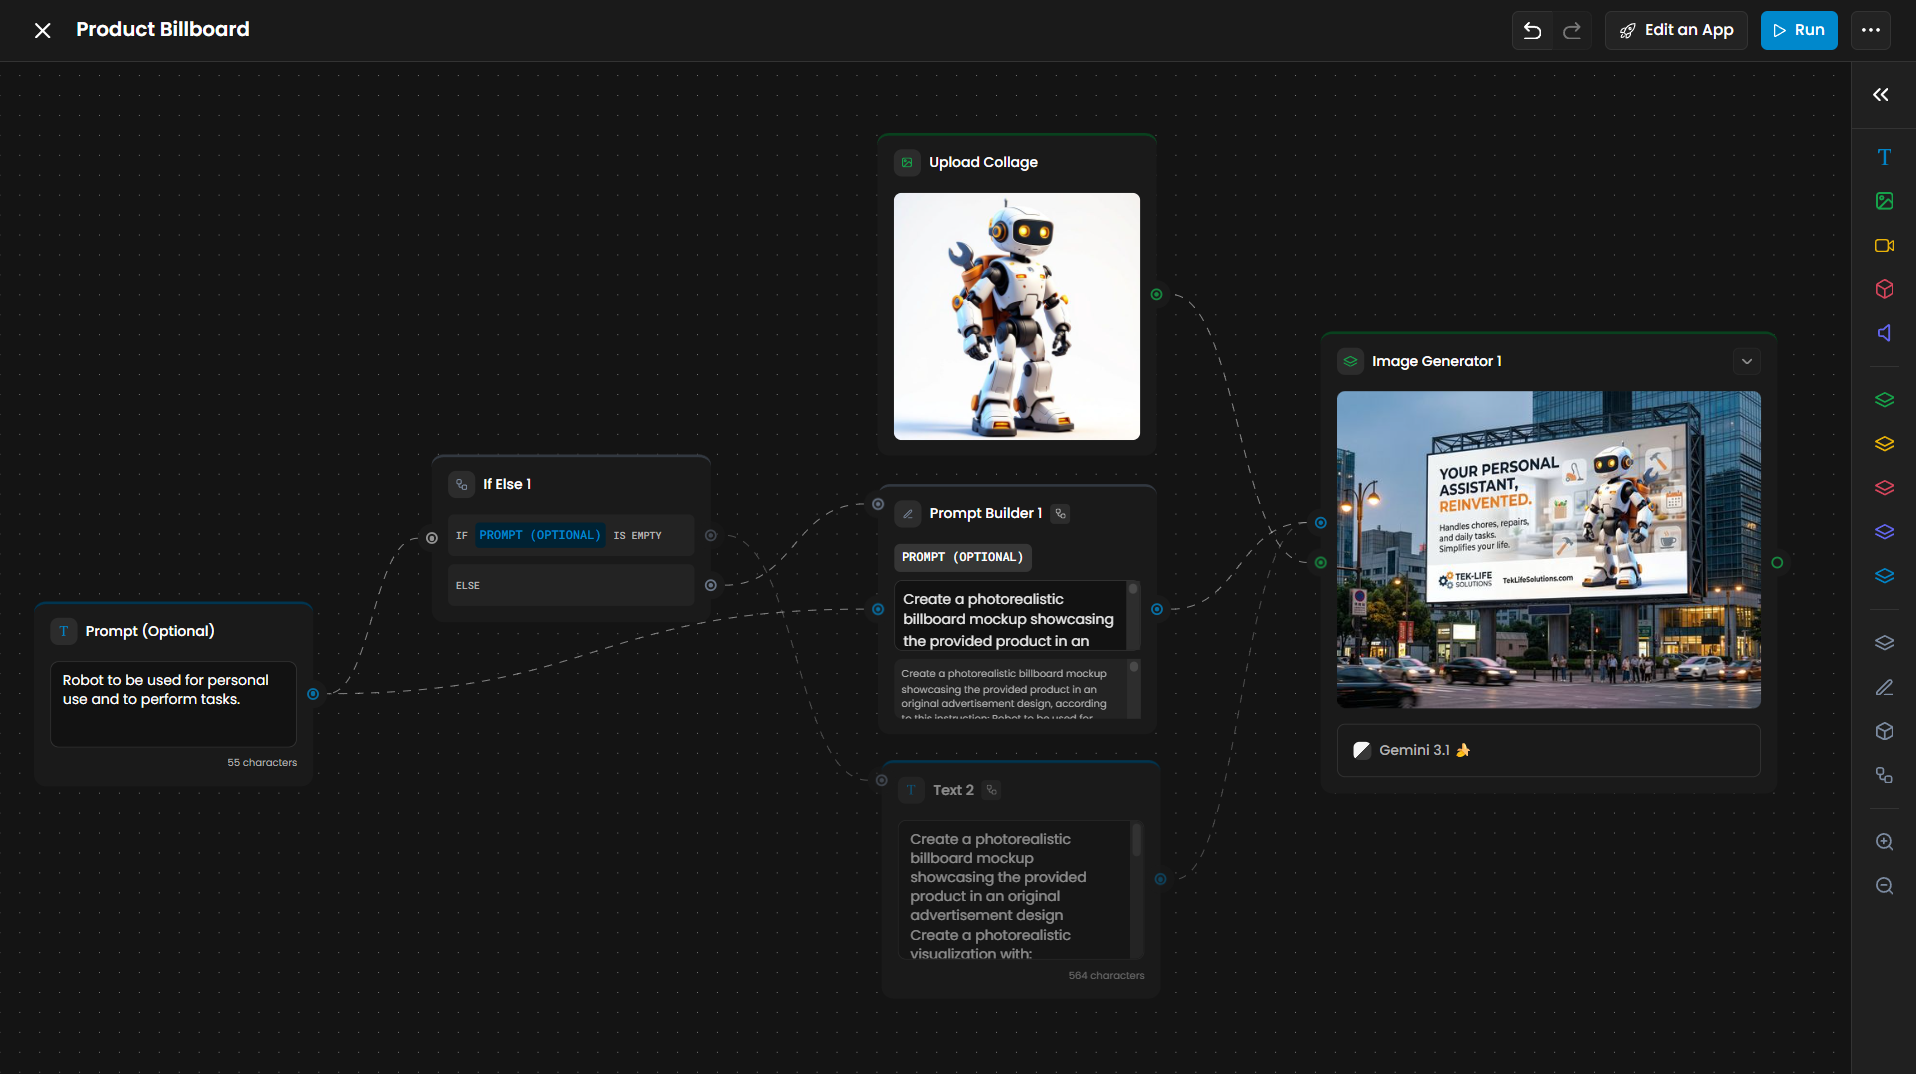
Logic (If–Else)
Make your workflow smart.
How it works:
Routes data based on conditions.Use case:
If the image is landscape, send it to Generator A (Scenery Model). If it’s portrait, send it to Generator B (Character Model). This creates a single workflow that adapts automatically to the input.
Your Models, Your Workflow
Every custom model you've trained in Scenario is available here.
When you select an Image Generator node, your personal models appear alongside platform options (like Flux or Seedream) in the settings panel. This allows you to hard-code your studio's specific art style into a reusable workflow that anyone on your team can run.
Advanced Management
Apps to Workflows: For any App on the platform, click the Edit Workflow button to reveal its underlying node structure, allowing you to study and expand professional pipelines.
Saving and Organizing
Workflows auto-save as you work.
Rename: Click the title to give it a clear name (e.g., "Character Concept v2").
Duplicate: Don't break a working pipeline. Duplicate the entire workflow to experiment with new variations safely.
Share: Use the Export button to download your workflow file, or the Import button to add shared pipelines to your library, enabling team members to run your sophisticated pipelines with their own inputs.
Tips for Better Workflows
Start Simple: Get a basic path working (Input → Generator → Output) before adding complex logic.
Test Incrementally: Use "Run Node" to test specific parts of the chain without spending credits on the full flow.
Learn from Examples: Duplicate a Platform Workflow and break it apart to see how the pros structure their graphs.
Custom Workflows Examples
Here are the essential pipelines visualized in your studio's references, ready to launch:
Asset & Weapon Production
The Weapon Evolution workflow rapidly generates elemental variants—such as Fire, Ice, or Lightning—from a single base design. By utilizing parallel prompting, it preserves the original silhouette while automating batch background removal for immediate game engine integration. This pipeline is the definitive solution for building tiered loot systems without manual, repetitive editing.
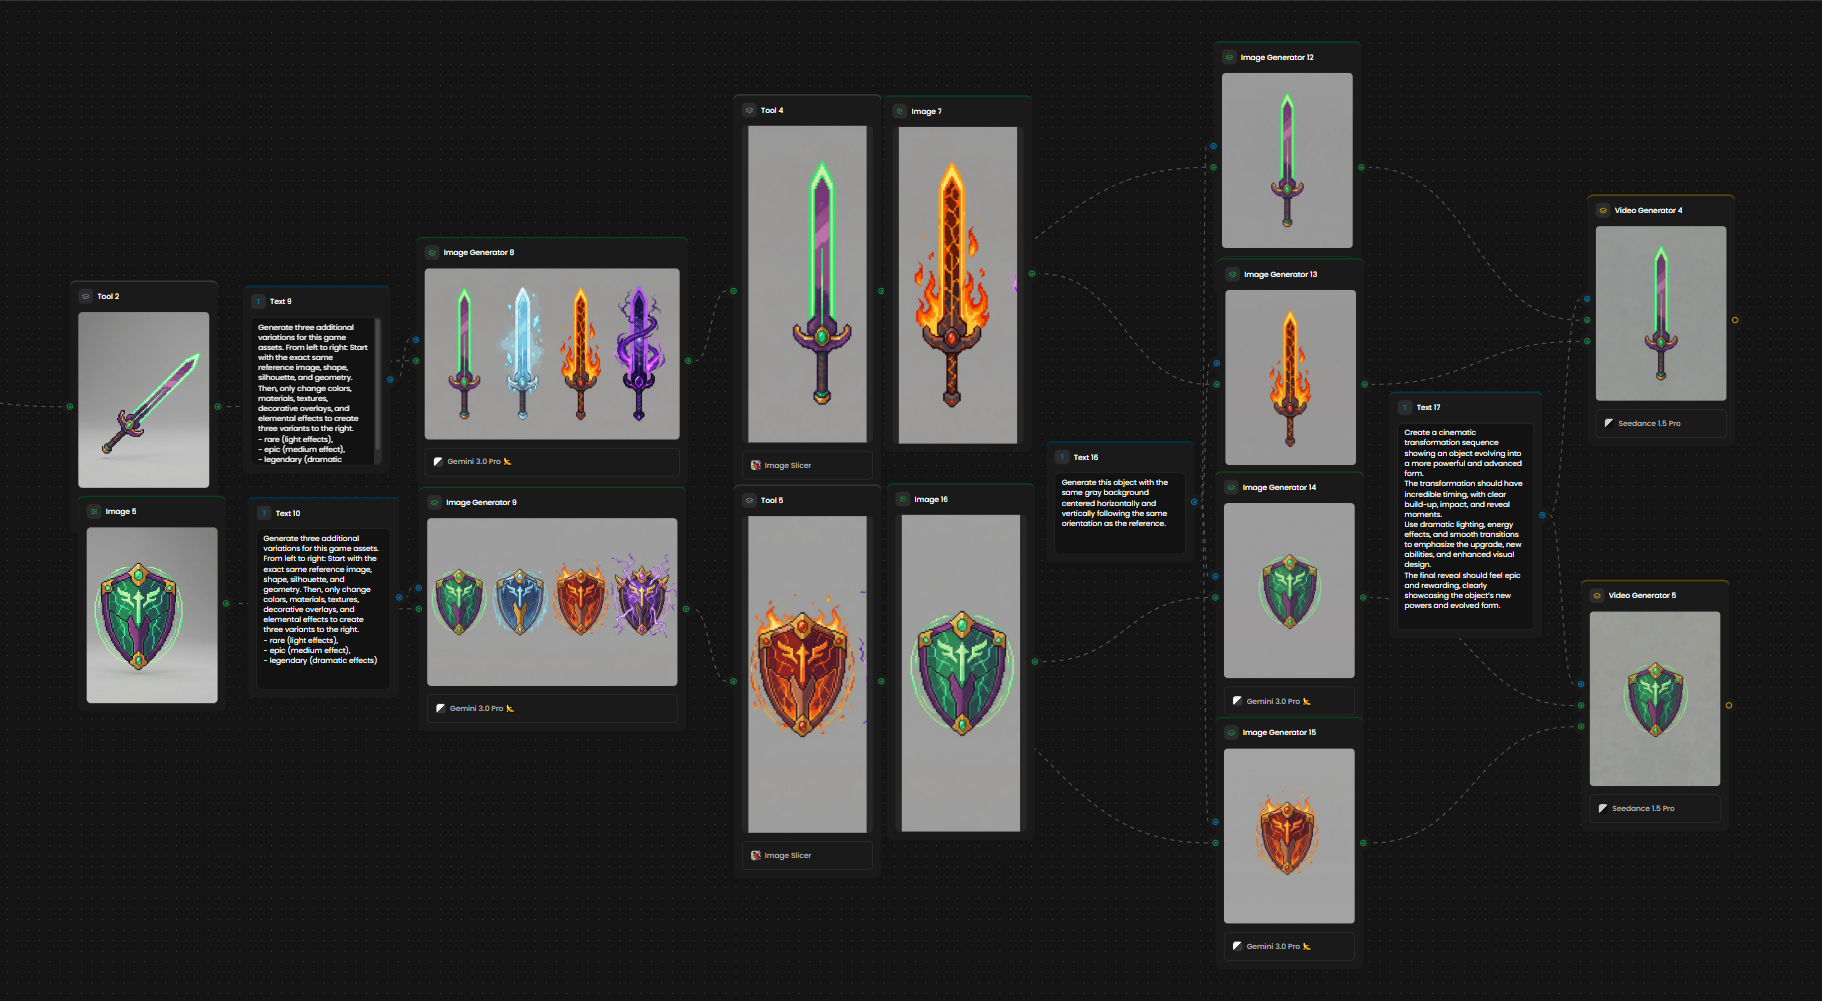
The image above illustrates a weapon evolution workflow, where multiple weapon variations are generated and then transformed into videos that showcase their evolution over time.
Character & Concept Art
The Sketch to Final Render workflow transforms rough pencil sketches or greybox meshes into high-fidelity character illustrations. Utilizing ControlNet structure guidance, it ensures the final polished artwork maintains the exact composition and proportions of your original concept.
The video above illustrates the Sketch to Final Render workflow as it executes, transforming a sketch into a final rendered result.
3D & Technical Art
2D Character to 3D: Concept to Rigged Assets
The 2D Character to 3D workflow transforms flat character concepts into textured, rigged 3D models. By automatically generating upscaled front views, it effectively bridges the gap between initial 2D art and production-ready 3D assets.

The image above shows the 2D Character to 3D Model workflow, where a 2D character is expanded into multiple views and then converted into a fully realized 3D model.
Make it Yours
Custom Workflows unlock the full potential of Scenario. What used to take multiple tools, manual exports, and scattered steps now lives in one visual pipeline that you control completely.
Build workflows that match how you think. Automate the repetitive. Focus on the creative.
Your process. Your rules. Your workflow.