Learn how to upscale and enhance seamless textures, while preserving detail and generating full PBR texture maps for realistic, high-quality visuals.
Creating high-quality, seamless textures is essential for any project requiring detailed and realistic visuals. Whether you're working on game development, digital art, or 3D modeling, enhancing your textures can elevate the final product. Here's how to upscale a seamless texture, such as one generated from the prompt "Dark Bark of a tree covered with patches of green moss and tiny red mushrooms," using Scenario's texture enhancement tools.
Begin by generating your base texture using a custom model. In this case, a 1K texture of "Dark Bark of a tree covered with patches of green moss and tiny red mushrooms" was created using a custom model trained on various bark textures. You can generate textures like this via Scenario's Texture Generation Tool. Full guide on how to generate textures on our dedicated article.
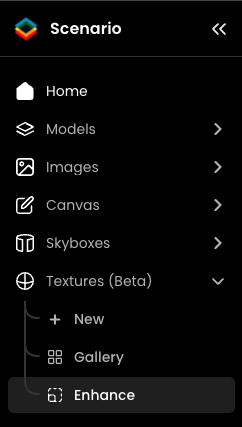
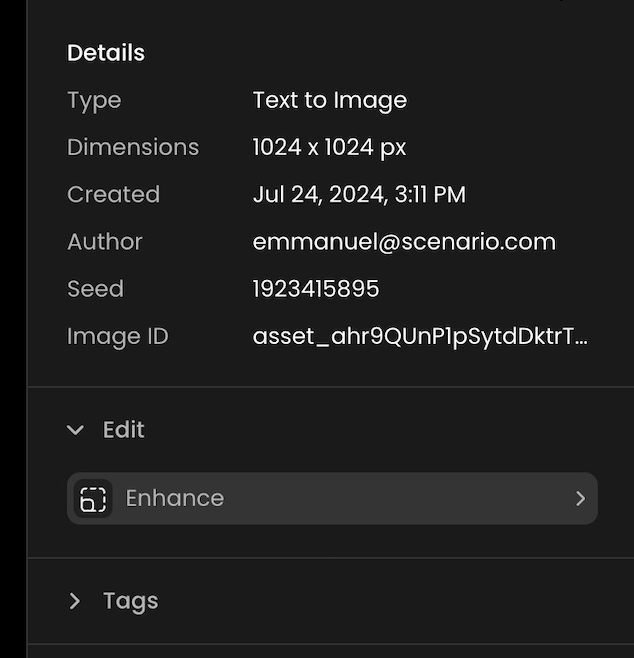
Once you have your base texture, the next step is to enhance it. On the left-hand menu of the Scenario app, go to Textures (Beta) > Enhance or directly on your texture screen, int the header or in the info column


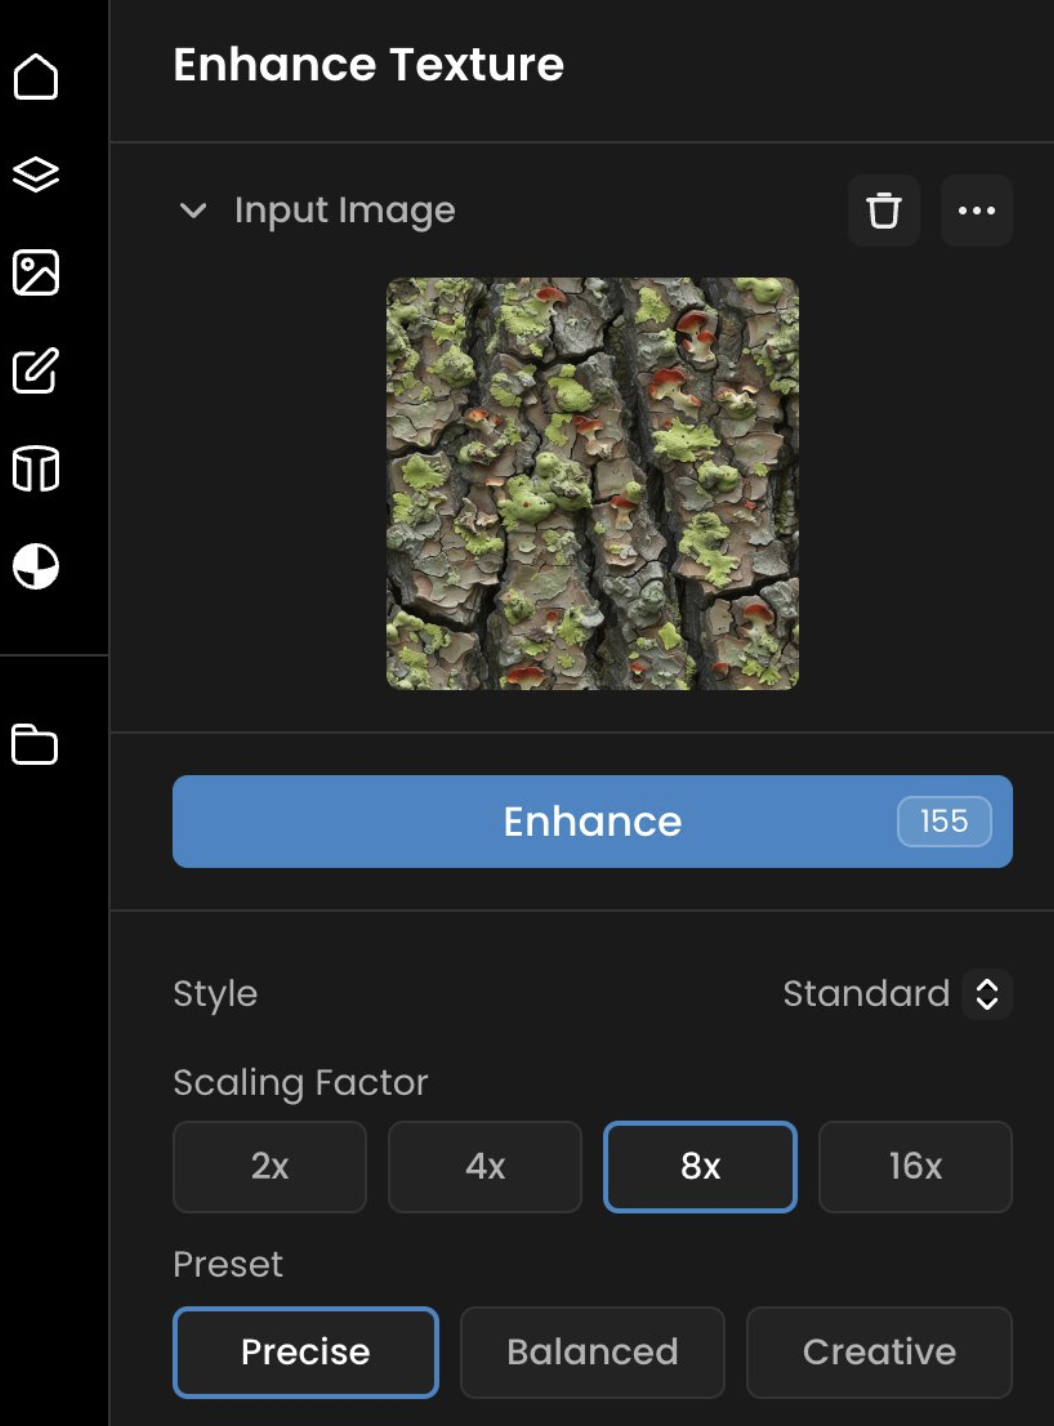
Here, you’ll find the enhancement options that allow you to upscale your texture while maintaining its seamless quality.
You can choose the level of upscaling you want, ranging from 2x to 16x. For most high-detail projects, upscaling from 1K to 8K is ideal, as it significantly enhances the texture's resolution without losing the seamless pattern.

Scenario offers two presets for texture enhancement:
Precise: This preset is perfect for maintaining the exact details of your original texture. It focuses on accuracy, ensuring that the upscaled texture remains true to the original.
Creative: If you want to add more intricate details and give the texture a unique, creative flair, the Creative preset is your best choice. It enhances the texture by introducing subtle, additional details.
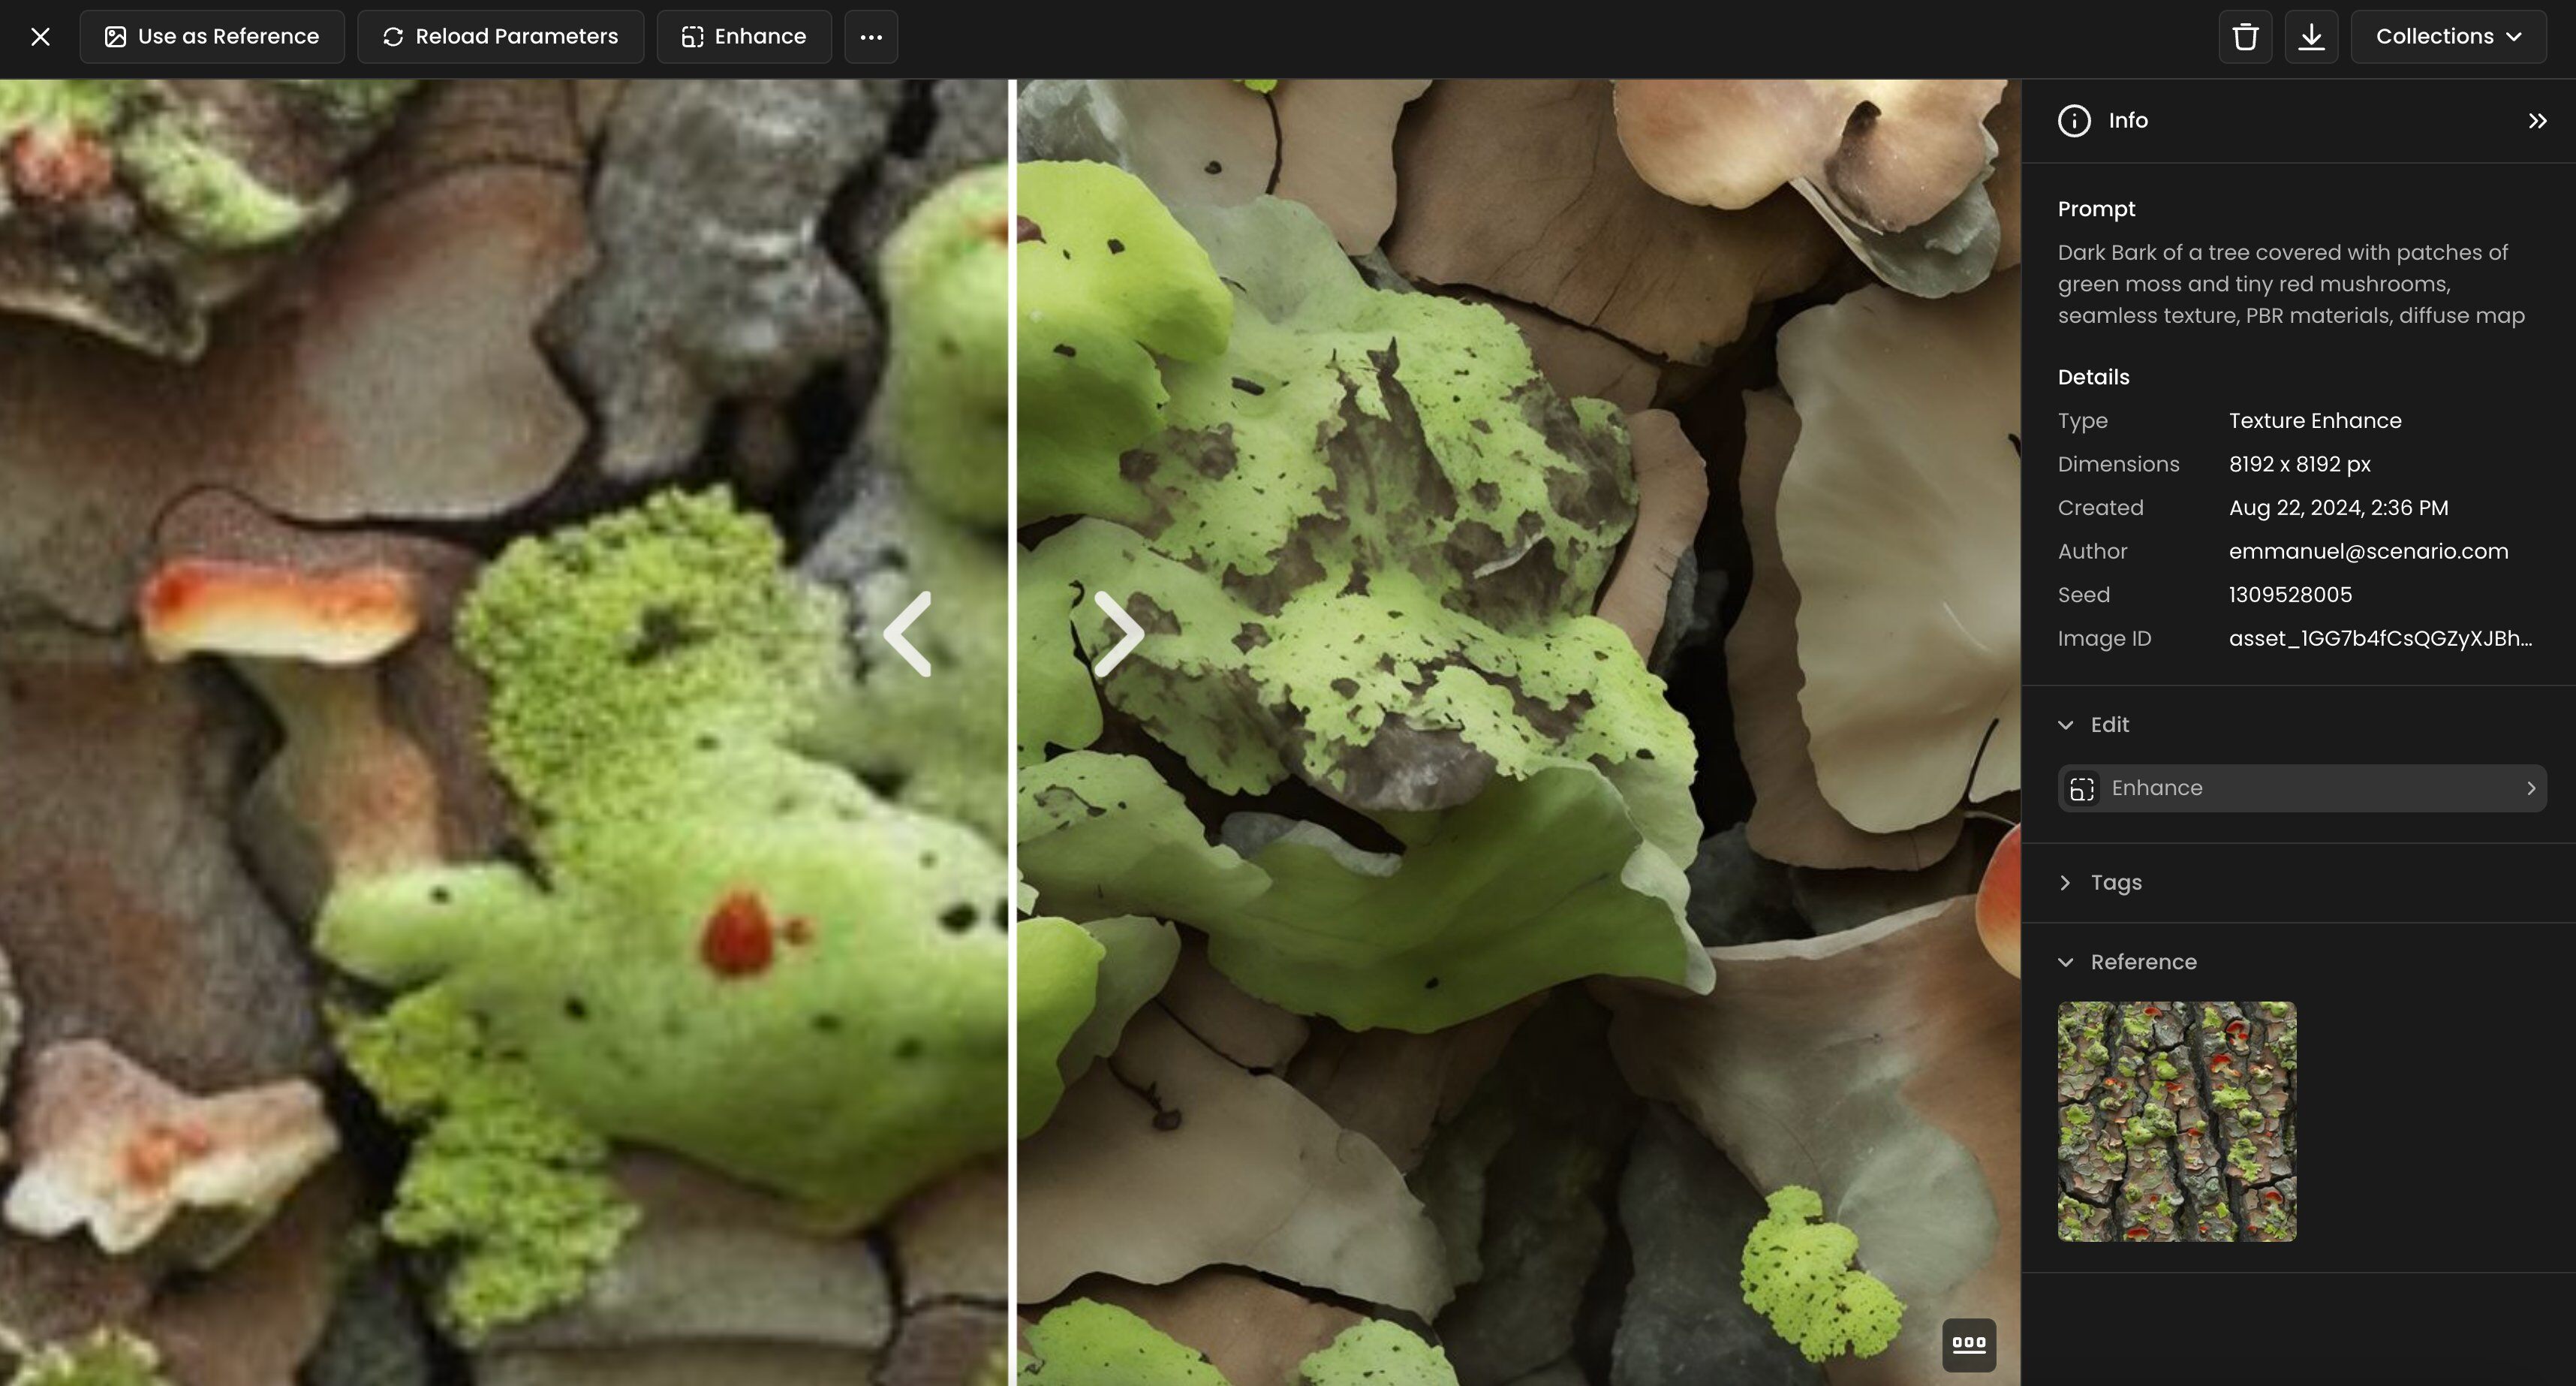
After selecting your preset, the enhancement process begins. In just a few minutes, your low-res 1K texture will be upscaled to 8K. The result is a high-resolution, seamless texture that’s ready for use in your projects.

To further enhance your project, adjust the parameters on the left panel to generate a full set of PBR (Physically-Based Rendering) texture maps. This includes maps for height, normal, smoothness, metalness, edge, and ambient occlusion (AO). These maps are crucial for adding depth, realism, and texture detail to your final render.
By following these steps, you can transform low-resolution textures into high-quality, seamless assets, making them suitable for even the most demanding projects. Explore Scenario’s texture enhancement tools to bring your digital environments to life with stunning, detailed visuals.
Was this helpful?

Quentin