How to Create Spritesheets for Character Animation
Spritesheets are vital for 2D game animation, powering sequences like walking, attacking, and idle loops. This guide walks you through how to generate consistent, frame-by-frame sprites using Scenario’s models like Flux Kontext, Seedance, or Pixverse.
With just a few steps, you can go from a static character design to a fully animated spritesheet - ready for implementation in your app, game engine or toolset.

Step 1: Generate the Base Character Image
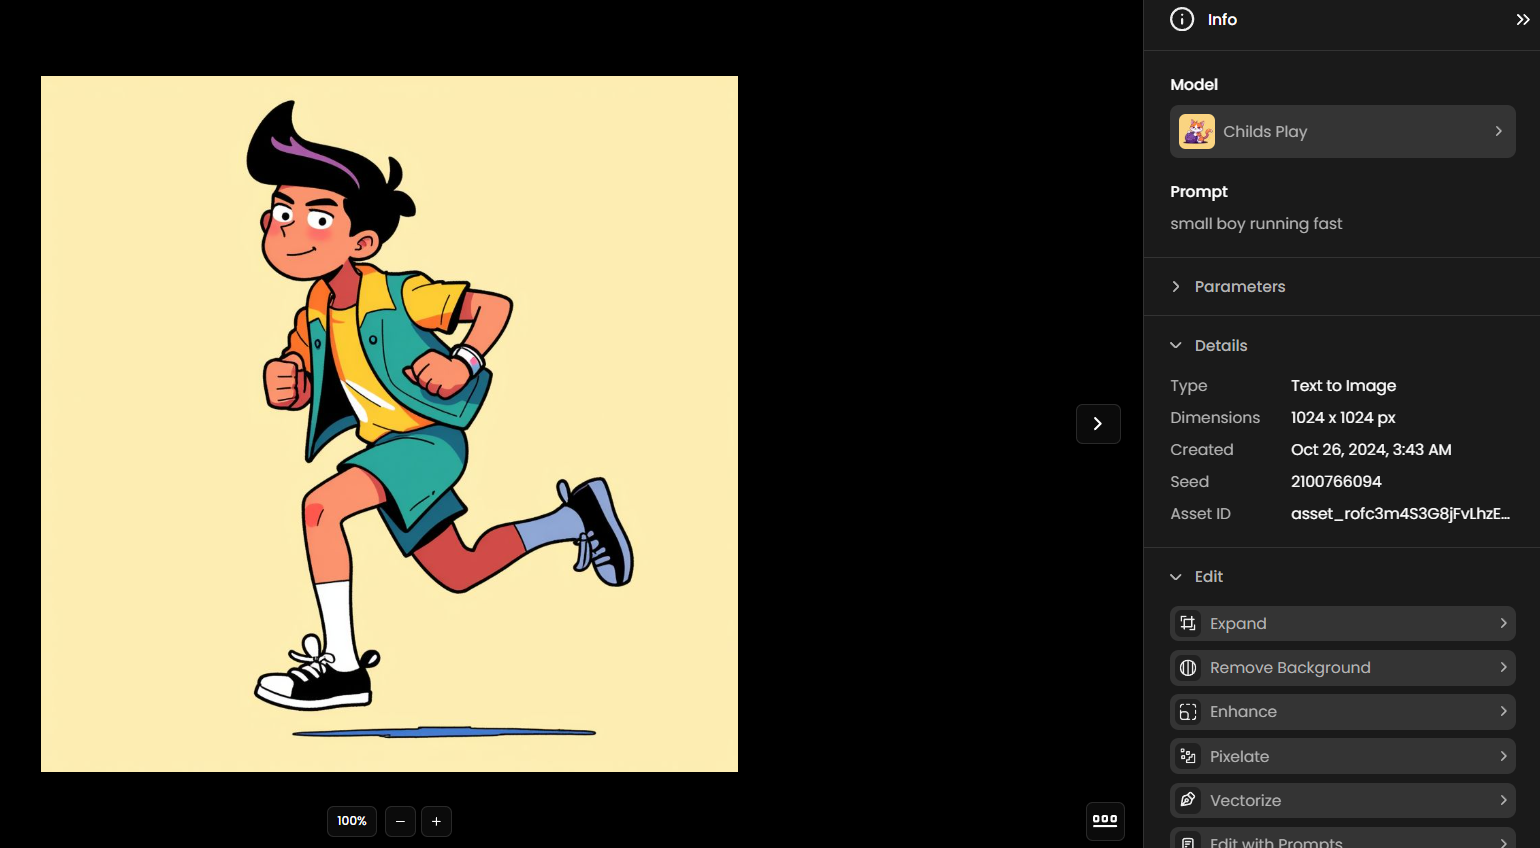
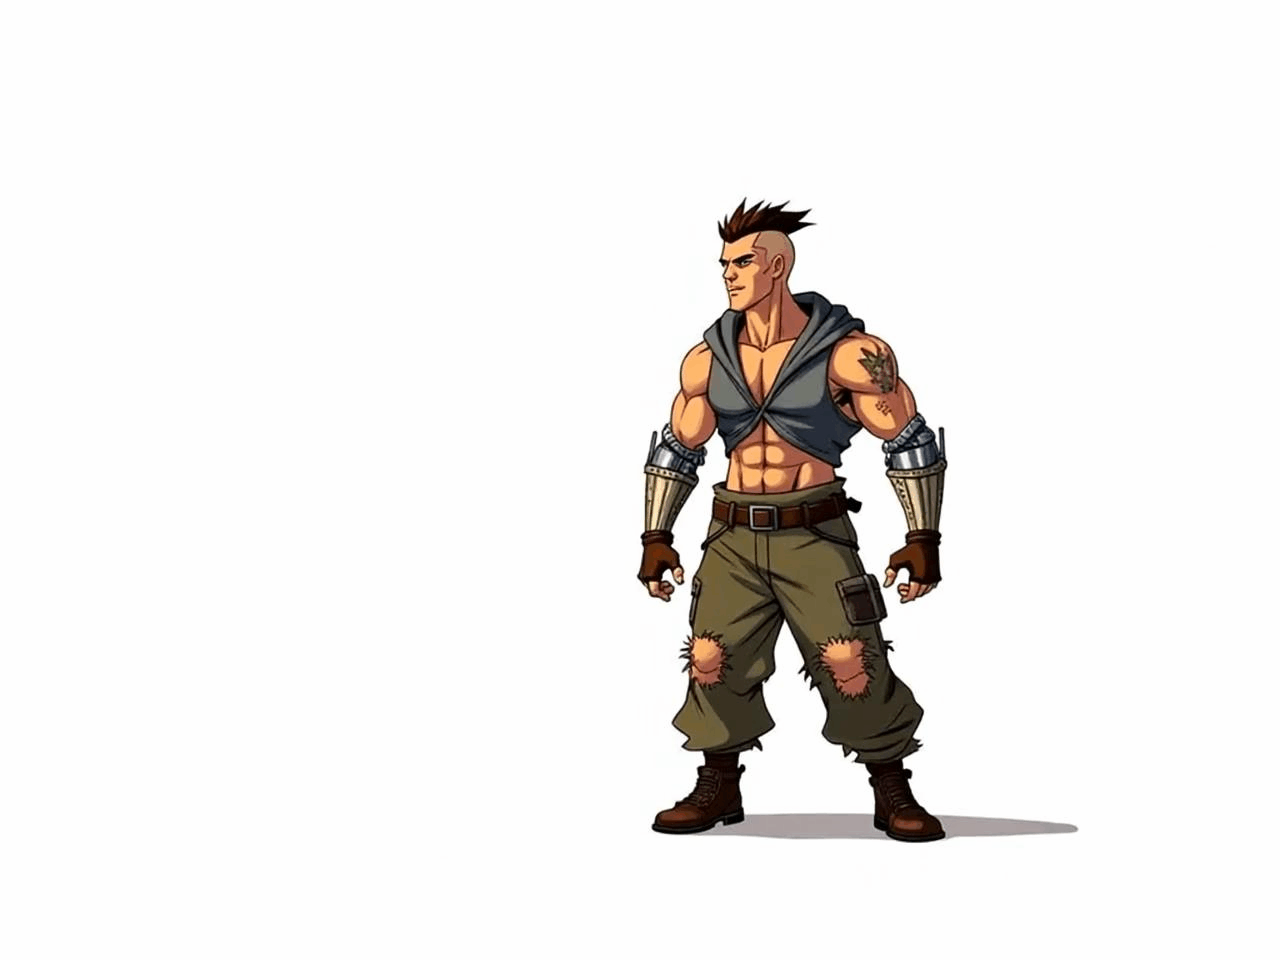
Begin with a side-view image of your character in a running pose - this will act as the first frame and foundation for your spritesheet. In this guide, we're using a running animation as an example, but the same process applies for any loop, such as idle, walking, or attacking.
You can create this image directly in Scenario using a base model like Flux or Imagen, or a custom-trained style or character model for consistent aesthetics, ensuring higher fidelity frames. Alternatively, simply upload an existing image to your Scenario workspace to begin.
The example below was generated using the Childs Play model. You'll find the associated prompt, settings, and parameters included for reference.
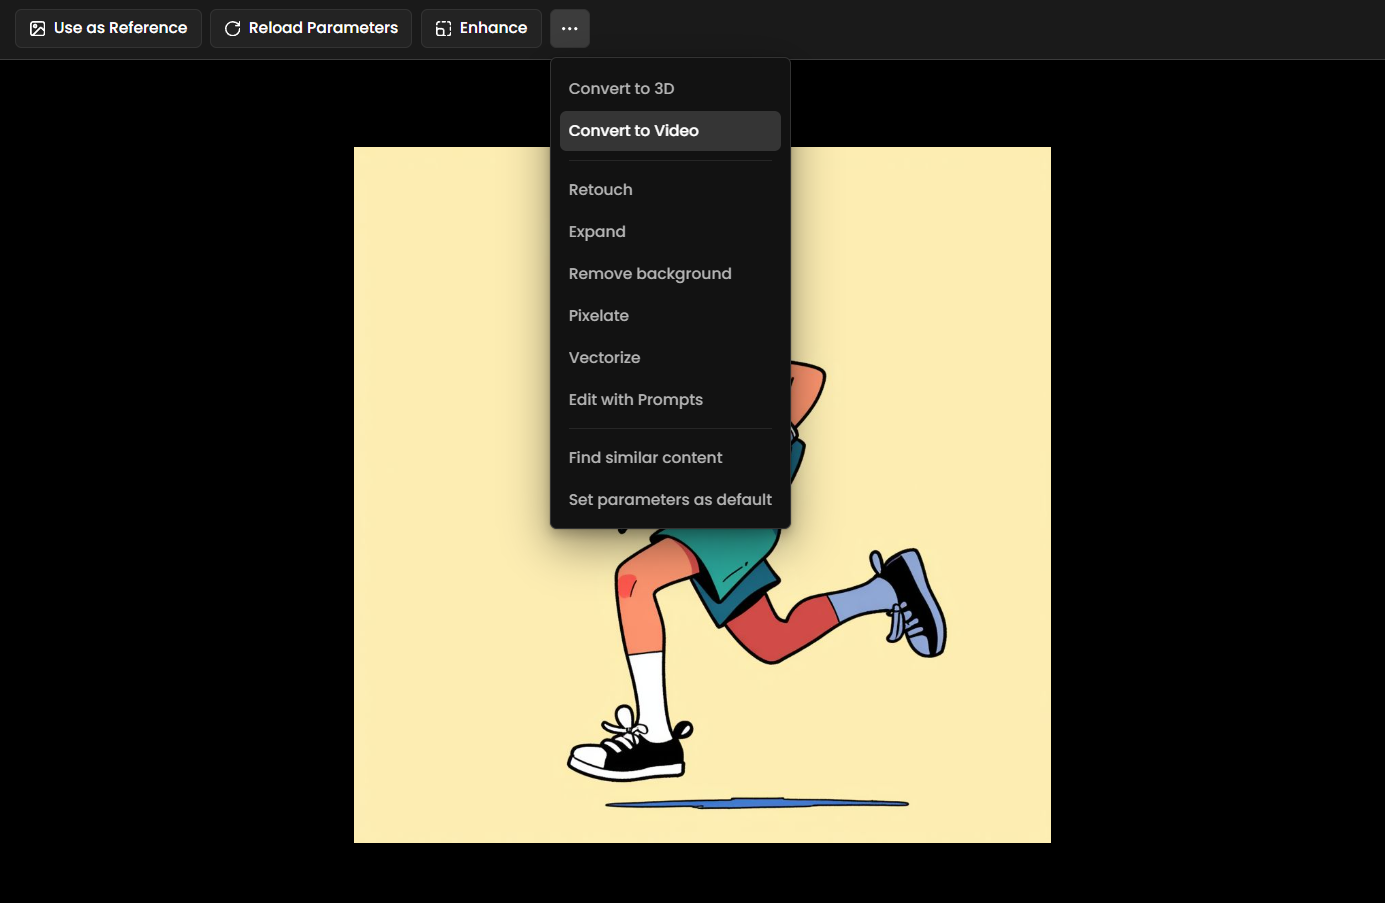
Once you're happy with your base image, open the three-dot menu in the top-right corner and select “Convert to Video.” This will launch the video generation interface, with your image automatically loaded as the first frame (to the left), ready to guide the video sequence.
Step 2: Set Up Video Generation
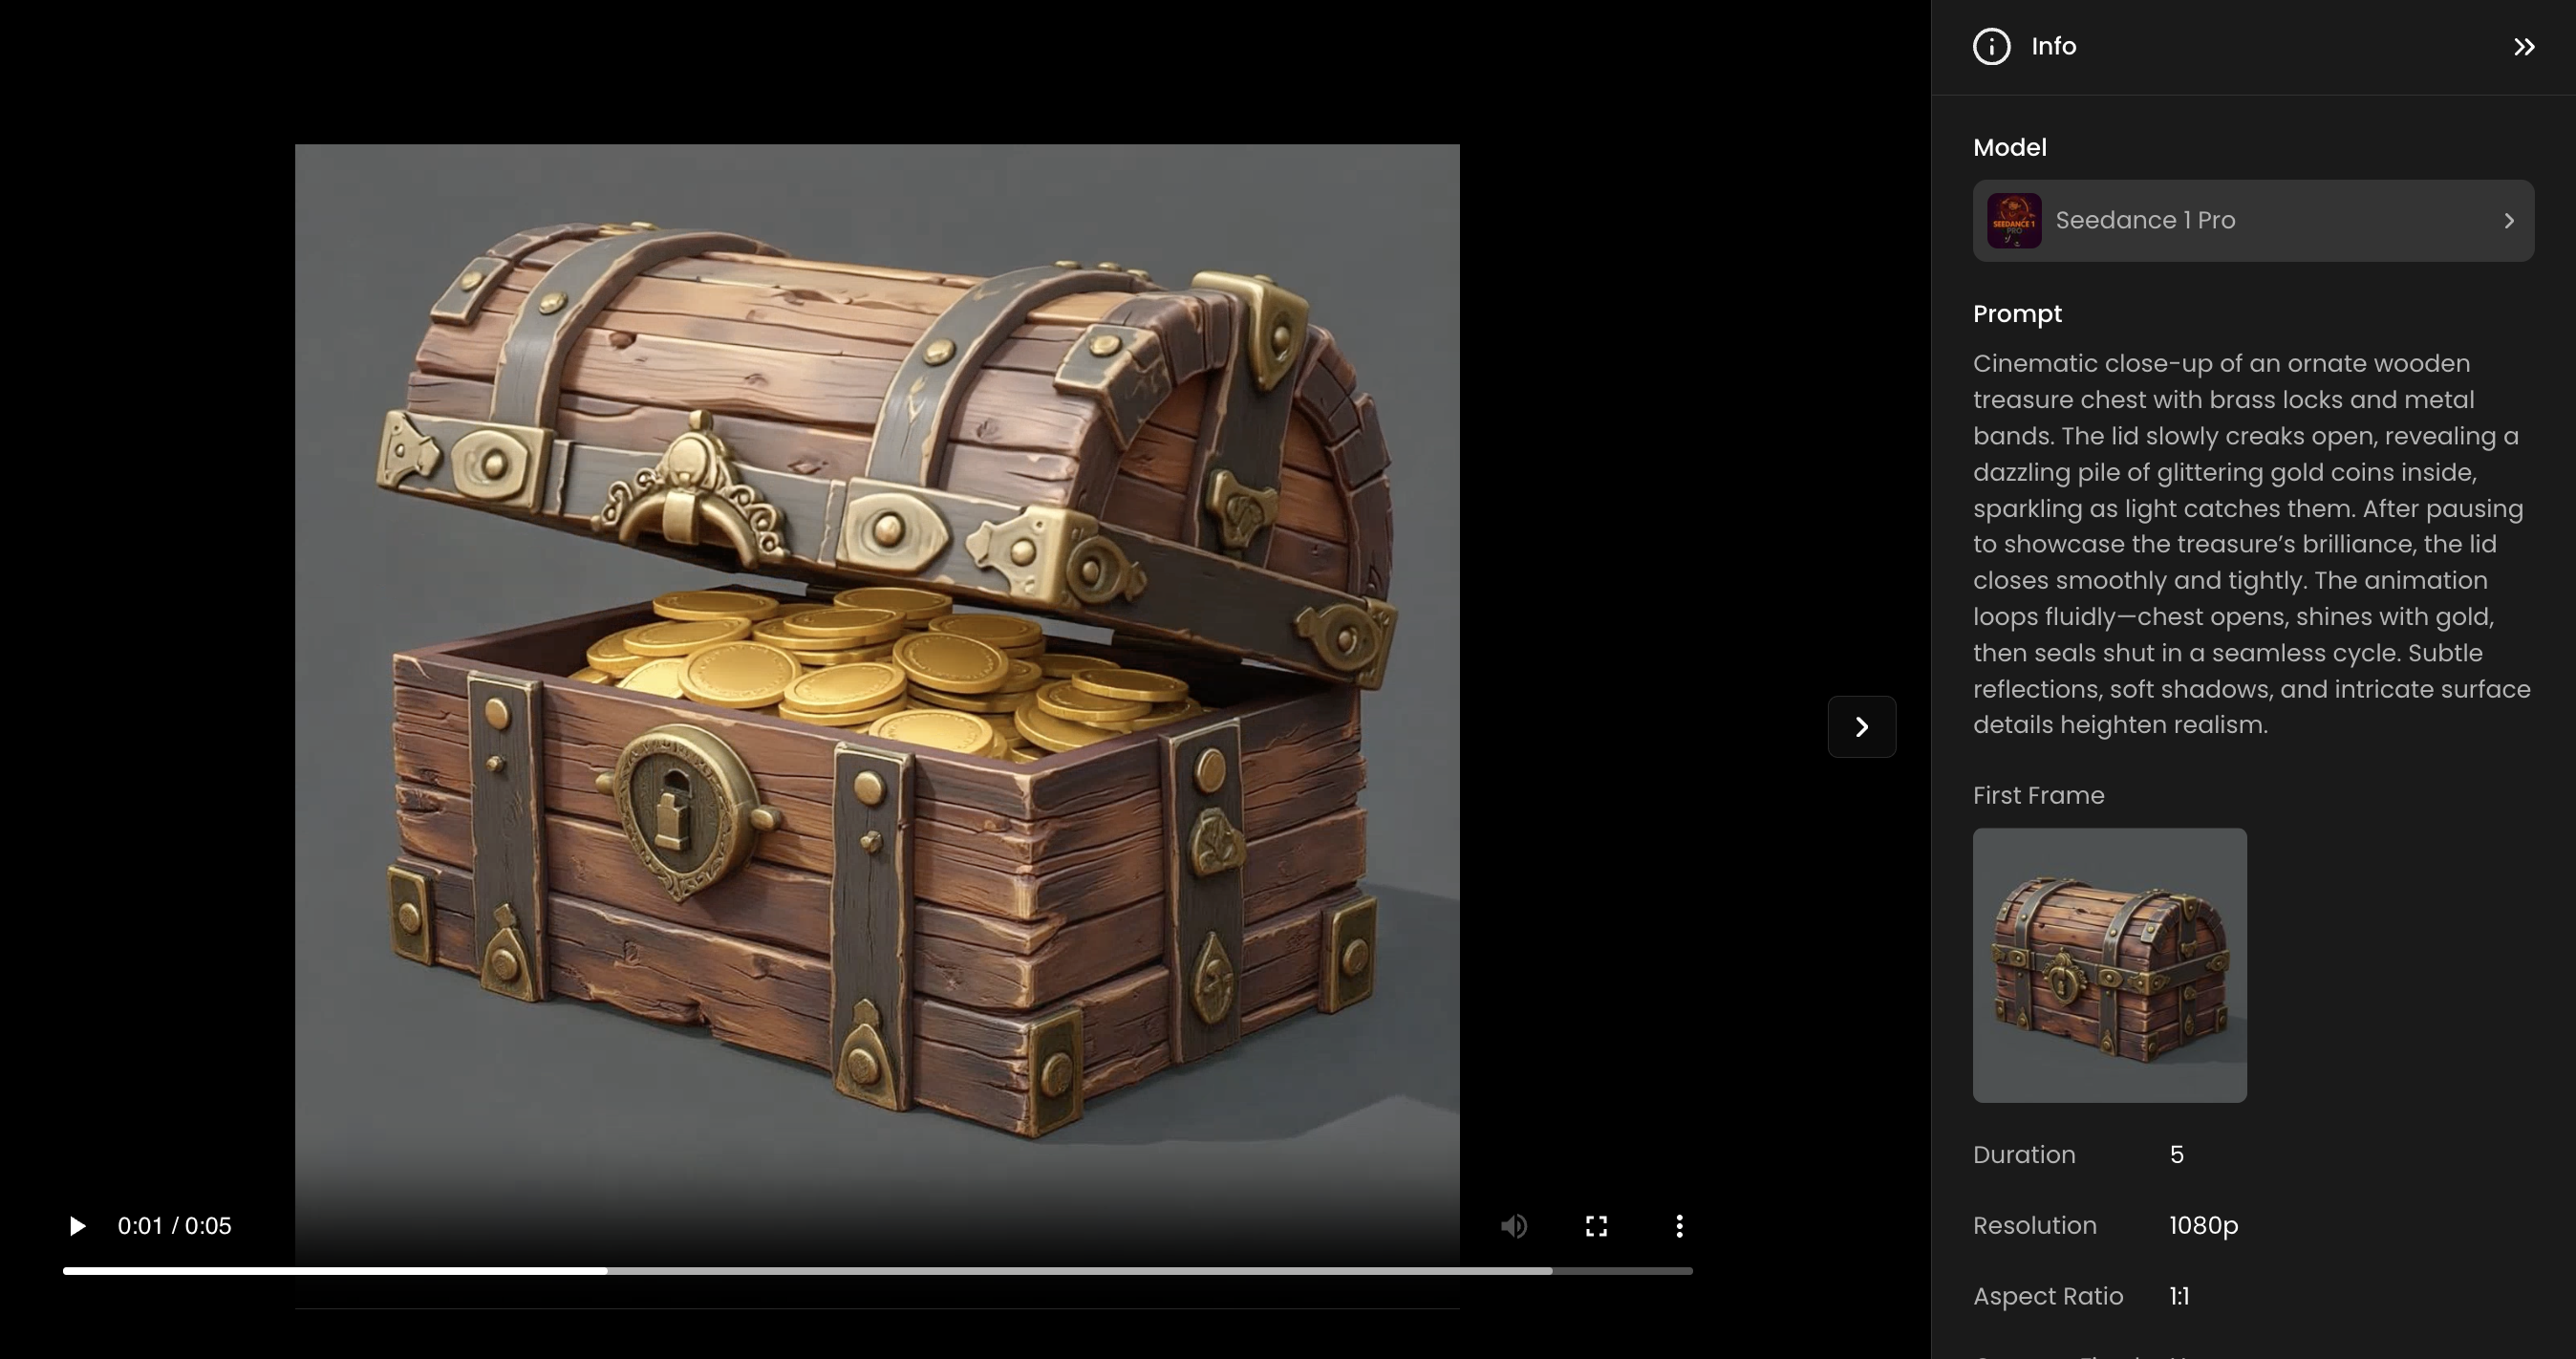
On the video generation page, begin by selecting a video model. Click the model dropdown in the top-left corner and choose either Seedance 1 Lite or Seedance 1 Pro - both support using a reference image as the first frame to guide the animation. Seedance 1 Lite also supports last frame.
These models are optimized for smooth, stylized motion and are well-suited for sprite animation workflows.

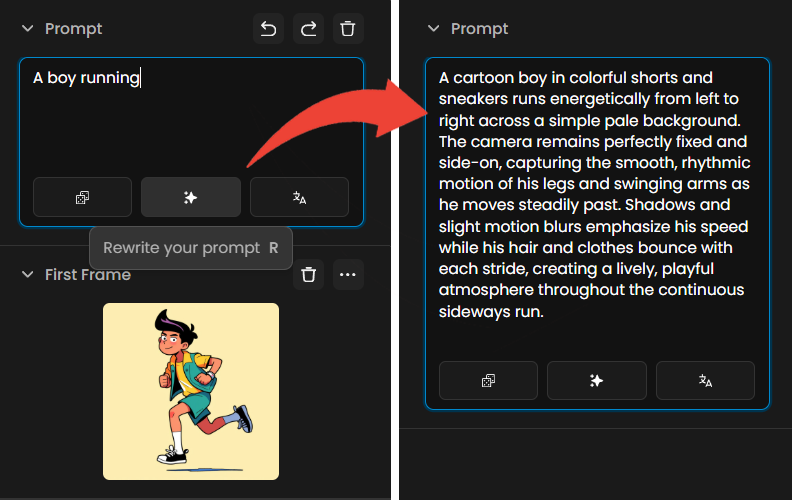
Next, enter a simple prompt describing the action you want to animate — for example, “a boy running.” Then click “Rewrite your Prompt” below the prompt box to enhance it for the selected AI model.
Review the rewritten version and make any adjustments to better match your character or desired motion.
These were the parameters used to generate the video: Duration: 5 seconds / Resolution: 1080p / Aspect Ratio: 1:1 / Camera Fixed: Off
Click Generate and wait for the video to render. Once complete, preview the animation and identify the key poses in the sequence (for example, contact, lift-off, or mid-stride in a running loop.)
The motion may sometimes be slow or slightly imperfect. Focus on spotting frames that clearly represent the essential stages of the animation.
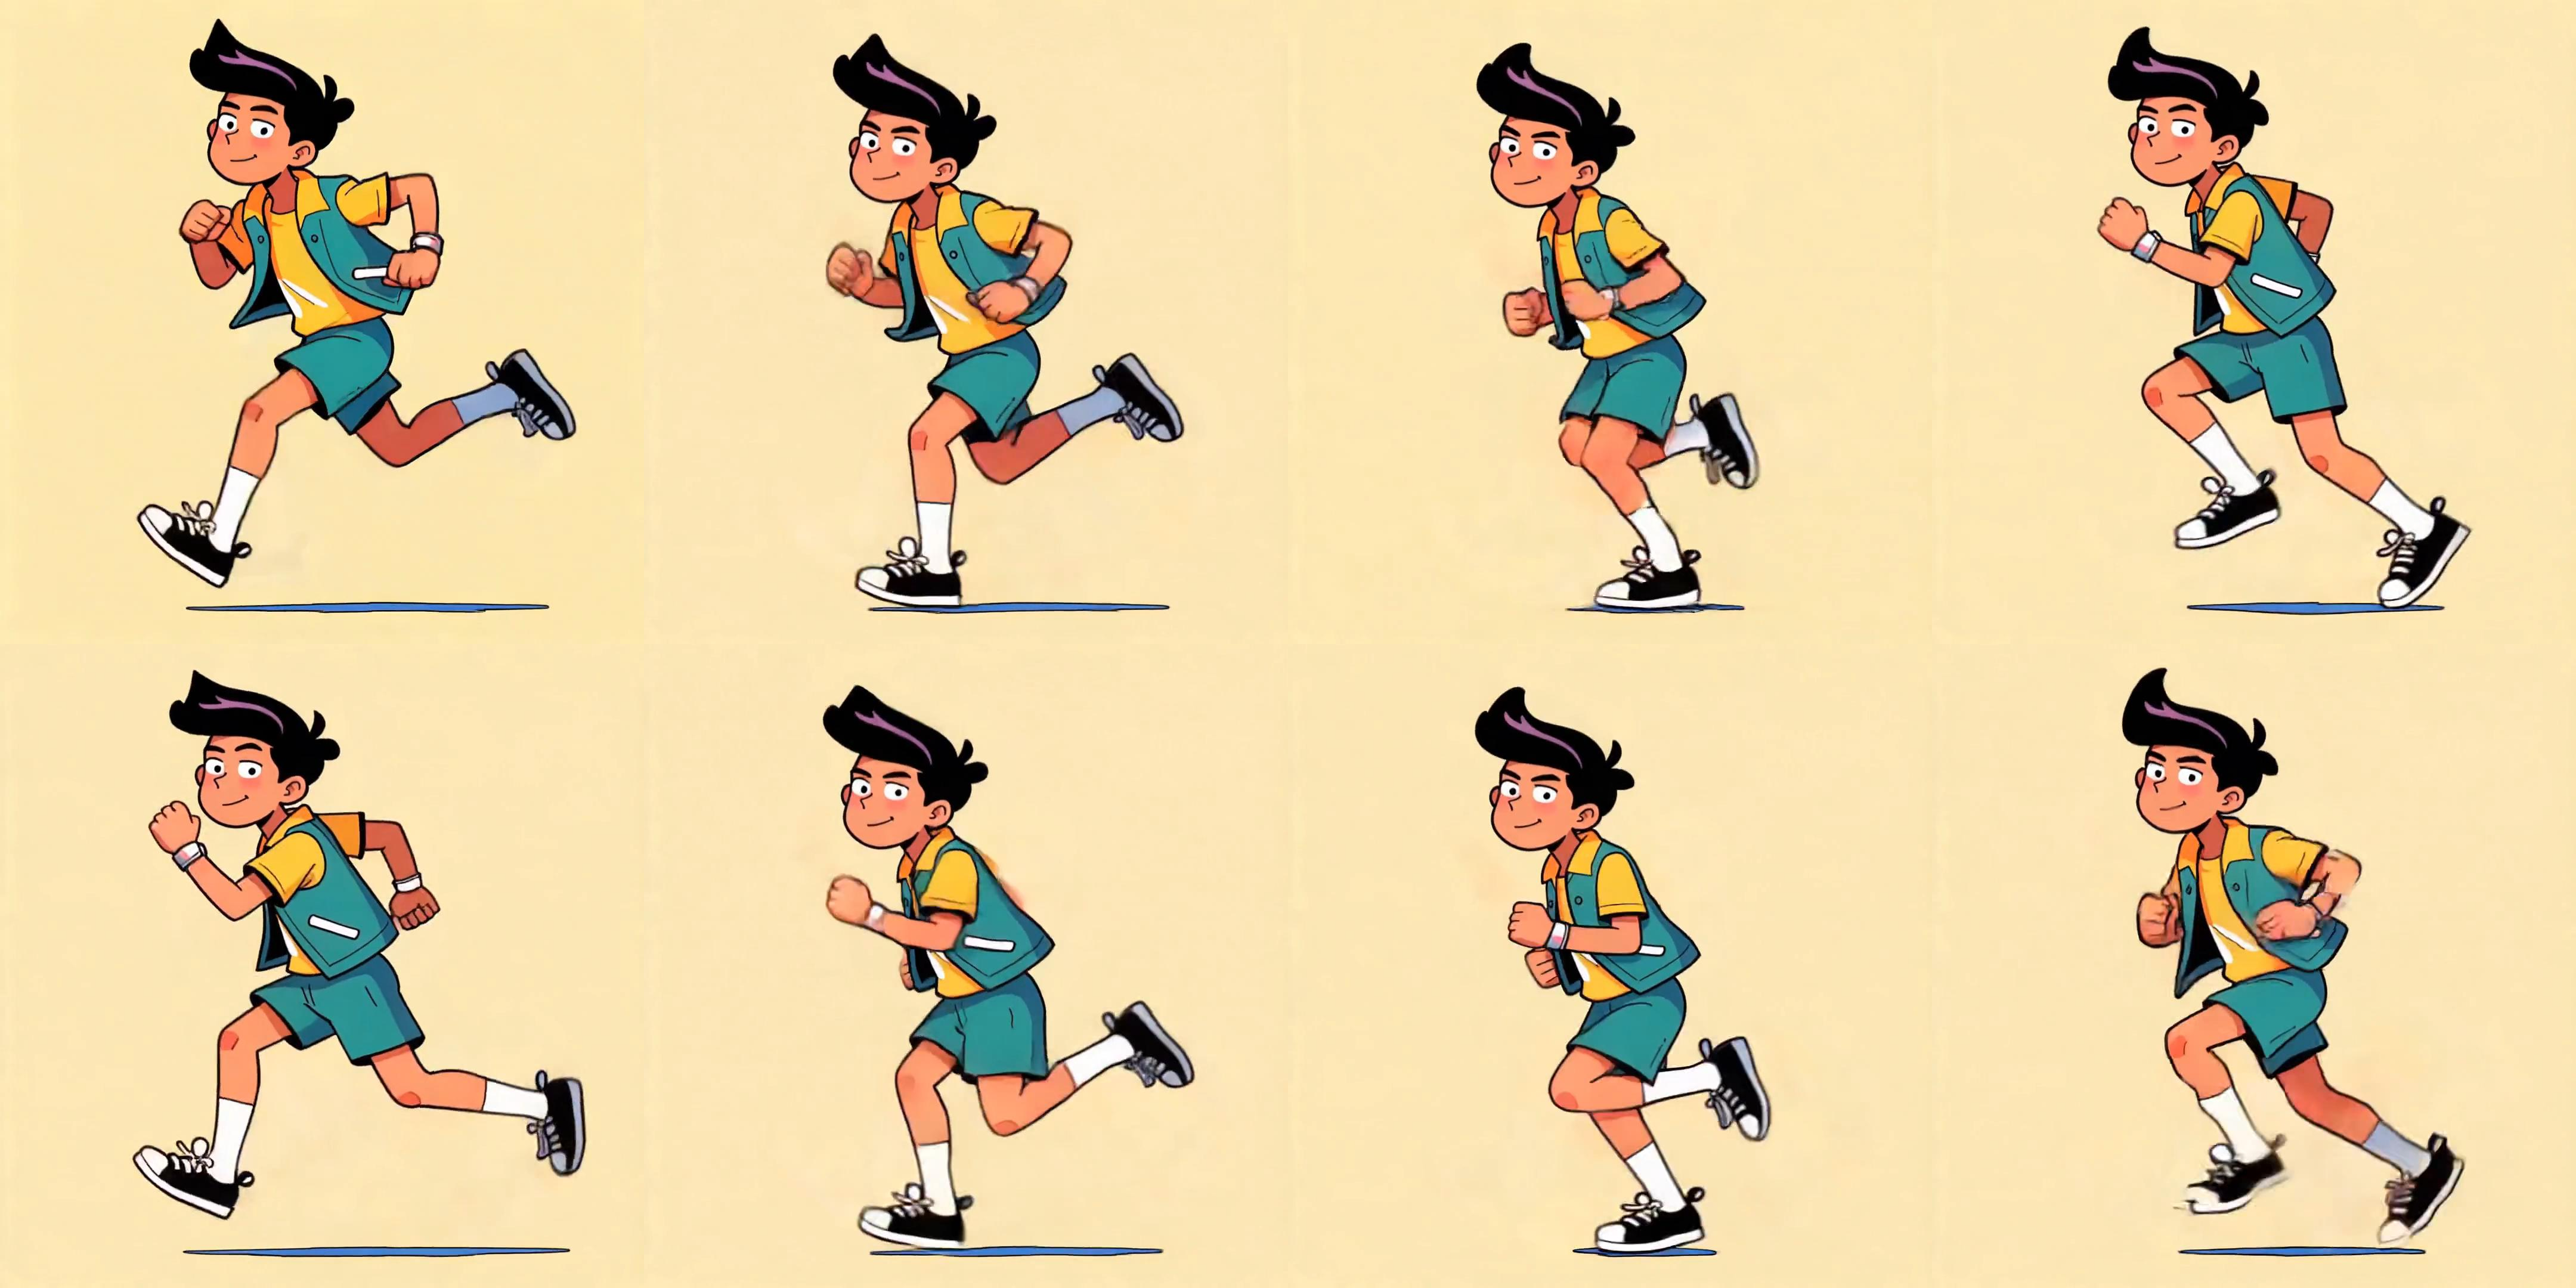
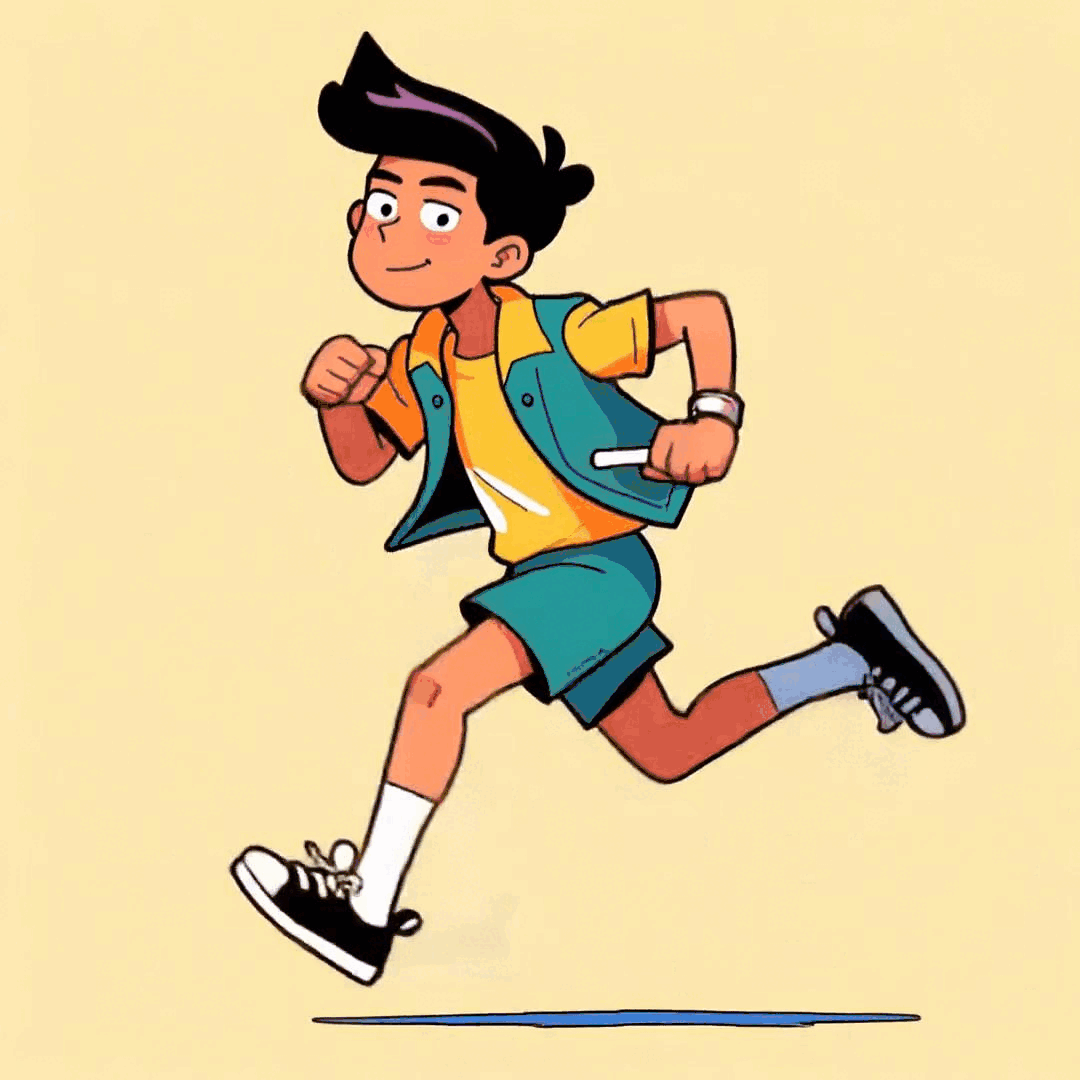
Step 3: Extract Key Poses
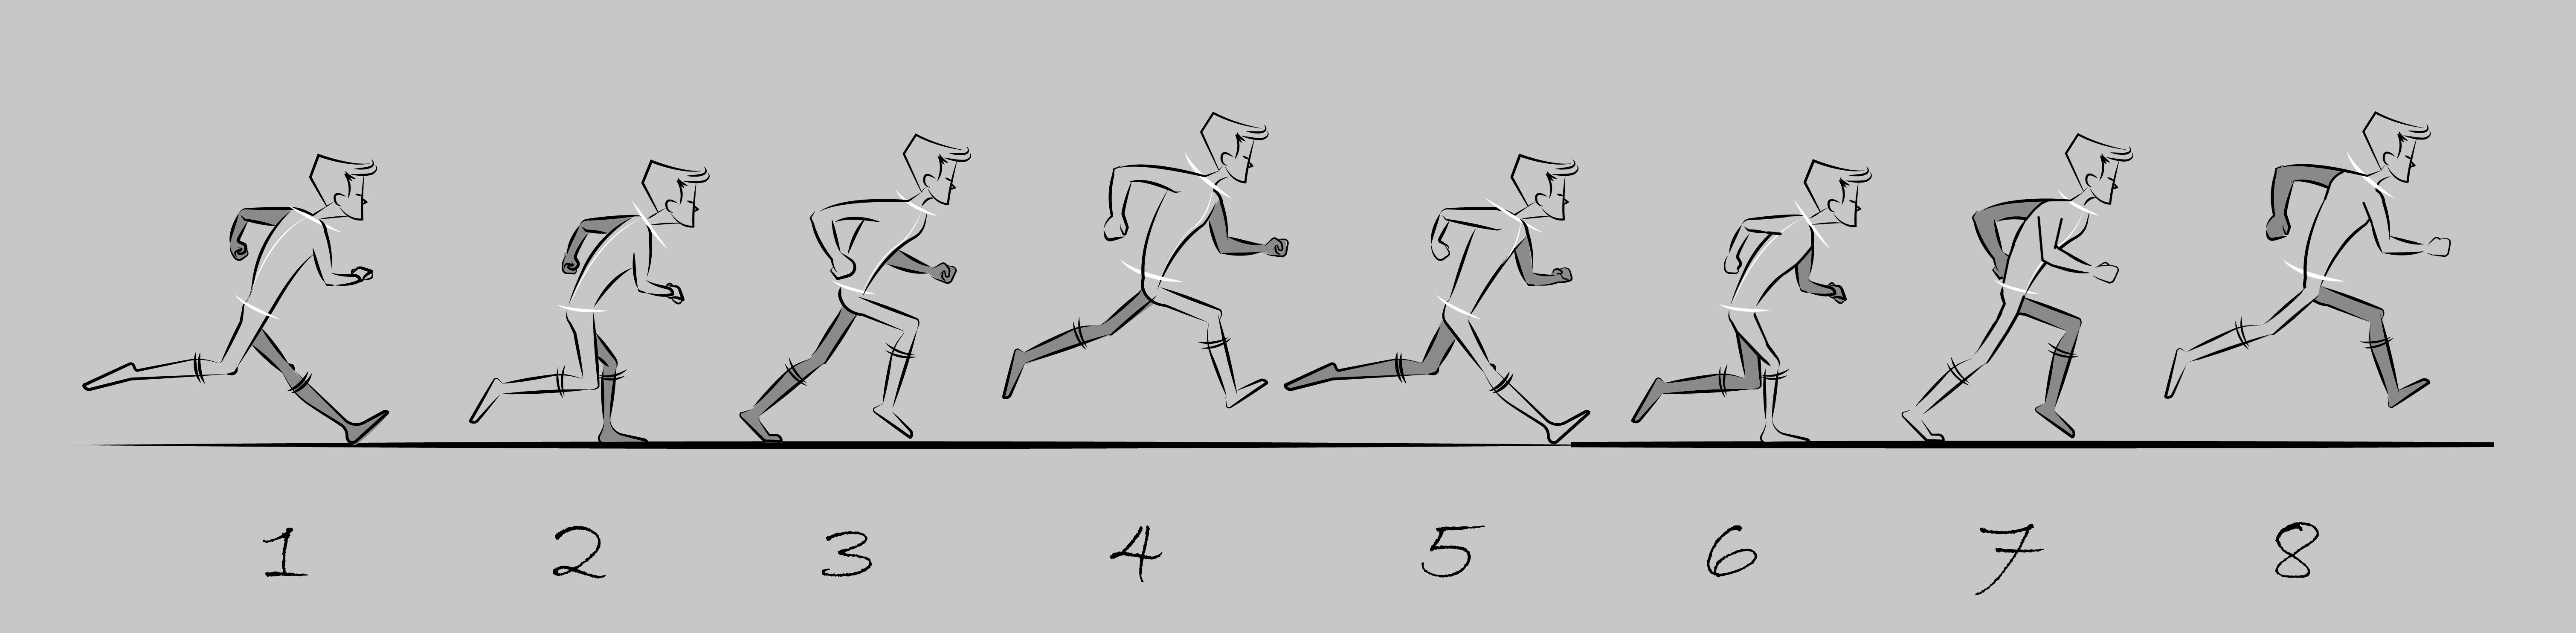
Refer to the image below for an example of a typical 8-frame run cycle, highlighting key poses you may want to capture for your spritesheet.
Capture each key pose by taking screenshots of the selected frames, or use a video editor to extract them directly. Save each pose as a separate image, ideally in the same format and resolution to ensure consistency across your spritesheet.

Step 4: Create the Spritesheet
Use an image editor or an online tool like Final Parsec Sprite Sheet Maker to arrange your extracted frames into a single spritesheet. Make sure the poses are evenly spaced and aligned for smooth playback when animated.
Once done, test your spritesheet in Unity, Unreal Engine, or with online preview tools like is.si Animator to ensure the animation loops correctly.
You now have a fully functional run-cycle spritesheet.
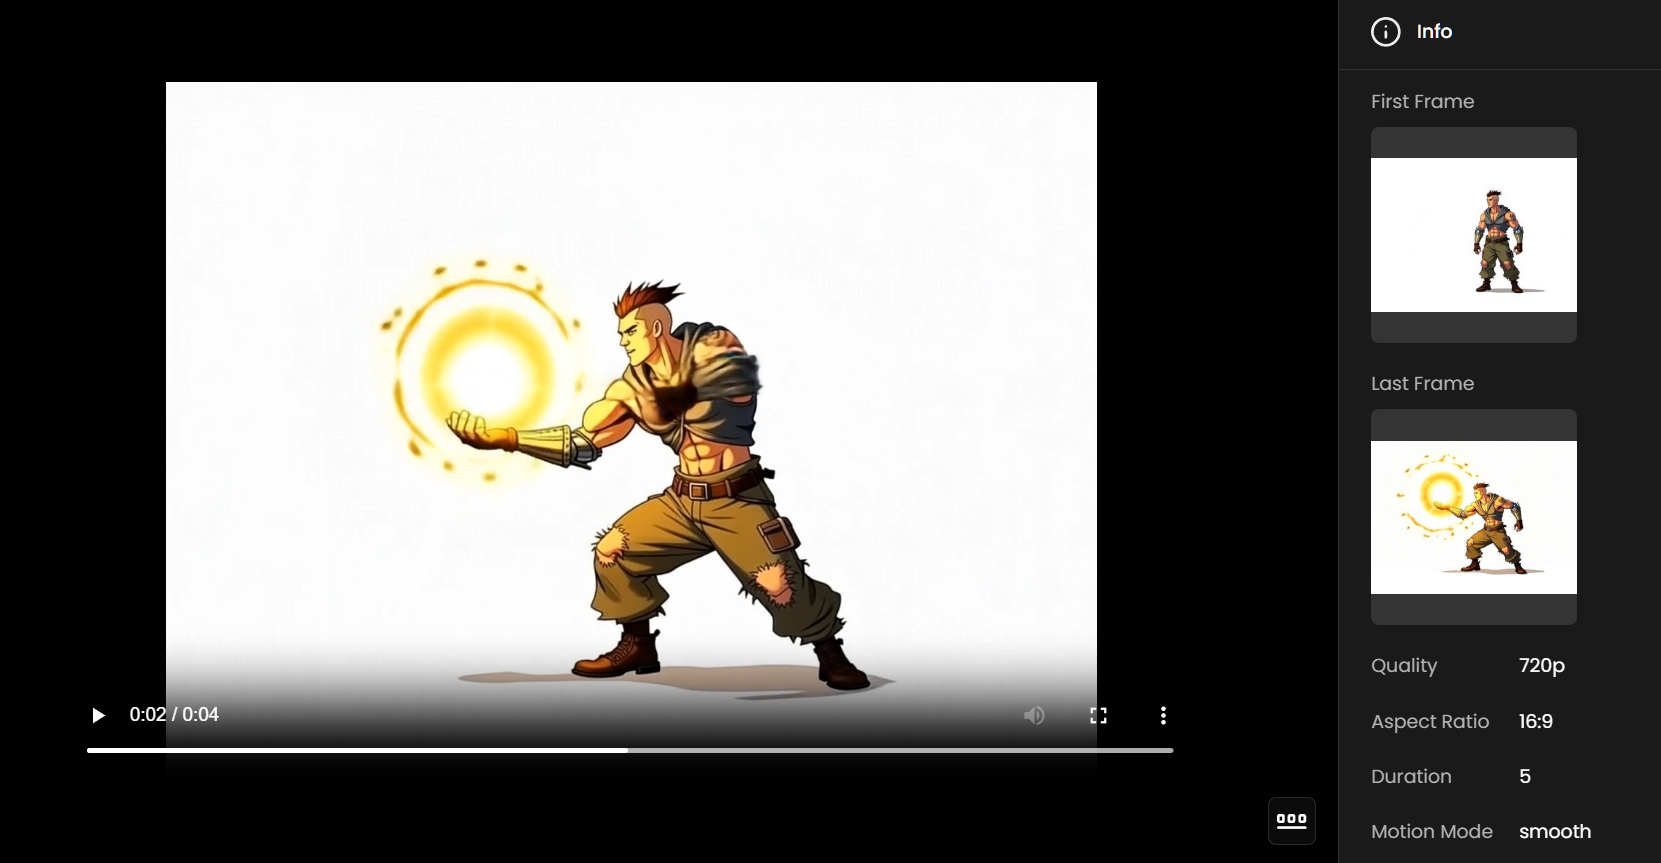
Advanced Example: Attack Animation
For more dynamic sequences, you can also try other models like Pixverse v4.5, which supports first and last frame inputs to create guided, sequential motion.
To start, generate a video that transitions from a neutral pose to an attack pose. This will serve as the first half of your animation sequence.
Next, generate a second video that brings the character from the attack pose back to the neutral pose.
To do this, simply swap the first and last frames from the previous video. This creates a smooth return motion, completing the full attack loop.
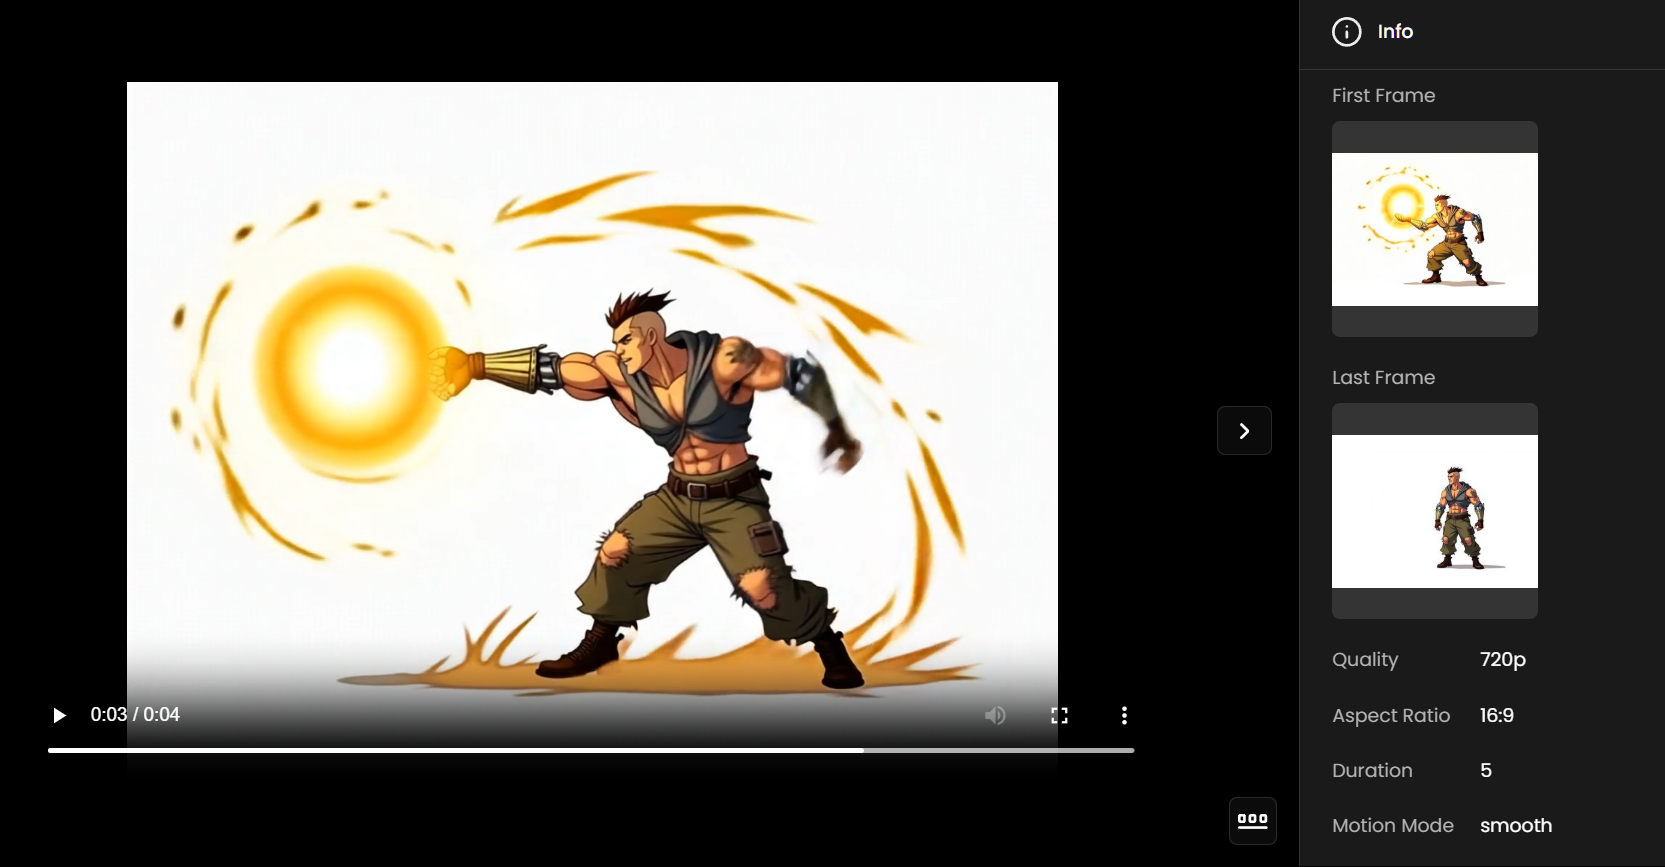
In this example, Pixverse v4.5 was used to generate the videos. These were the parameters used to generate both videos: Quality: 720p / Aspect Ratio: 1:1 / Duration: 5 seconds / Motion Mode: Smooth. You may try other settings too.
To make the animation sequence clearer, the two videos were combined into a single edit, showing the full motion from neutral to attack and back.
From the combined video, 16 key poses were extracted to build the final spritesheet shown below.

From the completed spritesheet, the following animated GIF was created to preview the full attack loop in motion.
Example: Chest Animation
This same workflow can also be used to animate props or environmental objects, like doors or treasure chests.
To start, generate or upload an image of a treasure chest, then simply open the three-dot menu in the top-right corner and select “Convert to Video” to launch the animation interface.
On the video page, select your video model, in this example we used Seedance 1 Pro, then enter the motion prompt such as “open and close loop”. You can even use Prompt Spark to re-write your prompt.
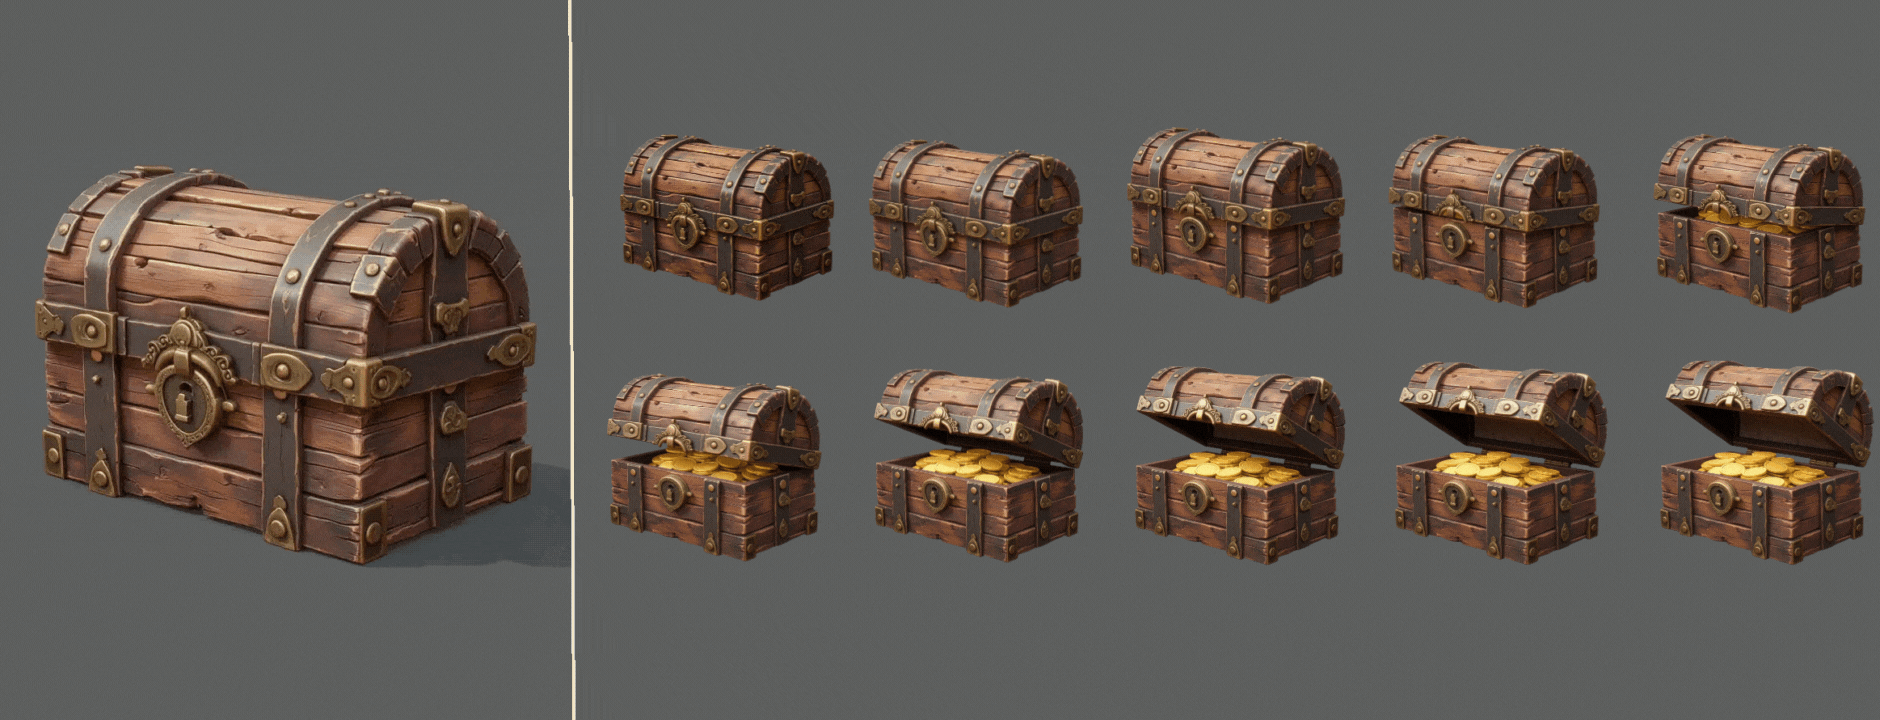
From the video, you can extract every frame to build your final spritesheet, covering both the open and close phases of the animation.
From the completed spritesheet, you can also create an animated GIF to preview the full loop in motion.
Conclusion
By following this workflow, you can create professional-quality spritesheets for your game characters directly within Scenario. From basic run cycles to more complex attack animations, this process helps you build consistent, stylized motion sequences with precision and control.
Try experimenting with different poses, actions, and custom models to expand your animation library and bring even more life to your characters.
Was this helpful?