Single-Image Character Consistency (Ideogram)
Last updated: April 9, 2026
Introduction
Ideogram Character (direct link on Scenario) is a character-consistency model that generates a persistent, recognizable character from just one reference image — a workflow called single-image consistency.
Basically it’s face swap
Ideogram Character is one of the best models for creating variations of a character—especially realistic ones—and it often outperforms older but more versatile methods like Character Reference (which can be used on both Flux-based and SDXL-based models, offering greater flexibility but requiring more effort to master).
Once you define your character with a single portrait or design, you can reuse that identity across poses, styles, scenes, and lighting setups — without retraining a model or building a dataset.
This guide covers how Ideogram Character works, how to integrate it into your Scenario workflows, and best practices for strong, repeatable results.
What is “Single-Image Consistency”?
Traditionally, character consistency is achieved by training a LoRA model with 5–15 reference images, a process that offers maximum fidelity but takes time to prepare and train.
Single-image consistency skips the training step. Ideogram Character extracts defining features from a single image and applies them across all generations. While it may not match a well-trained LoRA in every scenario, it’s fast, easy to use, and ideal for many creative needs.
Why Use it
Fast concept testing — explore ideas without training delays.
Iterative storytelling — keep the same hero or mascot across scenes.
Low barrier to entry — perfect when you only have one high-quality image.
About Style Consistency
Ideogram Character is strongest in realistic styles but can be guided toward illustrated, cartoon, or other stylized looks with clear prompt instructions. For better control:
Include style cues in your prompt (“anime style,” “oil painting,” “cel-shaded”).
Use Scenario’s Restyle, Edit with Prompts, or Image-to-Image to refine outputs.
Where to Access It
You can access Ideogram Character from the “Image Generation” page in Scenario or via this link.
Access the Models Gallery (via the Model menus, or via the top left tab when generating images).
Choose Ideogram Character from the list.
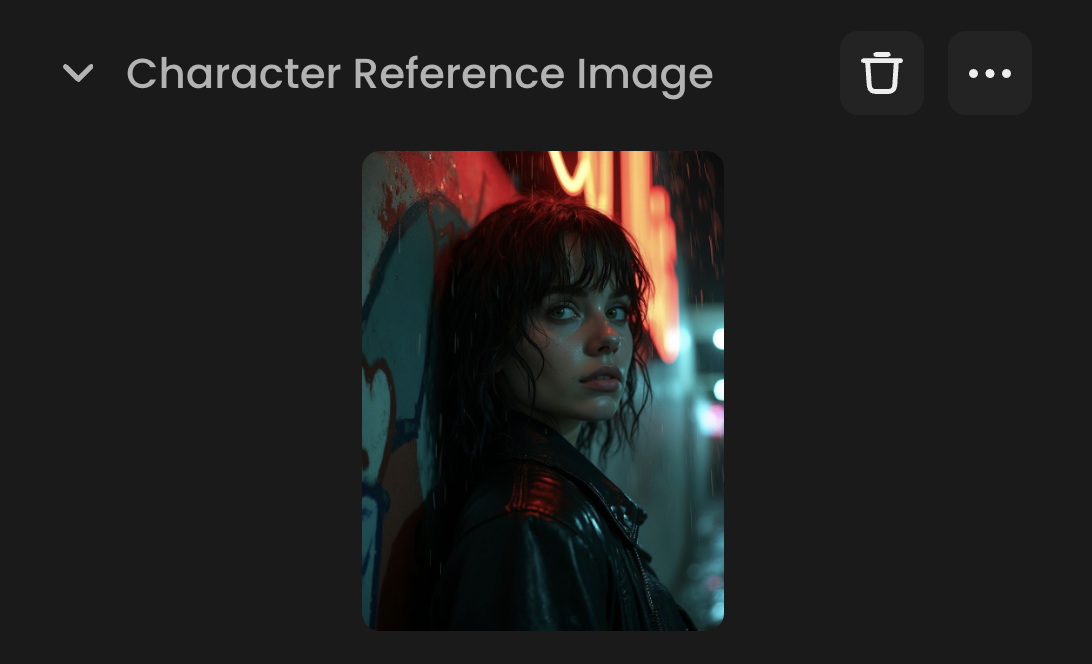
In the Reference Image panel, upload your single character image.
Adjust the prompts, mask and settings to define which features should stay consistent.
Step-by-step guide, in Scenario
Step 1. Add Character Reference Image
Once the model is loaded, you will use this feature a similar way you would do with Image-to-Image mode on Scenario. First, load the Reference Image:
Step 2. Write Your Prompt
Describe your character, be specific with the style and details you want for your output.
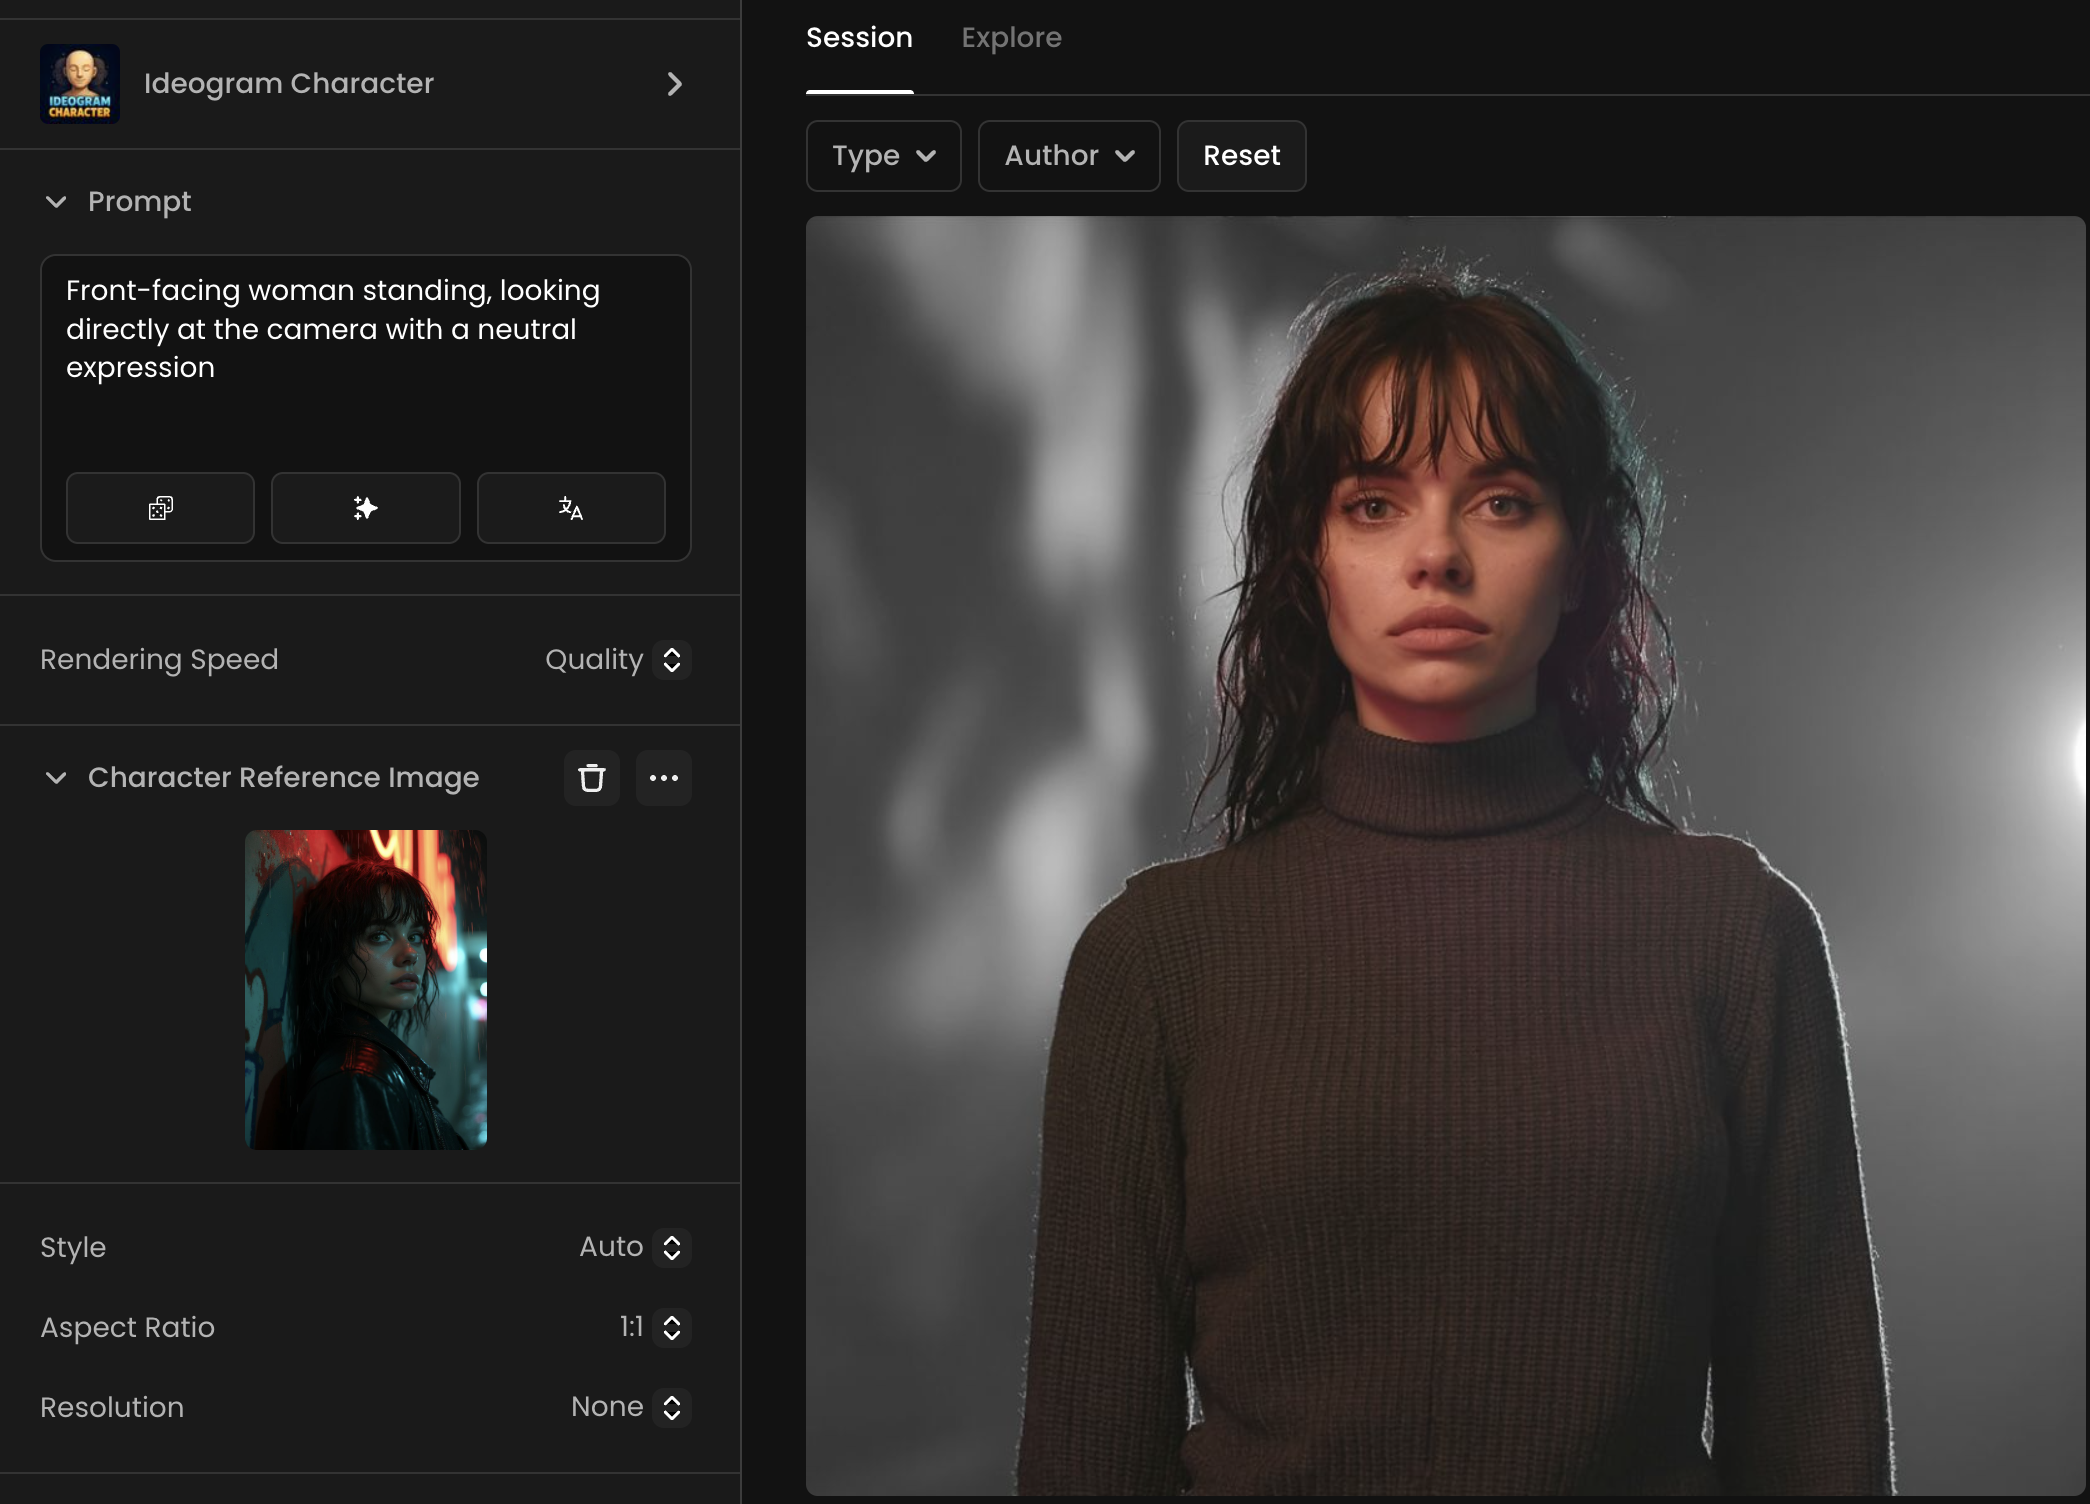
Step 3. Set Style, Aspect and Resolution
Style – Choose from Auto, Fiction, or Realistic.
Aspect Ratio – Options include portrait, landscape, square, and cinematic formats (e.g., 1:1, 2:3, 9:16, 16:9, 4:5, 5:4, and more).
Resolution – Multiple presets available, from 512 × 1536 (tall) to 1536 × 512 (wide), including popular sizes like 1024 × 1024, 1280 × 720, and 1408 × 704.
Step 4. Generate and Review
Once you get your output image, you can begin iterating on it if needed. As long as your prompts are clear, your character’s consistency will be preserved throughout the process.
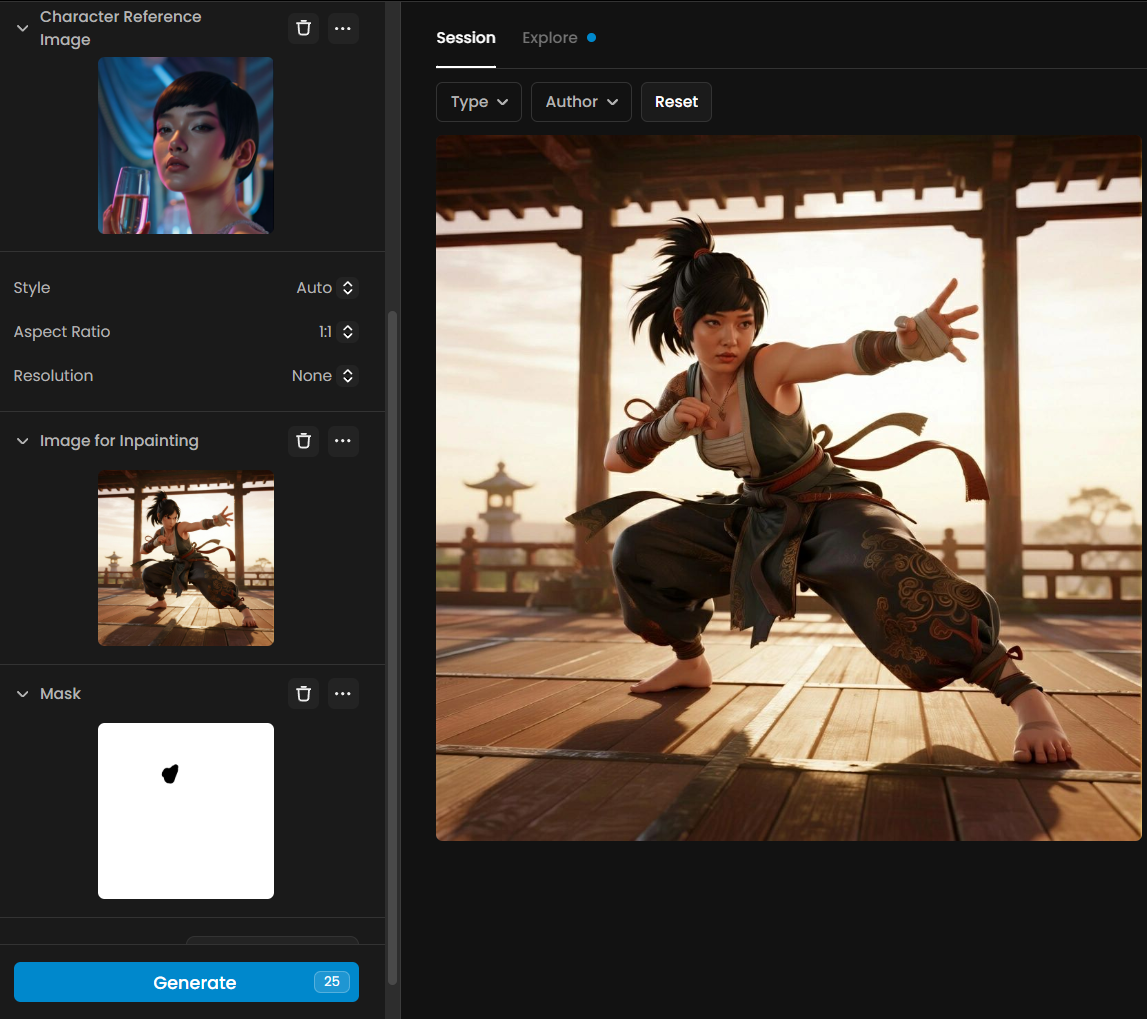
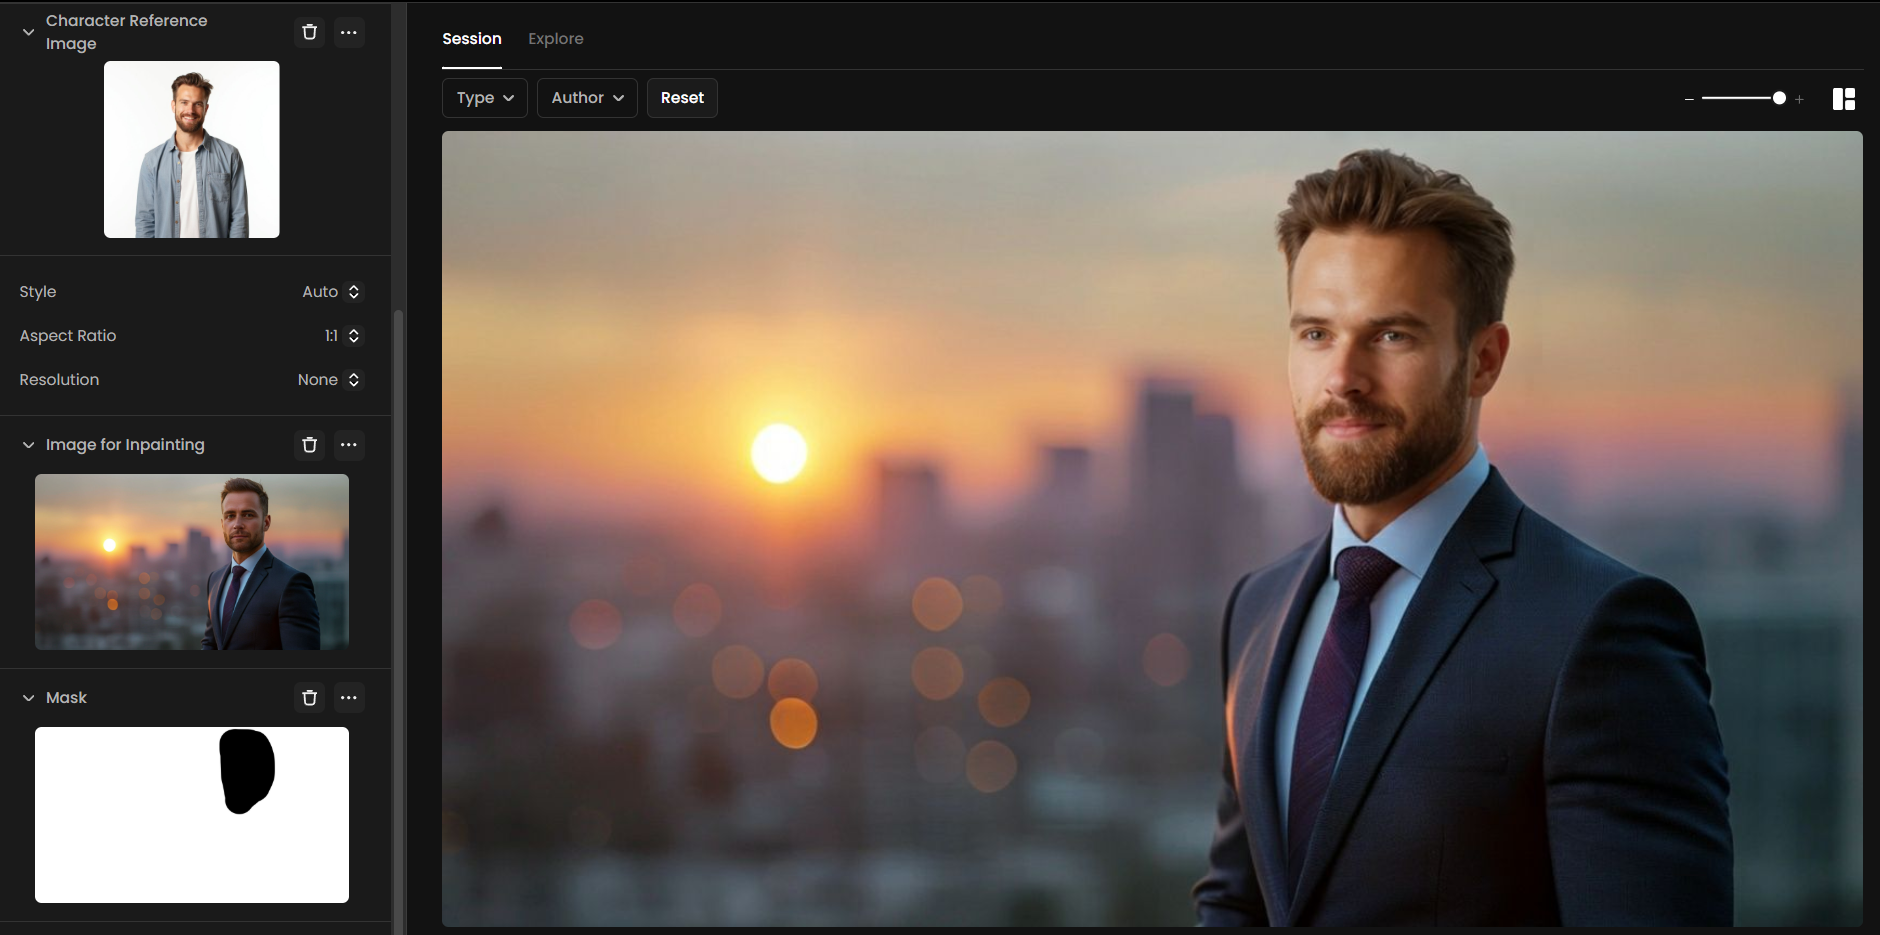
Step 5. Masks & Inpainting for Targeted Changes (Face Swap)
When making a character “transfer“ with Ideogram, inpainting images let you decide which parts of a target image will be updated and which parts will stay the same. You do this by applying a mask — a black-and-white guide image that tells the AI exactly where to make changes.
Black areas of the mask mark the regions to be replaced with features from your reference character.
White areas remain untouched.
For example, if you only want to update the face, mask just that area in black. If you also want the hair to change, expand the black area to include it. You can create a mask by drawing directly in Scenario’s editor or by uploading a black-and-white image as your mask.
Inpainting image: This is the target image you’re editing. The AI uses your mask to replace only the black-masked sections with the new character features, blending them seamlessly into the rest of the image.
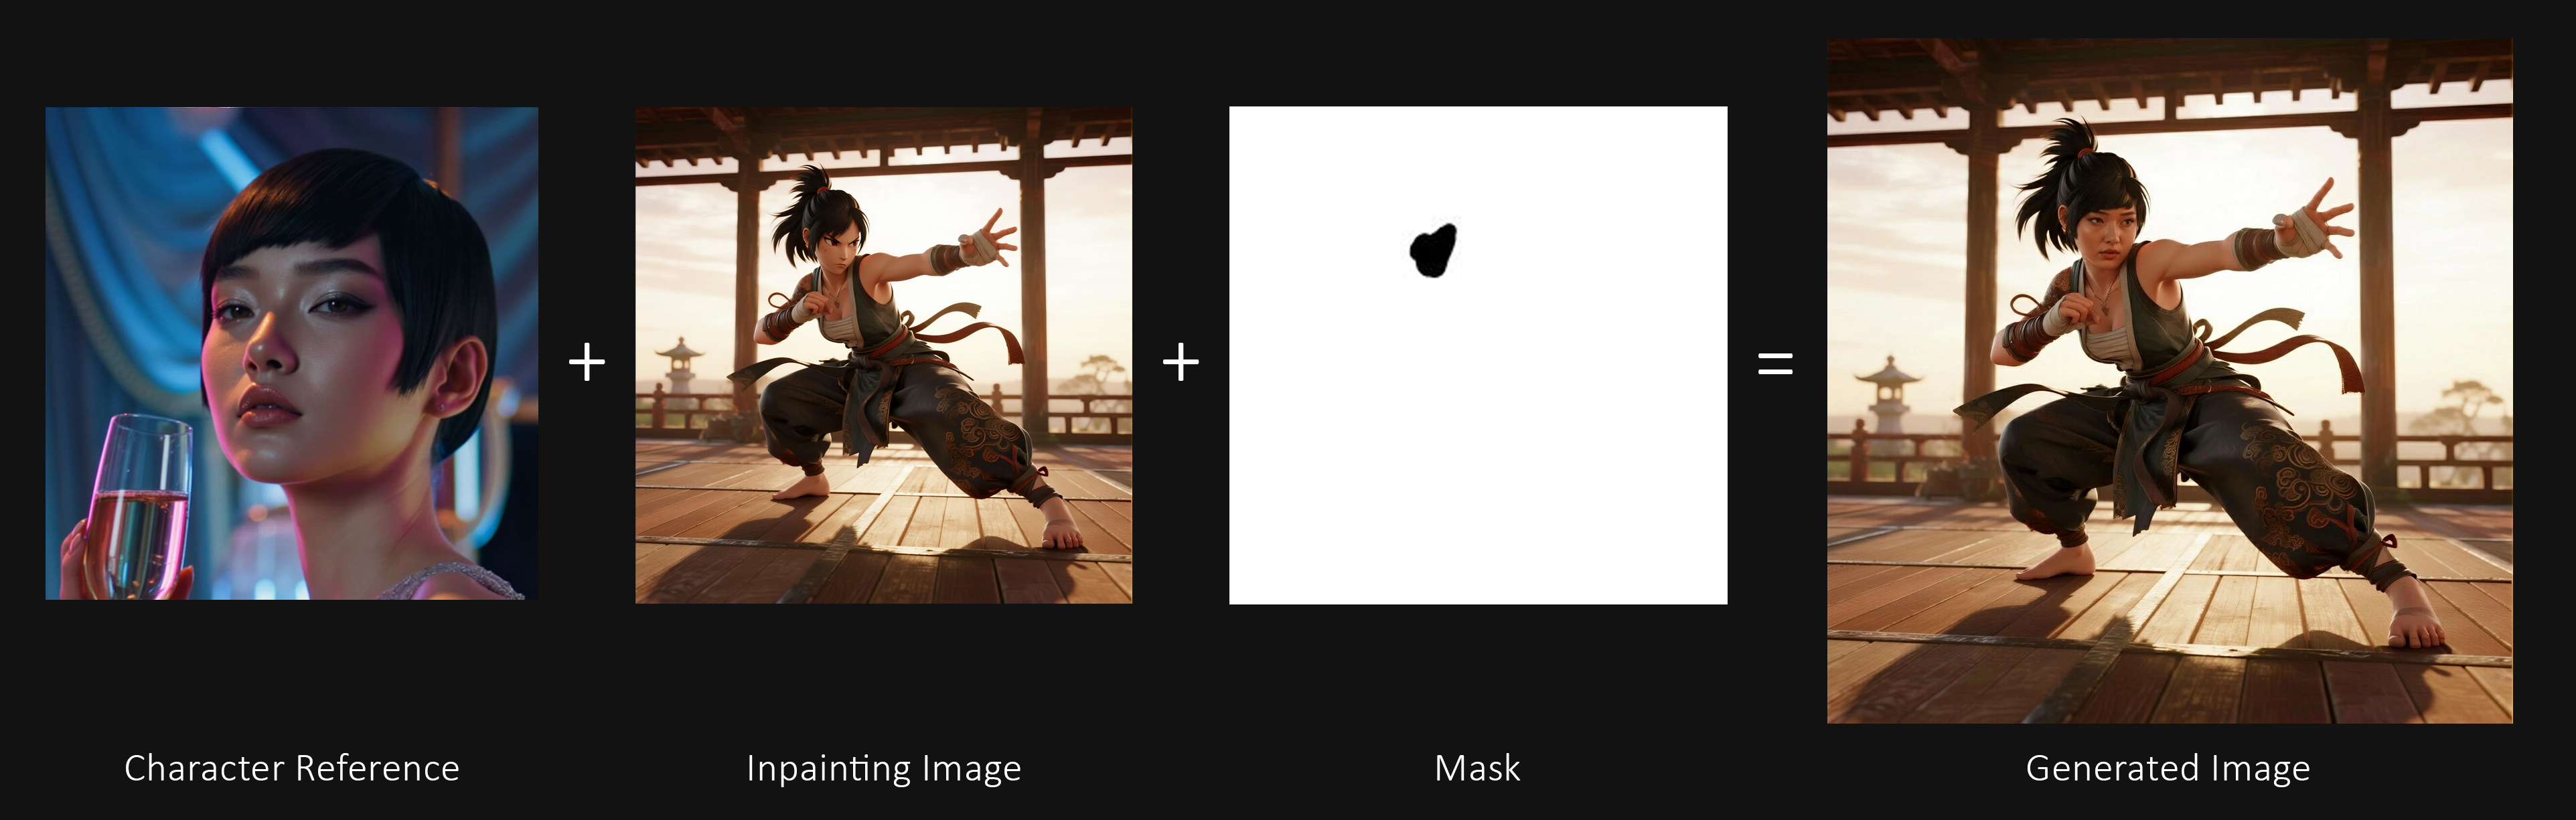
From left to right:
Character Reference – The source image whose identity or features you want to transfer.
Inpainting Image – The target image you want to update.
Mask – A black-and-white guide showing where to apply the transfer (black = replace, white = keep).
Generated Image – The final result, where only the masked areas are updated with features from the reference.
This approach gives you fine-grained control — perfect for cases where you want to keep most of the original image while only transforming specific parts.
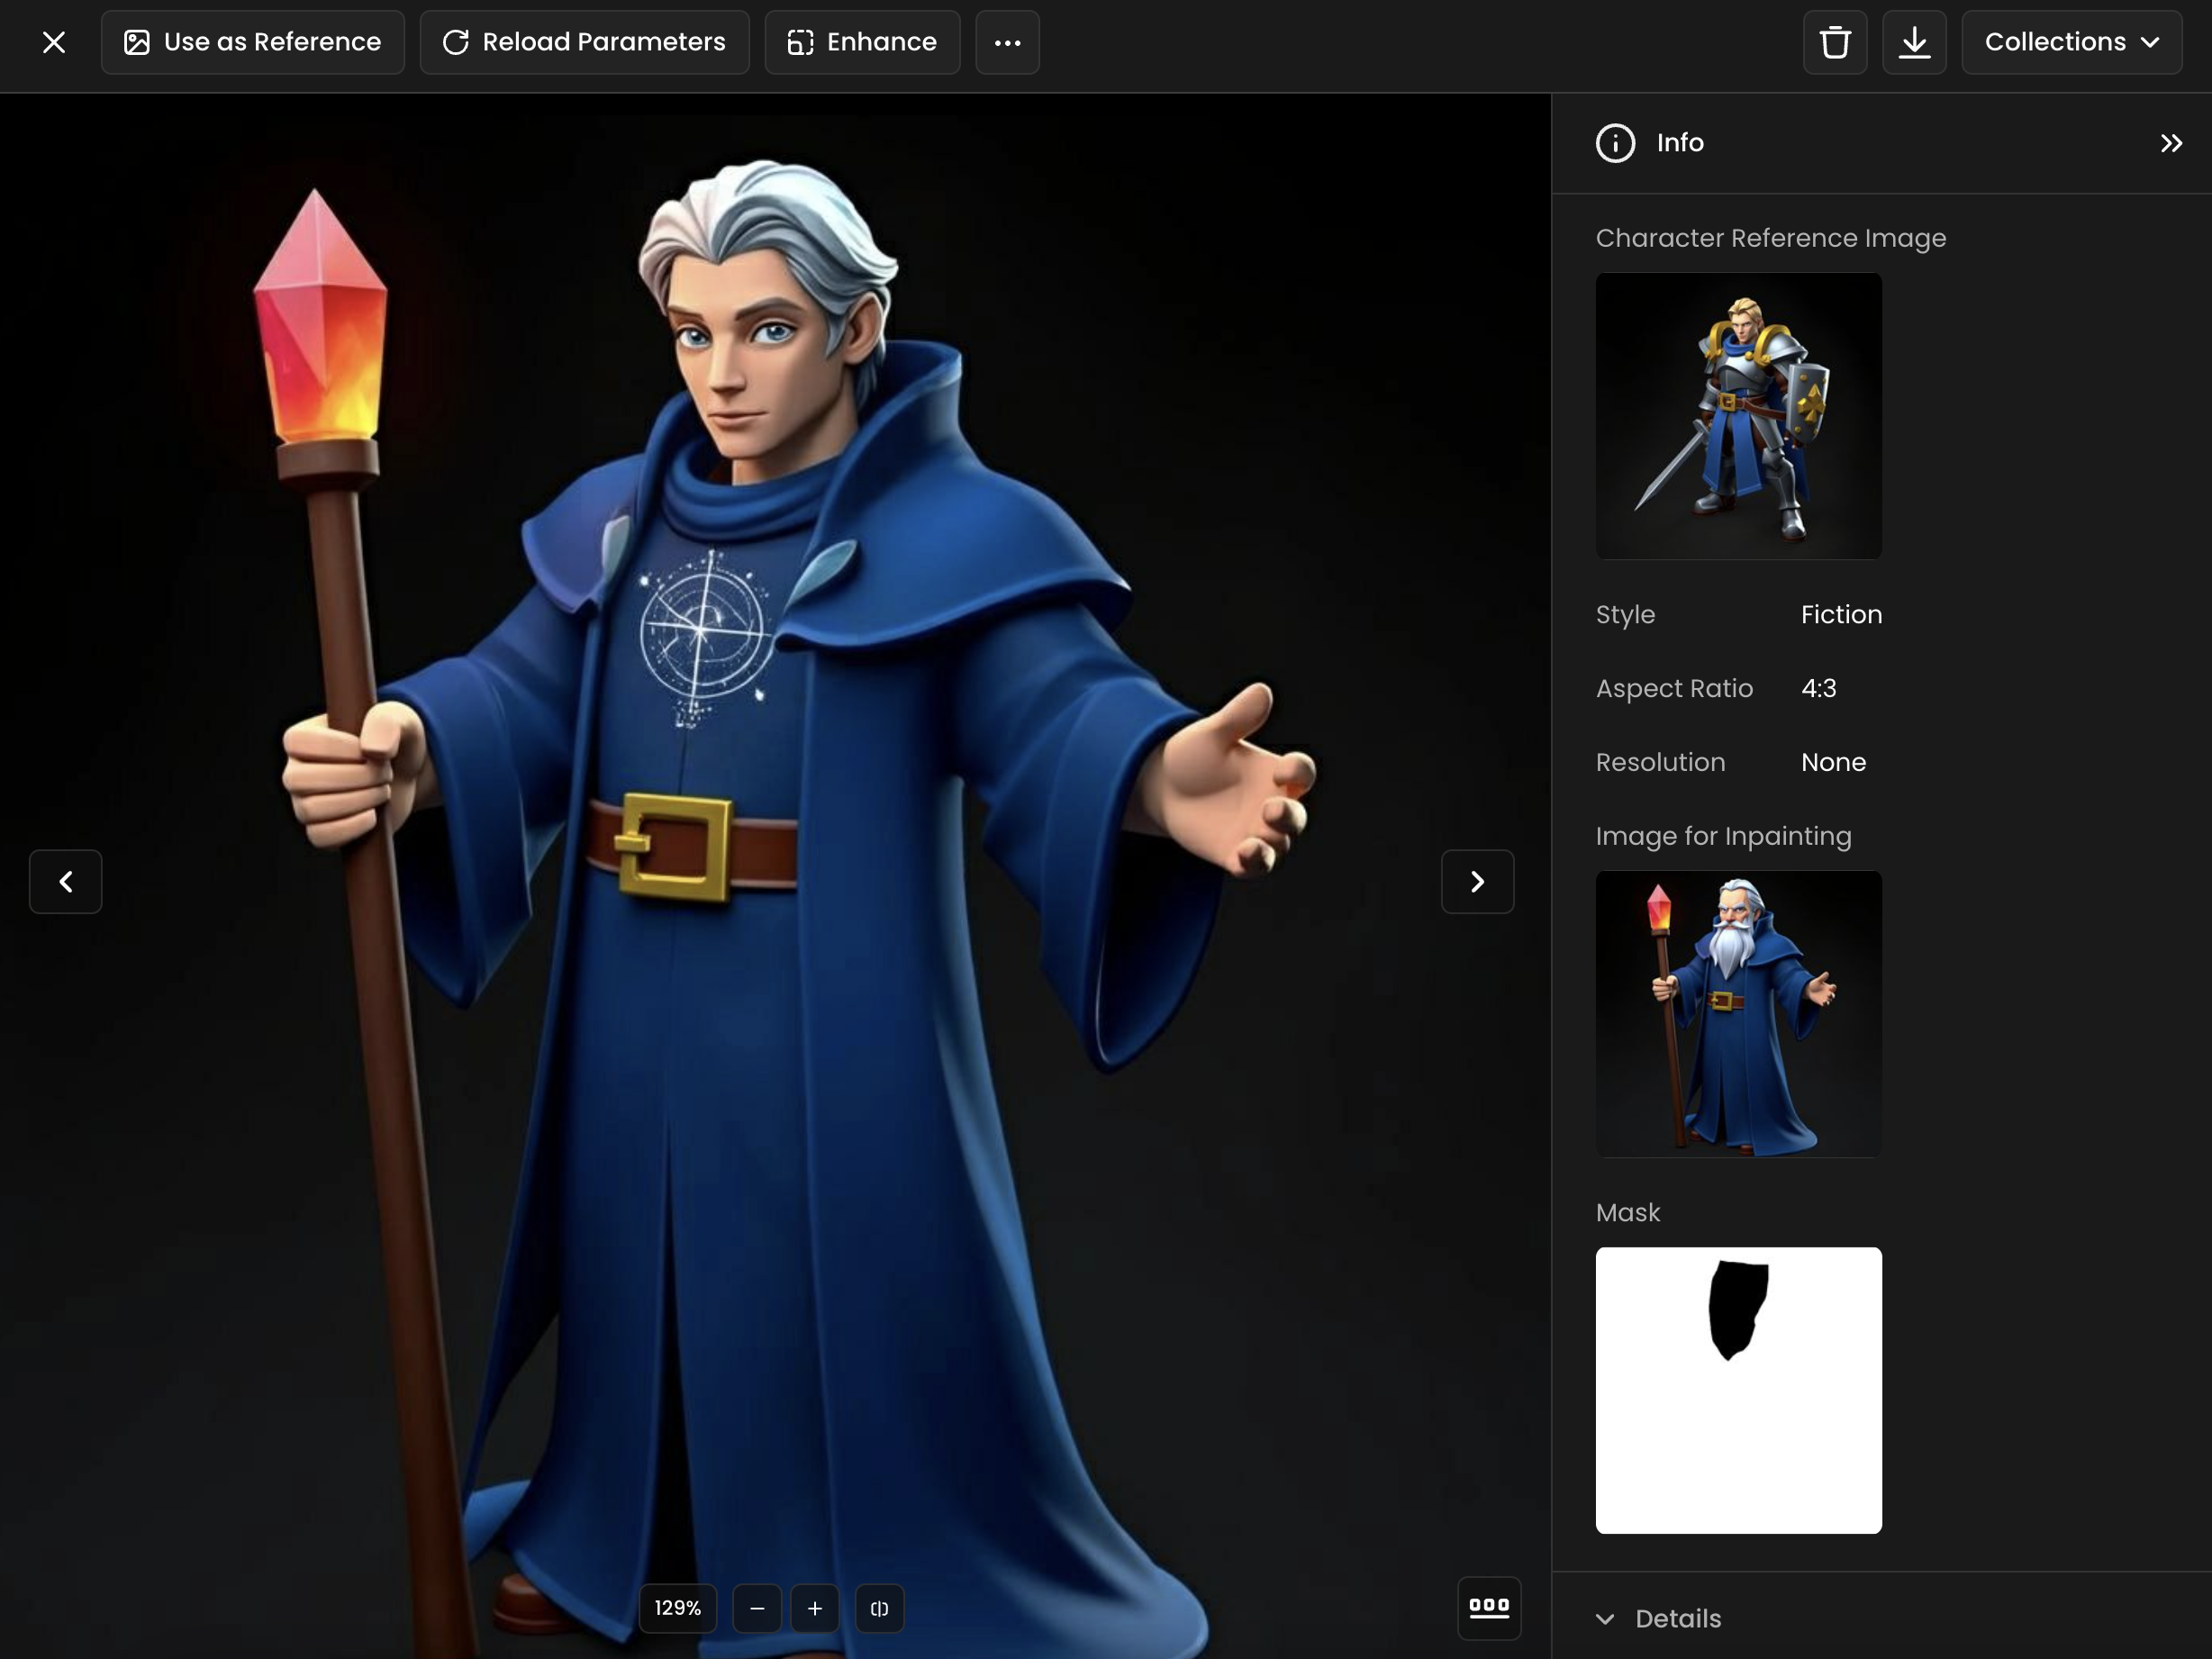
In the example below, the knight’s face (character reference image) replaces the wizard’s face (provided in the inpainting image), thanks to the black area in the mask image.
Core Capabilities
Single-image identity lock: Keep one consistent face or character design across all outputs.
Mask-based control: Decide exactly what should remain consistent (face, hair, clothing, props).
Flexible style translation: Apply any style — photorealistic, cinematic, anime, toy-like — without losing character identity.
Scene adaptability: Easily place the same character in radically different settings, from fantasy worlds to product photos.
Rapid iteration: No training wait times; start generating as soon as your reference is uploaded.
Use Cases in Scenario
Brand / mascot design: Keep the same stylized spokesperson across campaign assets.
Game character prototyping: Quickly visualize a single NPC or hero in multiple environments.
Storyboards & comics: Maintain protagonist consistency panel-to-panel.
Social content & memes: Place your mascot into trending templates using scene insertion.
Product marketing: Feature the same “model” with different props or seasonal backgrounds.
Best Practices for Stronger Consistency
Use a clean, well-lit reference image. Avoid extreme shadows, clutter, or occlusion over key features.
Start with a clean head-and-shoulders reference. Good, even lighting and unobstructed facial features improve identity lock.
Mask with intention:
Face + hair → keeps identity, allows outfit changes.
Face + clothing → keeps a full, uniform look.
Write prompts with both subject and context: “The character in [setting], [lighting], [style]” works better than vague scene-only prompts.
Test styles in smaller batches first to confirm consistency before producing large sets.
If inserting into another image (like the “moon” scene in your screenshot), match style and perspective cues in your prompt.
Example Prompt Ideas
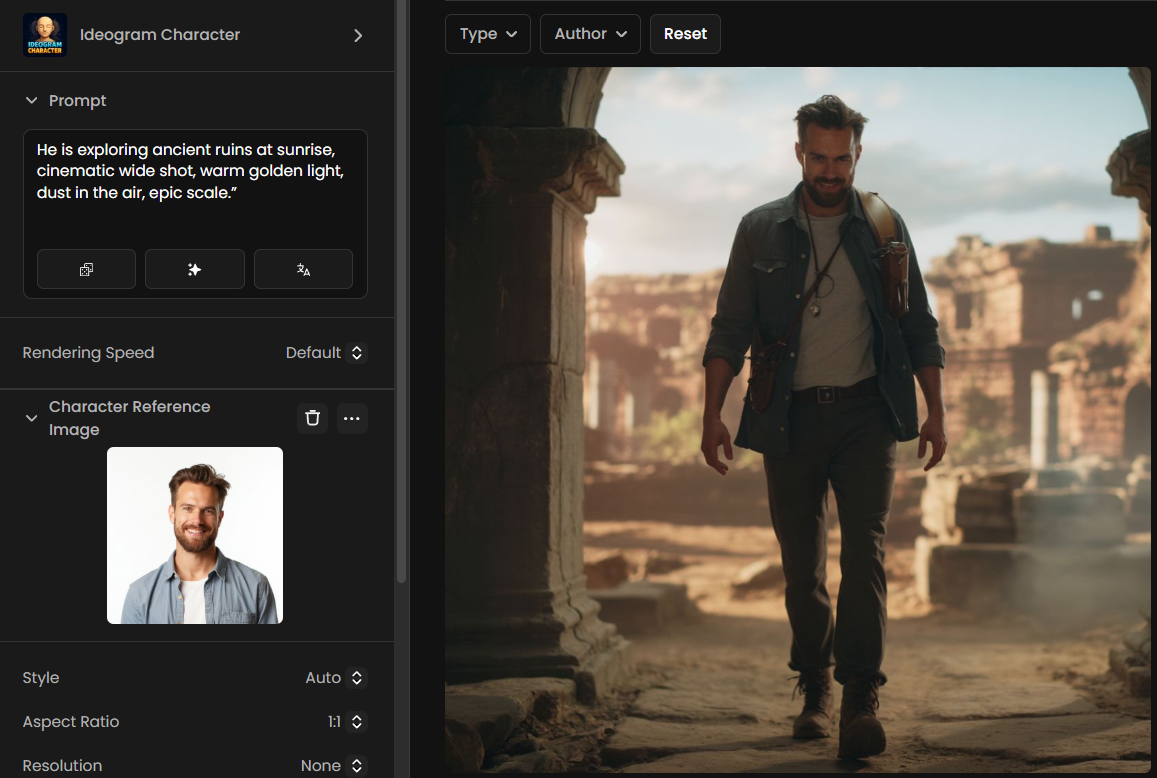
Make sure your reference image is loaded in the Reference Image panel. You may replace [character ref] in the prompt with “the character” or a short description of the character for greater consistency. You can extend the prompt as needed to further lock in the desired style, pose, expression, and other key details.
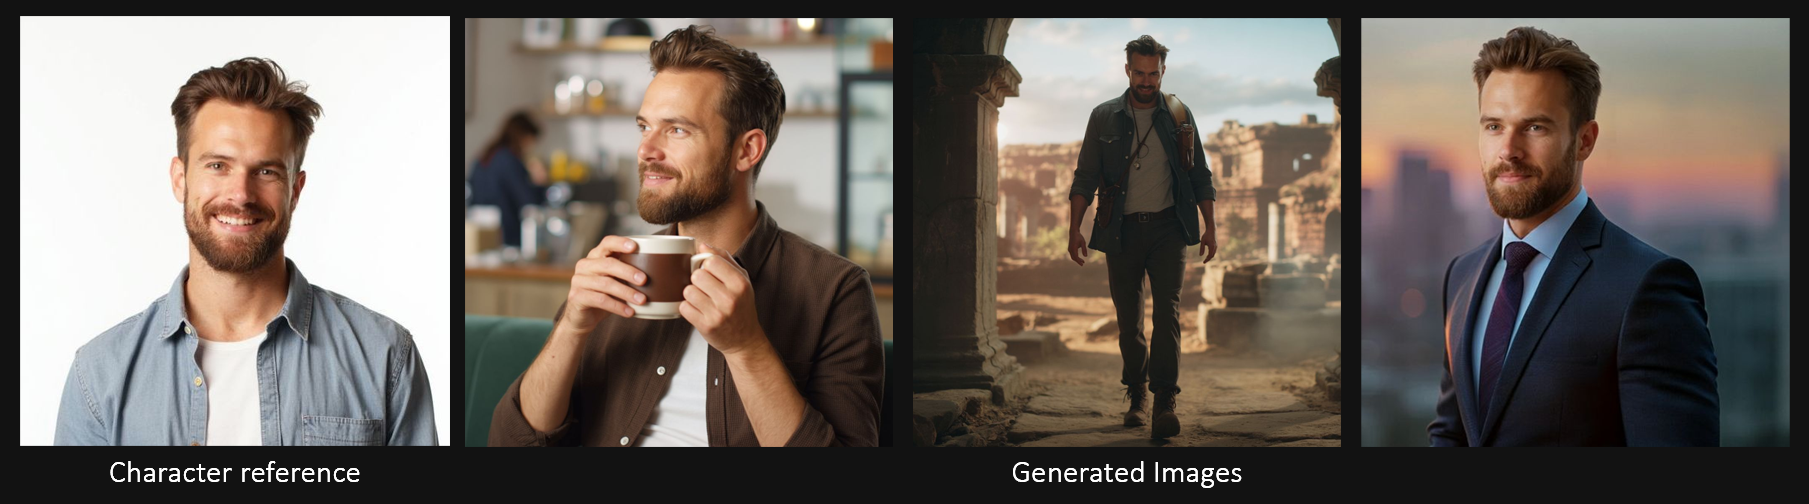
Adventure scene: “[character ref] exploring ancient ruins at sunrise, cinematic wide shot, warm golden light, dust in the air, epic scale.”
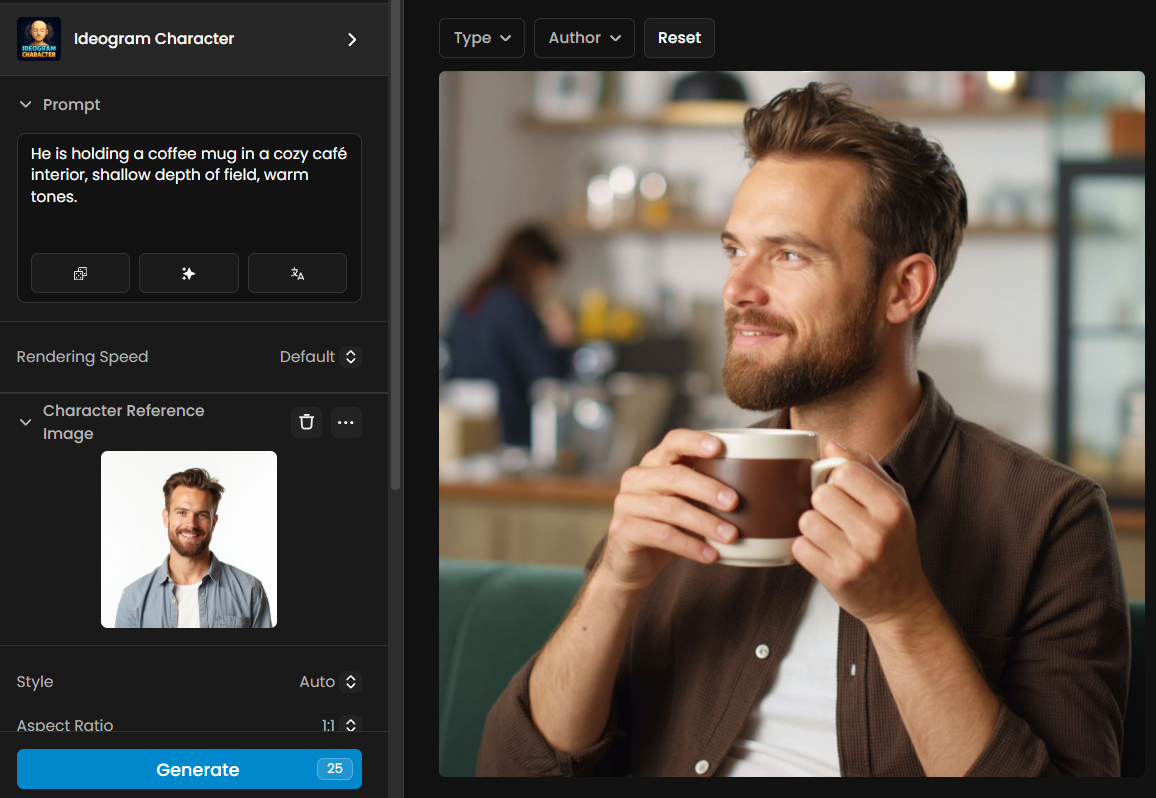
Product shot: “[character ref] holding a coffee mug in a cozy café interior, shallow depth of field, warm tones.”
Changing the face: “[character reference] wearing a dark suit and tie, standing confidently on a rooftop at sunset, with the city skyline blurred in the background.”
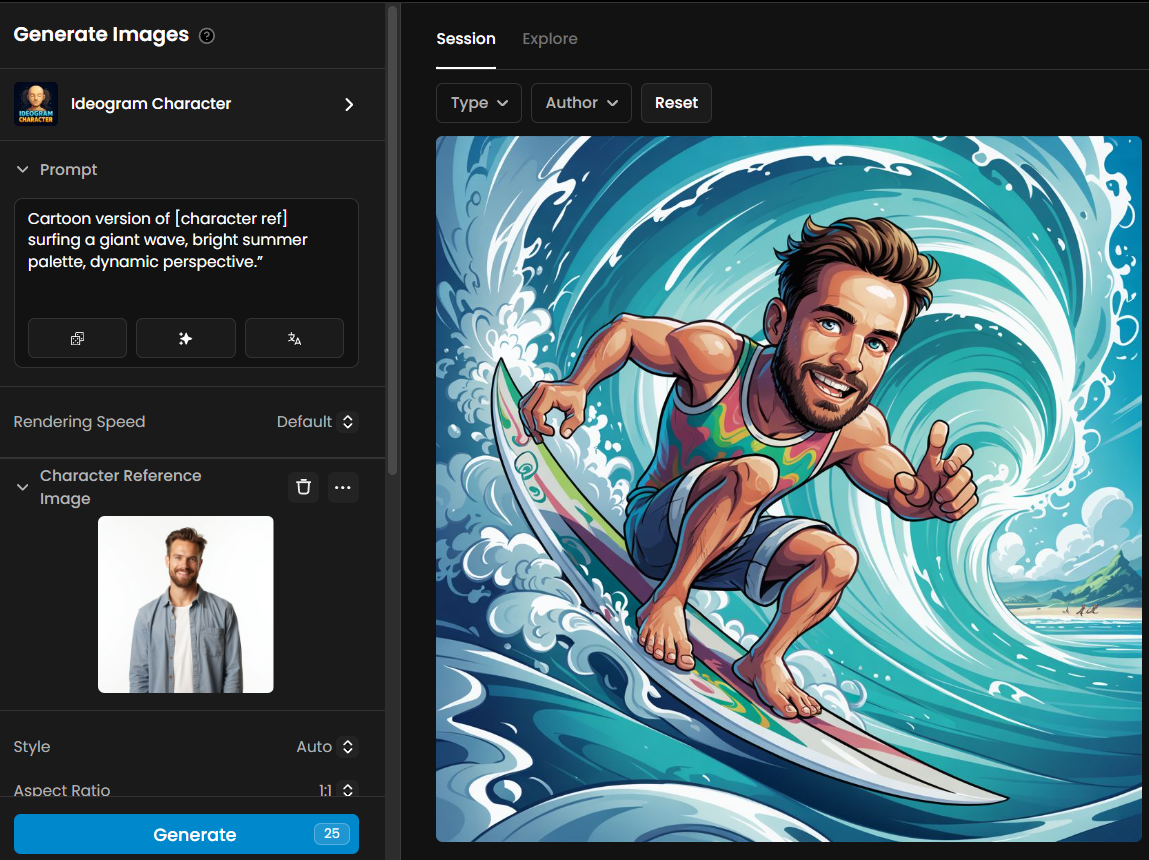
Cartoon adaptation: “Cartoon version of [character ref] surfing a giant wave, bright summer palette, dynamic perspective.”
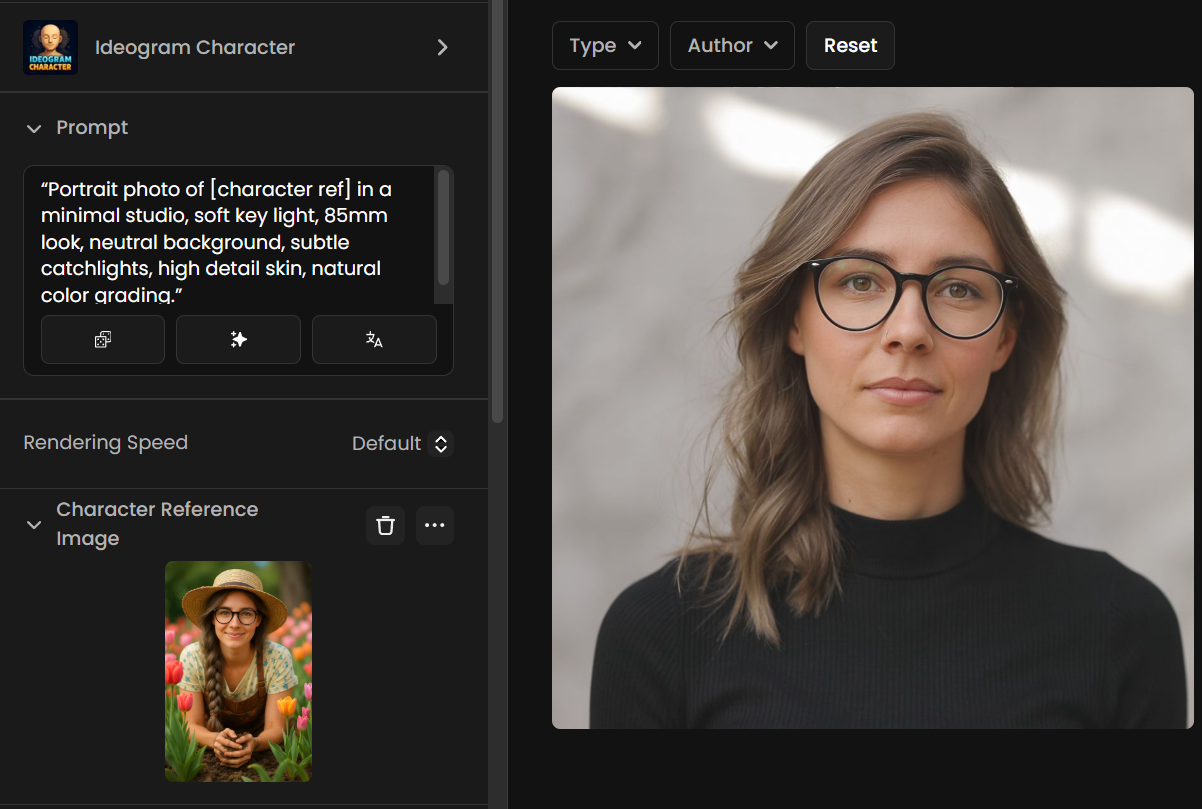
Clean studio portrait: “Portrait photo of [character ref] in a minimal studio, soft key light, 85mm look, neutral background, subtle catchlights, high detail skin, natural color grading.”
Outdoor lifestyle: “[character ref] walking through a neon-lit night market, shallow depth of field, candid street-photo vibe, motion blur, high dynamic range.”
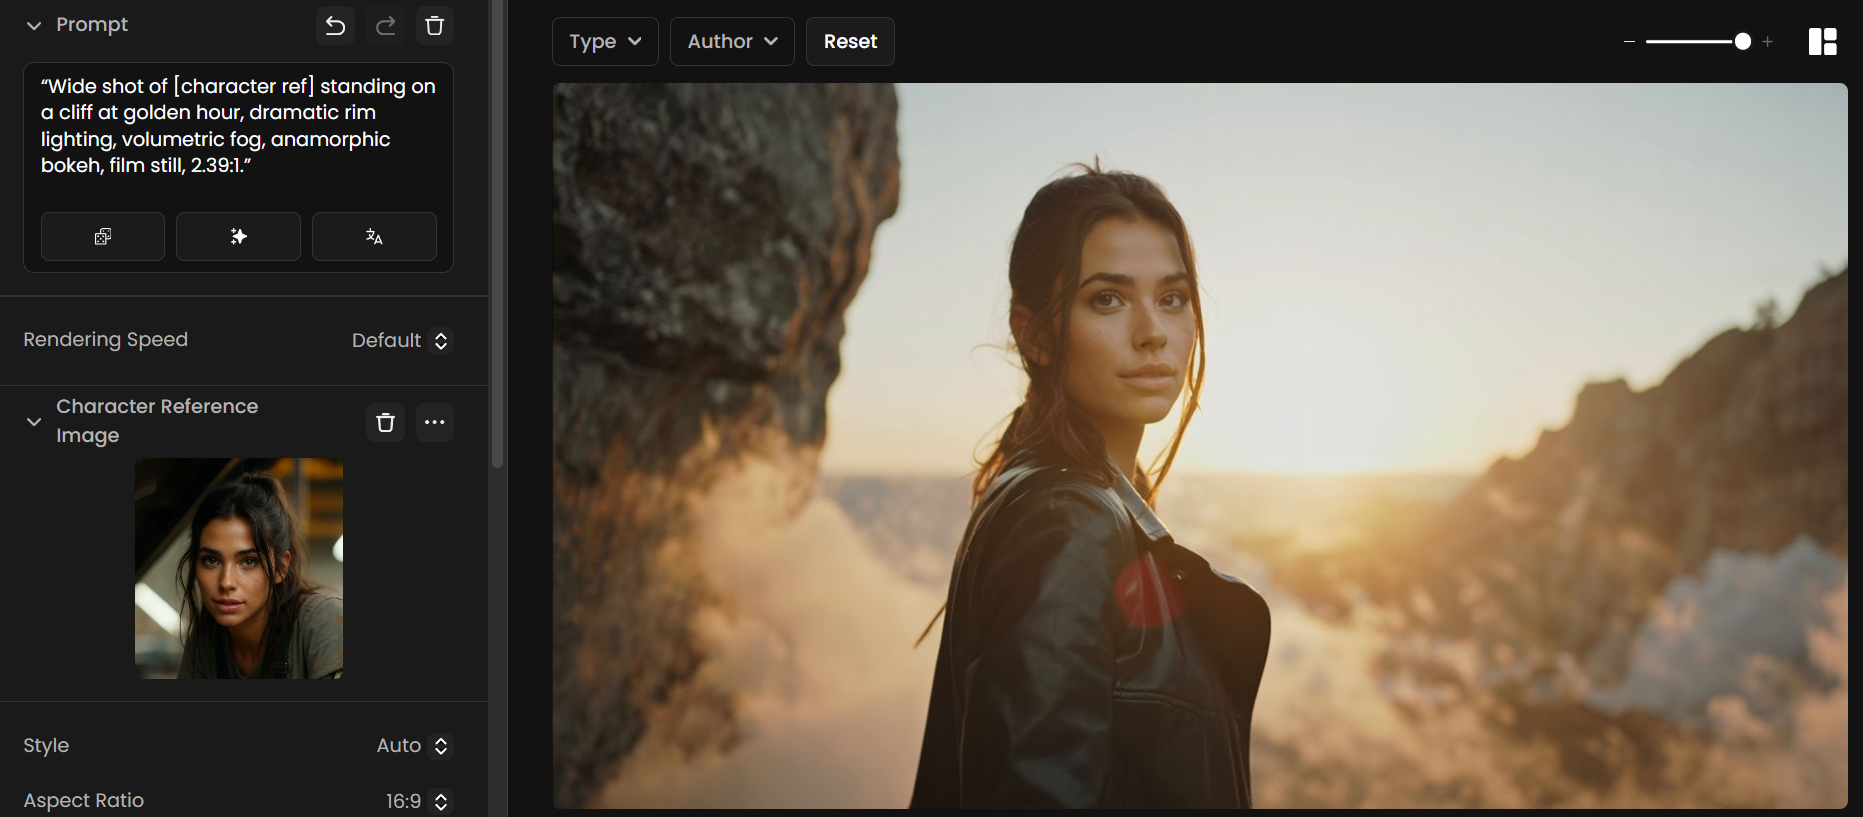
Cinematic still: “Wide shot of [character ref] standing on a cliff at golden hour, dramatic rim lighting, volumetric fog, anamorphic bokeh, film still, 2.39:1.”
Fashion lookbook: “Full-body of [character ref] wearing a monochrome tailored suit, editorial lighting, seamless paper backdrop, glossy magazine style.”
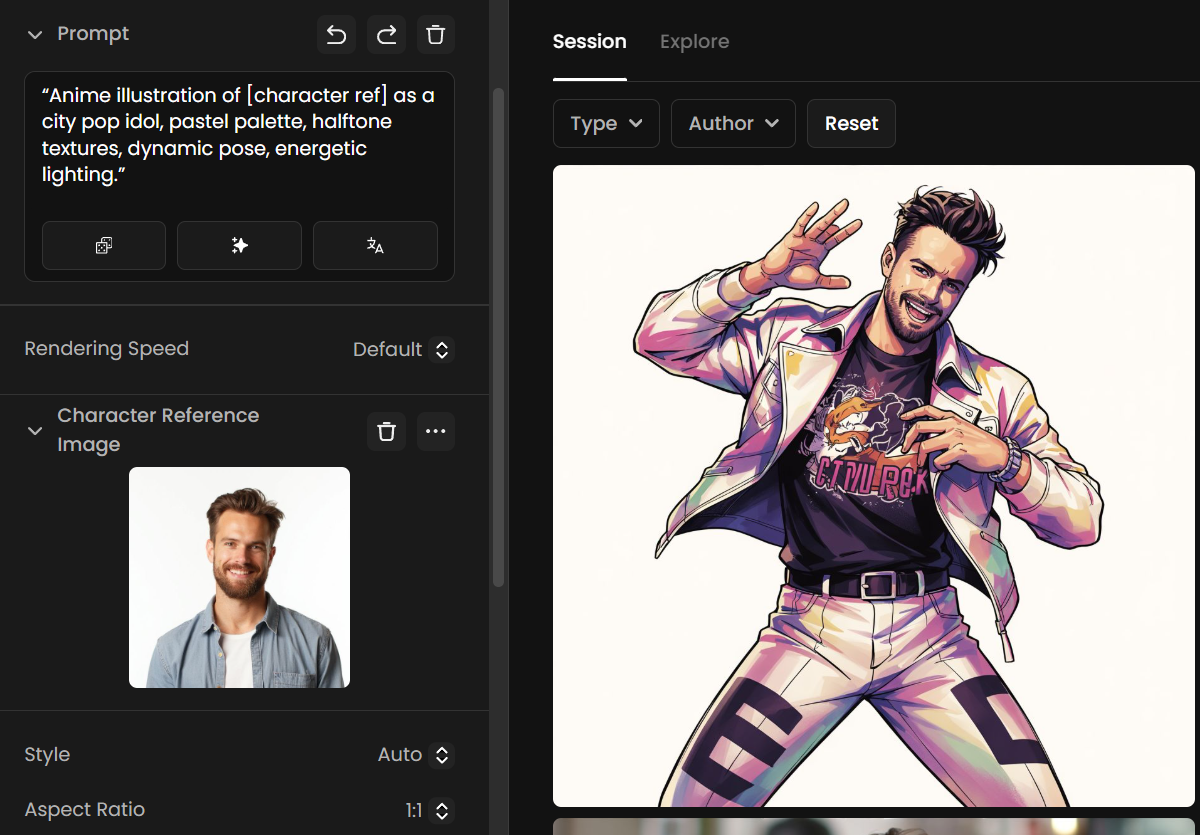
Stylized illustration: “Anime illustration of [character ref] as a city pop idol, pastel palette, halftone textures, dynamic pose, energetic lighting.”
Historical scene: “[character ref] as a 19th-century explorer in a Victorian library, warm tungsten lamps, leather-bound books, fine-art portrait style.”
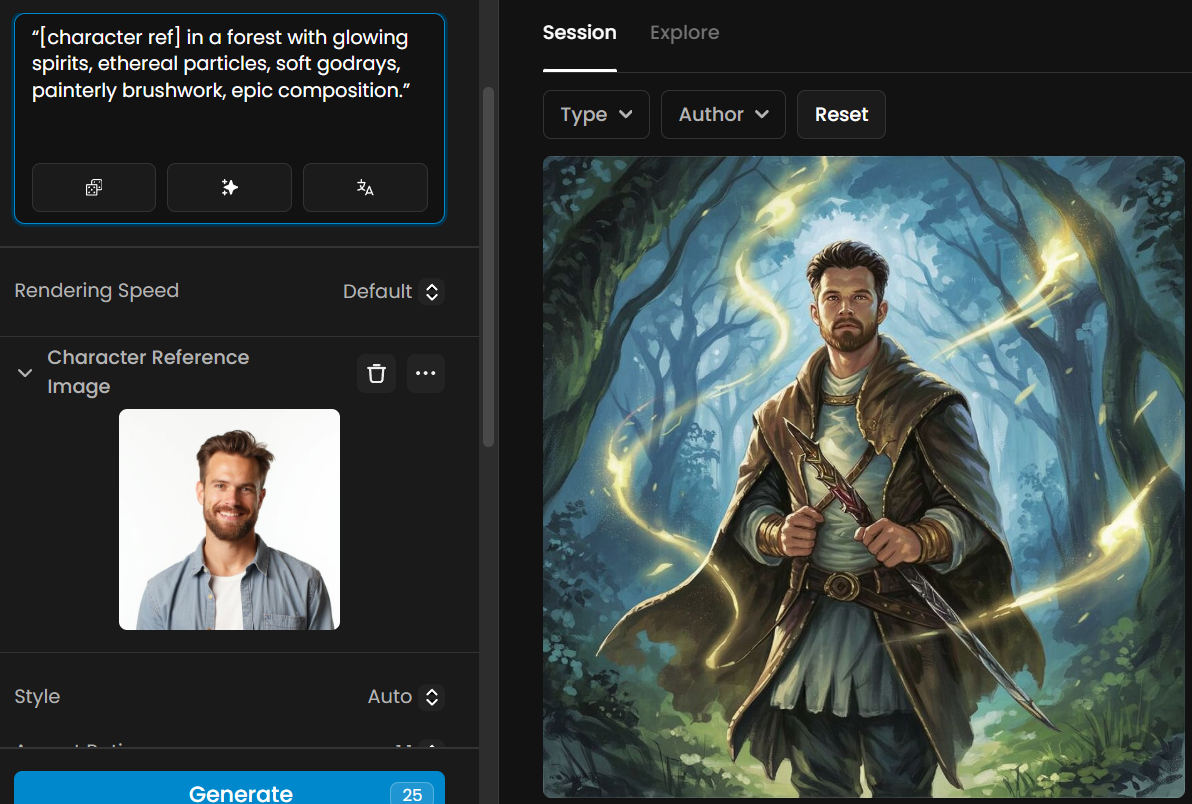
Fantasy poster: “[character ref] in a forest with glowing spirits, ethereal particles, soft godrays, painterly brushwork, epic composition.”
When to Use This Model
Use Ideogram Character when you need fast, consistent character results from just one reference image, without the time and resources required for training a LoRA or Scenario custom character model. It’s ideal for:
Quick prototyping — rapidly test concepts, outfits, or environments without preparing a dataset.
Limited references — you only have one high-quality image of a person, mascot, or design.
Iterative campaigns — generate multiple themed assets with a recurring character in different contexts.
Social & content creation — keep a recognizable brand mascot or avatar across posts, stories, and thumbnails.
And more!
You may opt for a custom-trained character model instead when:
You have multiple images (5–15+) and want maximum identity fidelity.
You need absolute control over fine details across long-term projects.
The character must remain perfectly consistent under extreme poses, angles, or stylization.
Combining Ideogram Character with Other Scenario Features
Ideogram Character works best when used as part of a multi-step Scenario workflow. By combining it with other Scenario tools, you can extend its single-image consistency into complete, production-ready assets.
Edit with Prompts
Once you’ve generated a strong base image of your character, you can send it to Edit with Prompts to refine facial expressions, adjust posture, or change the background while keeping the character’s identity intact. This is ideal for making quick, precise creative changes without starting from scratch.
Restyle
You can also apply new art styles to your Ideogram Character images using Restyle. This preserves facial and design consistency while transforming the visual look, making it easy to deliver multiple style variations—such as realistic, anime, cel-shaded, or painterly—across brand or campaign assets.
Custom Model Training (LoRA)
Another approach is to use Ideogram Character as the starting point for custom model training. By generating ten to twenty high-quality, consistent images from a single reference, you can curate the best results and upload them as a dataset for a Scenario custom model (LoRA). This hybrid workflow moves you from fast single-image consistency to long-term, high-fidelity control.
Video Workflows
For animation and video projects, generate key start and end frames of your character in Ideogram Character. These can be used as anchors in Scenario’s image-to-video or animation workflows, ensuring the character remains consistent in identity throughout the sequence.
Upscaling & Final Output
Finally, pass your completed images through Scenario’s upscalers to prepare them for print or high-resolution delivery. Upscaling ensures your character stays crisp and detailed, no matter the final format or platform.
Limitations to Keep in Mind
Extreme camera angles or poses may slightly alter facial details — test multiple seeds to get the most accurate output.
Clothing or accessories outside the mask may change between generations unless explicitly included.
External References
Official Ideogram Character guide: https://ideogram.ai/news/ideogram-character
Ideogram Character on YouTube
The Rundown guide to single-image consistency: https://www.therundown.ai/p/ideogram-character-guide