Introduction to 3D Generation
Last updated: April 9, 2026
The AI-Powered 3D Production Pipeline
Modern 3D AI tools have evolved beyond simple "Image-to-3D" conversion. They now offer a modular ecosystem where you can generate, refine, rig, and prepare assets for professional production in games, VFX, and industrial design.
Core Functions & Capabilities
To transform a concept into a production-ready asset, these models perform several specialized tasks:
Generation (Image-to-3D & Text-to-3D): This is the entry point. Models like Tripo P1 or Hunyuan 3D 3.1 PRO use diffusion techniques to create high-fidelity 3D meshes from single images or text prompts, reconstructing depth and "hidden" sides of an object.
AI Rigging: Provided by tools like Tripo Rigging 2.5 and Tripo Rigging 1.0 [Biped], this process automatically generates an internal skeleton (bones) and weight maps for a 3D model. This allows the character or object to be animated immediately without hours of manual joint placement.
Retopology (Optimization): AI-generated meshes are often "messy" with uneven polygons. Tools like Hunyuan Polygen 1.5, Tripo Retopology, and Meshy Remesh reconstruct the geometry to ensure clean topology (quads or optimized triangles), making the model lightweight and performant for real-time engines like Unity or Unreal Engine.
Retexture: Tools like Tencent Texture Edit, Trellis 2 Retexture, and Meshy Retexture allow you to keep an existing 3D shape but completely overhaul its visual style. Using AI-driven texture synthesis, you can apply new materials, colors, and surface details (PBR maps) to a model while maintaining its original geometry.
UV Unwrapping: Tencent UV Unwrapping automates the process of unfolding a 3D model's surface into a flat 2D layout, a necessary step before painting or baking custom textures in external tools like Substance Painter.
Stylization: Tripo Stylization applies a visual style transfer to an existing 3D model, allowing you to push a generated mesh toward a specific aesthetic (cartoon, painterly, realistic) without regenerating it from scratch.
Partition (Segmentation): This advanced feature segments a complex 3D model into logical, separate parts. Tools like Hunyuan 3D Part can identify and separate the wheels from a car or the limbs from a creature, which is crucial for mechanical animation and modular asset design.
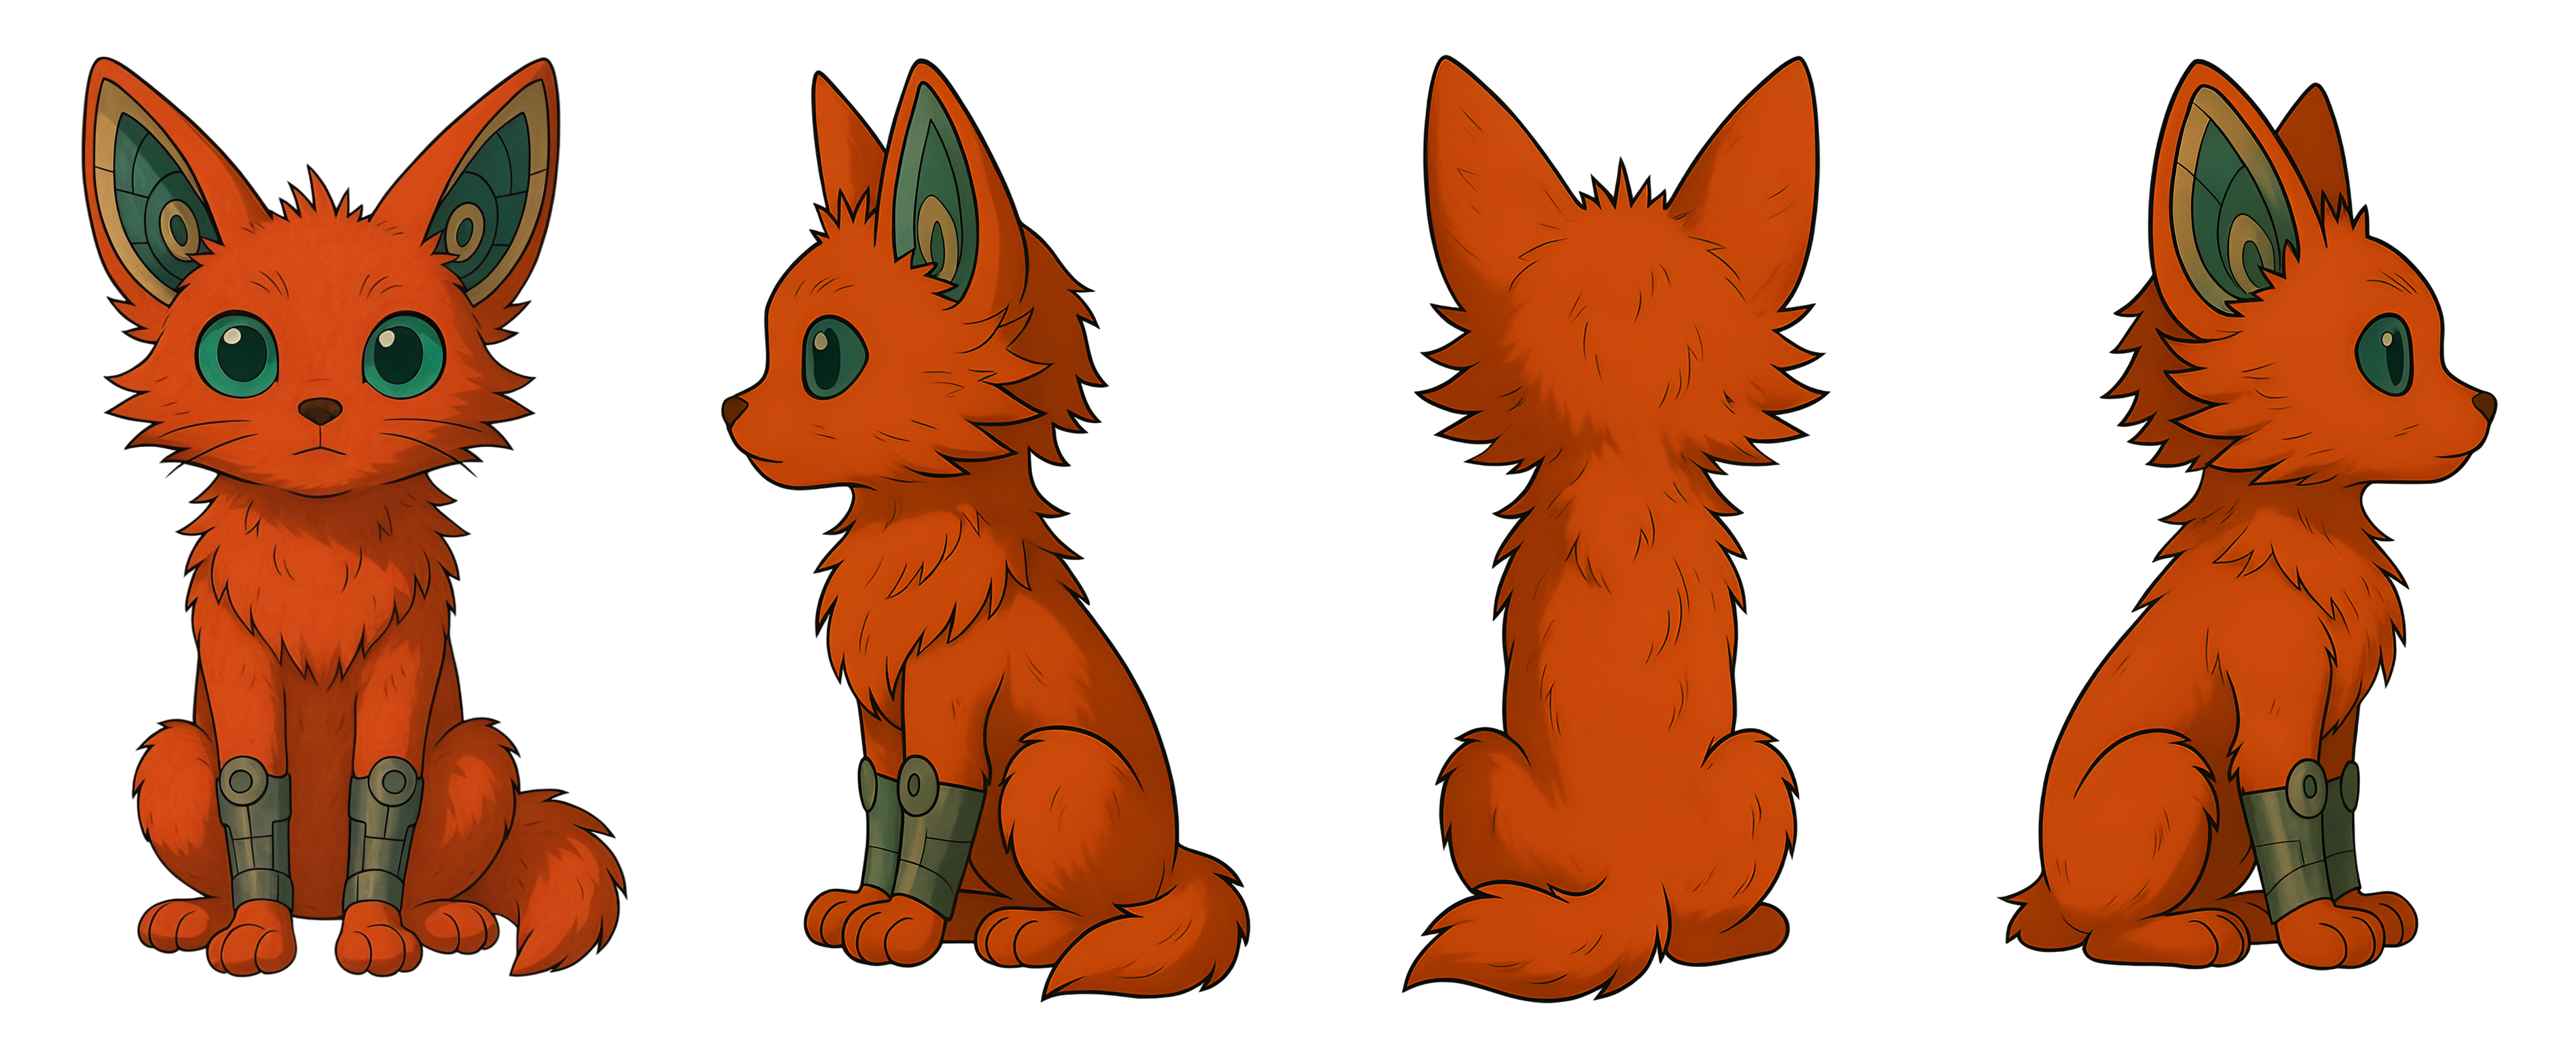
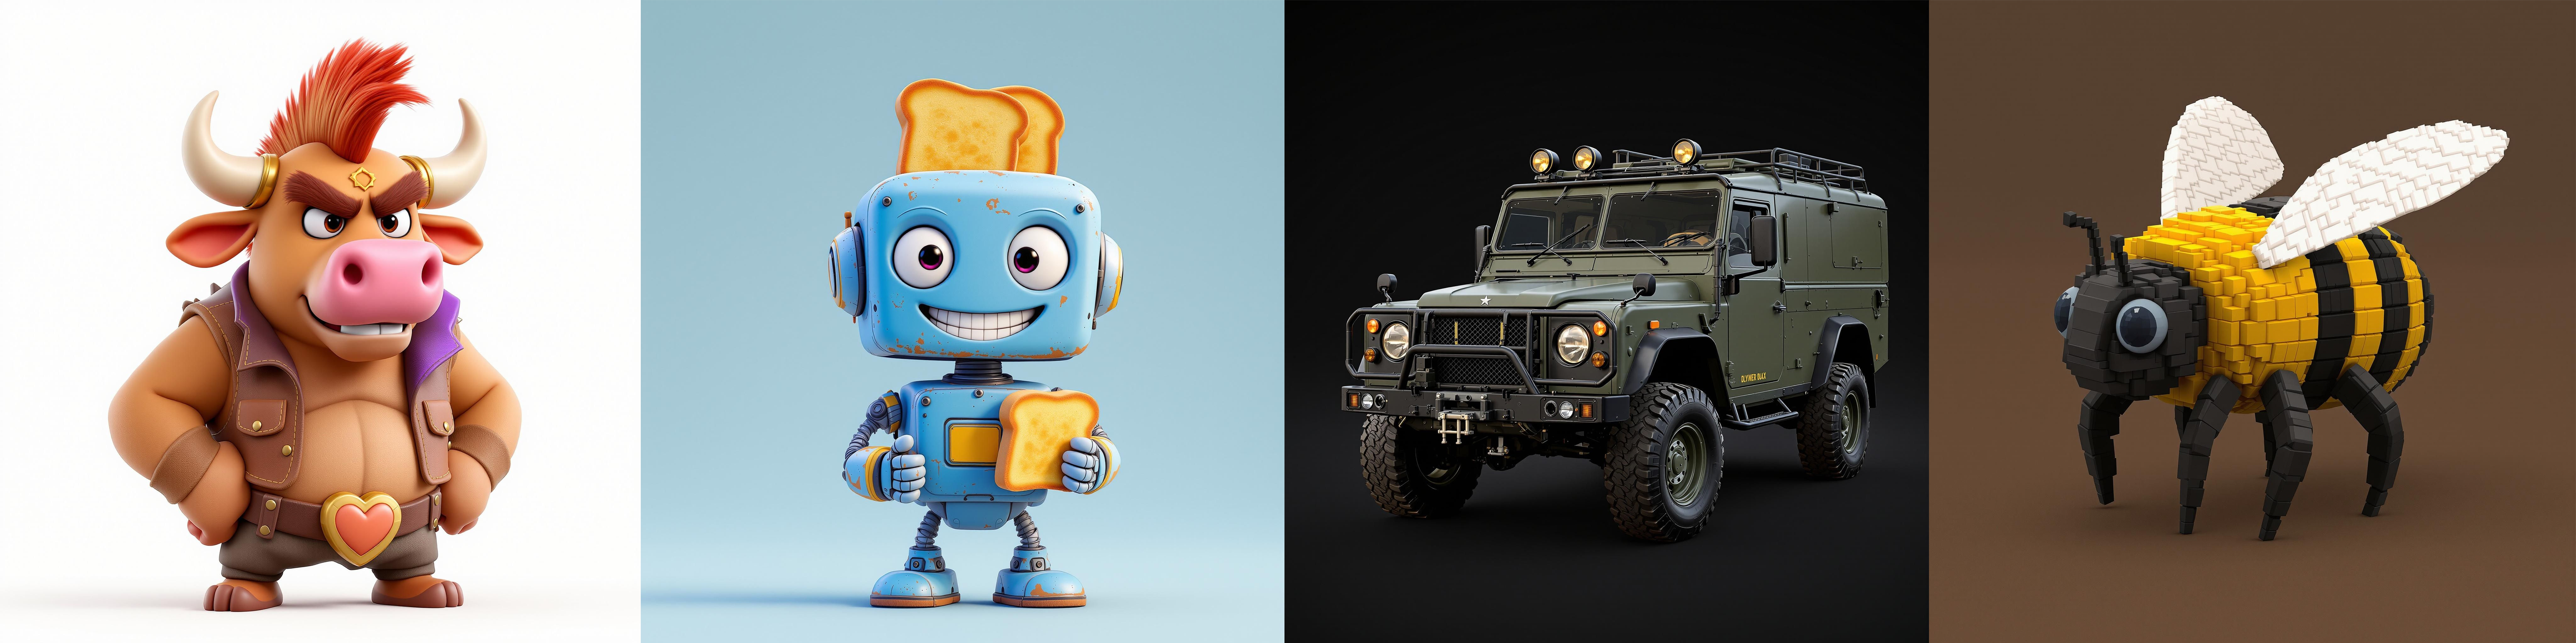
The first demonstration showcases the core Image-to-3D process. It visualizes the transition from a single 2D character illustration into a high-fidelity 3D model.
The second demonstration strips away the surface textures to reveal the Geometry (Mesh) of the model. This view is crucial for understanding how the asset will perform in a production environment.
Available 3D Models
Scenario provides access to a wide range of specialized 3D generation and refinement models, each optimized for different use cases and quality requirements.
Tripo Models (P1, 3.1, 3.0, 2.5)
Developed by VAST AI, the Tripo family covers the full 3D production pipeline — generation, retopology, rigging, and stylization.
Tripo P1 (Standard and MultiView): Tripo P1 is optimized for delivering clean, production-ready assets with well-optimized geometry. It is a strong choice when you need good mesh quality at a lower polygon count, making it well-suited for game-ready assets and real-time pipelines. The P1 Multi View variant accepts up to four reference images (front, left, right, back) for improved reconstruction accuracy.
Tripo 3.1 (Standard and MultiView): Tripo 3.1 is the most capable generation model in the Tripo family. It can produce both high-quality high-poly meshes and optimized geometry depending on your settings, making it versatile for everything from detailed hero assets to game-ready props. The 3.1 Multi View variant accepts multiple angle references for improved geometric symmetry.
Tripo 3.0 (Standard, MultiView, Texturing). The previous-generation Tripo model, still available in three variants:
Tripo 3.0: Single-image generation for general use cases.
Tripo 3.0 Multiview: Multi-angle reconstruction.
Tripo 3.0 Texturing: A dedicated texture enhancement pass for Tripo 3.0-generated meshes.
Tripo Rigging 1.0 [Biped]: Specialized for bipedal (humanoid) characters. Produces cleaner joint placement and more accurate weight distribution around hips, knees, and shoulders compared to a general-purpose rigging model.
Tripo Rigging 2.5: Automatically generates a full skeletal structure and skin weights for specialized 3D creature meshes, including quadrupeds, hexapods, and octapods. Please note that this version is specifically designed for non-bipedal structures and is not compatible with bipedal characters.
Tripo Retopology: Reconstructs any mesh geometry with cleaner edge loops and better polygon distribution. Run this before importing into animation or sculpting software.
Tripo Stylization: Applies AI-driven style transfer to an existing 3D mesh, modifying surface appearance and texture to match a chosen aesthetic (cel-shaded, painterly, hyper-realistic, etc.) without altering the underlying geometry.
Hunyuan/Tencent Models
Developed by Tencent, the Hunyuan 3D ecosystem represents the state-of-the-art in generative 3D assets. The latest models utilize a sophisticated 3D-DiT hierarchical carving technology, capable of handling up to 3.6 billion voxels to produce high-fidelity geometry with extreme precision.
Hunyuan 3D 3.1 PRO (Standard): Tencent's current flagship image-to-3D model. Accepts a single reference image and produces high-fidelity meshes with PBR texture support at resolutions up to 1536³. Tripling the modeling accuracy of previous versions, it is best suited for stylized game characters, props, and objects with clear outlines.
Hunyuan 3D 3.1 PRO (MultiView): The MultiView variant of Hunyuan 3D 3.1 PRO accepts up to four reference images (front, side, and back angles of the same subject), providing the model with a complete 360-degree understanding to significantly improve reconstruction accuracy and structural symmetry.
Hunyuan 3D 3.1 PRO (Sketch): A specialized sketch-to-3D engine that translates 2D hand-drawn sketches and line art into detailed 3D meshes, maintaining the original artistic intent and silhouette character of the conceptual drawing.
Hunyuan Specialized & Utility Models
Hunyuan Polygen 1.5: A high-performance polygon-based generation tool. Optimized for creating clean, real-time ready topology directly from 2D concepts, ensuring that generated assets are lightweight and ready for immediate game engine deployment.
Hunyuan 3D Part: A specialized model designed for mesh segmentation. It automatically analyzes geometry to identify and separate distinct components (such as mechanical parts or limbs), outputting neatly organized sub-meshes ready for independent animation or editing.
Hunyuan 3D - Fast: Optimized for near-instant generation. It prioritizes low latency and speed, making it the ideal choice for rapid prototyping or "grey-boxing" where speed is more critical than absolute geometric precision.
Hunyuan 3D Multi View - Fast: A high-speed multi-view engine that combines the structural consistency of multiple reference angles with a low-latency generation process for rapid 360-degree asset drafting.
Hunyuan 3.0 Pro & Legacy Generations
Hunyuan 3D 3.0 PRO (Standard): The previous generation flagship image-to-3D model. Known for highly stable mesh structures and balanced vertex density, it remains a reliable choice for a wide variety of environmental props and character bases.
Hunyuan 3D 3.0 PRO (MultiView): The multi-angle version of the 3.0 Pro engine, utilizing up to four images to solve structural ambiguity in complex models.
Hunyuan 3D 3.0 PRO (Sketch): The 3.0 version of the sketch-to-3D utility, efficient at interpreting conceptual line art into 3D volumes.
Hunyuan 3D 2.1 / 2.0: Legacy image-to-3D models. These remain available for projects requiring backward compatibility or specific stylistic outputs characteristic of Tencent’s earlier generation algorithms.
Hunyuan 3D 2.0 - Multi View: A legacy multi-view generation engine that provides consistent 3D results from multiple angles based on the 2.0 reconstruction logic.
Tencent UV Unwrapping: Automates the process of flattening 3D meshes into clean, non-overlapping UV layouts. This is a critical step for ensuring that textures wrap correctly around a model without distortion. It is an essential utility for creators who need to export assets for further detailing in external tools like Substance Painter or Photoshop. The model is particularly effective on Hunyuan 3D-generated assets, handling complex geometries that would traditionally require hours of manual UV mapping.
Tencent Texture Edit: A refinement tool that allows you to modify the surface appearance of an existing 3D model using a text prompt or reference image. Because it operates specifically on the texture layer, it can completely transform the look of an object, changing its material or color, without altering the underlying mesh geometry. It is tightly integrated with the Hunyuan 3D ecosystem and supports full PBR output, including base color, metallic, roughness, and normal maps for realistic material rendering.
Rodin Hyper3D (Gen-1, Gen-2)
Rodin is Scenario’s 3D model generation suite designed for fast, flexible, and high-quality asset creation. It supports both Image-to-3D and Text-to-3D workflows, allowing users to generate 3D models from images or prompts. Rodin offers different generation modes - Sketch, Regular, Detail, and Smooth - each tailored for specific levels of detail, poly count, and texture resolution. It’s especially well-suited for game-ready assets, character modeling, or rapid prototyping.
Meshy Suite

The Meshy suite provides a powerful set of tools for creating production-ready assets with a focus on high-quality textures and optimized geometry.
Meshy Image-to-3D: Transforms any 2D image into a detailed 3D mesh while preserving the visual style of the source. It supports PBR (Physically Based Rendering) materials, including base color, metallic, roughness, and normal maps.
Meshy Text-to-3D: Generates complex 3D objects from natural language prompts. It is ideal for rapid concepting of characters and props.
Meshy Retexture: Allows you to refresh the surface of an existing 3D model. You can apply entirely new styles using a text prompt or reference image without altering the underlying geometry.
Meshy Remesh: A specialized optimization tool that refines generated meshes. It can convert geometry into clean Quad topology for animation or Triangle meshes for game engines, while allowing you to set a specific Target Polycount for performance.
Meshy Rigging: Automatically generates an internal skeletal structure (bones) and skin weights for 3D characters. This prepares models for immediate animation by defining how the mesh deforms during movement, eliminating the need for hours of manual joint placement and weight painting.
PartCrafter
PartCrafter is the first open-source, image-to-3D generative model that transforms a single RGB image into 2–16 separate 3D meshes, semantically meaningful, all in one step. It can produces explicit meshes suitable for further editing, animation, or 3D printing - no segmentation or manual intervention required.
Unlike existing “single-block” AI mesh generators, PartCrafter separates your input object into defined components it can recognize (such as arms, wheels, panels, etc). These parts are cleanly segmented, each with its own geometry.
PartCrafter empowers 3D creators to generate modular, editable 3D assets directly from images, streamlining workflows for game development, animation, and design.
Trellis (1 and 2)
The Trellis 2 model represents a major advancement in Microsoft’s 3D generative suite, utilizing a powerful 4B parameter model and a native 3D VAE. By employing a two-stage Diffusion Transformer (DiT) pipeline with 16x spatial compression, it produces high-resolution PBR assets at 1536³ resolution with full material maps.
Advanced Topology Support: This architecture is designed to handle complex topologies, including challenging elements like open surfaces and transparent materials.
Structural Versatility: Trellis 2 prioritizes structural flexibility, making it highly effective for creating stylized characters or complex environmental props with arbitrary geometry from diverse reference inputs.
While Trellis 2 is the latest flagship, the original Trellis model—built on Microsoft's Structured LATent (SLAT) architecture—remains a capable option for creating stylized assets and generating models from multiple images.
Direct3D-S2
Developed by NJU-3DV, Direct3D-S2 is a scalable 3D generation framework based on sparse volumes that utilizes Spatial Sparse Attention (SSA) for efficient high-resolution generation. This model can generate detailed 3D models at 1024³ resolution using significantly fewer computational resources than traditional volumetric approaches.
Sparc3D (1.0 and 2.0)
Developed by Math Magic and researchers from Nanyang Technological University and Imperial College London, Sparc3D 2.0 represents a massive leap in generative 3D fidelity. By utilizing the novel Sparcubes mesh processing and the Sparconv-VAE engine, this generation delivers near-lossless 3D reconstruction with a 3x speedup and 4x faster convergence over previous methods.
Sparc3D 2.0 (General): An advanced Image-to-3D model that transforms 1 to 4 images into high-fidelity, watertight meshes of objects, props, and environments. It supports professional-grade resolutions up to 1536³ Pro and polycounts reaching 2,000,000 faces, making it ideal for the most demanding production pipelines.
Sparc3D 2.0 (Portrait): A specialized variant engineered specifically for human subjects. It prioritizes facial coherence and volume stability to reconstruct clean, watertight head models with superior anatomical accuracy compared to general-purpose models.
Note: While the 2.0 suite is recommended for professional high-fidelity assets, the original Sparc3D models remain available for rapid prototyping and standard-resolution tasks where lower computational overhead is required.
Voxel Crafter 1.0
Voxel Crafter 1.0 is Scenario’s specialized 3D model that transforms text descriptions or 2D reference images into stylized voxel art. Unlike models focused on photorealism, Voxel Crafter is optimized for the blocky, grid-based aesthetic popular in games like Minecraft, The Sandbox, and MagicaVoxel.
SAM3D Suite
The SAM3D family by Meta provides a modular pipeline to reconstruct objects and human subjects from 2D images into structured 3D environments.
SAM3D Objects: Extracts specific items (e.g., "desk lamp") into watertight 3D geometry, significantly reducing manual modeling time. It supports Point and Box prompts for precise asset isolation.
SAM3D Human Body: Reconstructs standardized 3D anatomical meshes rather than exact likenesses, serving as high-quality foundations for visualization or animation. It can output combined group models or individual files for each person detected.
SAM3D Align: An integration model that combines body meshes and object props into a cohesive 3D scene. It aligns assets in a shared 3D space to maintain original spatial relationships and uses Focal Length settings to match the source photo's perspective.
Step-by-Step Generation Process
Step 1: Access Generate 3D page
You can launch 3D Generation in different ways:
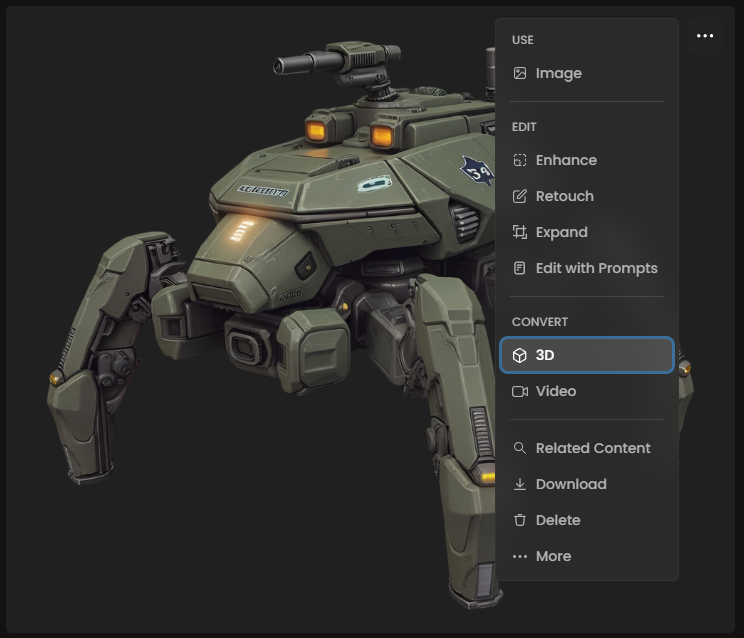
From existing images: Open any image in your Scenario gallery, click the three-dot menu, and select "Convert to 3D"
From main menu: Navigate to "3D" in the main “Create” menu to open the interface, and start uploading new images
Step 2: Select Your Generative Model
The interface loads with a default AI model. Click the model name in the top-left corner to browse available options based on your goal:
Flagship Quality: Choose Hunyuan 3.0 (Pro) for the highest modeling accuracy or Tripo 2.5 for photorealistic detail.
Multi-View Accuracy: Select Hunyuan 3.0 (MultiView) or Tripo 2.5 (Multiview) if you have multiple angles of your object to ensure geometric symmetry.
Stylized Art: Use Voxel Crafter 1.0 for grid-based assets or Trellis for stylized, Microsoft-architecture-based outputs.
Human Faces: Choose Sparc3D (Portrait) for high-precision head and expression reconstruction.
Step 3: Configure Input Images
For single-view models, your selected image appears in the input area. For multi-view models like Hunyuan Multi-View, you'll see options to add additional images on the left side of the interface.

When using multi-view:
Ensure all images show the same object with the same proportion
Include different angles (front, left side, right side, and back)
Maintain consistent lighting across images
Keep the images in the correct orientation
Step 4: Adjust Generation Settings
Configure the parameters based on your requirements:
Step Count: Start with 30 for balanced results, test and adjust as needed
Face Count: Choose based on your intended use (20k-60k for most applications)
Guidance: Begin with 5 for optimal balance before testing incrementaly
Step 5: Generate Your 3D Model
Click "Generate" to begin. Processing time depends on model complexity (e.g., Hunyuan 3.0 handles massive voxel counts), step settings, and server load (especially for initializing the model if it’s “cold”)
Step 6: Review and Inspect
Once complete, use the built-in 3D viewer to:
Orbit, zoom, and pan around the model.
Toggle wireframe to check the geometry structure.
Step 7: Refine and Optimize
Don't settle for the first result. Use specialized tools to improve your model's quality:
Optimize Topology: Use Meshy Remesh to convert messy geometry into clean Quad topology for professional animation or optimized Triangle meshes for game performance.
Enhance Surface: Use Meshy Retexture to refresh the visual style or materials without changing the base shape.
Segment Parts: If your model has complex components (like a robot with limbs), use Hunyuan 3D Part or PartCrafter to separate the mesh into modular, editable pieces.
Step 8: AI Rigging (For Characters)
If you are creating a character or a creature that needs to move:
Select Meshy Rigging to automatically generate a skeletal structure (bones).
The AI will assign skin weights, allowing the mesh to deform naturally when animated in external software.
Step 9: Download and Export
When satisfied, download your model in the format that fits your pipeline:
GLB: Recommended for web, mobile AR, and quick viewing (includes geometry and textures in one file).
OBJ: Traditional format with separate texture maps, widely supported across all 3D software.
Best Practices for Optimal Results
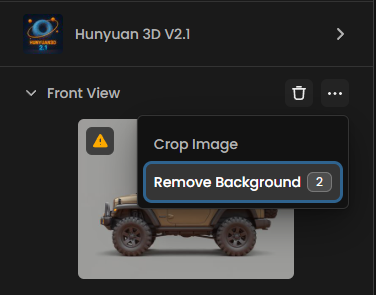
Remove Backgrounds
Background elements can confuse the 3D reconstruction process, leading to unwanted geometry or texture artifacts. Clean, isolated subjects produce significantly better results than images with complex backgrounds. Even when your image appears to have a simple background, removing it entirely helps the model focus on the primary object.
Implementation: Use Scenario's built-in background removal tool directly from the 3D generation interface, or prepare your images beforehand using Scenario's Remove Background feature.
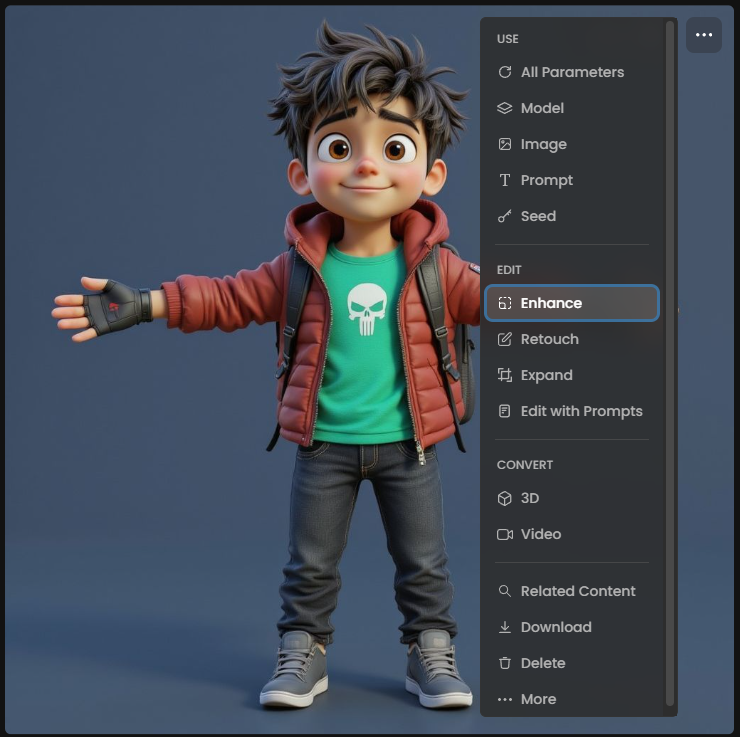
Upscale Input Images
Increasing your input image resolution to 2x or 4x the original size often dramatically improves texture quality in the final 3D model.Higher resolution inputs provide more texture detail for the model to work with during the texture synthesis stage. This is particularly important because 3D models need to maintain visual quality when viewed from multiple angles and distances.
Recommendation: Use Scenario's Enhance tool before converting to 3D, especially for images smaller than 1024x1024 pixels.
Optimize Image Characteristics
Certain image qualities consistently produce better 3D reconstruction results:
Clean, stylized artwork: Images that already resemble 3D or cel-shaded artwork convert more successfully than rough sketches or ultra-detailed realistic photos
Clear object boundaries: Well-defined edges help the model distinguish between the object and background
Consistent lighting: Avoid images with extreme shadows or multiple light sources that might confuse depth perception
Single, prominent subject: Images focusing on one main object work better than complex scenes with multiple elements
Understanding Output Limitations
Topology Considerations
AI-generated 3D models typically require retopology for production use in animation or game development, as initial outputs prioritize visual accuracy over optimal edge flow for deformation.
While many base generation tools don't (yet) produce clean, quad-based topology natively, specialized models like Tripo Retopology and Meshy Remesh are now available to automate the remeshing process. Plan to integrate these workflows if your assets need to be technically sound for professional rigging or high-end animation.
Texture Mapping
Generated models include UV mapping, but the layout may not follow traditional texturing conventions. For projects requiring custom texture work, you can now automate the creation of clean, non-overlapping layouts using the Tencent UV Unwrapping model.
File Size Management
Higher face counts create more detailed models but significantly increase file sizes. Consider your target platform's constraints:
Mobile/VR: Keep face counts under 5K for optimal performance
Desktop games: 10K-20K faces work well for most assets
Rendering/visualization: Higher face counts acceptable for non-real-time use
Integration with Scenario Workflows
Custom Model Integration
Image-to-3D works seamlessly with Scenario's custom-trained models. Generate images using your trained style or character models, then convert them to 3D to maintain visual consistency across your asset pipeline.
Workflow example: Train a style model for your game's art direction → Generate character or prop images → Convert to 3D models → Export for use in your 3D software

3D Apps & Workflows
For a professional-grade 3D pipeline, Scenario offers a suite of specialized workflow apps designed to bridge the gap between initial concepts and engine-ready assets. These tools automate the most time-consuming aspects of 3D production, from consistent views to final rigging.
Asset Generation & Turnarounds
Turnaround Studio: A dedicated workflow to generate a full rotation of your character or object, ensuring all sides match the original design.
Make Precise 4-Pose Turnarounds: Specifically optimized to create clean front, back, and side views (T-pose or A-pose). These are perfect for Multi-view models like Hunyuan 3.1 PRO or Tripo P1 Multi View.
Game 3D Assets - Concept to 3D Model: Turn text prompts and style references into high-quality 3D game assets in seconds.
Game Assets - Concept to 3D Model (Multiview): Transform a single 2D concept into a complete 3D model with consistent multiview perspectives for higher structural accuracy.
Optimization & Technical Finishing
Optimize 3D Model: A comprehensive "all-in-one" workflow to Retopologize, Unwrap, and Texture your model for production use.
Retopologize 3D Model: Instantly convert high-poly, unorganized meshes into clean, optimized 3D topology suitable for animation.
Smart UV Unwrapping: Skip the manual labor with AI-generated UV maps that are efficient, non-overlapping, and ready for painting.
3D Model Texturing: Apply high-quality, PBR-ready textures directly to your optimized models based on your artistic direction.
Rigging & Prototyping
3D Model Auto-Rigging (Biped): Instantly generate professional bone skeletons and skin weights for any 3D bipedal model using AI-driven mapping.
Image to Rigged Low Poly Character: Transforms 2D character art into an optimized 3D asset. This app interprets character proportions and textures to deliver a model ready for game engines and prototyping, skipping the manual modeling phase entirely.
Generate Multi-View using Edit with Prompts
If you have a single image and need more reference angles, you can use the Edit with Prompts tool to manually expand your asset library.
Advanced Models: Use Gemini 3.1 or Seedream 5.0 Lite within the editor to describe and generate missing angles (e.g., "rear view of the same character") while maintaining style consistency.
Flux Kontext (Character Turnaround): Utilize the specialized Character Turnaround model in the editing interface to automatically project your character into 3 different poses and views, ensuring the 3D modeler has enough visual data to build a watertight mesh.
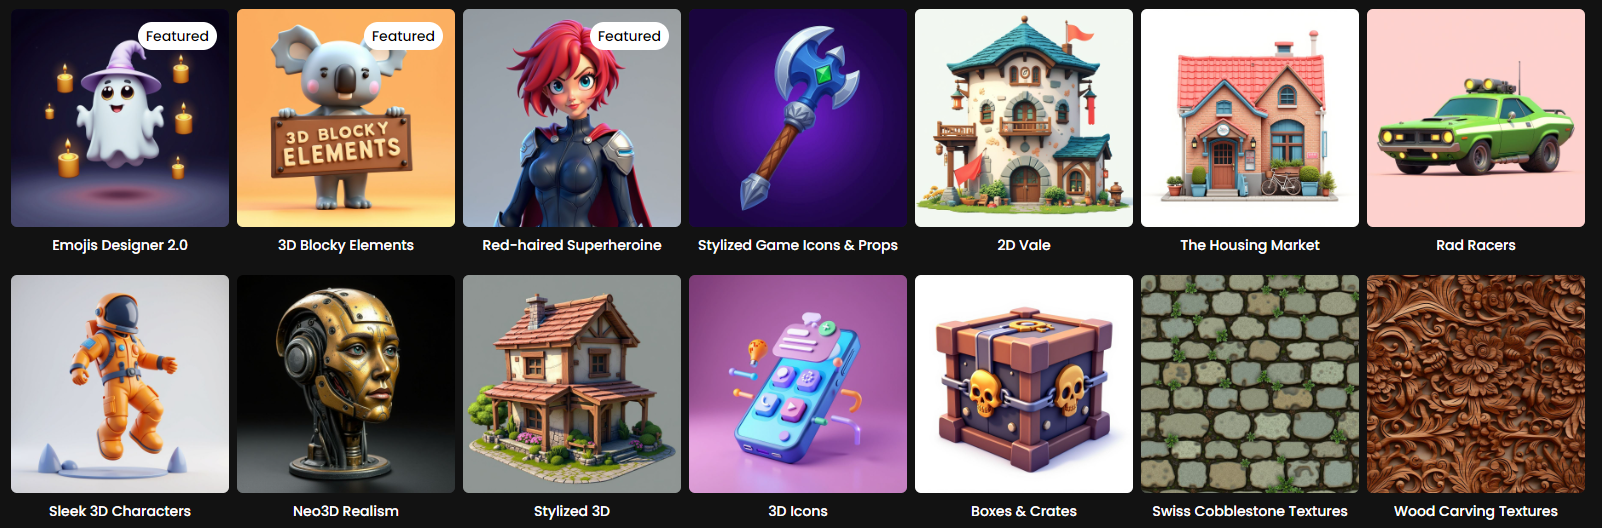
Specialized Starting Models
Scenario provides several image generation models optimized for 3D conversion:
Cartoon Characters 2.0: Generates high quality characters in 3D style.
3D Blocky Elements: Creates images with clear geometric forms ideal for 3D reconstruction
Toy Box: Generates toy-like objects with simple, clean shapes
Neo3D Realism: Produces realistic objects with good depth cues for 3D conversion
Stylized 3D: Generates detailed 3D-style renders with a distinct stylized aesthetic.
and many more, including foundation models like Flux, GPT Image, and more
Asset Organization
Generated 3D models integrate with Scenario's content management system. Use Collections to organize your 3D assets alongside their source images, and apply Tags for easy retrieval in larger projects.
Quality Expectations
Image-to-3D is great for creating visually convincing 3D models for concept work, prototyping, and assets viewed from limited angles. For hero assets requiring close inspection or animation, consider the generated model as a starting point for further refinement.
Future Developments
Image-to-3D capabilities continue evolving rapidly. Upcoming improvements include enhanced mesh quality, better texture resolution support, and expanded model options. Check Scenario's product updates and Knowledge Base for the latest features and best practices.