Image Generation Basics
Last updated: April 23, 2026
Introducing the Image Generation Interface
The Image Generation interface (link) is the primary tool for creating images and content in Scenario. It’s built to generate consistent visuals through a structured approach using models, prompts, or reference images.
You can generate inferences (the process of creating images) by selecting models, prompts, reference images, and settings, adjusting parameters in the right column. Once generated, the results appear on the left, where you can refine their display and iterate further. Here’s how it works.
Access Image Generation - Choose one of three ways:
In the Scenario web app, open the left panel, select “Images“, and click “New”.
From the Image gallery, click “Generate Images“ (top right). For both option 1 and 2, you’ll have to pick a model to proceed.
On a model page, hit “Use this model” > “Generate” to load the interface with that model ready.
Interface Overview
Inference Panel (left)
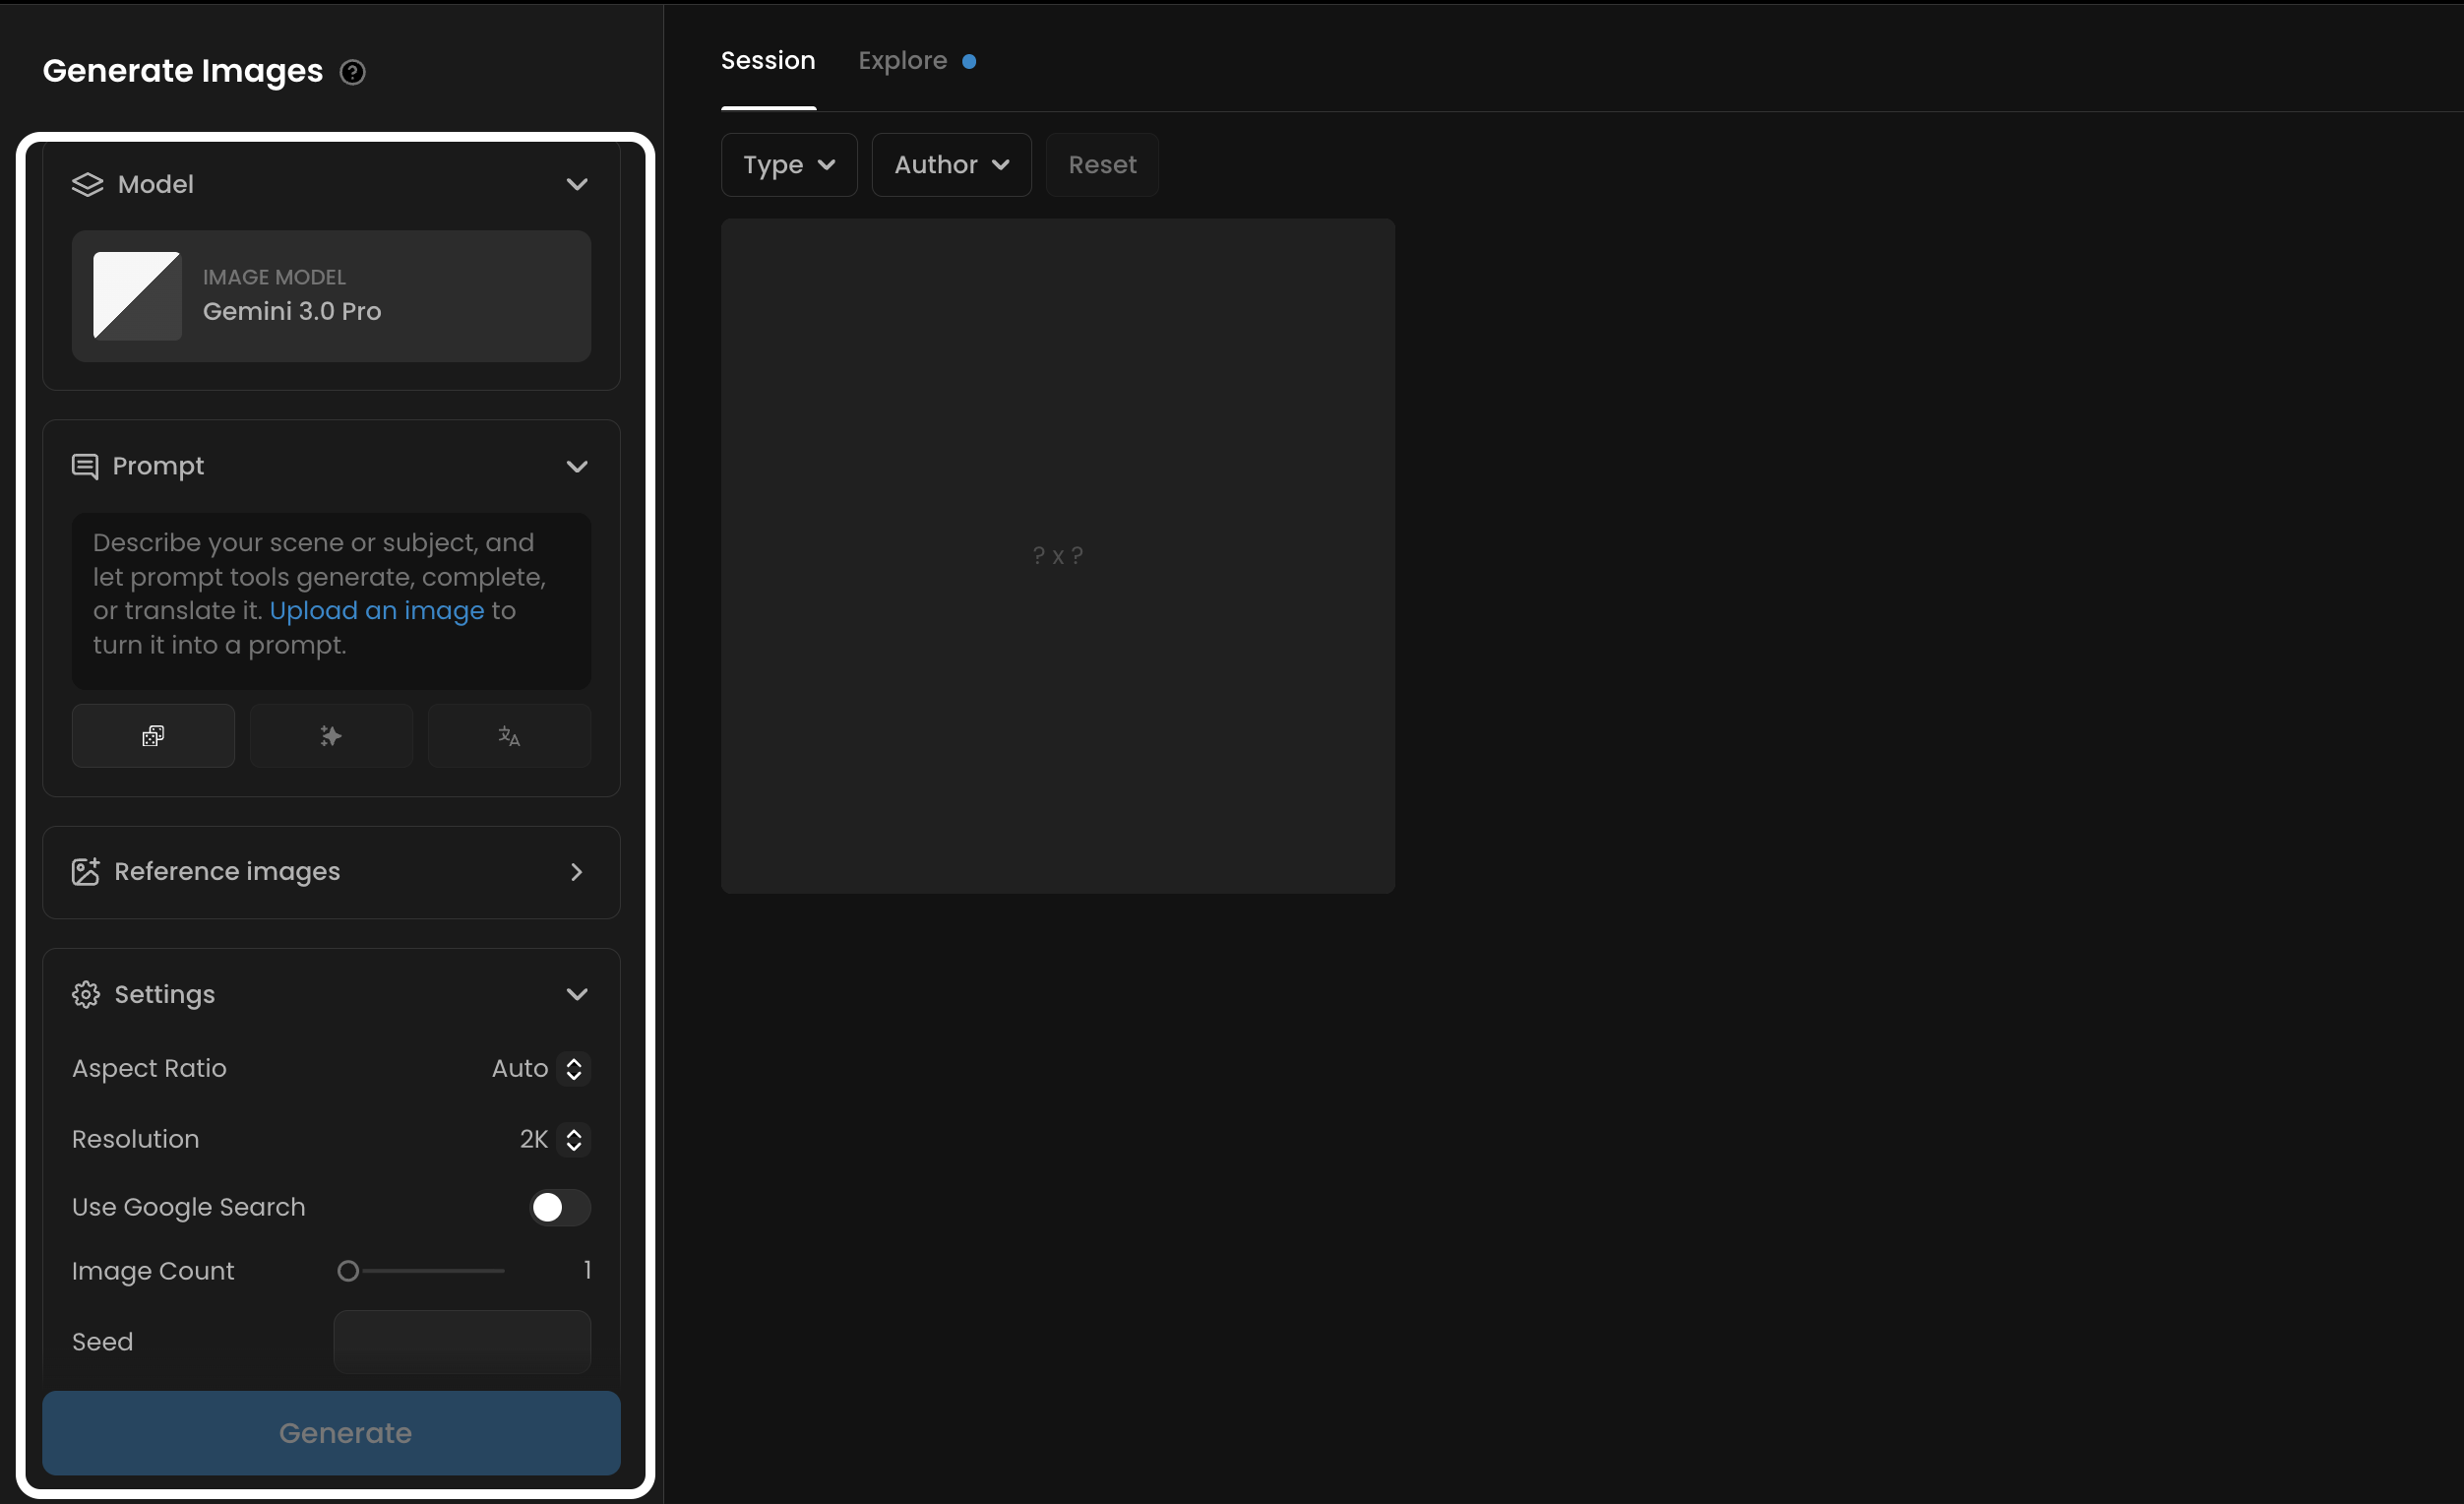
The inference panel is where you configure and adjust all the parameters for your generation before starting the process. Here’s a breakdown of its elements, from top to bottom:
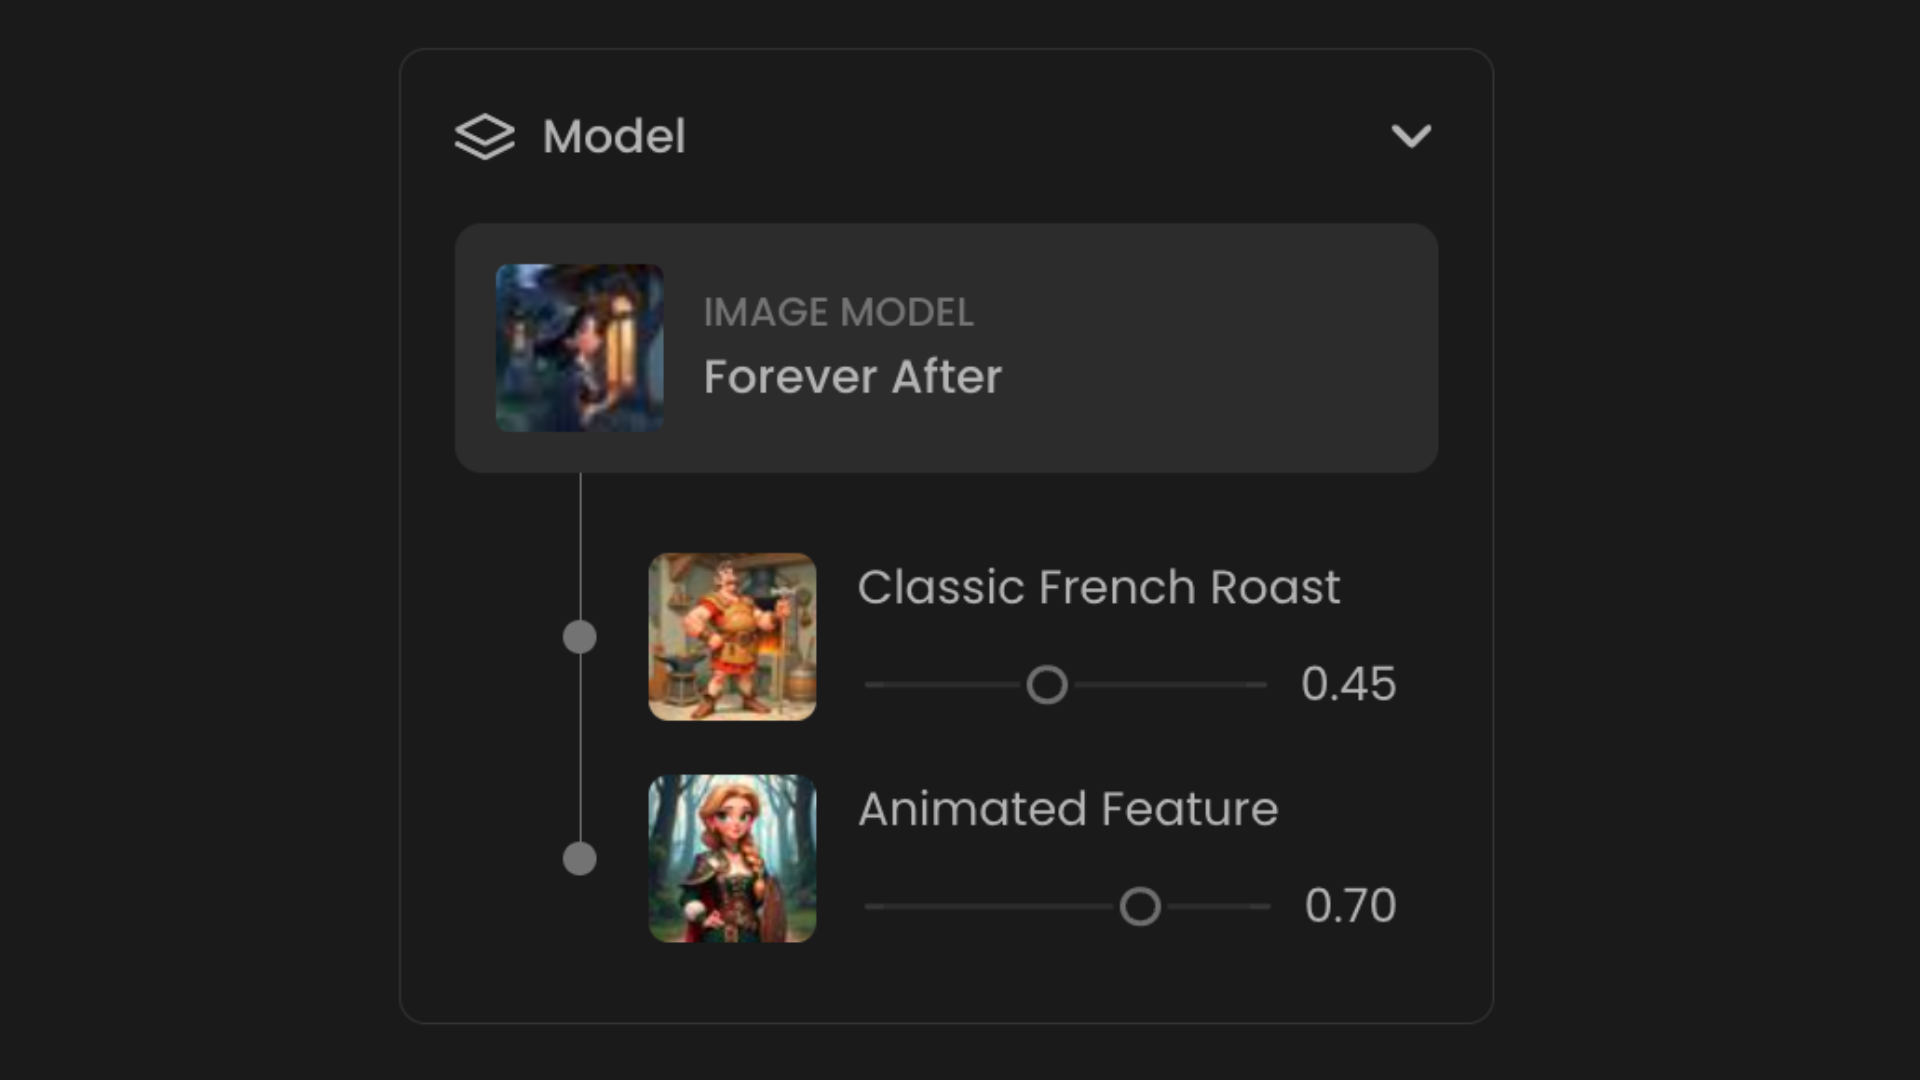
1 - Model
Every inference requires a model, either a “base model” like Imagen 4 (for example), or a custom-trained model, such as a LoRA or multi-LoRA tailored to specific styles or subjects.
Opening the model menu brings up a modal with a list of available models, along with filters to help you browse or search for the right one. For more details on selecting or creating models, refer to the Models section in the Knowledge Base.
When using a multi-LoRA, you can adjust the influence of each individual LoRA component under the Model Components section. If using a single-LoRA, only that specific LoRA will be displayed.
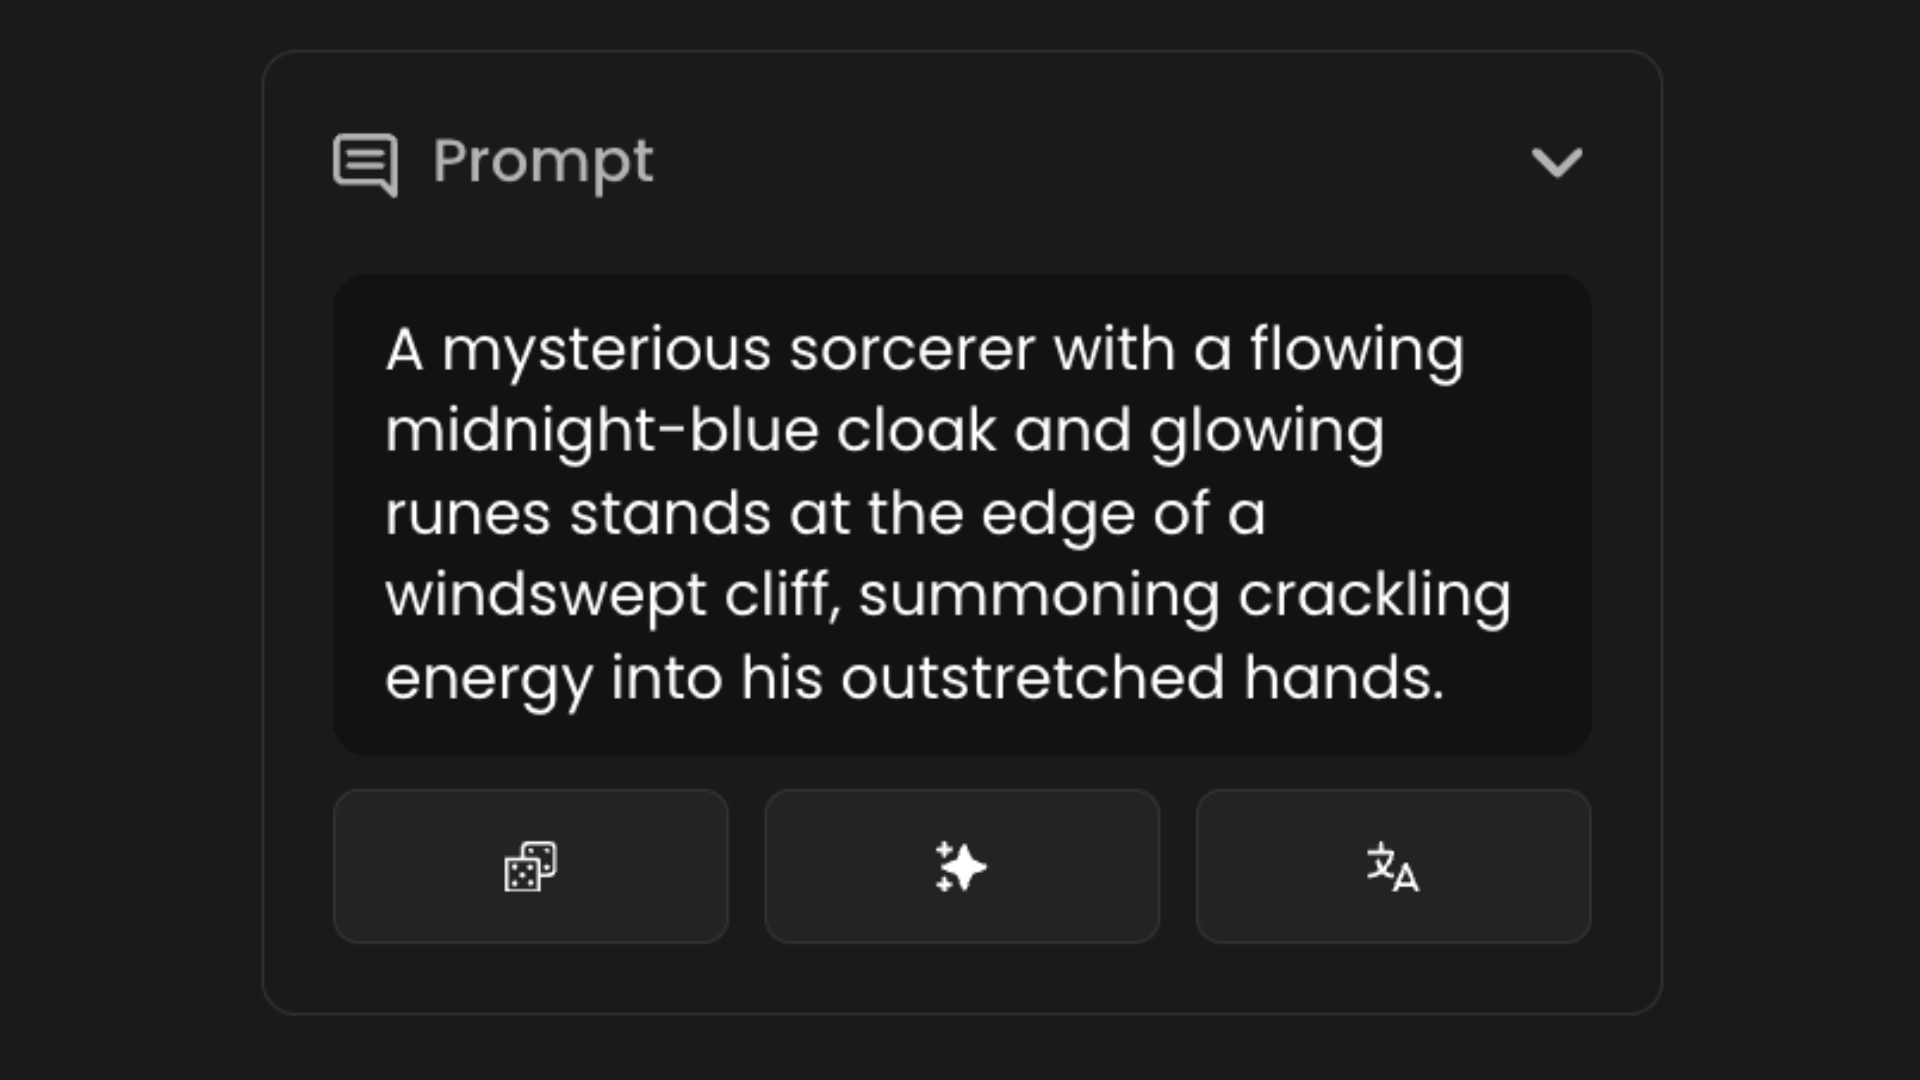
2 - Prompt
The prompt is your description of the content you want to generate and serves as a key tool for guiding the model. Depending on the model, prompts can be either brief or highly detailed. Since different models will interpret the same prompt in varying ways, it's important to tailor your input per the model, for the best results.
Scenario provides a suite of interactive tools to help you craft effective instructions.
Generate (Dice Icon): Use this to generate a completely new, solid prompt from scratch that is specifically tailored to the model you are currently using.
Prompt Spark (Stars Icon): This tool helps you expand on a few initial words or basic ideas to create a more detailed and descriptive prompt.
Translate (A/Language Icon): This allows you to translate a prompt from any language into English before refining it for generation.
Learn more about these features here.
3 - Reference Images
Beyond prompts, you can guide the AI further by uploading reference images. Different modes extract specific features from these reference images (such as the colors, depth, or style for instance). You can use one or two reference images, each with its own mode. Reference images are a very powerful tool to better guide your generations. Explore the available modes here: [3.3].
You can upload an image from your computer, choose one from your library, or sketch directly within Scenario. Alternatively, you can simply copy and paste an image from your clipboard, and it will automatically load into the menu. Once added, use the slider beneath the image to adjust its influence. Different modes may require varying influence levels to achieve the right balance between consistency and creativity.
Keep in mind that image influence is part of a set of parameters: its effect depends on the model, the prompt, and the selected settings. Adjust accordingly to find the right balance.
4 - Settings
Additional inference settings and options include:
Image Count: Select how many images to generate per inference.
Sampling Steps (also known as denoising steps) refer to the number of “passes” the AI model takes to refine and generate the image. More steps generally result in higher detail and quality, but also increase inference time. The default value provides a balanced trade-off between speed and quality.
Guidance: Controls how closely the image follows your prompt. Adjust the scale to tweak its influence.
Dimensions: Set the aspect ratio for your generated images.
Seed: A key setting that controls the randomness in image generation. It acts as a unique identifier for the generated result, ensuring that the same prompt, model, and settings will consistently produce identical images when using the same seed. Changing the seed introduces variation, allowing for different outputs while keeping other parameters unchanged.

5 - Generate
When all your parameters are set, simply hit the blue “Generate“ button to start the inference and generate your content. The total cost (in credits) is displayed on the blue button. Use Cmd/Ctrl + Enter as a faster shortcut. Press “H” to see a full list of shortcuts available in Scenario.
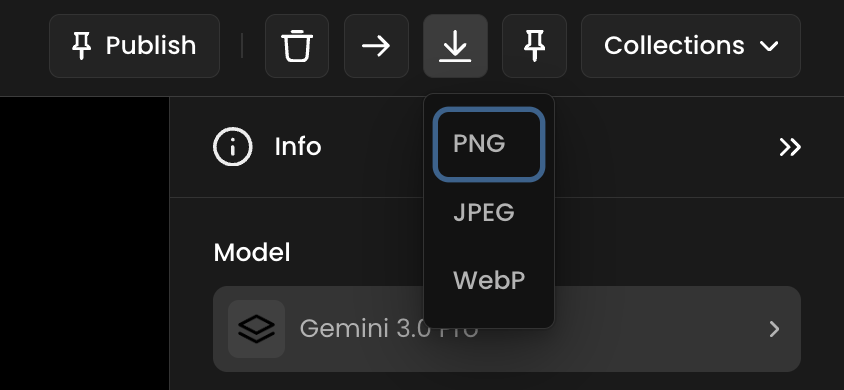
6 - Downloading your results
To save an image you generated, you have two options:
From the viewer – Click on the image thumbnail to open it in the viewer. Then click the download icon (⬇) in the top-right corner and choose the desired format (PNG, JPEG, or WebP).
From the thumbnail menu – Hover over the image thumbnail, click the three-dot menu (…), and select Download. This will download the image directly as a PNG file.
Content Panel (right)
The content panel is where your generated images appear once an inference is complete. Click on any image to enlarge it, view its generation settings, or make further edits and refinements.
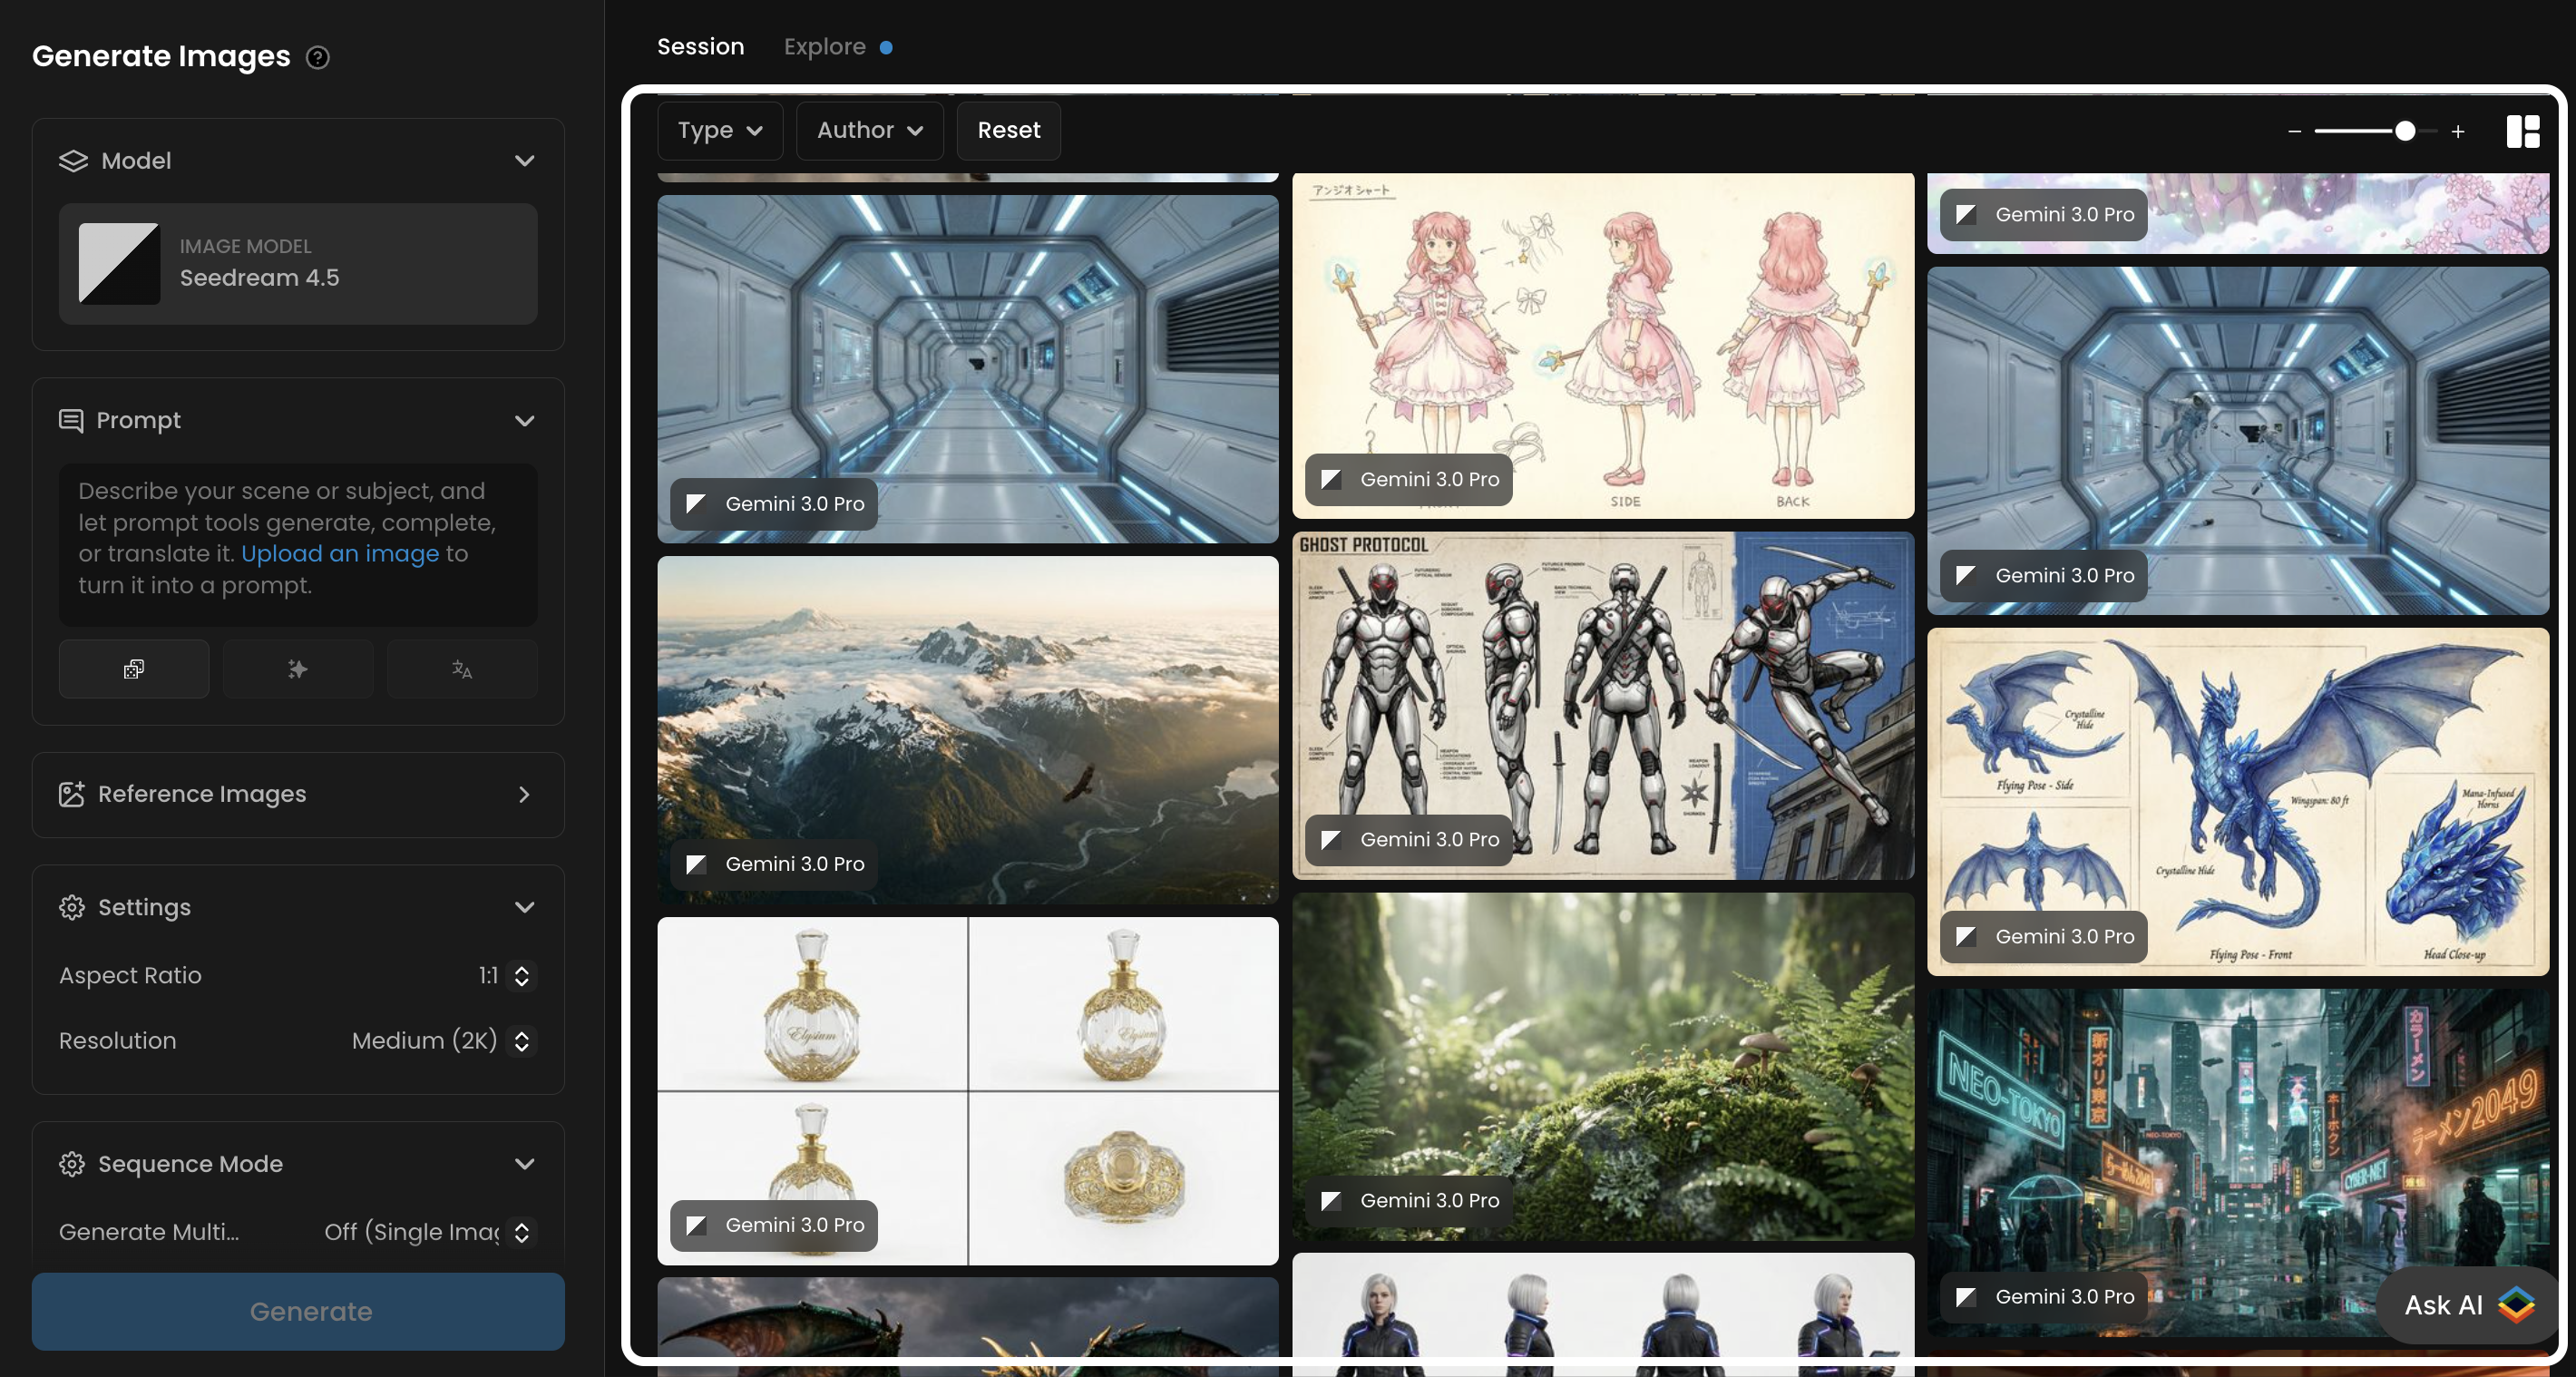
Key Features of the Content Panel:
Filters: In the top, you can customize the displayed elements, allowing you to focus on specific authors or actions, such as generated images, enhancements/upscales, background removal, and more.
Reset: This button lets you remove images from the current session without however deleting them from your library (to delete, select instead one or more images and click “Delete“).
Zoom Level: Slide to resize how many thumbnails are previewed on-screen. Or use the +/- keys as shortcuts.
“Display Alignment“ options: Choose from four modes to arrange images for easier viewing and comparison:
Masonry: Images are staggered like bricks in a wall.
Fill in Grid: Images are zoomed in to fully occupy a uniform square grid.
Fit in Grid: Images resize proportionally to fit within a square grid without cropping.
Row (by Inference): Images align in rows based on each generation.
Reuse Selected Parameters from the Content Panel
The generation interface is built for step-by-step refinement, reducing the unpredictability of relying solely on prompts. You can generate images and then instantly inspect them on the right.
To reuse elements from a previous inference, click the three dots in the top right of any generated image.
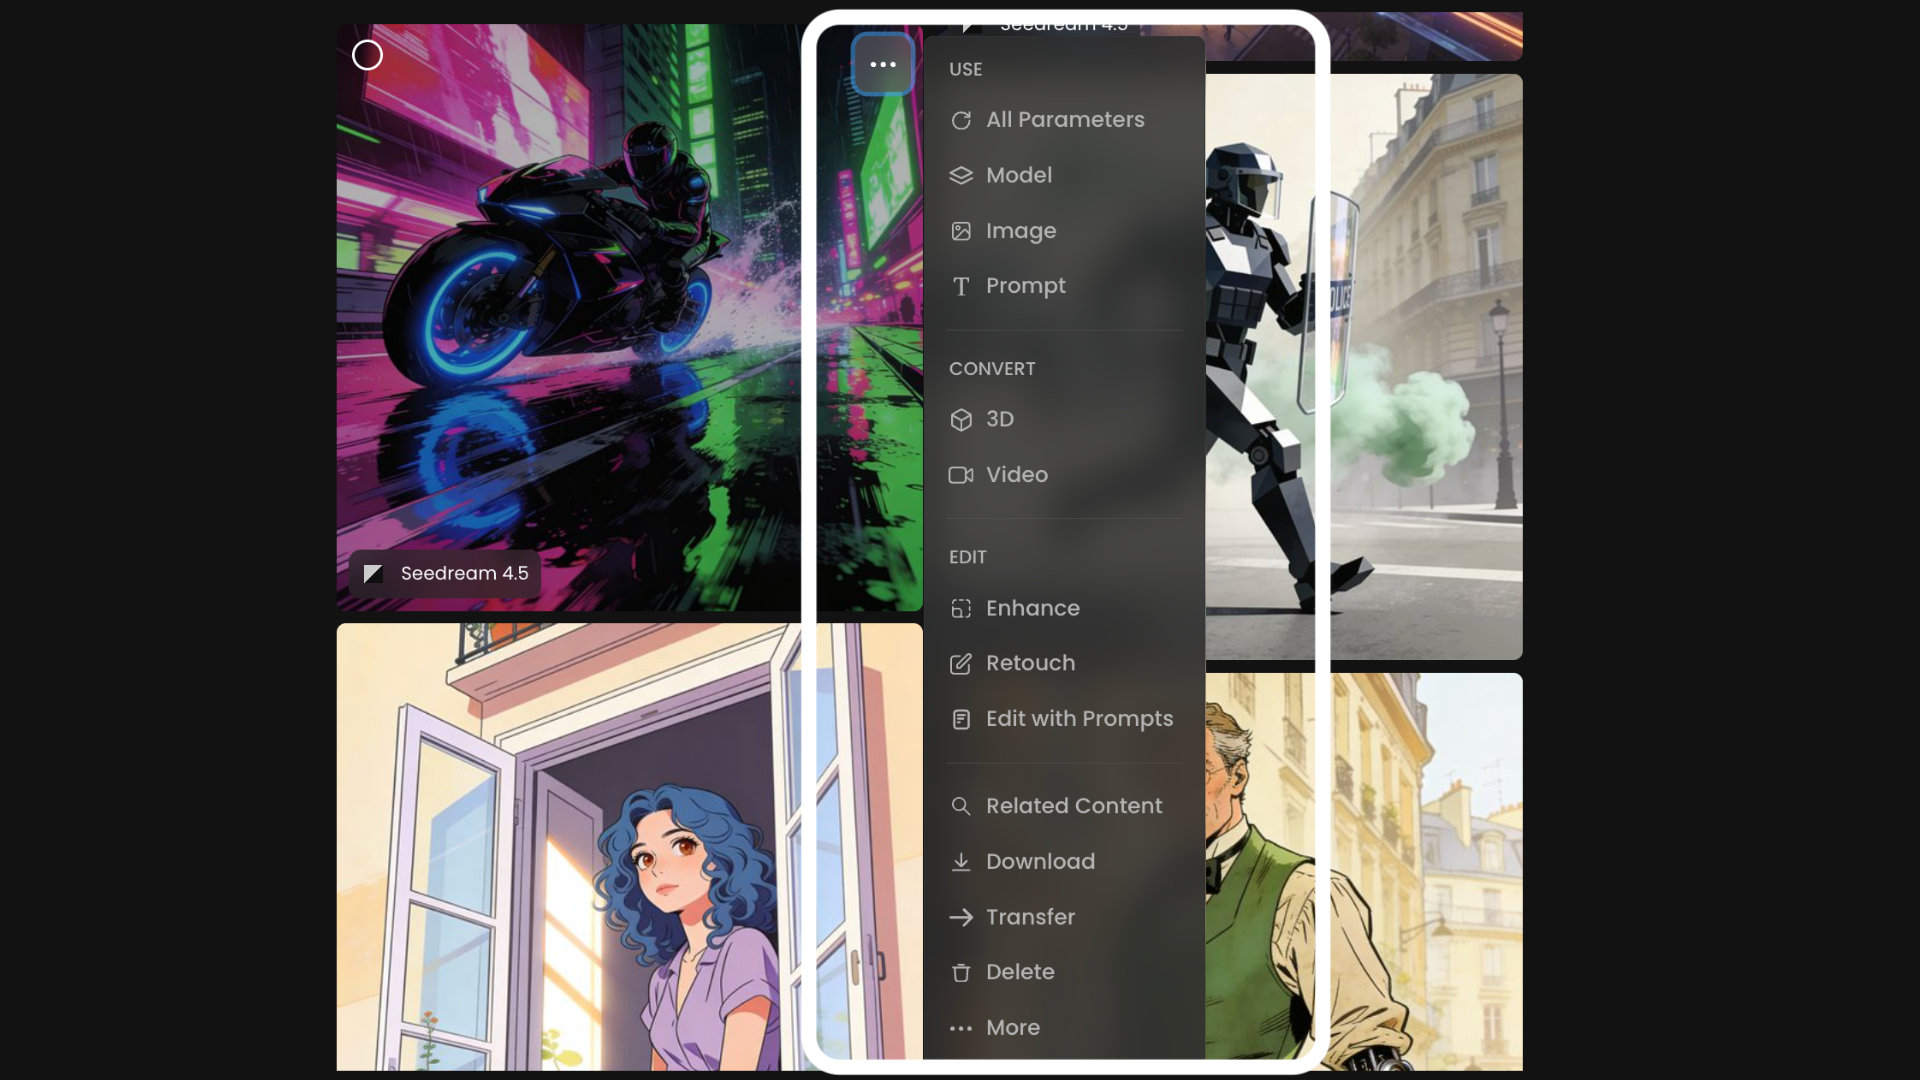
The menu is organized into specific categories:
USE
All Parameters: Reuse the full set of settings from the selected image.
Image: Use the image as a reference for a new generation.
Prompt: Copy and reuse the original prompt.
CONVERT
3D: Generate a 3D model from the image.
Video: Generate a video based on the image.
EDIT
Enhance: Improve resolution & image quality.
Retouch: Make manual, detailed adjustments (inpainting).
Expand: Extend the image beyond its original boundaries (outpainting).
Edit with Prompts: Modify the image using text instructions.
ADDITIONAL ACTIONS
Related Content: Search for similar images or variations.
Download, Transfer, Delete: Manage your asset files.
To reuse an image only, you may either select Image (under the USE section) to load it as a reference image in the left inference panel, or drag and drop the image from the content panel into the reference image menu.
Access This Feature Via API
You can utilize Scenario's API to generate images from text prompts by following these steps:
Run a Text-to-Image (txt2img) Inference: Submit a text prompt to create an image.
Retrieve Inference Results: Obtain the generated images from your inference request.
Resources:
Run a txt2img Inference and Retrieve Results: Text to Image
Text-to-Image Inference Endpoint: Scenario API Documentation - POST /txt2img/inferences