Texture Generation Basics
Last updated: April 9, 2026
This guide explains how to create seamless textures using Scenario, a powerful tool for generating high-quality materials. Seamless textures ensure visually consistent surfaces in games, animations, architectural renders, and digital art. Scenario simplifies the process, allowing you to design new textures or refine existing ones with precision.

How to access Texture Generation
There are two ways to access the texture generation tool:
Log in to app.scenario.com, navigate to the left panel and click on "Textures" > "+New".
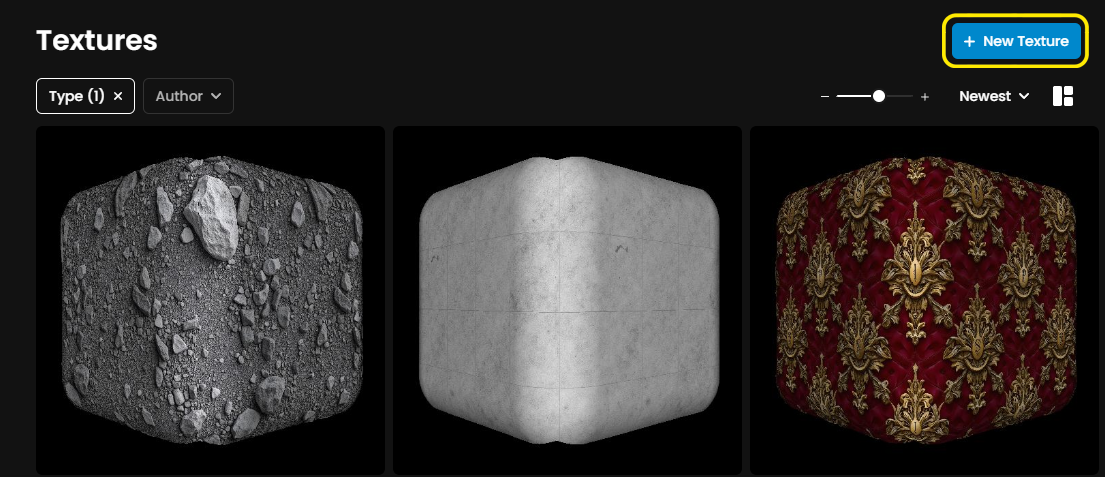
Through the Texture Gallery, clicking on the blue "+ New Texture" button in the top right corner.
Exploring the Texture Generation Interface
The texture generation interface has three main areas:

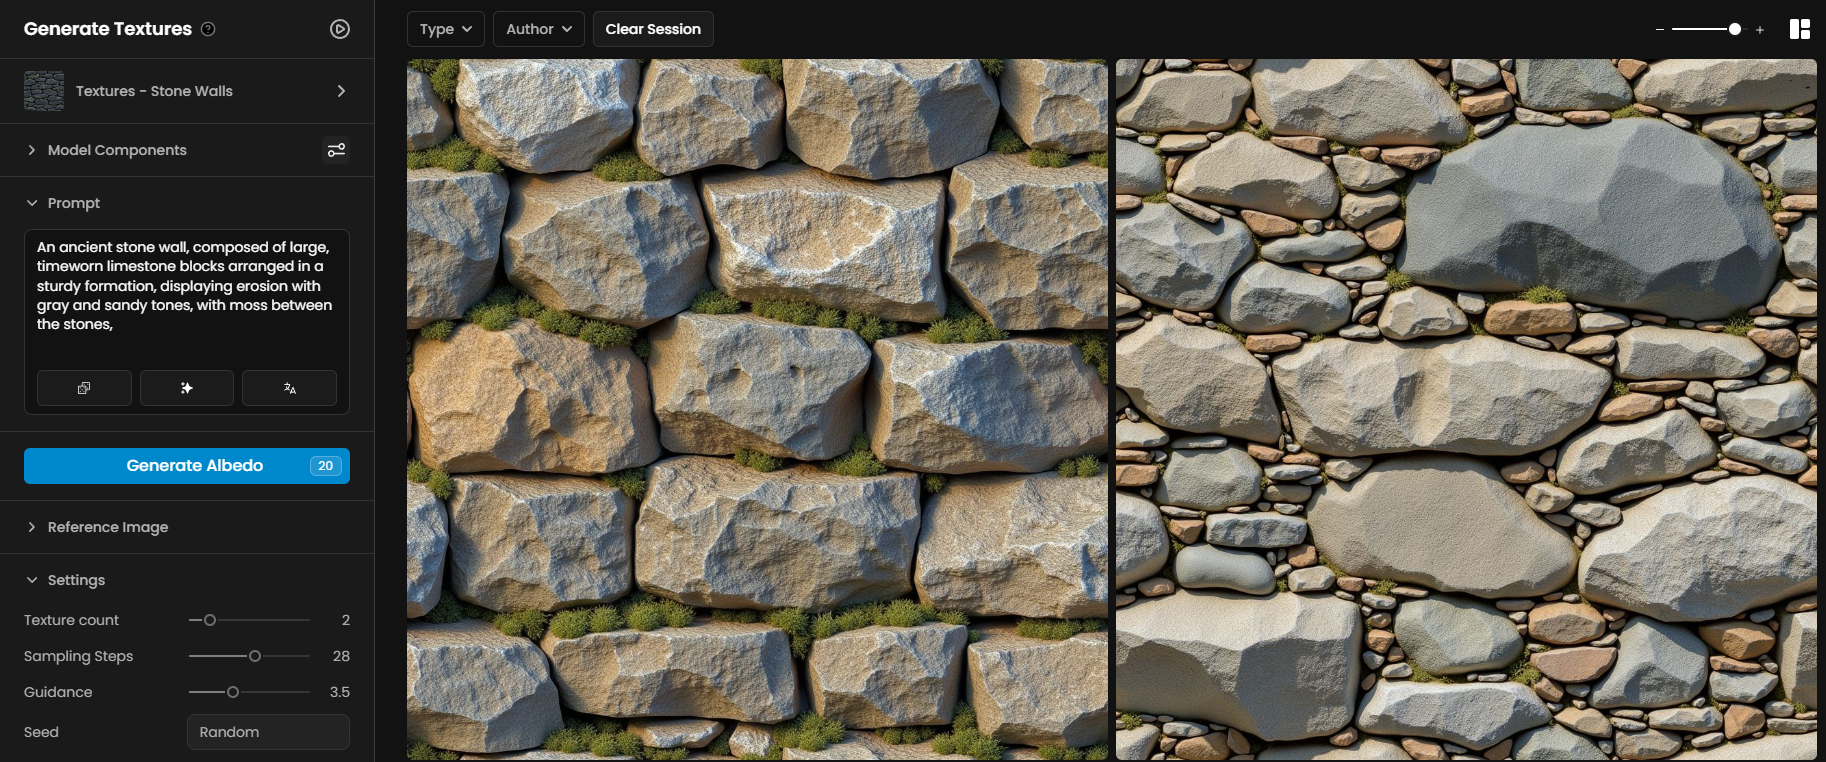
A) Model Selection
Located in the top left corner, this dropdown allows you to choose a specific model for texture creation, such as Realistic Textures 2.0.
B) Prompt and Prompt Tools
Just below the model selection, this section is where you'll describe your texture and use Scenario's prompt tools to refine it.
C) Settings
On the bottom left, this section lets you adjust generation parameters like texture count and sampling steps for precise control.
How to generate textures
Step 1: Choose a Texture Model
Start by selecting a model optimized for textures:
Available Models: Scenario offers specialized models for specific patterns, like wooden floors, stone walls, and terracotta roofs. You'll also find style-focused options such as Realistic Textures 2.0 for lifelike details and Lineart Textures for designs with defined outlines.
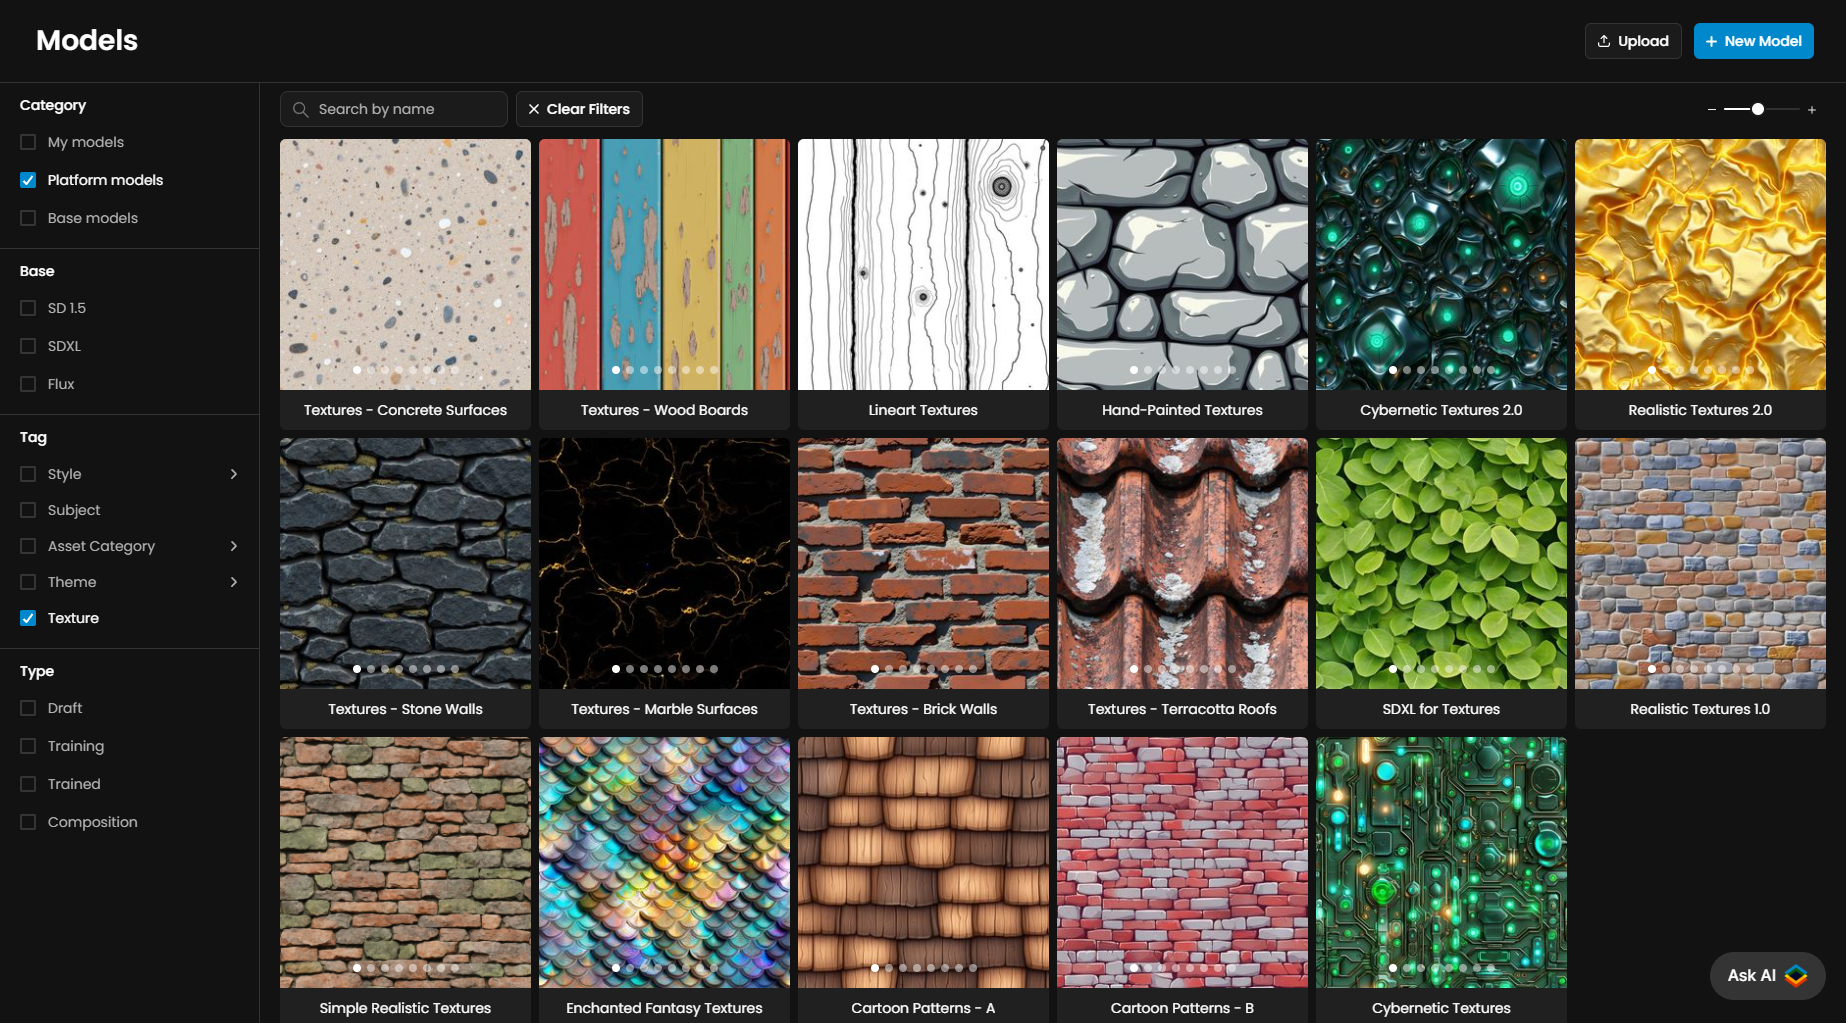
Custom Models: For a truly unique style, you can train your own texture model by uploading 10-50 images that reflect your desired look. Tag it with "Texture" after training to use it in the Generate Textures screen.
Step 2: Craft a Prompt
Enter a detailed prompt in the text box, such as: "An ancient stone wall, composed of large, timeworn limestone blocks arranged in a sturdy formation, displaying erosion with gray and sandy tones, with moss between the stones".
Use the Prompt Spark tools (icons below the prompt box) to:
Generate new prompt ideas
Expand short descriptions into detailed ones
Translate prompts into English
Upload an image to convert into a prompt
Tip: Keep prompts specific but concise. Focus on materials and key details for accurate results.
Example (Wall): An ancient stone wall, composed of large, timeworn limestone blocks arranged in a sturdy formation, displaying erosion with gray and sandy tones, with moss between the stones
Step 3: Adjust Settings
Texture Count: Set to 4 by default, this determines how many texture variations the AI generates at once. Adjust between 1-8 based on your needs.
Sampling Steps: Defaults to 28 for Flux models. Increase for more intricate details or lower for faster results.
Guidance: Set at 3.5 by default for Flux and 6 for Stable Diffusion. This controls how closely the AI follows your prompt. Increase to 5 for tighter adherence or lower to 3 for more creativity for Flux. For SDXL, keep values between 6 and 12.
Seed: Leave as "Random" for varied outputs, or set a specific value to replicate results.
Tip: Start with default settings and make incremental adjustments.
Step 4: Generate the Albedo Map
Create your base texture: After adjusting all parameters, press "Generate Albedo" to generate the texture.
Preview your generated textures: Once your albedo map is generated, use the 3D Viewer to evaluate your texture's appearance and seamlessness:
Open the 3D viewer: Click on any result to open it in the 3D Viewer, which displays your texture applied to a 3D object.

Adjust your Display Settings (A):
Tiling: Controls how often the texture repeats on the surface.
Geometry: Switch between shapes like Sphere (default), Plane, Cube or Cylinder.
Metallic, Roughness, Env Intensity, AO Intensity: Adjust these sliders to simulate material properties and lighting effects.
Environment and Background: Change the environment to test how your texture looks under various lighting setups.
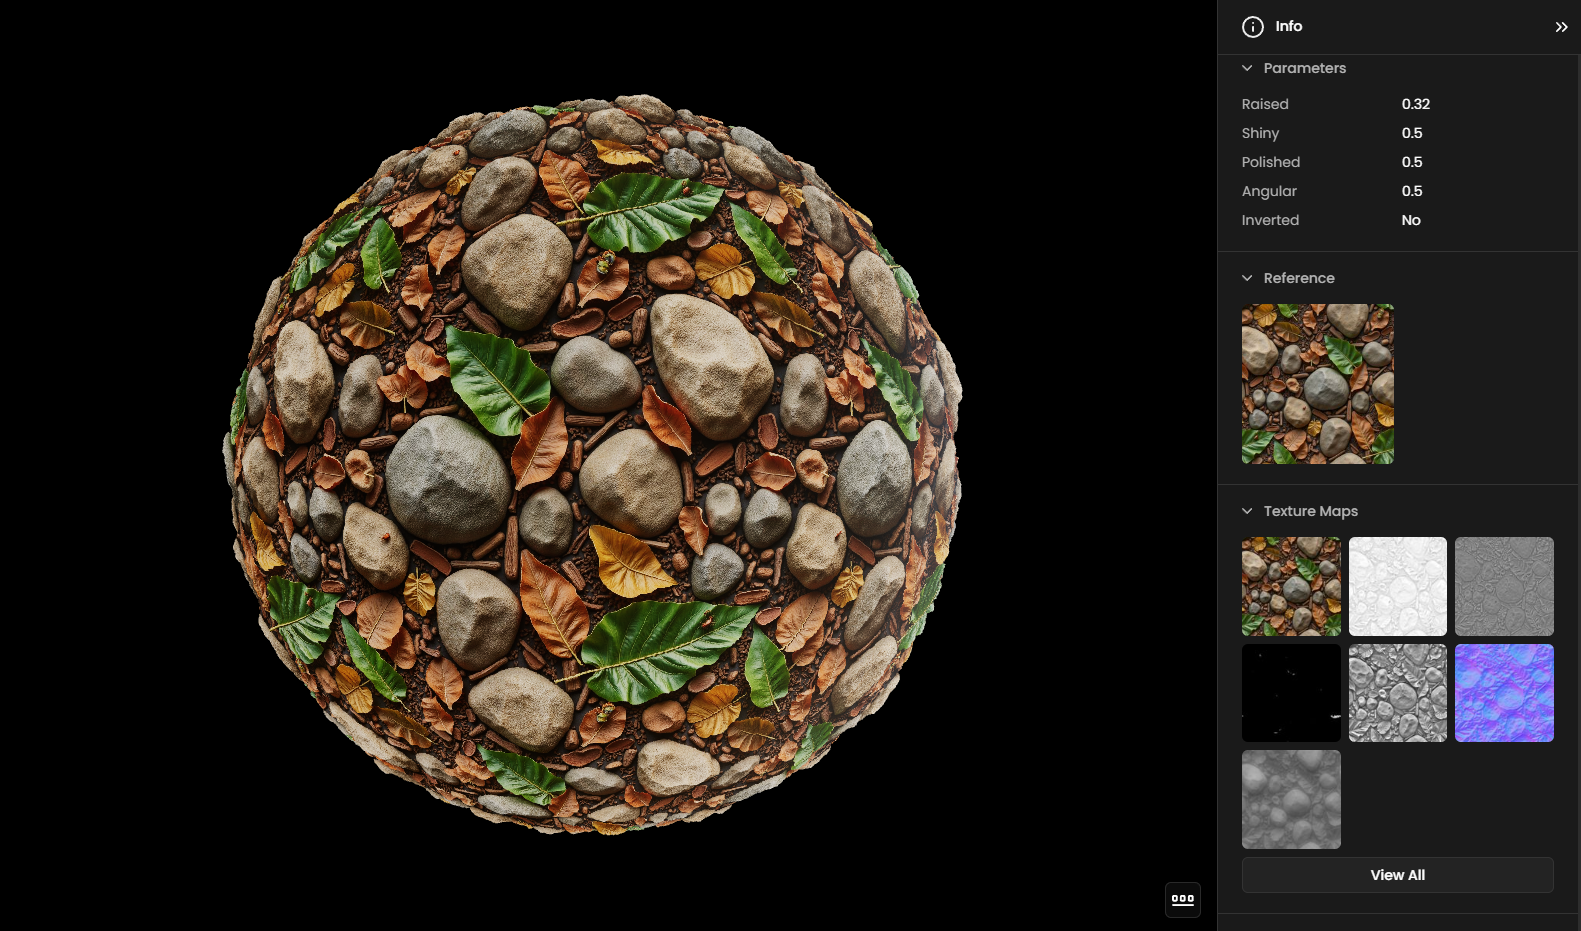
Adjust your Texture Maps Settings (B):
Raised: Controls height and elevation for depth.
Shiny: Adjusts the surface sheen.
Polished: Smooths the texture's finish.
Angular: Sharpens edges for crisper details.
Image Details (C): On the right panel, check metadata like the prompt, model used, dimensions, and creation date. You can also enhance the texture directly from here or add a tag.
Step 5: Generate the PBR Maps
Click Generate Maps to create a full PBR set: height, normal, metallic, edge and ambient occlusion maps.
Tip: Invert maps if needed (e.g., for height) to match the texture pattern.
Practical Examples
Ancient Stone Wall
Model: Hand-Painted Textures
Prompt: "A hand-carved ancient stone wall texture, featuring irregular block patterns in varying shades of aged gray and moss-green, with subtle cracks and weathered details that reflect a historic, timeworn surface."
Result: High-quality stone wall textures for a cartoon interior.

Weathered Wooden Fence
Model: Realistic Textures 2.0
Prompt: "A weathered fence texture featuring rough, splintered wood in faded tan and gray hues. The planks show signs of warping with frayed edges and natural grain patterns enhanced by sun and rain exposure, evoking a rustic countryside ambiance."
Result: High-detailed, realistic wooden fence textures.

Access This Feature Via API
Text-to-Texture Generation: Scenario API Documentation - POST /generate/txt2img-texture
Texture Maps Generation: Scenario API Documentation - POST /generate/texture