The Isometric Assets from Sketches workflow described in this article remains fully functional. However, for improved efficiency and consistency, we now recommend using newer models and dedicated tools.
Models like Nano Banana Pro and Seedream 4.5, as well as Flux Kontext LoRAs, often achieve similar or better results with fewer steps. Additionally, the dedicated Sketch Colorizer workflow streamlines the creation of cohesive isometric assets.
Recommended Guides:
- Gemini 3.0 Pro Image: The Essentials
- Seedream 4: The Essentials
- Train a Flux Kontext LoRA
👉 Access the Sketch Colorizer workflow here
Introduction
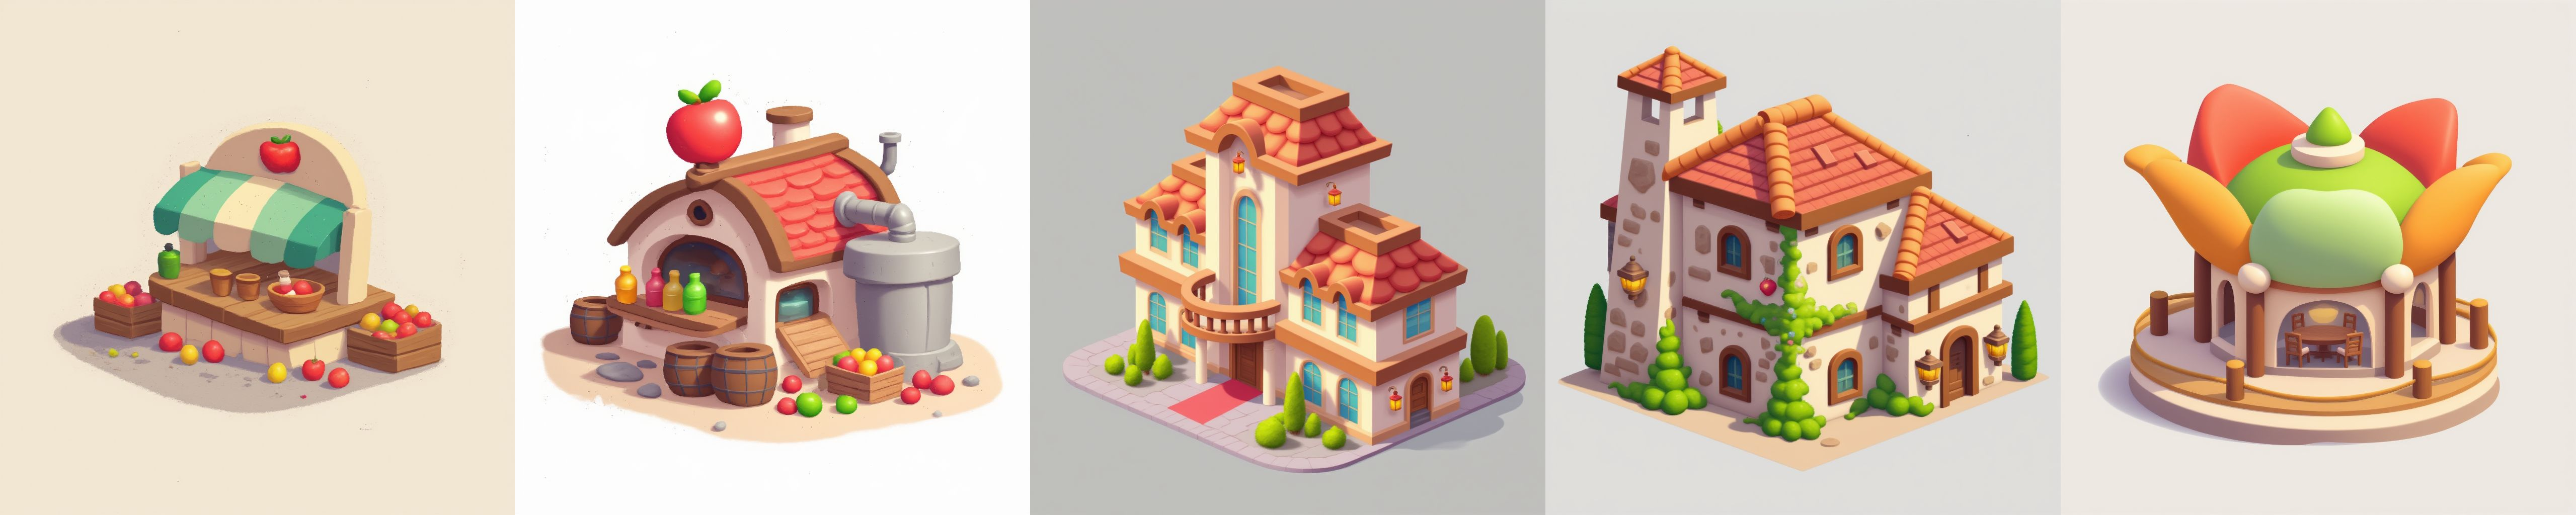
When creating game or illustration assets, controlling the look and feel across a set of images can be difficult. Scenario’s ControlNet workflow allows you to sketch shapes, specify colours and then refine the results into polished 3D isometric illustrations. This article summarises a workflow to generate consistent assets using ControlNet Sketch, Image‑to‑Image and Depth modes.
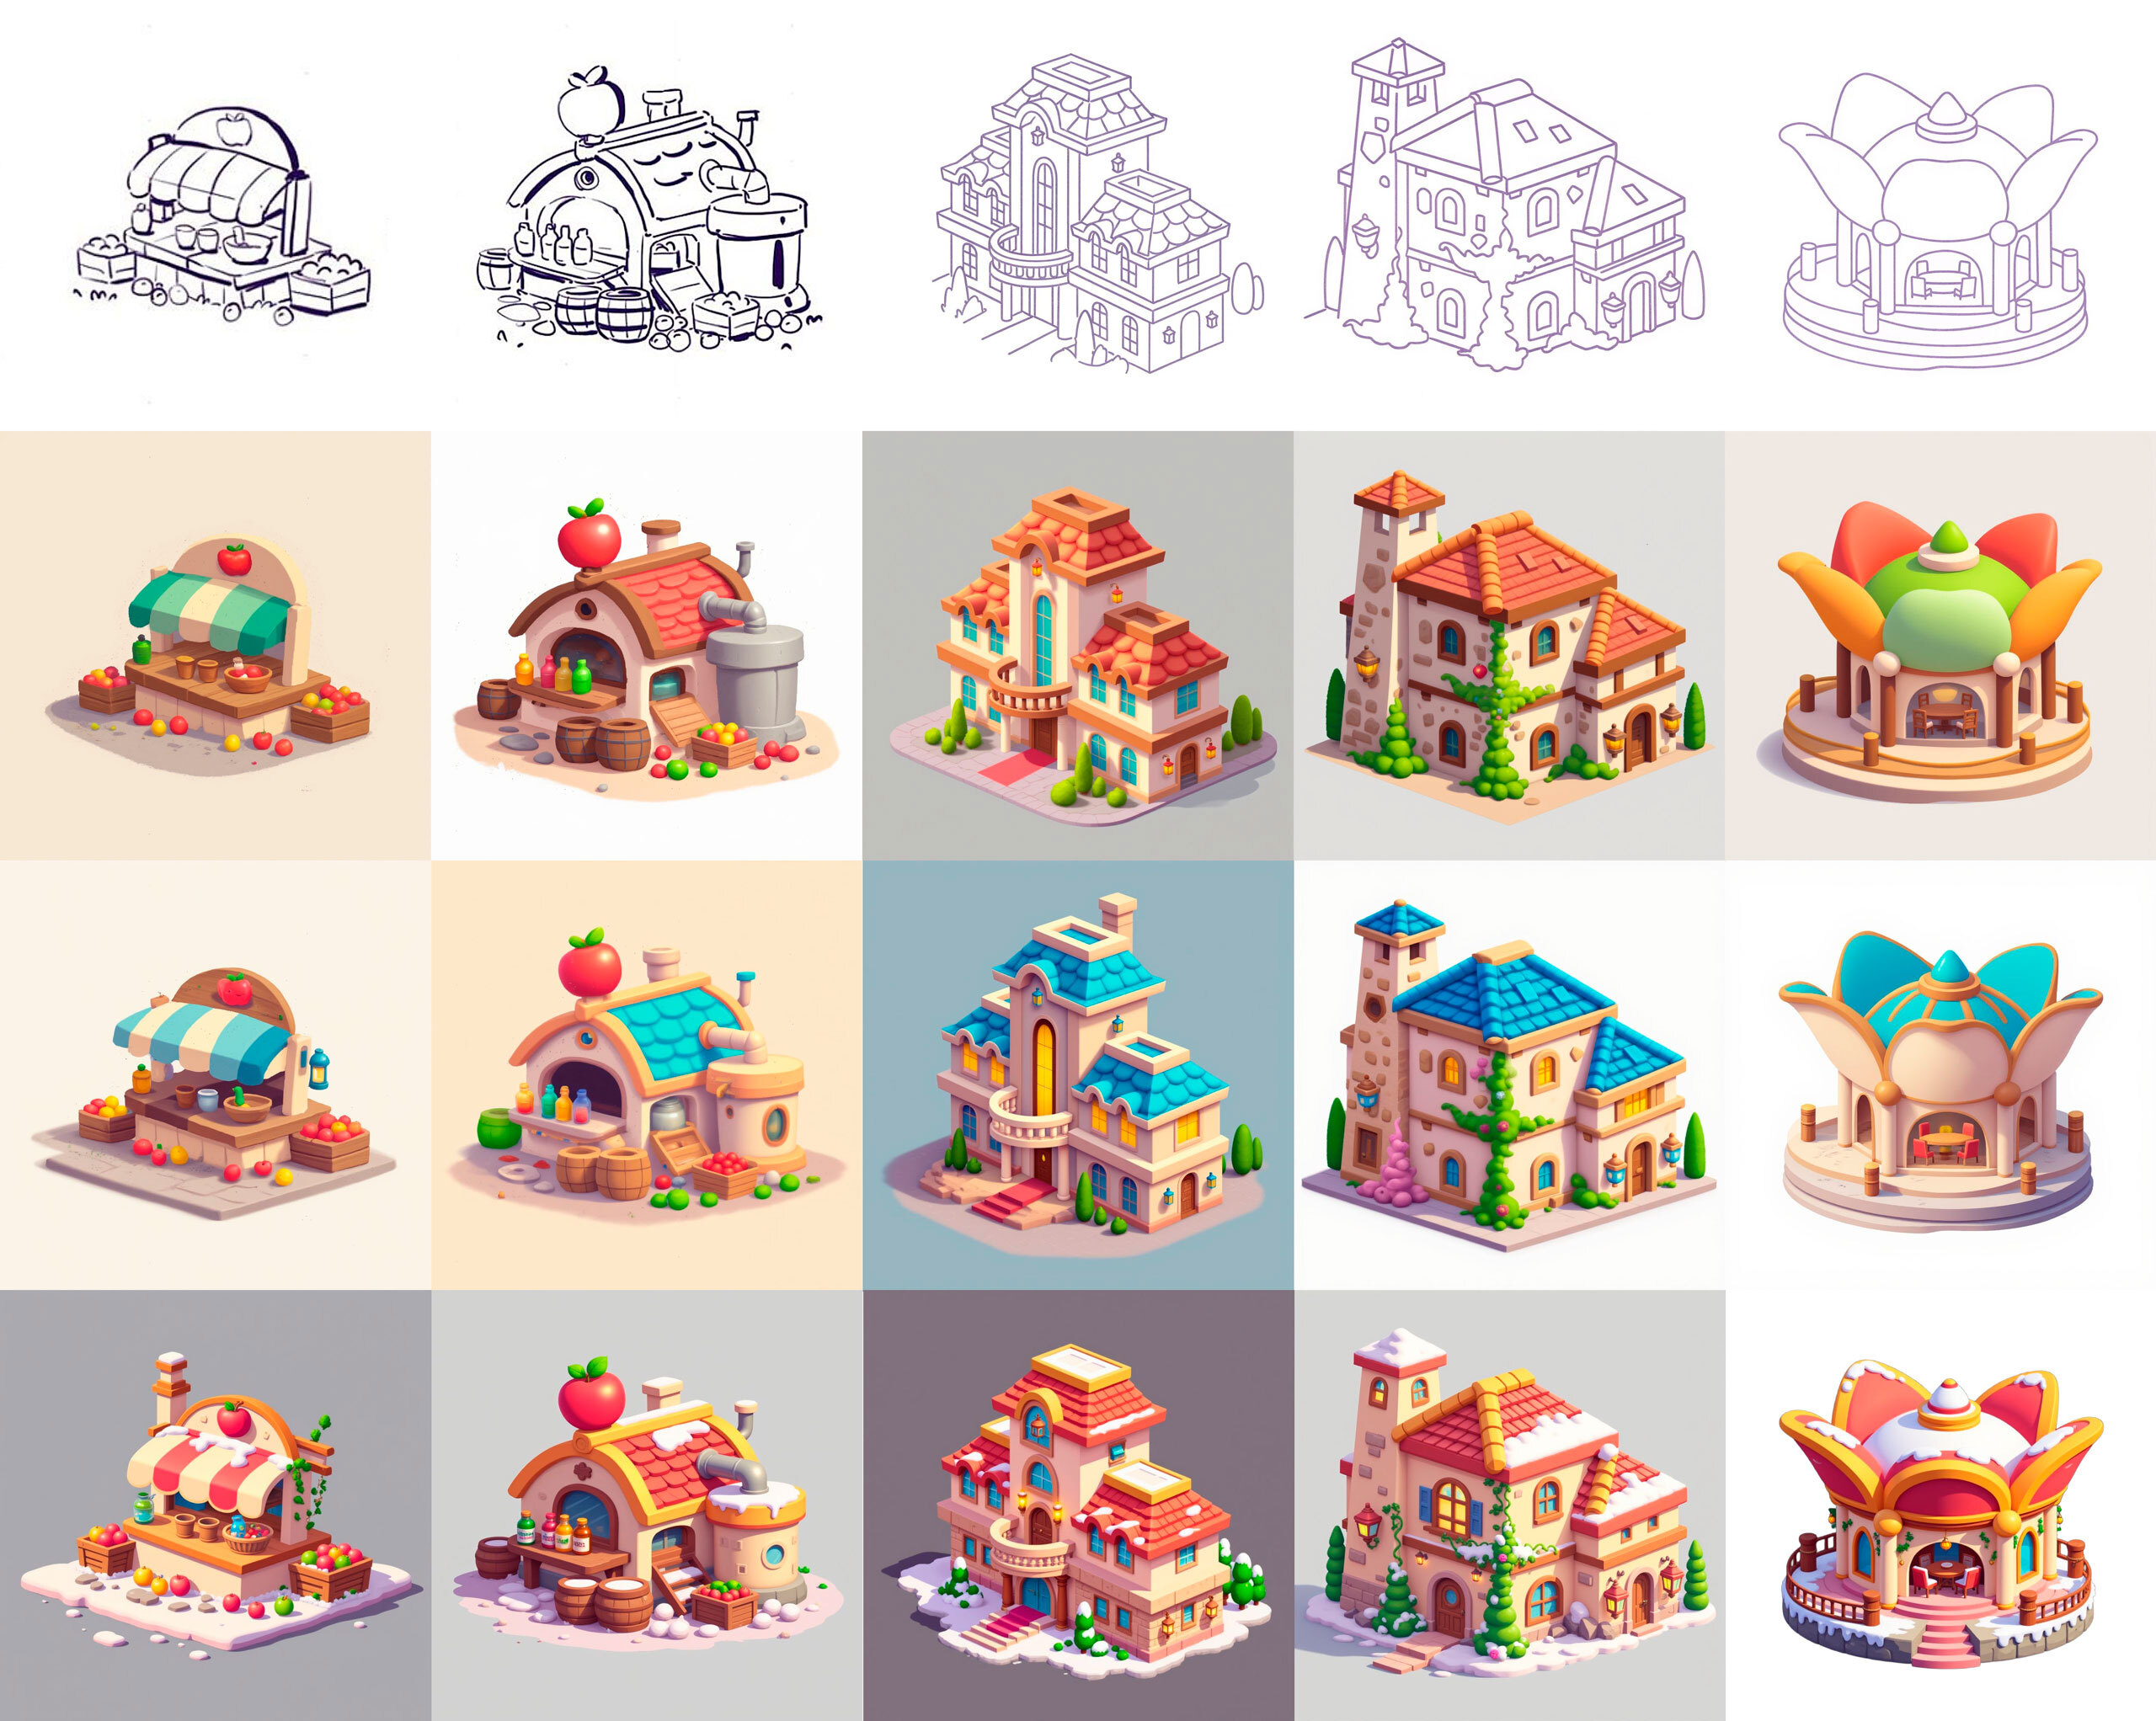
The image above shows how it is possible to generate different styles using the same sketch.
1. The importance of a detailed prompt
A good prompt is the foundation of this workflow. It defines shapes and colours and ensures the model reproduces those elements accurately. For a cider house example:
A cozy cartoon-style cider house in a farm setting, painted with warm earthy tones.
Building: small arched-roof structure made of light beige plaster walls with soft brown wooden beams, the roof covered in curved tiles painted warm terracotta red.
Apple on the roof: bright red with a glossy finish and a fresh green leaf.
Barrels: rustic wooden barrels in deep brown with darker iron bands.
Bottles: glass bottles in soft green and amber colors, slightly transparent, sitting neatly on a wooden shelf.
Metallic machine: cylindrical cider press attached to the side of the building, painted in dull silver with darker gray accents, showing a faint shine.
Crate of apples: wooden crate in pale brown filled with round apples in shades of bright red, golden yellow, and green.
Ground: scattered round apples in red, yellow, and green, lying among smooth gray stones.
Details: small chimney pipes in dark gray, window trim in medium brown, soft shadows giving the illustration depth.
Describing every element—including textures, colours and lighting—ensures the model follows your vision. Even slight changes in the prompt can produce significant differences in colour and mood, as shown in the first two images where only colour phrases were altered.
When you need to apply the same style across different isometric buildings, it helps to craft prompt templates. I used ChatGPT to generate and refine these prompts; by feeding it my base description (like the cider house) and asking it to adapt the wording for other building sketches, it produced consistent, well‑structured prompts that carried the same palette and feel. This approach ensures each asset shares the same cosy, playful atmosphere without manually rewriting every detail.
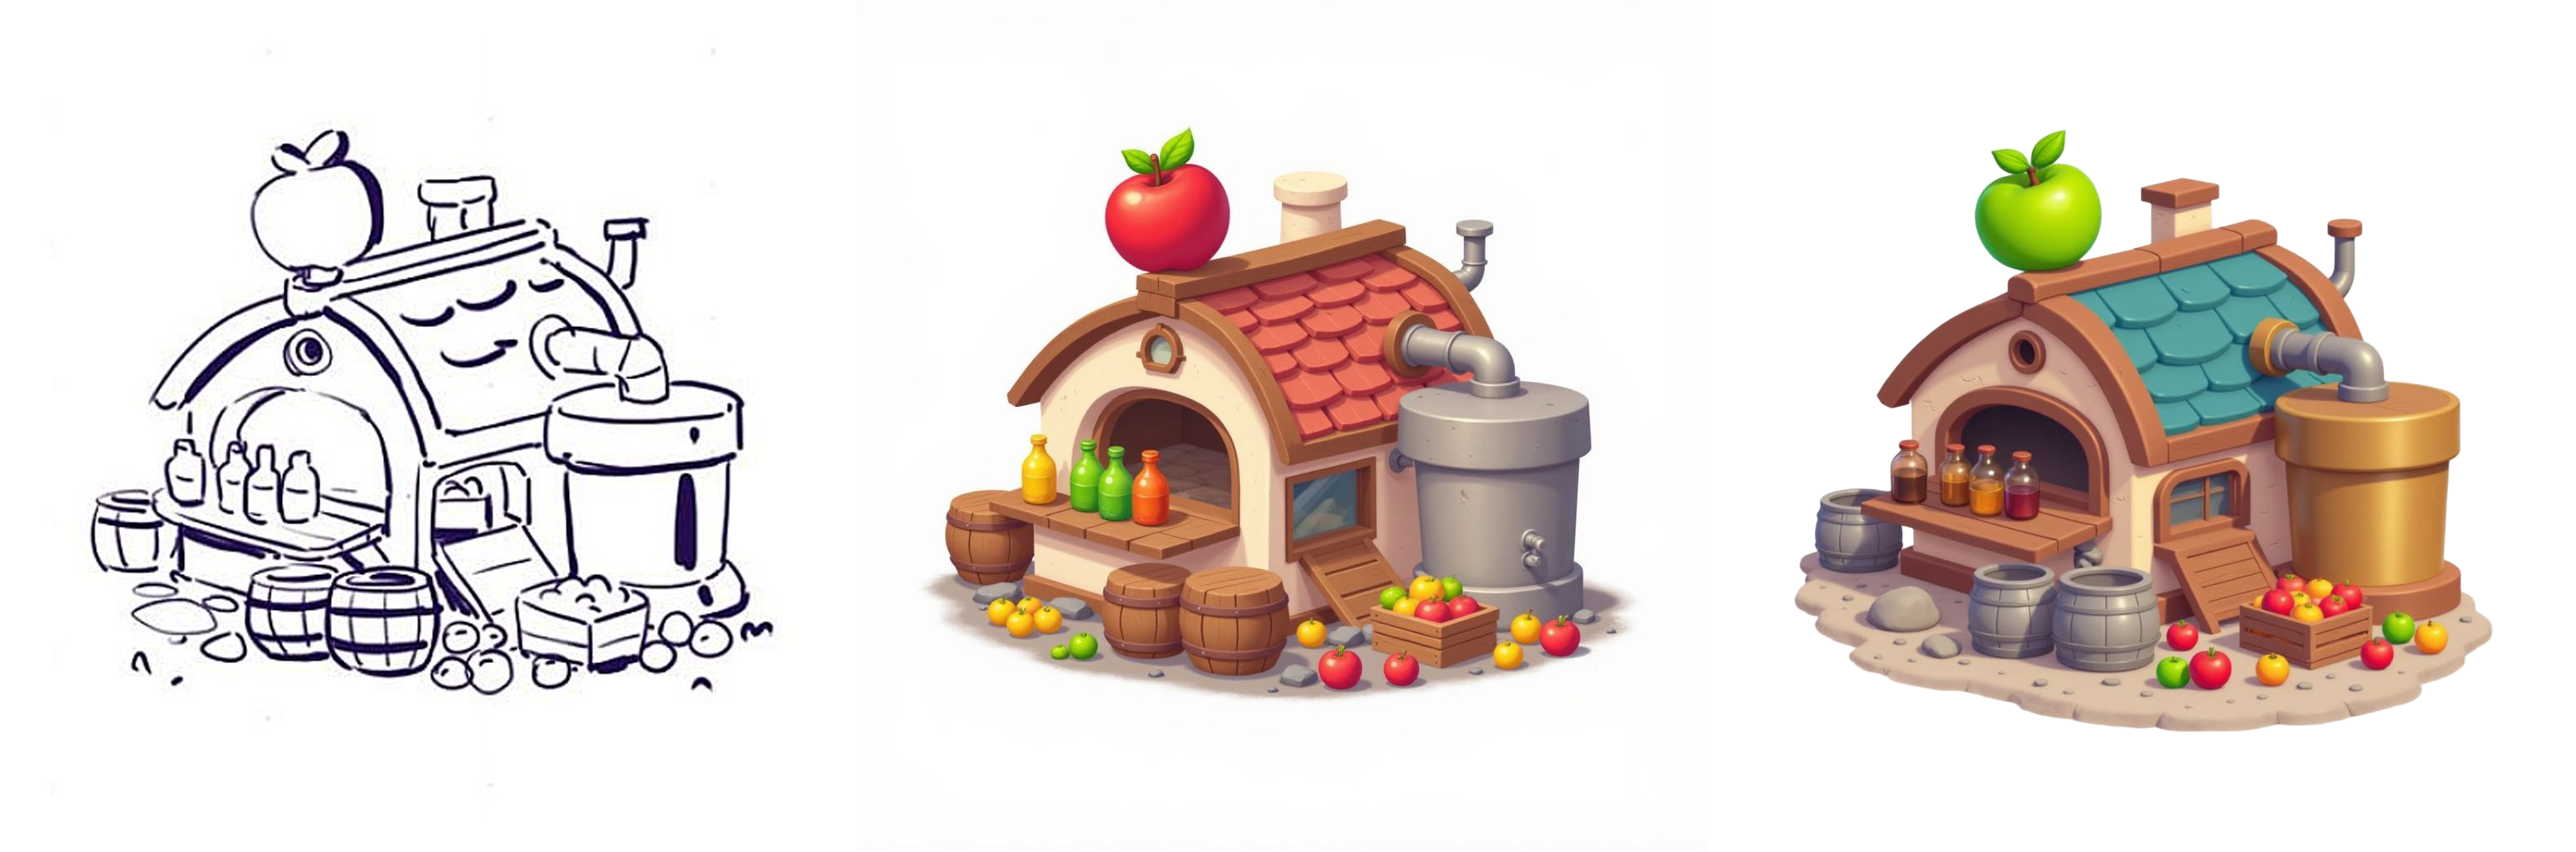
The image above shows two color variations generated using different prompts.
2. Initial generation with ControlNet Sketch
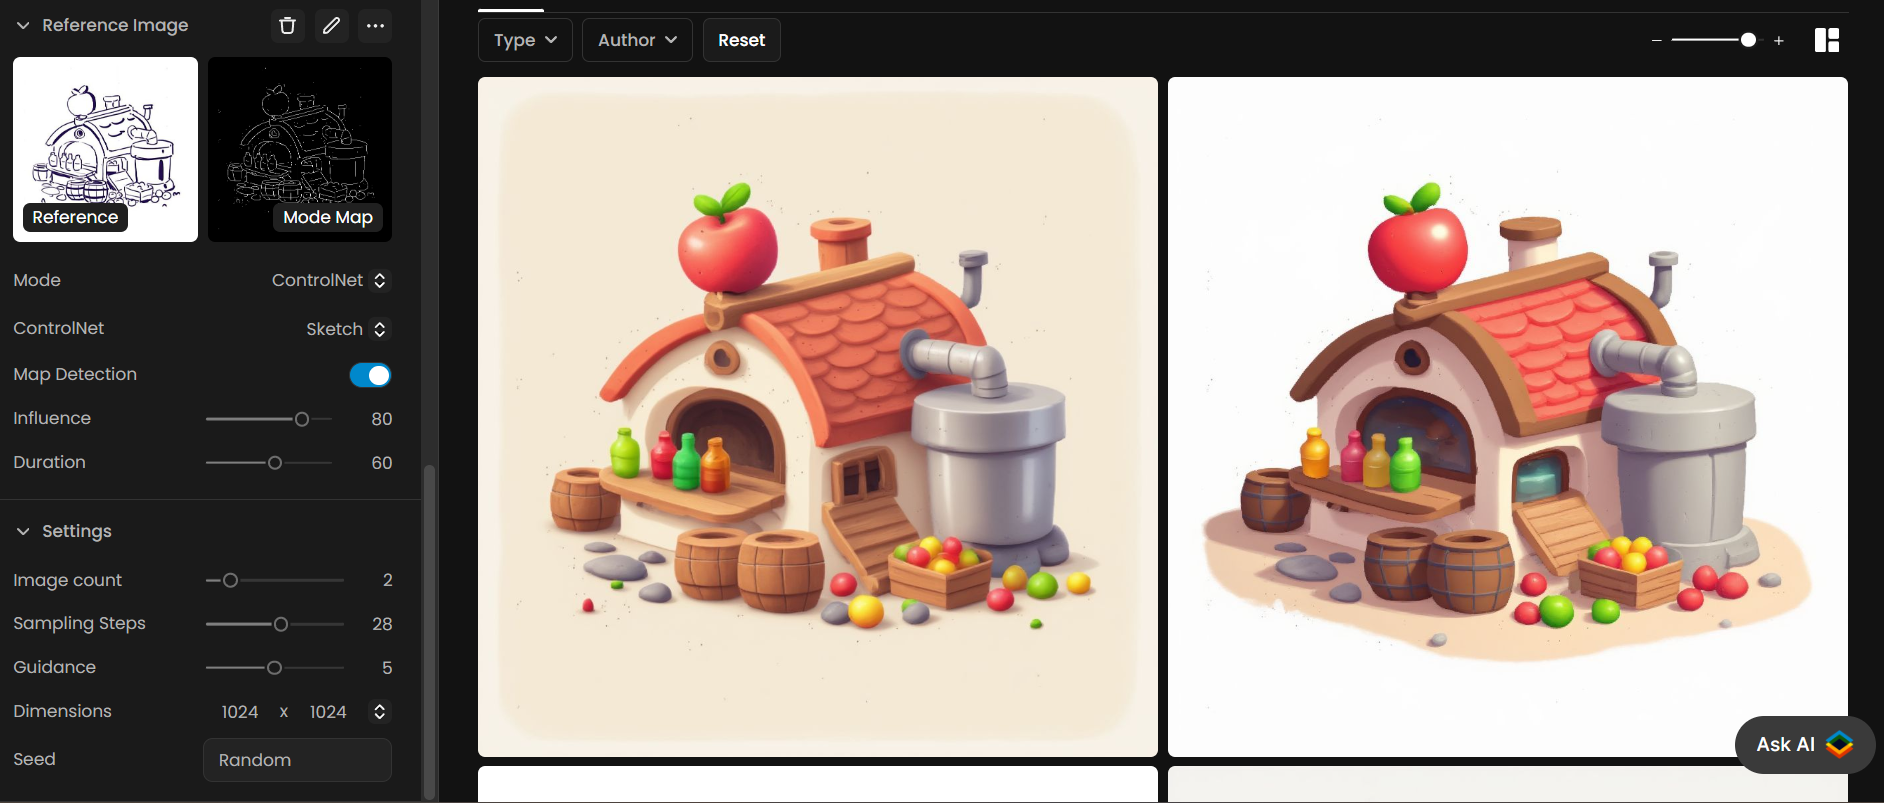
ControlNet Sketch takes a line drawing and tries to match its shapes while following your prompt. For black‑and‑white sketches, set Influence around 80 and Duration around 60 steps to keep shapes faithful. Before using Sketch mode, sharpen the lines in your drawing to help the model detect edges.
Write a detailed prompt.
Load your sketch in ControlNet Sketch mode.
Adjust the influence to roughly 50–60. If you reduce the influence, the prompt will have more freedom to reshape the image; raising it will cause the output to adhere more closely to the original sketch’s depth.
Generate the image.
The first generation is often good but may need refinement. Use Image‑to‑Image in the next step to improve resolution or details.
3. Refining with Image‑to‑Image
Once you have a satisfactory initial image, you can use it as a reference image in Image‑to‑Image mode to enhance details and reduce artefacts. This step is important for achieving crisp output while keeping the style consistent.
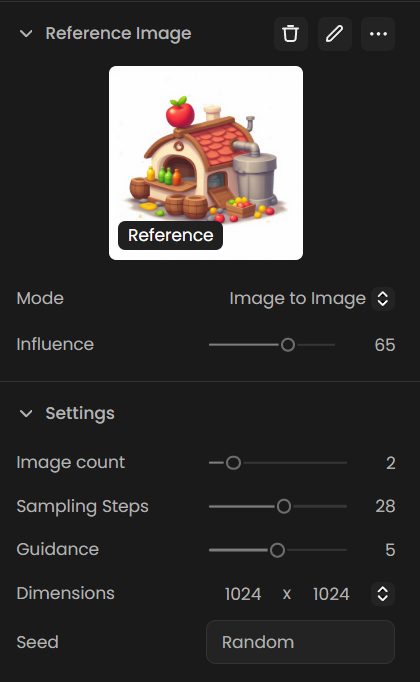
Select your favourite generation and click Use as Reference.
Select to Image‑to‑Image mode and set Influence around 65 .
Use the same prompt and model. Keeping the prompt identical ensures consistency in colours and style.
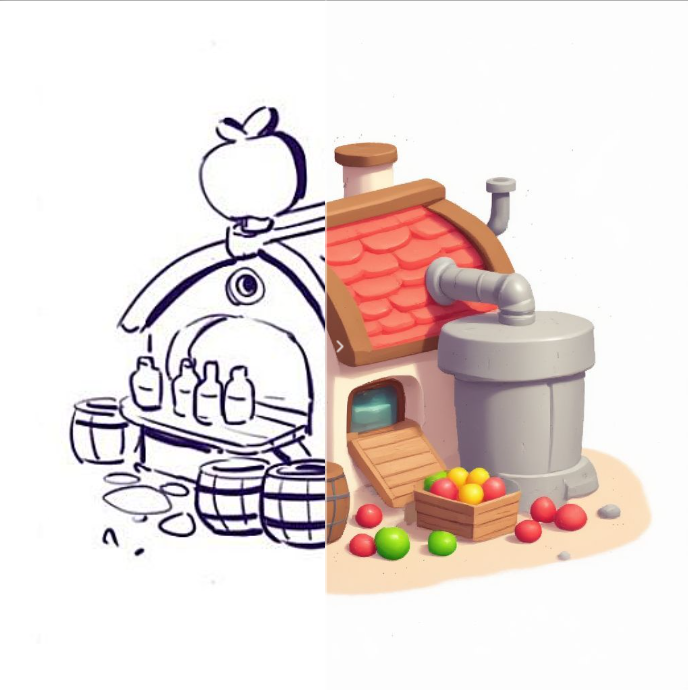
Generate the image; compare before and after. In the cider house example, Image‑to‑Image cleaned up texture and improved shading without changing the design.
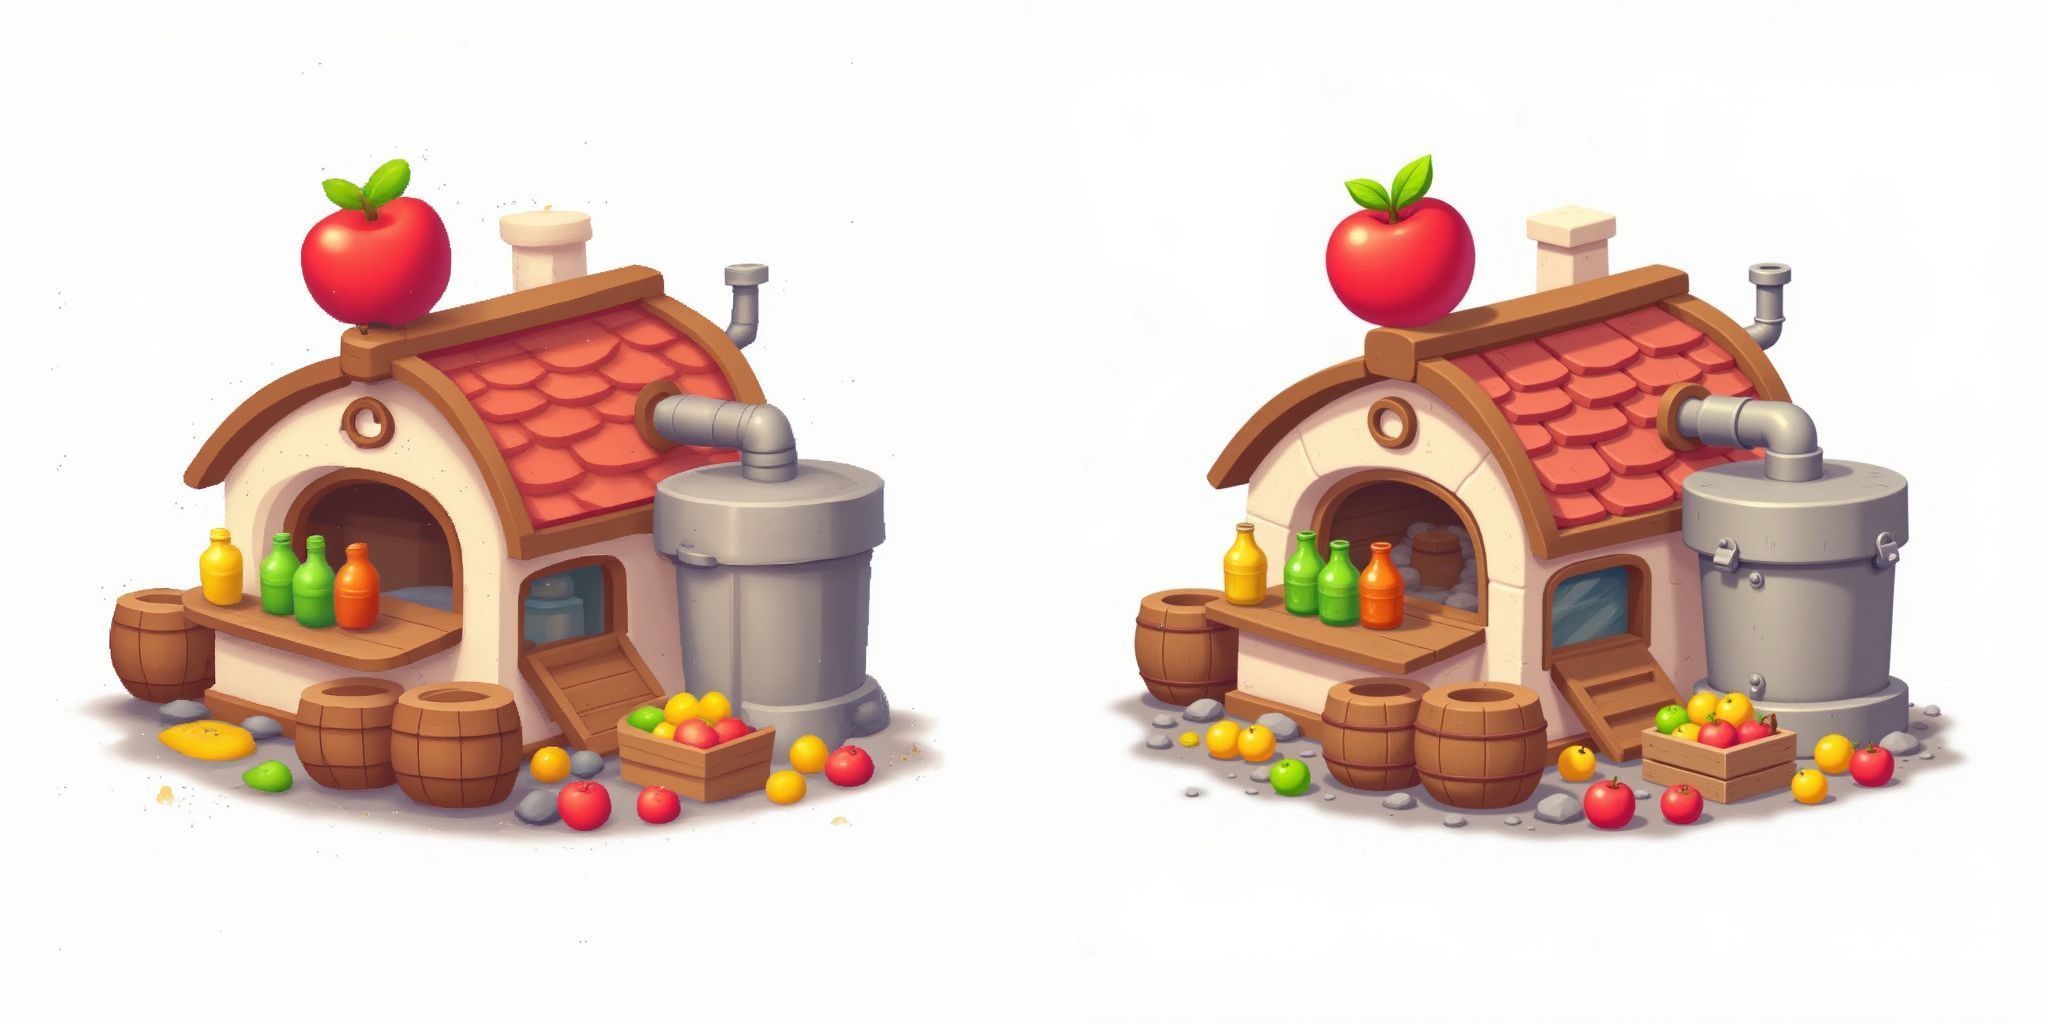
On the left is the original image generated, and on the right is the result after Image to Image.
4. ControlNet Sketch with coloured references
ControlNet Sketch works well with line drawings. If your sketch is coloured, you can still guide the generation by combining Image‑to‑Image and ControlNet:
Use Image‑to‑Image + ControlNet (Sketch). The coloured sketch guides the model on shapes and approximate colours.
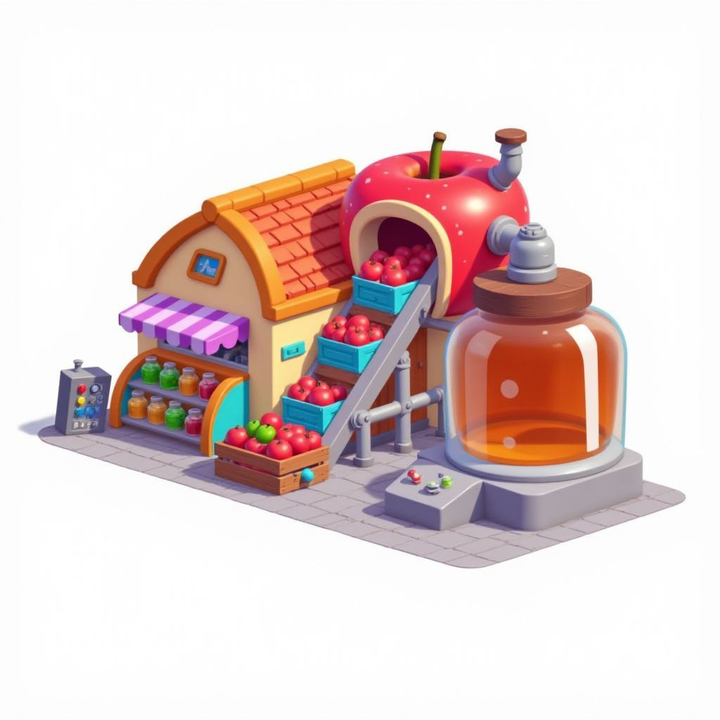
Write a detailed prompt describing colours, shapes and materials. For example, for a cider factory you might specify:
Building:
compact structure with yellow‑beige plaster walls and curved orange‑red tiled roofApple entrance:
large bright red apple with darker spots, metallic grey pipeCider jar:
transparent glass jar filled with golden‑orange cider.
Generate the first version using both the sketch and ControlNet.

Select the best result and run Image‑to‑Image again (without ControlNet) to polish it.
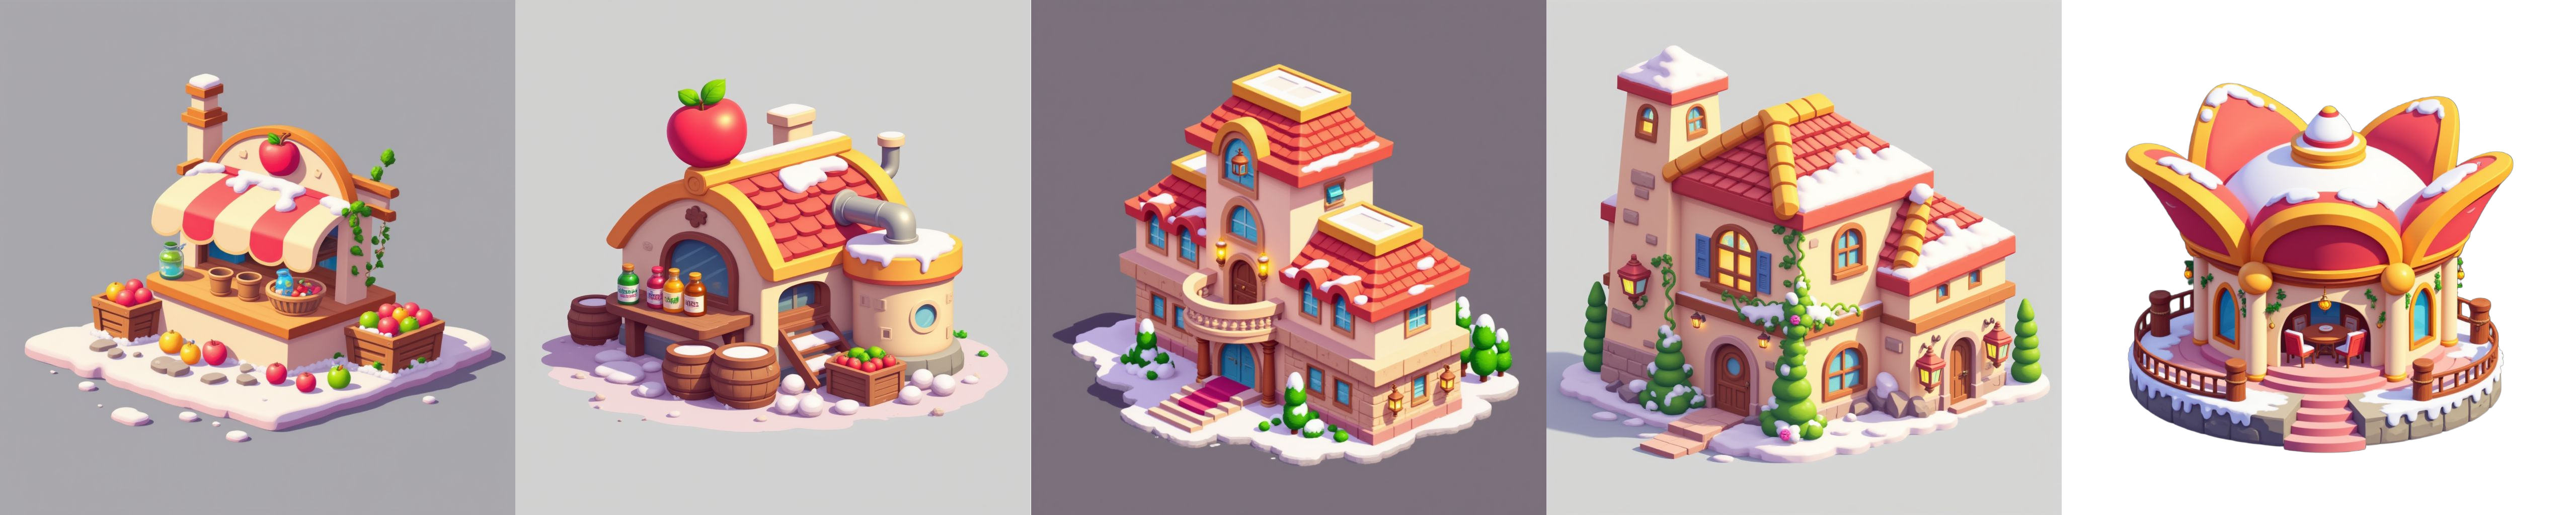
5. Maintaining a cohesive style across multiple assets
To produce a collection of assets (e.g. apple stalls, houses, towers) that share the same look, you need a consistent style description. Describe everything—materials, colours, atmosphere—in the prompt, then reuse that pattern with each new sketch. Here is a template used for a Mediterranean farmhouse style:
Overall style: playful and inviting, bold outlines, flat saturated colours with subtle shading.
Building: rustic two‑storey house with a tower; walls in pale beige plaster with peach stone patches.
Roof: terracotta‑red tiles with golden‑yellow ridges.
Windows: arched, framed in medium brown with warm amber glow.
Vegetation: climbing vines in vivid green and white flowers; stylized trees.
Ground: lavender‑grey base with greenery near edges.
This prompt was reused with different sketches to generate an entire collection of houses following the same palette. ChatGPT can help refine and expand your prompt, ensuring repeated structures while allowing slight changes.
Adapting the style
When you want to create a different “collection” from the same sketches, adjust the prompt accordingly. For example, to make roofs azure blue and add golden details, the new prompt might say:
Roof: curved tiles painted vivid azure blue with creamy beige trims.
Entrance: warm reddish‑brown doorway with deep blue lanterns glowing yellow.
Vegetation: vines with pink and white flowers.
Details: golden yellow highlights along the roof ridges.
By keeping the descriptive structure but altering key colours, you can create another cohesive set with a new mood, as seen in the blue‑roof collection.

Here is a comparison of the two generated collections:
6. Adding new elements with ControlNet Depth

ControlNet Sketch locks onto the drawn shapes; it cannot invent new elements like snow. To add elements that weren’t in the sketch, switch to ControlNet Depth. Depth maps preserve volume and proportions while allowing the model to reinterpret surfaces.
Write a prompt that describes the base object and the new element (e.g. snow). For example:
A cozy cartoon-style Mediterranean house with a tower, in a snowy setting, painted with warm playful colors.Building: rustic two-story structure with a tall side tower, walls painted pale beige plaster with soft peach stone details. Roofs covered in curved terracotta red tiles with golden yellow ridges, topped with thick layers of snow.Windows: arched windows framed in warm brown, glowing in amber and golden yellow light. Snow piled on sills, some icicles hanging down.Entrance: rounded arched doorway in reddish-brown wood, with snow gathering on the top frame. Lanterns in deep blue on each side glow bright yellow against the cold.Tower: tall narrow tower with terracotta roof capped with snow, small arched windows glowing warmly. Snow has drifted against the base, with icicles forming along the roof edges.Vegetation: climbing vines in vivid green along the walls, dusted with snow and ice, with a few pink flowers peeking through the frost. Surrounding bushes and cypress trees in deep green with snowy caps.Ground: lavender-gray snowy base with snowdrifts around the foundation, soft highlights and frosty stones partially visible.Details: golden accents on the roof ridges and lantern trims stand out against the snow. Warm glowing windows contrast beautifully with the winter setting.The overall style is playful and refined, flat saturated colors with subtle shading, golden highlights and warm interior glow against the snowy environment, consistent with the cozy winter theme.Adjust the influence to roughly 50–60. If you reduce the influence, the prompt will have more freedom to reshape the image; raising it will cause the output to adhere more closely to the original sketch’s depth.
Keep the rest of the style consistent with your previous collection so the winter versions match your summer versions.
The Depth mode preserves the shape of each building but allows snow to appear on roofs, windowsills and ground, resulting in a cohesive winter collection.
7. Summary of the workflow
Step | Description | Key points |
|---|---|---|
1. Write the prompt | Describe every element (shape, colour, material, atmosphere) in complete sentences. | The prompt drives colour consistency across assets. |
2. Generate with ControlNet Sketch | Use sketches as references; set Influence around 80. | Sharpen your sketch lines for better detection. |
3. Enhance with Image‑to‑Image | Use the best generation as a reference to improve details; keep the same prompt and model. | Set Influence ~65. |
4. Maintain a style across assets | Reuse the same prompt structure and palette for different sketches; adjust only key elements. | Use ChatGPT to help refine prompts. |
5. Add new elements with Depth | Switch to ControlNet Depth to incorporate snow or other additions. | Depth respects volume but isn’t tied to drawn details. |
6. Repeat | Iterate until you achieve the desired style and variations. | Use Enhance or run Image‑to‑Image again if necessary. |
Final thoughts
By carefully crafting prompts and using ControlNet’s different modes, you can turn rough sketches into a family of polished illustrations. Prompt writing is the core skill—when you clearly describe what you want, the model can faithfully execute it. Once your initial image is generated, refining it through Image‑to‑Image and exploring Depth mode for seasonal variations lets you achieve professional results without manual painting. Use this workflow to build consistent isometric assets for your game, illustrations or design project.
Was this helpful?