Scenario Image Tools: The Essentials
Last updated: September 23, 2026

Covers Scenario Text Layer (model_scenario-text-layer), Scenario Rich Text Layer (model_scenario-rich-text-layer), Scenario Perspective Warp (model_scenario-perspective-warp), Scenario Lighting Transfer (model_scenario-lighting-transfer) and Scenario Inpaint (model_scenario-inpaint)
Scenario Image Tools are five small, precise utility models built for compositing and graphic work. Text Layer renders exact text into a transparent layer. Rich Text Layer renders an HTML and CSS template into an image, for styled graphics, cards, banners, and masks. Perspective Warp maps a layer onto a flat plane with four corner points. Lighting Transfer grades a layer so its color and brightness match a target scene. Inpaint repaints only a masked area of an image from a text prompt and blends the result back in.
The first four are deterministic: they render or transform pixels, with no AI generation involved, so the same input always gives the same output. Inpaint is the only one that generates new content. They are designed to be used on their own or chained together, for example rendering a label, warping it onto a sign, and grading it to the scene lighting.
Which Model Should I Use?
Model | Input | Best for |
|---|---|---|
Scenario Text Layer | Text template (plus optional variables) | Exact single-style text: labels, nameplates, localized strings, batched names |
Scenario Rich Text Layer | HTML template + optional CSS | Styled graphics with multiple fonts, gradients, and layout: banners, cards, posters, masks |
Scenario Perspective Warp | 1 RGBA image + 4 corner points (or a homography) | Placing artwork or text onto screens, signs, billboards, and product faces |
Scenario Lighting Transfer | 1 RGBA layer + 1 reference scene (same size) | Matching a cut-out or text layer to the color and brightness of a scene |
Scenario Inpaint | 1 image + 1 mask (same size) + prompt | Adding, replacing, or fixing one region of an image while leaving the rest untouched |
Use Text Layer when the text has one font, size, and color. Switch to Rich Text Layer as soon as you need mixed styling, backgrounds, gradients, shapes, or layout. Use Perspective Warp and Lighting Transfer to place a layer into a scene, and Inpaint when the change needs newly generated content rather than a pasted layer.
How to Use the Models
Scenario Text Layer
Text Layer draws text into a transparent RGBA canvas with no AI guesswork: crisp edges, a clean alpha channel, and the exact characters you typed. Set textTemplate to the text, pick a Google Font with fontFamily (or point fontUrl to your own .ttf, .otf, .woff, or .woff2 file), then set size, color, and align.
Placement is controlled by bbox, a box given as x, y, width, and height in pixels from the top-left corner of the canvas. The overflow setting decides what happens when the text does not fit: wrap it inside the box, clip it, or shrink the font until it fits.
The template uses Mustache variables, so one setup can produce many versions. For example, a template of Player: {{name}} with a variables entry of key name and value Nova renders "Player: Nova". Swap the value to batch nameplates, badges, or localized labels that all share the same layout. The text is rendered as-is: HTML is not interpreted, so tags appear as literal characters.
Scenario Rich Text Layer
Rich Text Layer renders an HTML template, plus optional CSS, the way a web page is drawn, and returns the result as an image. Anything you can lay out on a web page works: multiple fonts and weights, gradients, rounded buttons, lists, shadows, and flexbox layouts. The canvas starts transparent, so leave out a background to get a transparent layer, or paint one in CSS to get a finished graphic.
This is the template behind the sale banner below (font import line omitted), on a 1200x628 canvas:
htmlTemplate:
<div class="wrap"><span class="tag">SUMMER SALE</span><h1>UP TO 40% OFF</h1><span class="cta">Use code SUN40</span></div>

css:
*{margin:0;box-sizing:border-box}
html,body{height:100%}
.wrap{width:100%;min-height:100vh;display:flex;flex-direction:column;justify-content:center;align-items:center;gap:20px;text-align:center;background:linear-gradient(120deg,#fb7185,#f59e0b);color:#fff}
.tag{font-weight:600;letter-spacing:8px;font-size:38px}
h1{font-weight:900;font-size:130px;line-height:1;text-shadow:0 6px 24px rgba(0,0,0,.2)}
.cta{margin-top:18px;background:#fff;color:#e11d48;font-weight:600;font-size:38px;padding:22px 56px;border-radius:999px}
A 1200x628 promo banner: gradient background, text shadow, and a pill-shaped call to action, all from CSS · Open on Scenario
Event poster (1080x1350) | Recipe card (1080x1350) |
|---|---|
 | 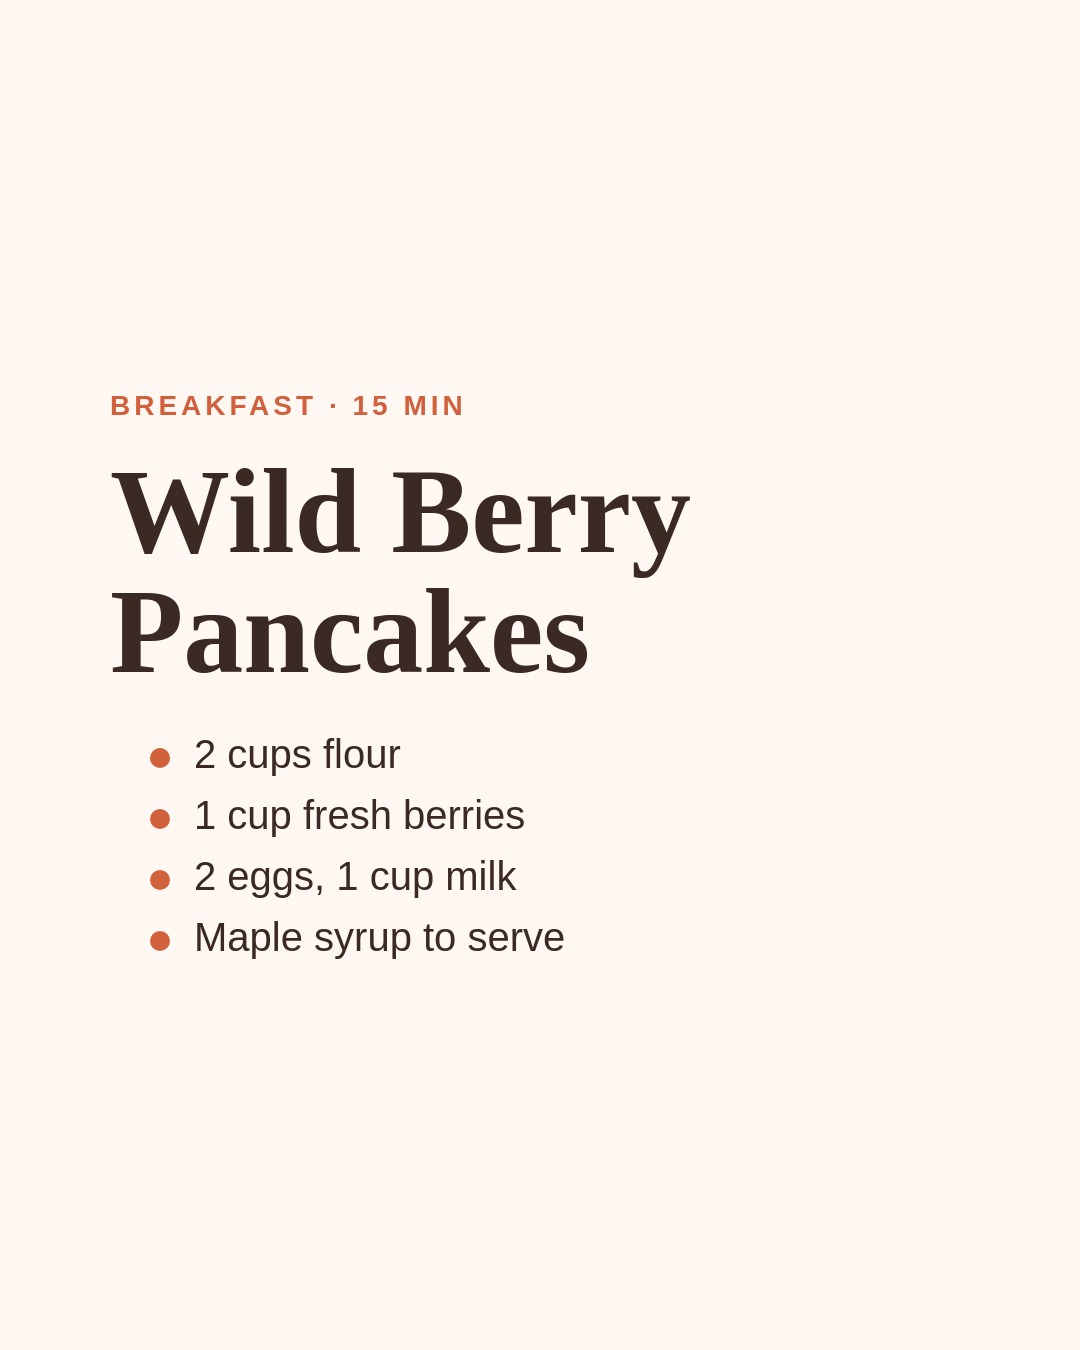 |
Left: a poster laid out with justify-content: space-between. Right: a recipe card with a custom bullet list built from CSS pseudo-elements · Open on Scenario
Two details make the design fill the canvas instead of collapsing to the height of its content: set html,body{height:100%} and give your outer wrapper min-height:100vh, as in the template above. Use {{var}} in the template to insert escaped text from variables, or {{{var}}} to insert raw HTML.
Scenario Perspective Warp
Perspective Warp takes an RGBA image and maps its four corners onto four points of a destination canvas, so a flat, front-facing layer looks like it sits on an angled surface. Set canvasWidth and canvasHeight to the size of the scene you are compositing into, then list the four destination corners in this exact order: top-left, top-right, bottom-right, bottom-left. For example, to fit a layer onto a sign that leans away to the right in a 1024x1024 scene:
corners:
[ {"x": 220, "y": 180},   top-left
  {"x": 760, "y": 240},   top-right
  {"x": 760, "y": 620},   bottom-right
  {"x": 220, "y": 700} ]  bottom-left
Read the corner positions from the scene image itself (any image editor shows pixel coordinates under the cursor). If you already have a 3x3 homography matrix from another tool, pass it as homography instead of corners. The alpha channel is preserved through the warp, so the output is still a transparent layer, ready for Lighting Transfer or for compositing.
Scenario Lighting Transfer
Lighting Transfer color-grades a transparent layer so it belongs in a scene. Give it the layer as source and the scene as reference. It samples the average color and brightness of the reference, by default in the area covered by the layer itself, and pulls the layer toward those values. The source and reference must have exactly the same pixel dimensions.
In the examples below, the same off-white "SCENARIO" layer (rendered with Rich Text Layer on a transparent 2048x1024 canvas) was graded against two different 2048x1024 scenes with mode: color-match. For display, each layer is shown composited over its reference scene: Before is the raw layer, After is the graded output.
Before | After |
|---|---|
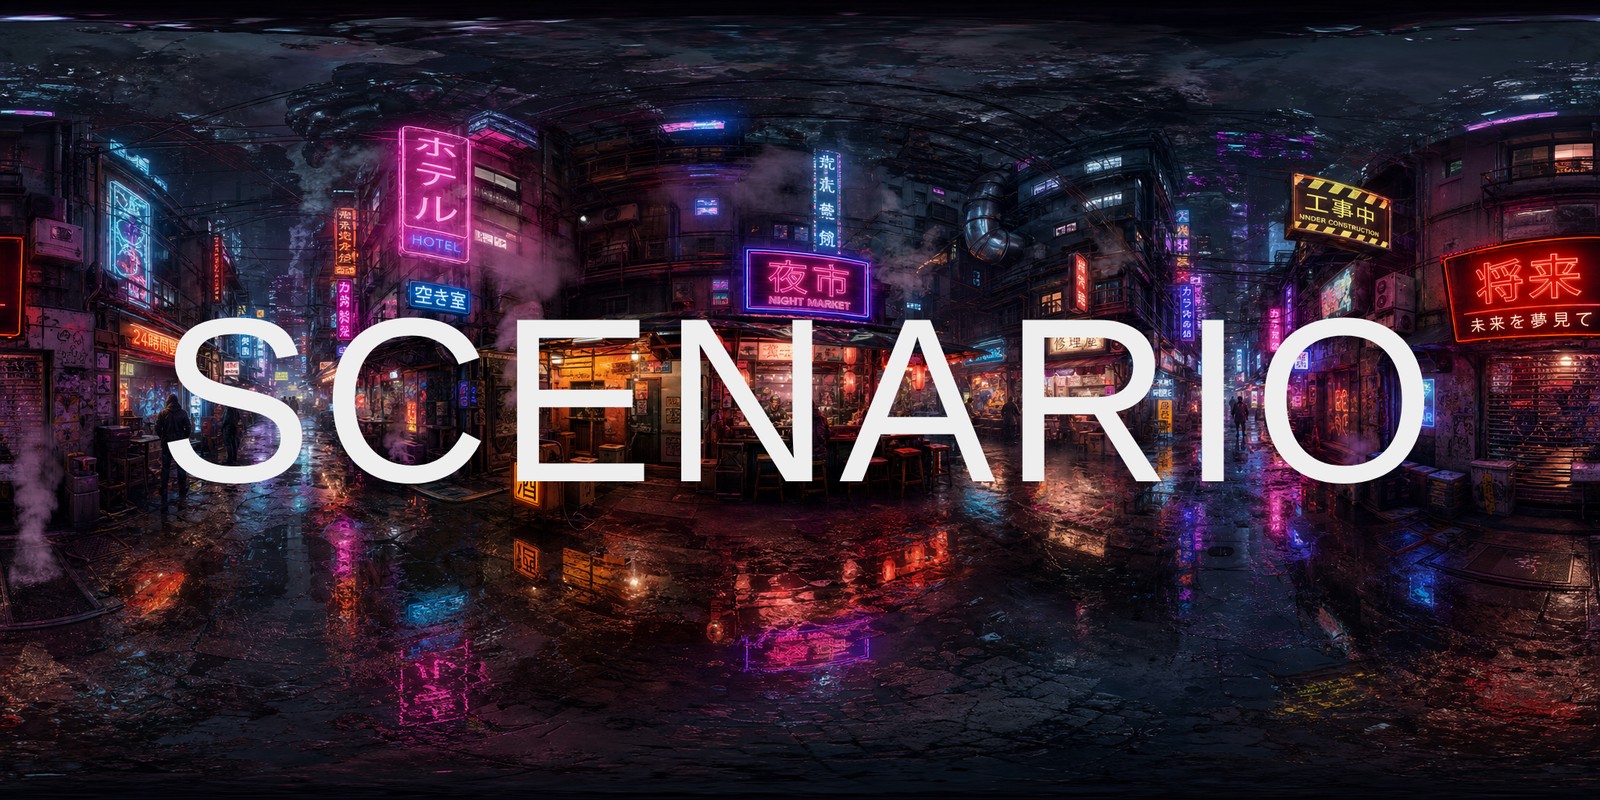 | 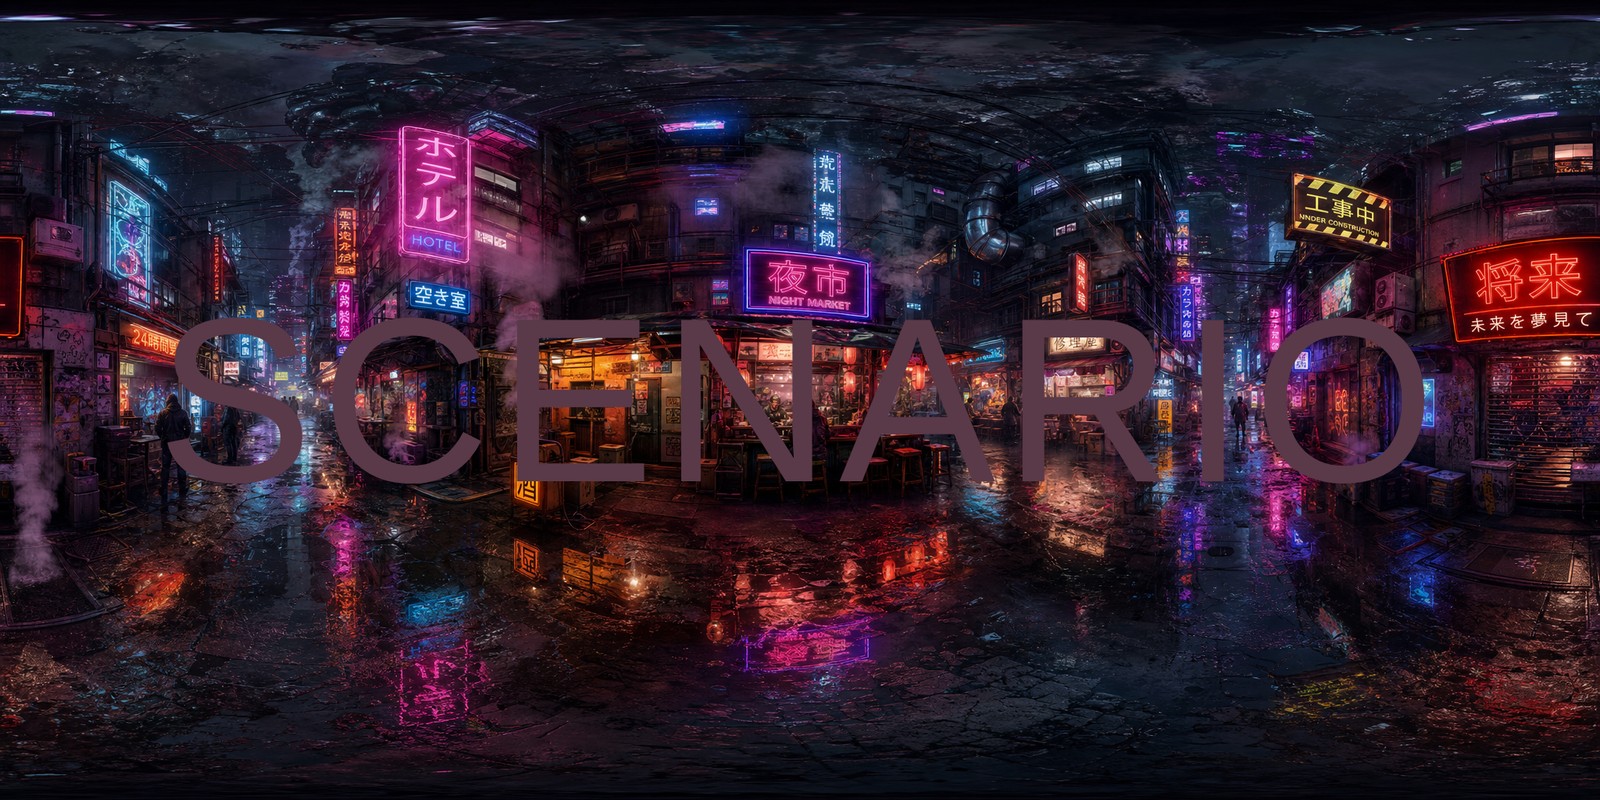 |
Neon night market reference: the white lettering drops to a muted plum that matches the dark, magenta-tinted street · Open on Scenario
Before | After |
|---|---|
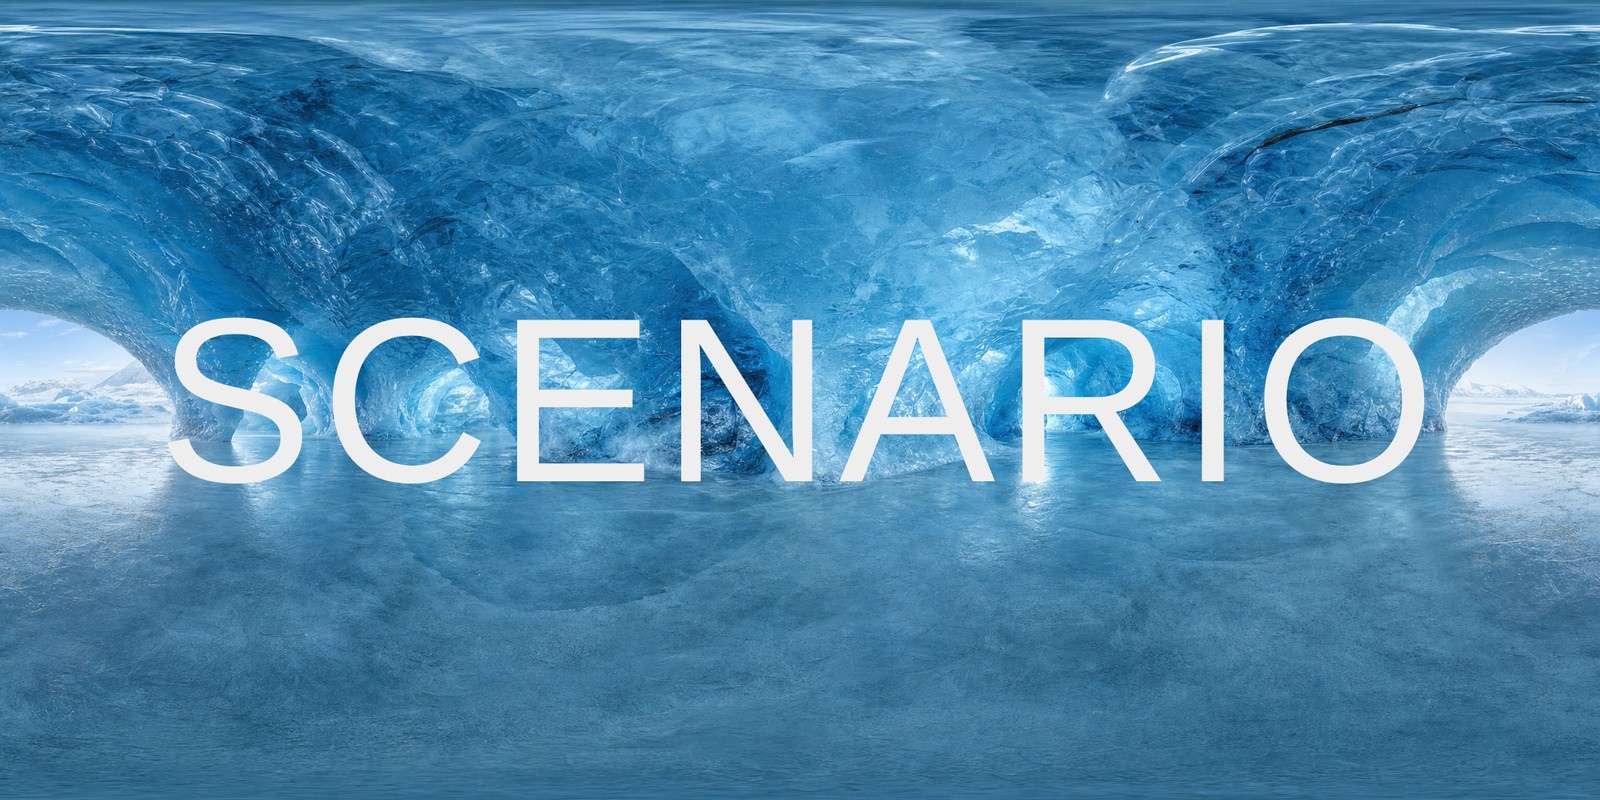 | 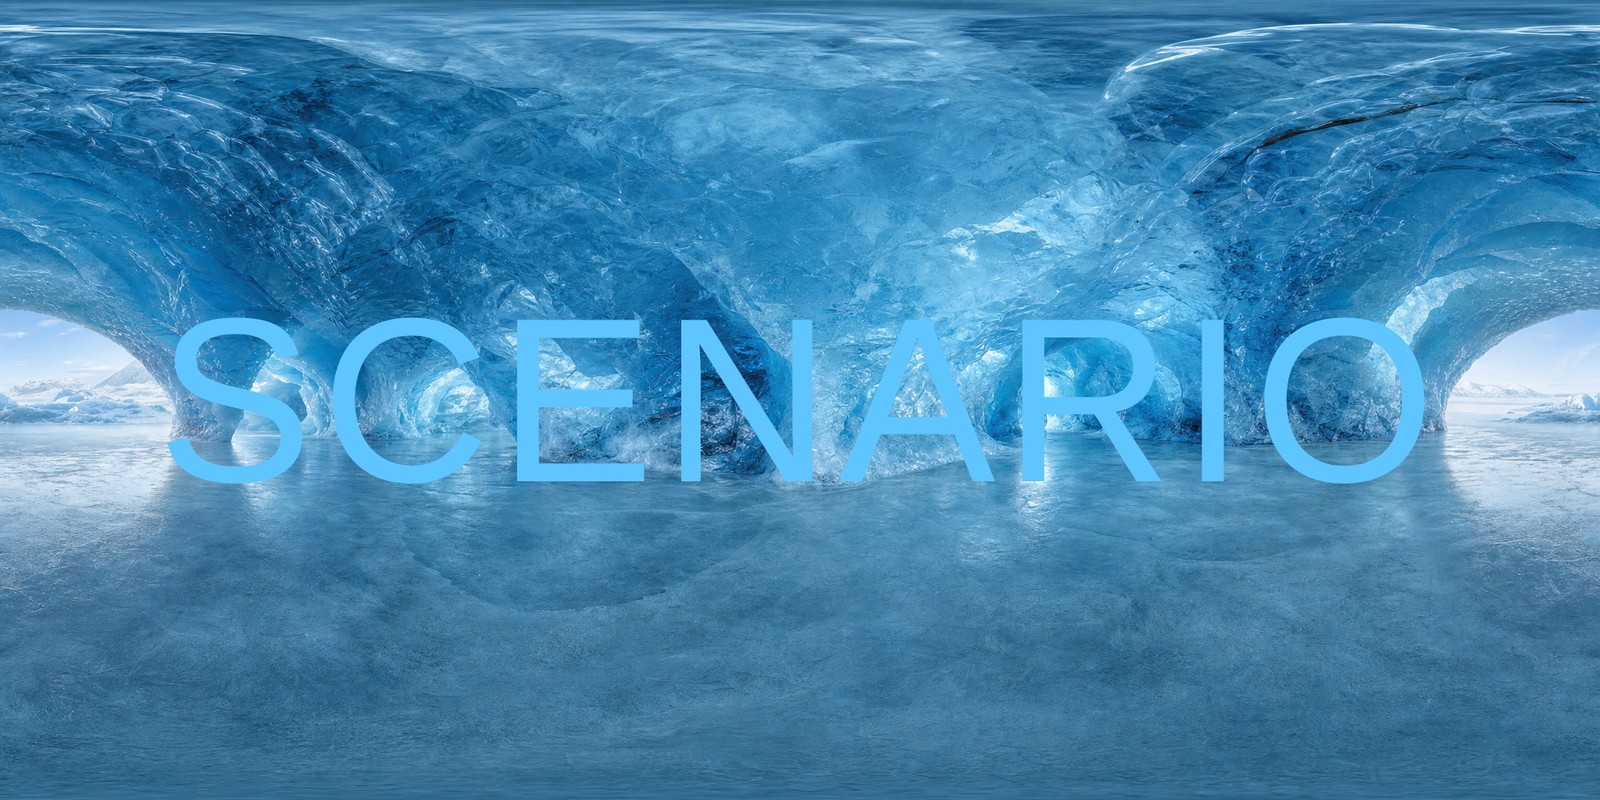 |
Ice cave reference: the same layer picks up the cave's cold, bright blue · Open on Scenario
Before | After |
|---|---|
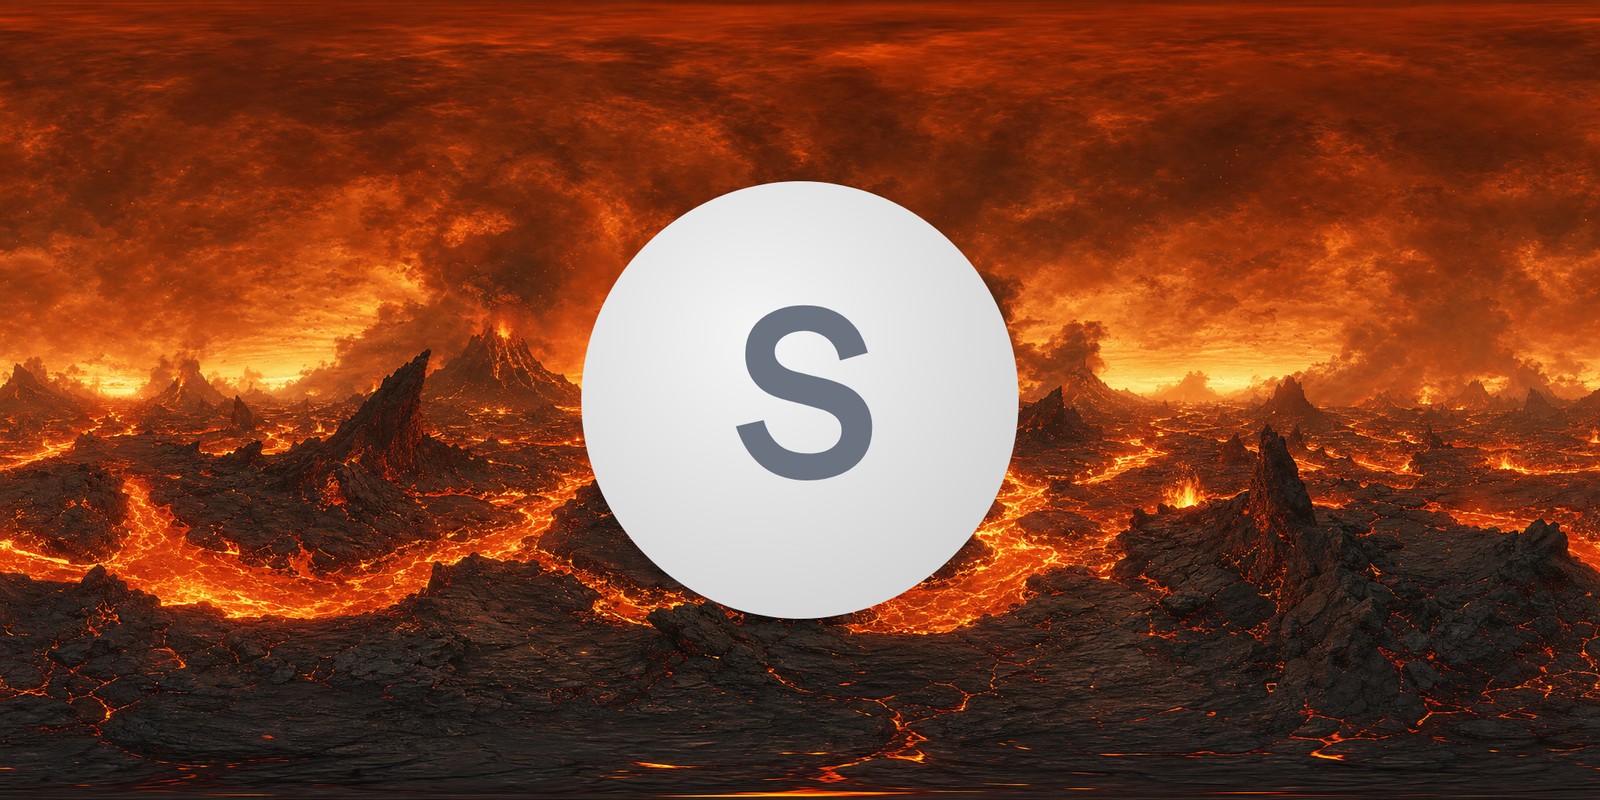 | 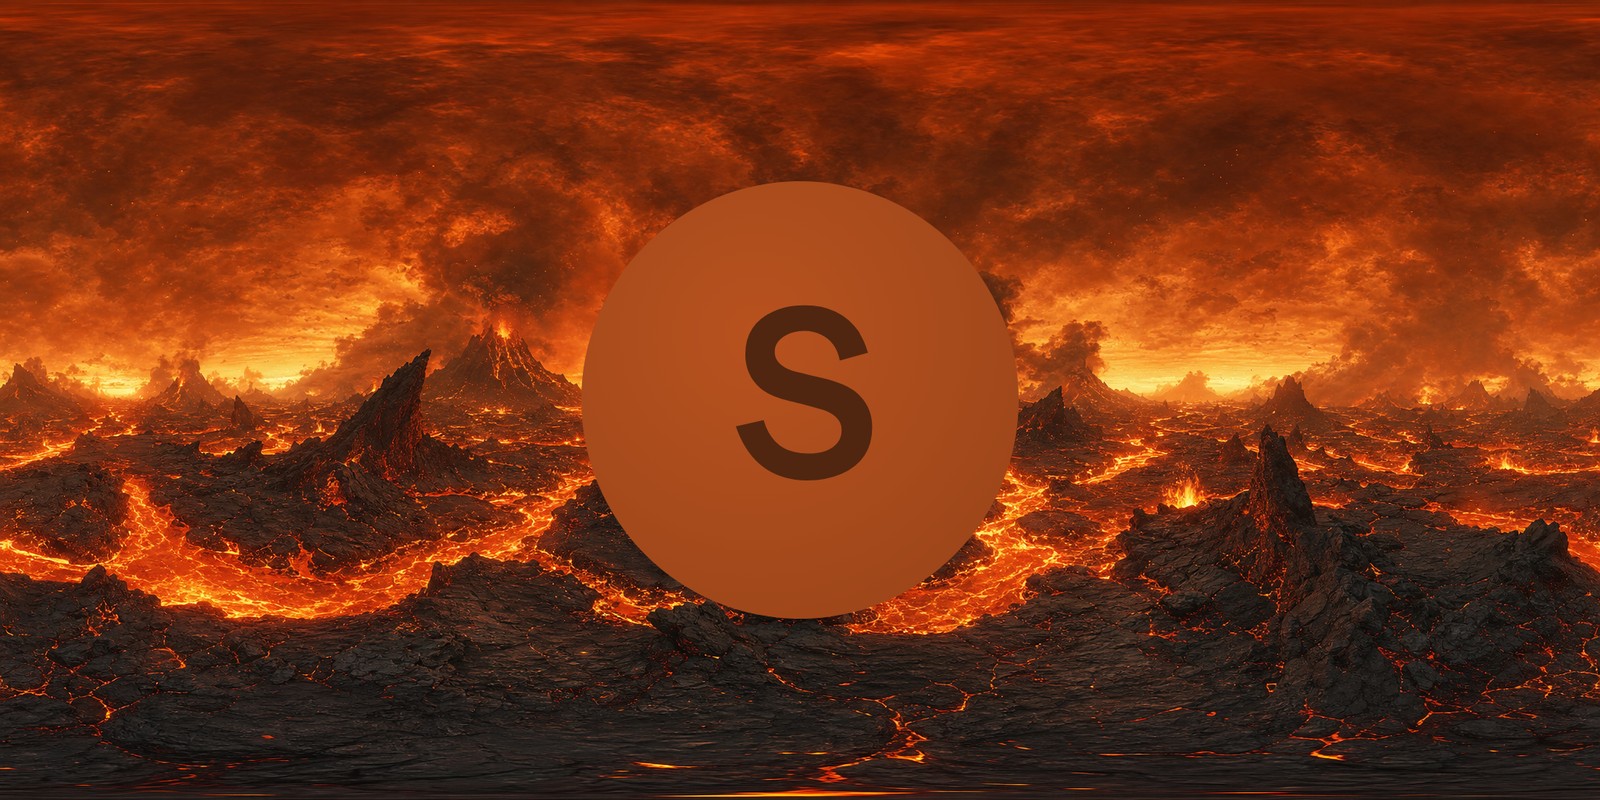 |
Volcanic reference: a gray badge graphic is pulled into the burnt orange of the lava field while keeping its internal shading · Open on Scenario
color-match shifts the layer's colors toward the scene while keeping the layer's own light and dark detail. luminance-match only rescales brightness to the scene average, useful when the layer's colors are brand colors that must not change. color+shadow applies color match and adds a drop-shadow plate configured through shadow, to ground an object on a floor or wall.
Scenario Inpaint
Inpaint edits only the part of an image you mark with a mask. Provide the image, a black-and-white mask of exactly the same size (white, or any non-zero pixel, marks the area to repaint), and a prompt describing what should appear there. The model generates the masked region, blends it back along a feathered edge, and leaves every pixel outside the mask exactly as it was.
Image | Mask | Result |
|---|---|---|
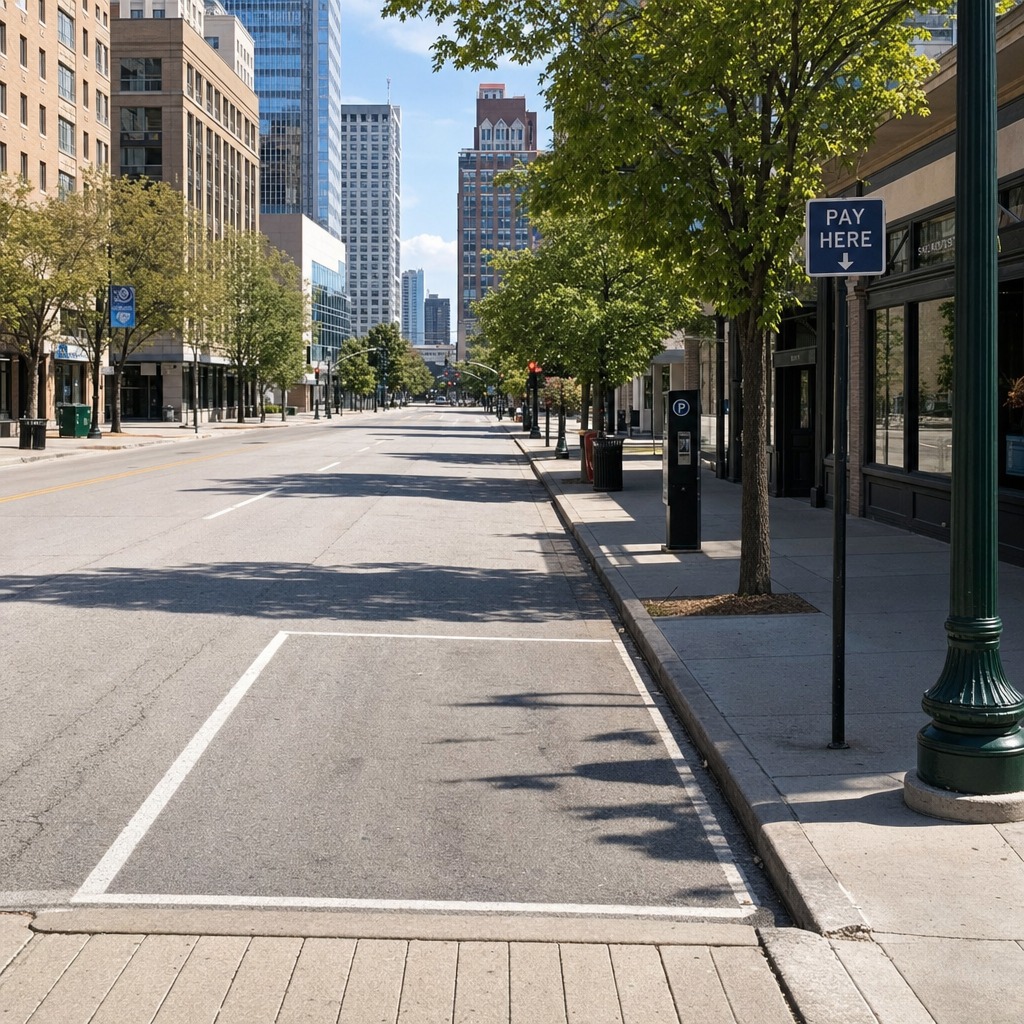 | 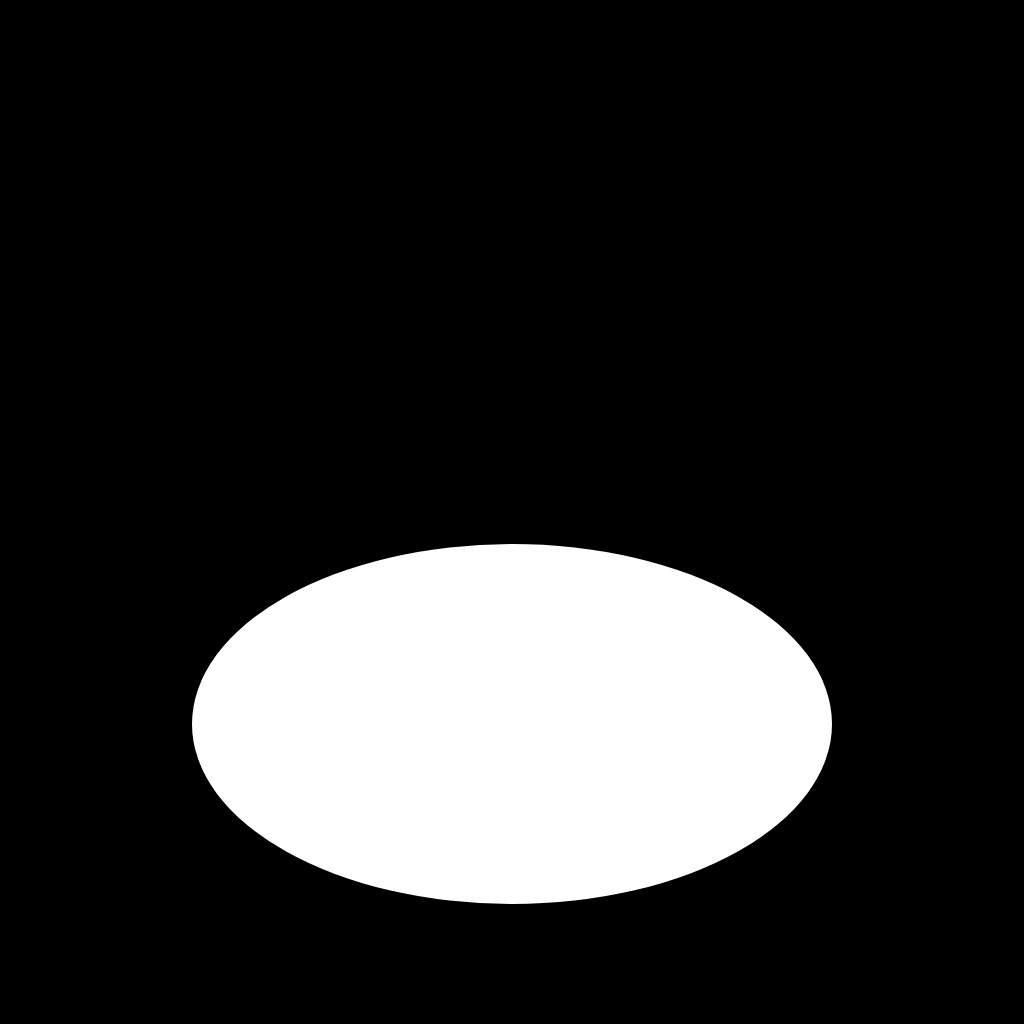 | 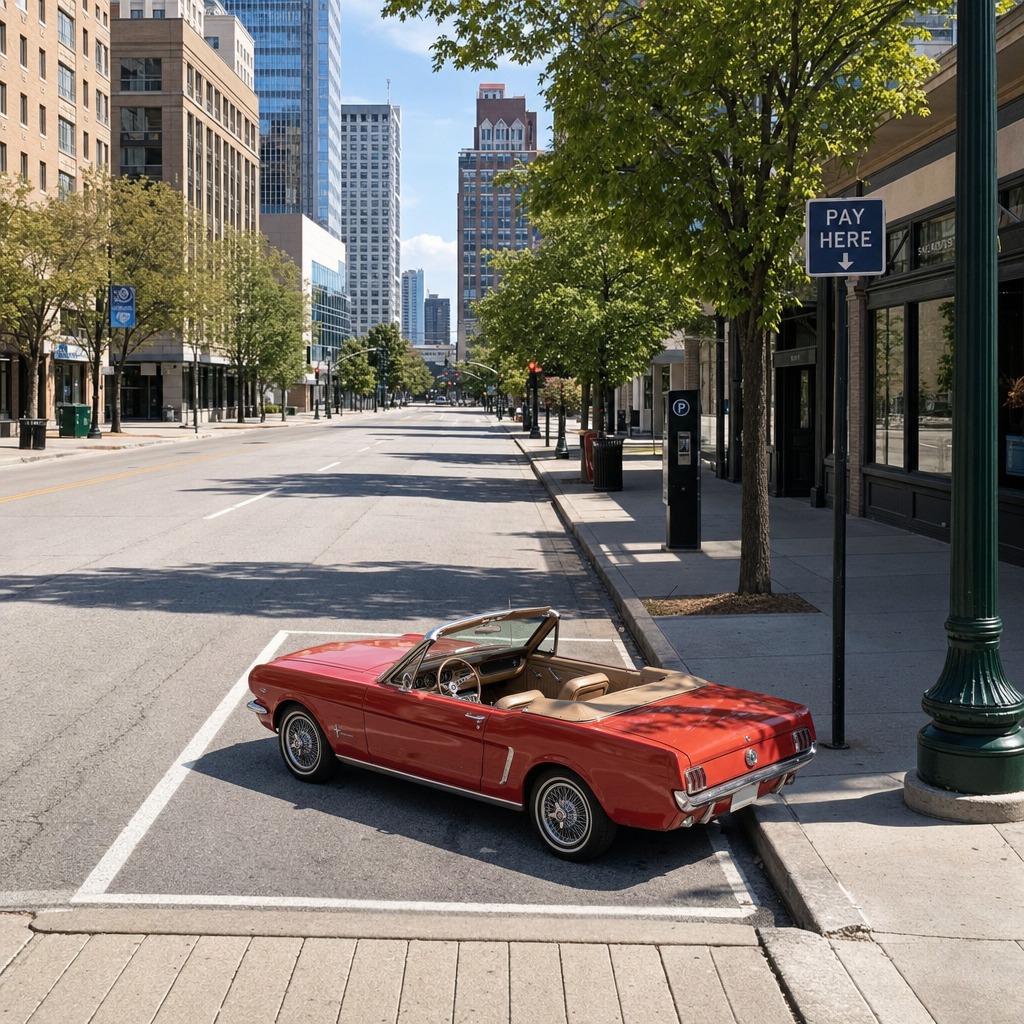 |
Prompt: "a classic red convertible car parked", featherPx 40. The empty parking bay, sign, and street are unchanged · Open on Scenario
Before | After |
|---|---|
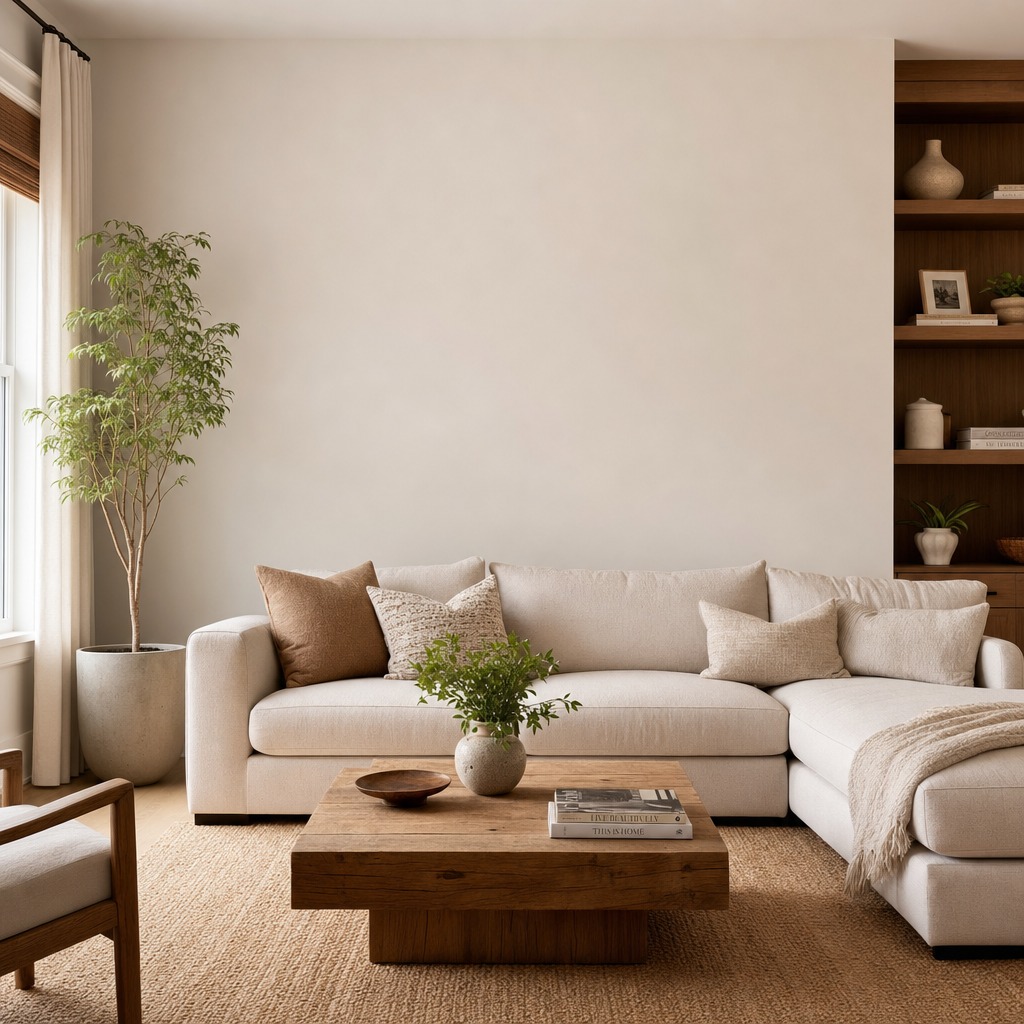 | 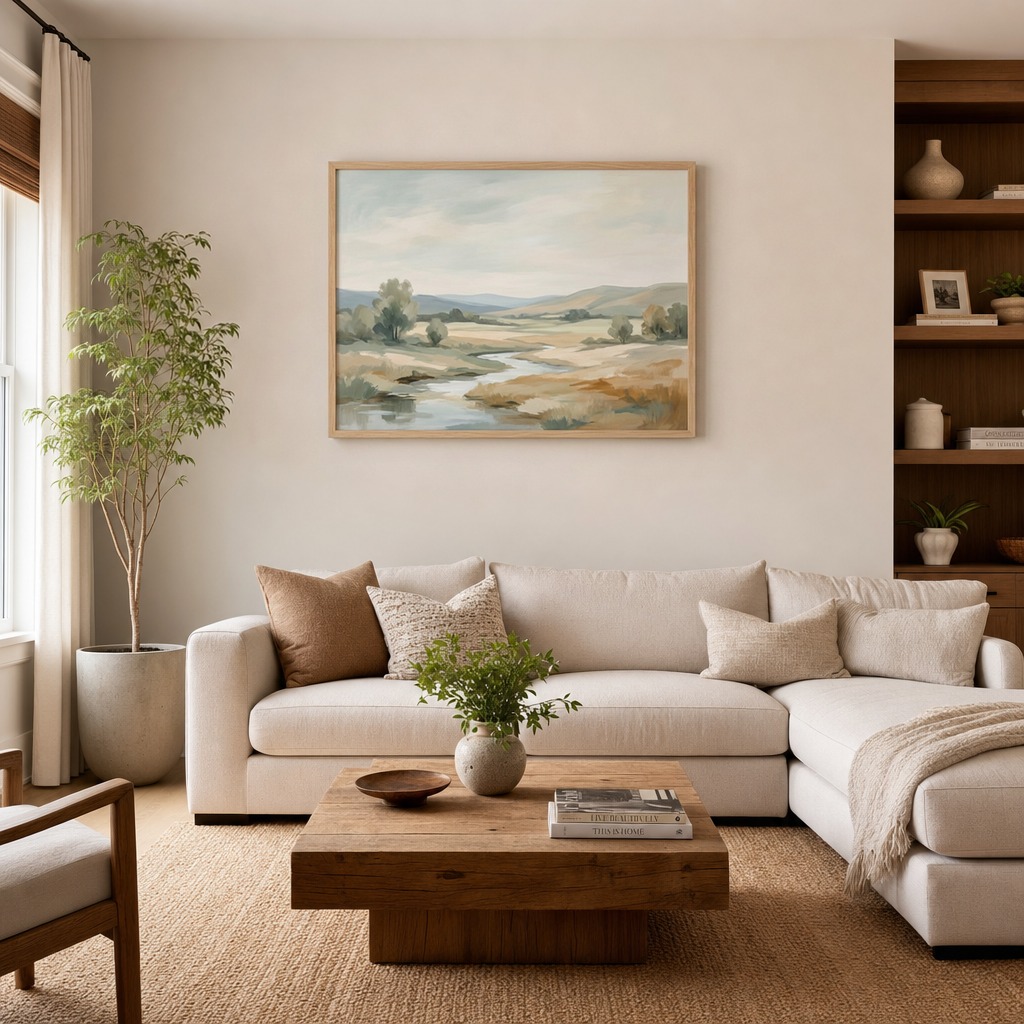 |
Prompt: "a large framed landscape painting hanging on the wall", with an oval mask over the blank wall · Open on Scenario
Before | After |
|---|---|
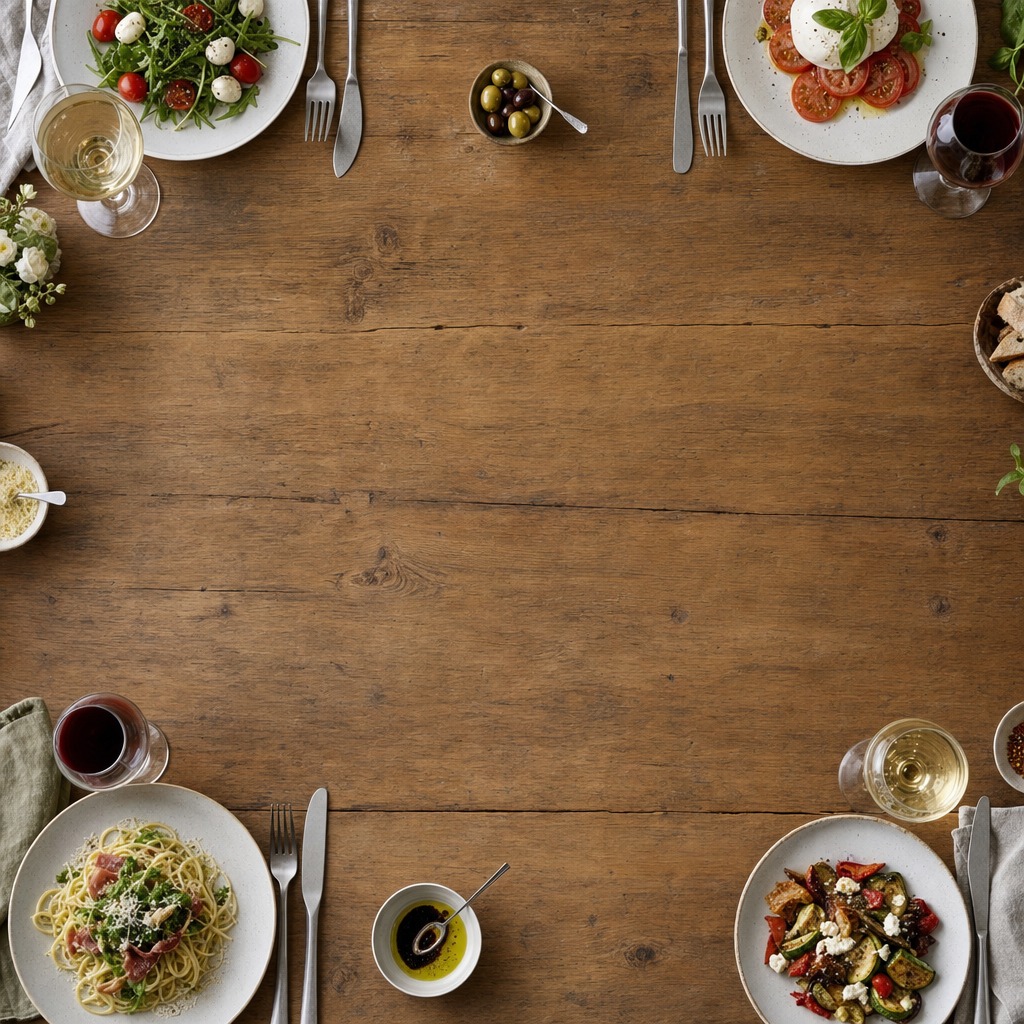 | 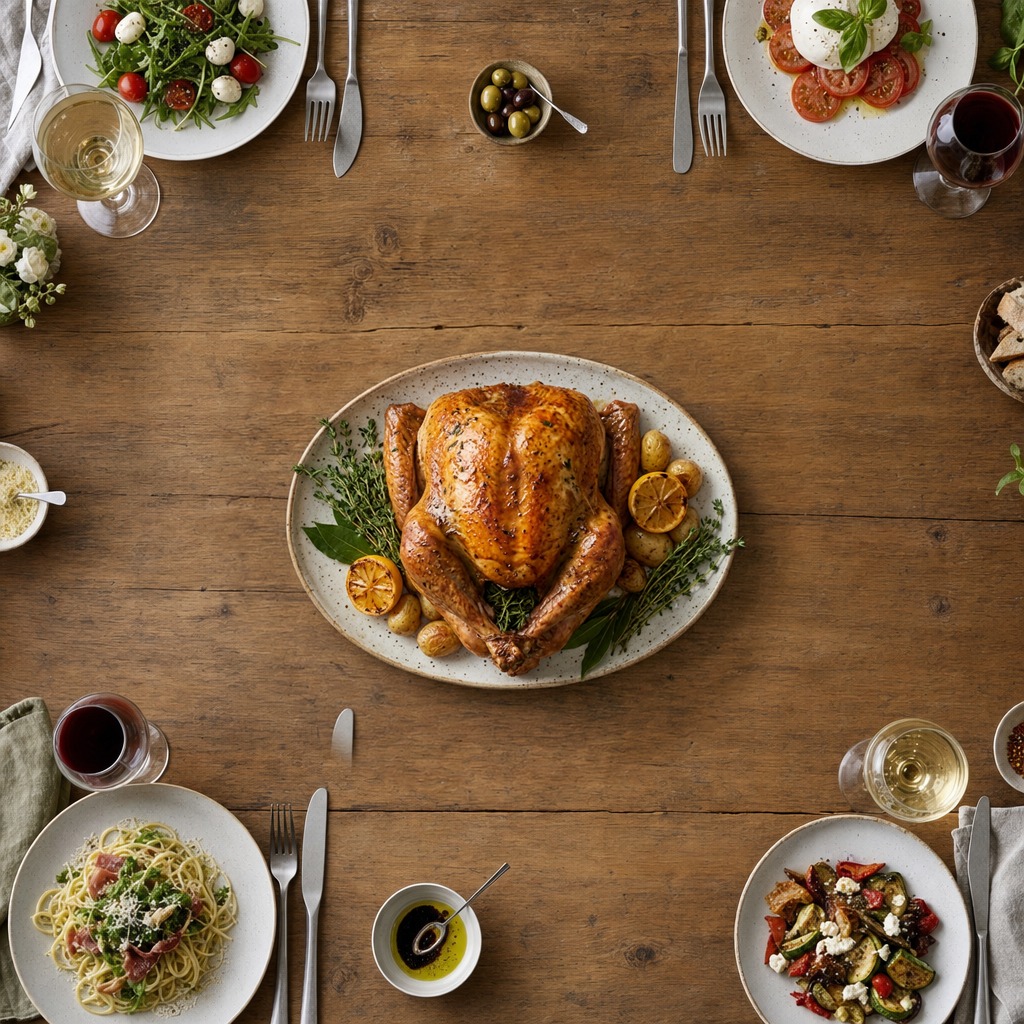 |
Prompt: "a whole roast turkey on a platter", with a round mask at the center of the table. The generated platter matches the overhead angle and warm light of the shot · Open on Scenario
A short prompt naming the object and its placement ("parked", "hanging on the wall", "on a platter") is enough: the model reads the surrounding pixels for perspective, lighting, and style. Size the mask to the object you want, since the new content is shaped by the mask area.
Chaining the Tools Together
Every mask in the Inpaint examples above was itself rendered with Rich Text Layer: a black canvas with one white shape positioned in CSS. This is the car mask, on a 1024x1024 canvas to match the 1024x1024 street photo:
htmlTemplate:
<div class="wrap"><div class="hole"></div></div>

css:
*{margin:0;box-sizing:border-box}
html,body{height:100%}
.wrap{width:100%;min-height:100vh;background:#000;position:relative}
.hole{position:absolute;bottom:120px;left:192px;width:640px;height:360px;border-radius:50%;background:#fff}
Typical chains:
Text into a scene: Text Layer or Rich Text Layer (transparent layer) → Perspective Warp (onto a sign or screen, canvas set to the scene size) → Lighting Transfer (graded against the scene) → composite the result over the scene.
Precise masks for Inpaint: Rich Text Layer with a black background and white shapes gives pixel-exact rectangles, ovals, or rounded boxes in exactly the size of your source image.
Graded graphics: Rich Text Layer (transparent badge or logo type) → Lighting Transfer, as in the "SCENARIO" and badge examples above.
Two sizing rules keep a chain working: the Lighting Transfer source and reference must have identical dimensions, and the Inpaint image and mask must have identical dimensions. The easiest way to guarantee both is to set canvasWidth and canvasHeight on the rendering and warping steps to the exact size of the scene image.
Parameters
Scenario Text Layer
textTemplate
Required. The text to render, optionally with Mustache variables such as {{name}}. Rendered as-is, with no HTML interpretation.
variables
Optional key and value pairs substituted into the template. Both are strings, so pass numbers and booleans as text.
fontFamily
A Google Font name, for example Inter. Use either this or fontUrl, not both.
fontUrl
A direct https link to a .ttf, .otf, .woff, or .woff2 file, for brand fonts not on Google Fonts. Use either this or fontFamily.
fontWeight
100 to 900 in steps of 100. Default 400.
fontStyle
normal (default) or italic.
size
Required. Font size in pixels, 4 to 2048. Default 32.
color
Required. Text color as #RRGGBB hex. Default #000000.
align
left (default), center, or right.
bbox
The text box: x, y (top-left origin), width, and height in pixels. It must fit inside the canvas.
canvasWidth / canvasHeight
Output size in pixels, 1 to 8192 each. Default 1024 x 1024.
lineHeight
Line height multiplier, 0.5 to 4. Default 1.2.
letterSpacing
Extra spacing between letters in pixels. Default 0.
overflow
wrap (default) word-wraps inside the box width and clips vertically, clip crops anything outside the box, shrink reduces the font size until the text fits.
Scenario Rich Text Layer
htmlTemplate
Required. The HTML to render, with Mustache variables: {{var}} inserts escaped text, {{{var}}} inserts raw HTML. Remote resources (images, stylesheets, fonts) must pass a fetch allowlist, by default Google Fonts plus Scenario domains. Embed other assets as data: URLs, or extend the allowlist with allowedUrlPrefixes.
css
Optional CSS, applied after a reset that makes the page background transparent. The same allowlist applies to url(...), @import, and @font-face.
variables
Optional key and value pairs for the template, both as strings.
canvasWidth / canvasHeight
Required. Output size in pixels, 1 to 8192 each. Default 1024 x 1024.
deviceScaleFactor
Pixel density multiplier, 0.5 to 4 in steps of 0.5. Default 1. Use 2 for a retina-sharp render of the same layout.
allowedUrlPrefixes
Optional list of extra https URL prefixes the renderer may fetch from. Non-https links, private network addresses, and internal hostnames are always blocked.
Scenario Perspective Warp
source
Required. The RGBA PNG to warp. Its four corners are mapped to the destination points.
corners
Four x, y points on the destination canvas, in the order top-left, top-right, bottom-right, bottom-left. Use either this or homography.
homography
A 3x3 row-major homography matrix, given as three rows of three columns. Use either this or corners.
canvasWidth / canvasHeight
Required. Destination canvas size in pixels, 1 to 8192 each. Default 1024 x 1024. Match the scene you will composite into.
interpolation
lanczos4 (default, highest quality), bilinear (faster), or nearest (keeps hard pixel edges, useful for pixel art).
Scenario Lighting Transfer
source
Required. The RGBA layer to grade, typically a text layer, a warped element, or a cut-out subject.
reference
Required. The RGB scene whose color and lighting are sampled. Must be the same size as source.
regionMask
Optional single-channel mask choosing where in the reference to sample. When omitted, the source alpha is used, so the layer is matched to the part of the scene it covers.
mode
color-match (default) pulls the layer toward the region's colors while keeping its luminance, luminance-match rescales only brightness to the region average, color+shadow applies color match plus a drop-shadow plate.
shadow
Only used in color+shadow mode. One entry with distancePx (0 to 512), blurPx (0 to 512), opacity (0 to 1), and an optional angleDeg (-360 to 360). Leave the angle empty to infer the shadow direction from the reference's brightness gradient.
Scenario Inpaint
image
Required. The source image to edit.
mask
Required. A black-and-white mask the same size as the image. Non-zero (white) pixels mark the region to repaint.
prompt
Required, up to 2,000 characters. What should appear in the masked area, for example "a classic red convertible car parked".
featherPx
Width in pixels of the soft blend ring along the mask edge, 0 to 256. Default 32. 0 gives a hard cut. The examples above used 40.
paddingRatio
Extra surrounding context sent to the model, as a fraction of the mask's bounding box added on every side, 0 to 1. Default 0.1. Raise it when the model needs more of the scene to match perspective and lighting.
Use Cases
Game UI and nameplates: batch character names, level labels, or item cards from one Text Layer or Rich Text Layer template with variables.
Marketing templates at scale: render sale banners, social cards, and posters from HTML and CSS, then swap copy per campaign or language without touching the layout.
Product and signage mockups: warp artwork onto screens, billboards, packaging faces, or shop signs with Perspective Warp, then grade it to the scene with Lighting Transfer.
Believable composites: match cut-out subjects, logos, or text to a background's color and brightness so they stop looking pasted on.
Scene set dressing: add a car, a painting, or a dish to an existing shot with Inpaint while keeping everything else pixel-identical.
Automated pipelines: because four of the five tools are deterministic, they slot into workflows where the same input must always give the same output.
Tips for Better Results
Make Rich Text designs fill the canvas. Set
html,body{height:100%}andmin-height:100vhon the outer wrapper, otherwise backgrounds and centered layouts only cover the height of their content.Always declare a fallback font family. End every font stack with a generic family such as
sans-seriforserif, and check the render: if a web font does not load, the renderer quietly uses the fallback.Build masks with Rich Text Layer. A black canvas with an absolutely positioned white shape gives an exact, repeatable mask at the precise size of your source image.
Match sizes before you chain. Set every canvas to the scene's exact width and height so Lighting Transfer and Inpaint never receive mismatched inputs.
Keep Inpaint prompts short and physical. Name the object and how it sits in the scene. The surrounding pixels already carry the style and lighting.
Keep a soft edge on Inpaint. A feather of 32 to 40 pixels hides the seam. Drop toward 0 only for hard-edged graphic edits.
Pick luminance-match for brand colors. When a logo or text color must stay on-brand, luminance-match adjusts only brightness, while color-match also shifts the hue.
Known Limitations
Lighting Transfer is a grade, not a relight. It matches average color and brightness; it does not add directional highlights, reflections, or cast light. Use color+shadow for a simple ground shadow, or regenerate with an image editing model when true relighting is needed.
Strict size matching. Lighting Transfer needs source and reference at identical dimensions, and Inpaint needs image and mask at identical dimensions. Resize first (for example with Scenario Resize Image) if they differ.
Perspective Warp handles flat planes only. Four corners define one plane, so curved surfaces such as bottles or cylinders will not wrap correctly.
Text Layer is single-style. One font, size, and color per render. For mixed styling in one line, use Rich Text Layer.
Rich Text fetches are restricted. Only Google Fonts and Scenario domains load by default. Inline other assets as
data:URLs or add their https prefix toallowedUrlPrefixes.Content outside the canvas is cut off. Rich Text Layer does not shrink oversized text for you; if a headline is wider than the canvas it is clipped at the edge. Test long copy, or use Text Layer with
overflow: shrink.Inpaint output follows the mask. The new content is confined to the masked area, so a mask that is too small crops the object and one that is too large replaces more of the scene than intended.