Basics of Model Training
Last updated: May 15, 2026
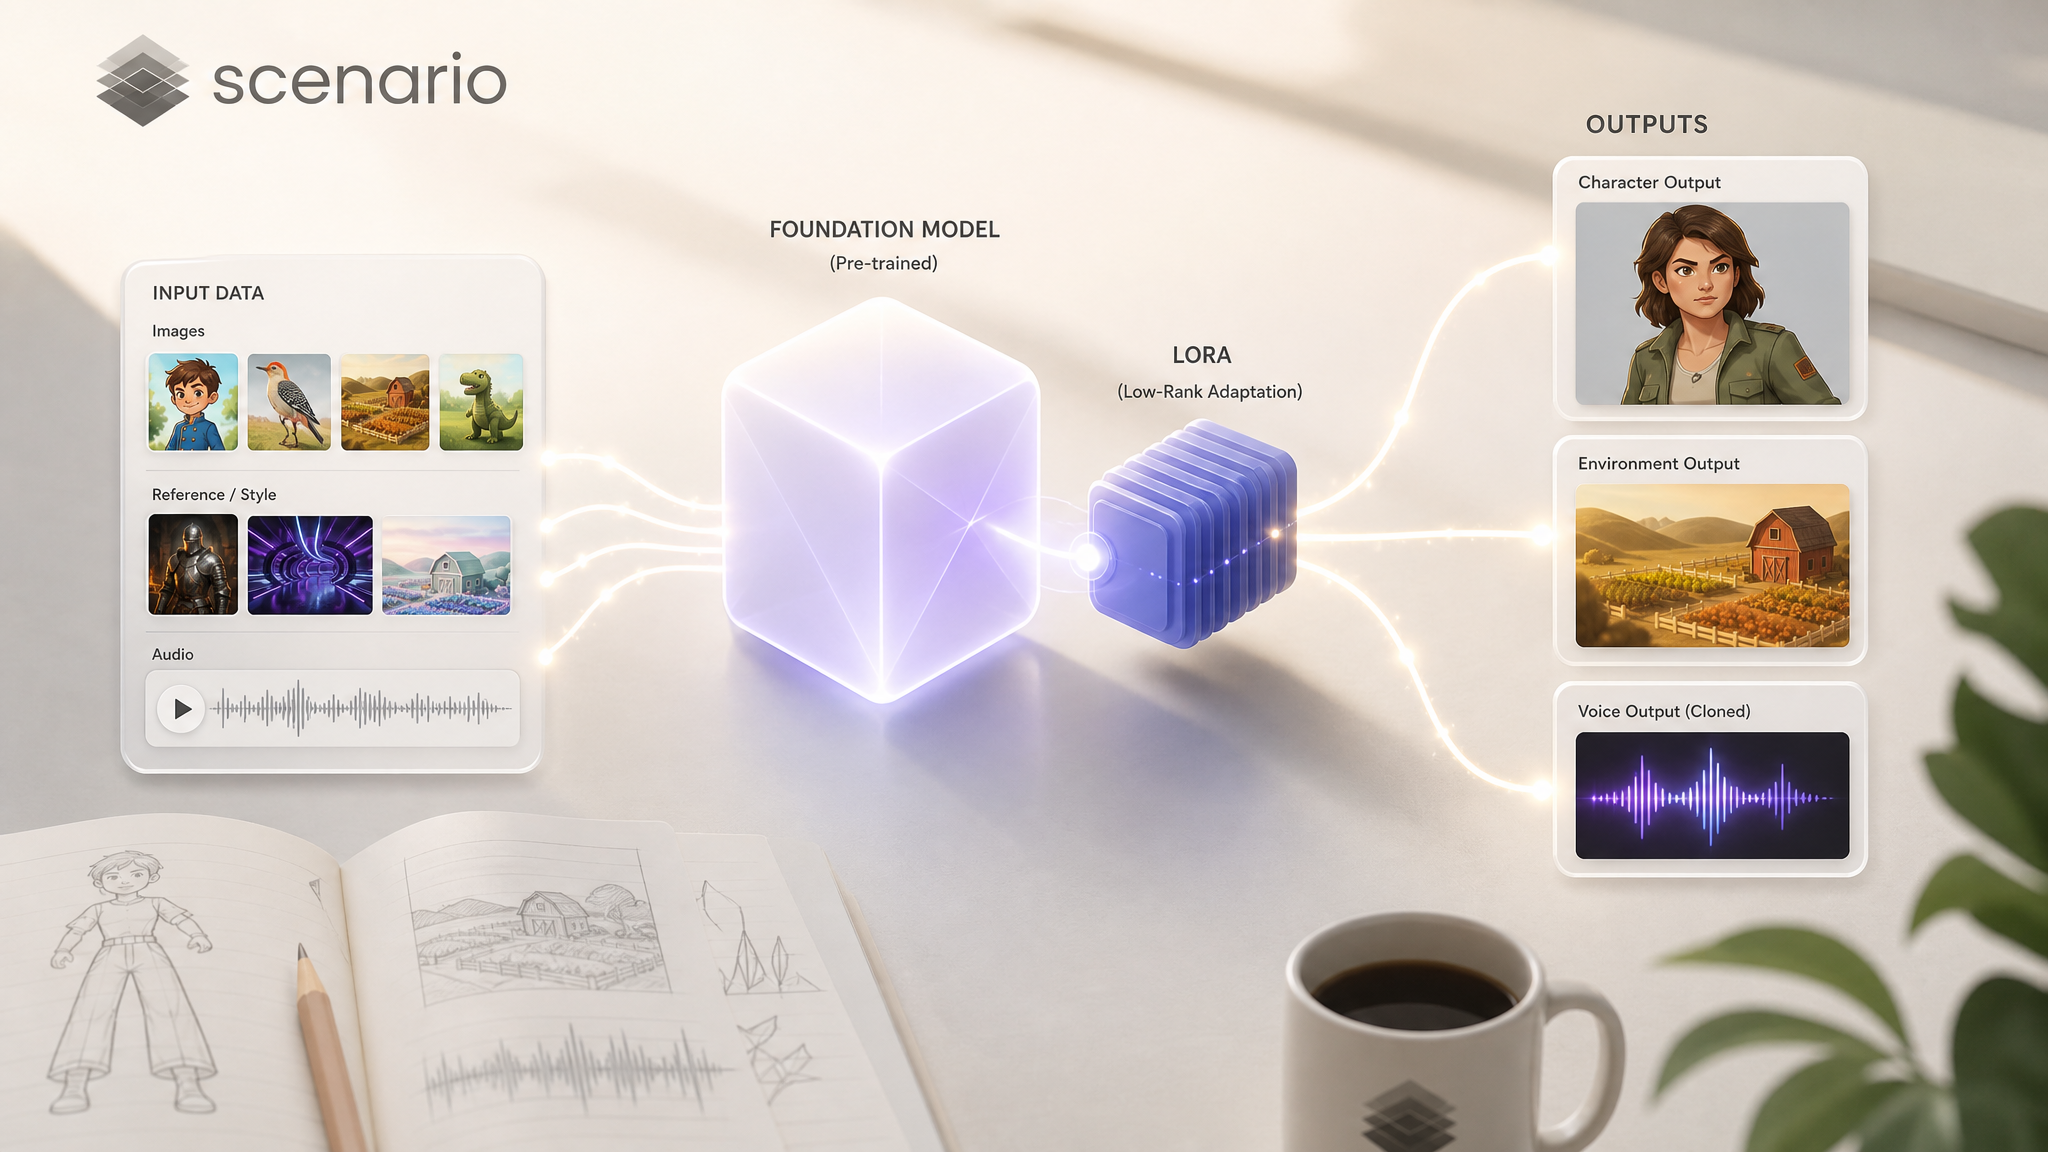
What’s Model Training
Training AI models on Scenario, also known as fine-tuning, means taking a foundation model and teaching it something new: a specific style, a recurring character, a product, an environment, a transformation, or a voice. Anything that the foundation model does not already know, you can teach it. Once trained, your custom model behaves like any other model on the platform. You can generate with it, share it, merge it, and call it from the API or MCP.
Scenario offers a streamlined interface for training: all on a single page, in just a few clicks. This article walks through the fundamentals.
What you'll train: a LoRA
Almost every custom model on Scenario is a LoRA, short for Low-Rank Adaptation. Think of a LoRA as a small adapter that sits on top of a much larger foundation model. The foundation model already knows how to render images of almost anything; the LoRA gently steers it toward your specific subject or style.
Because LoRAs are small adapters and not full retrains of the foundation model, they train fast, cost a fraction of a full fine-tune, and can be combined with each other to mix styles or stack characters. The same general workflow applies to voice cloning, with audio samples in place of images.
The three training paths
Before you start, pick the path that matches what you want the trained model to do. Each path uses different inputs, different captions, and different base models.
Path | Input | Use it when |
|---|---|---|
Single-image LoRA | 5 to 15 images of one subject or style | You want the model to generate a character, product, environment, or aesthetic from a text prompt. |
Edit LoRA | 5 to 15 before/after image pairs with instructional captions | You want the model to transform any input image: style transfer, recolor, character swap, relight, and so on. |
Voice clone | A short audio sample (under 30 seconds for IVC) | You want a generated voice that matches a reference speaker. |
Each path is paired with specific base model families, covered next.
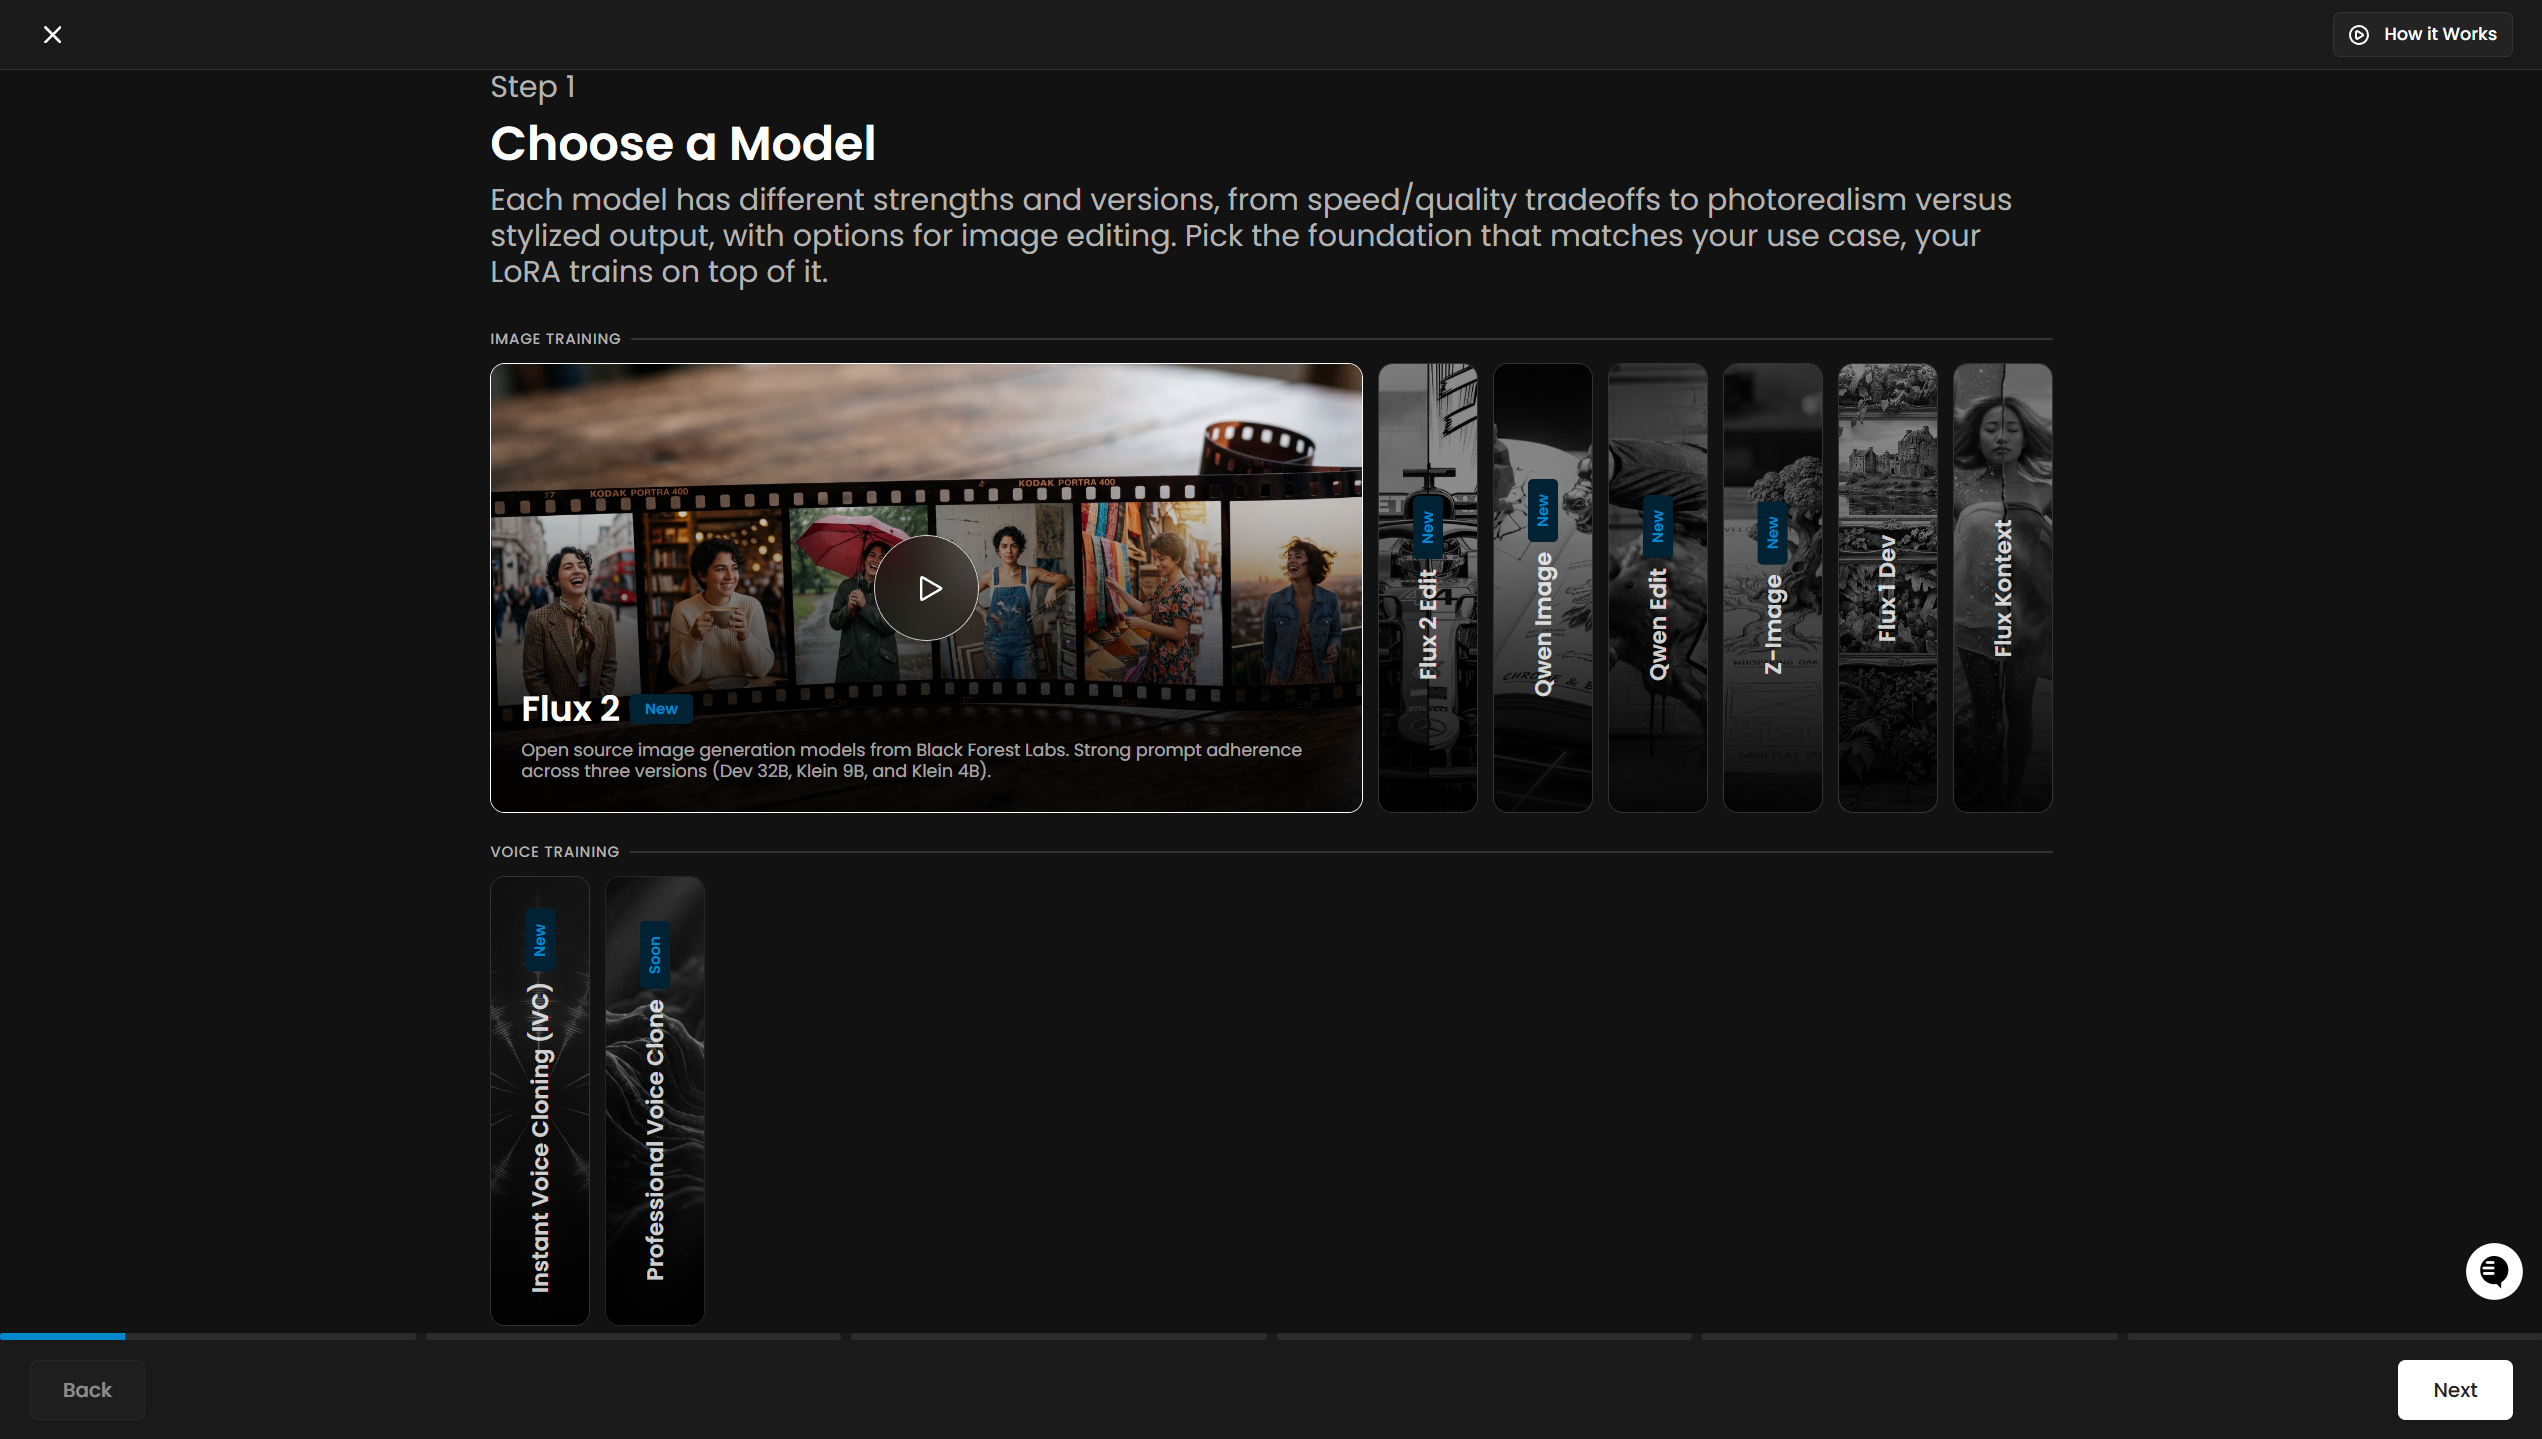
Base model families at a glance
When you click Create>Train>Start Training, the Choose a Model picker groups options into Image Training and Voice Training. The family you pick affects training time, cost, output style, and which paths are supported.
Image Training
Flux 2: the new default for single-image LoRAs. Three variants give you a quality versus cost trade-off: Dev 32B (highest quality), Klein 9B (balanced), and Klein 4B (most economical).
Flux 2 Edit: the new default for edit LoRAs (image pairs).
Qwen Image: strong prompt adherence at lower cost. A solid pick for product and environment work.
Qwen Edit: edit LoRAs that preserve surrounding context particularly well.
Z-Image: three variants (Full, De-Turbo, Turbo) with a unique perk: a single trained LoRA works across all three at inference. Train once, swap variants depending on quality versus speed.
Flux Kontext: the established edit family. Still trainable for users with existing Kontext workflows.
Voice Training
Instant Voice Cloning (IVC): fast experimentation from a short audio sample.
Professional Voice Clone: coming soon.
If you have an existing Flux.1 Dev or SDXL model, see Migrating Legacy Models for guidance on moving to Flux 2, Qwen, or Z-Image.
Training images: what makes a good dataset
The quality of your trained model depends, more than anything else, on the quality of the images you feed it. A model can only learn what its dataset shows it, so curation is the single highest-leverage step in the whole process. The same principles apply across all base model families.
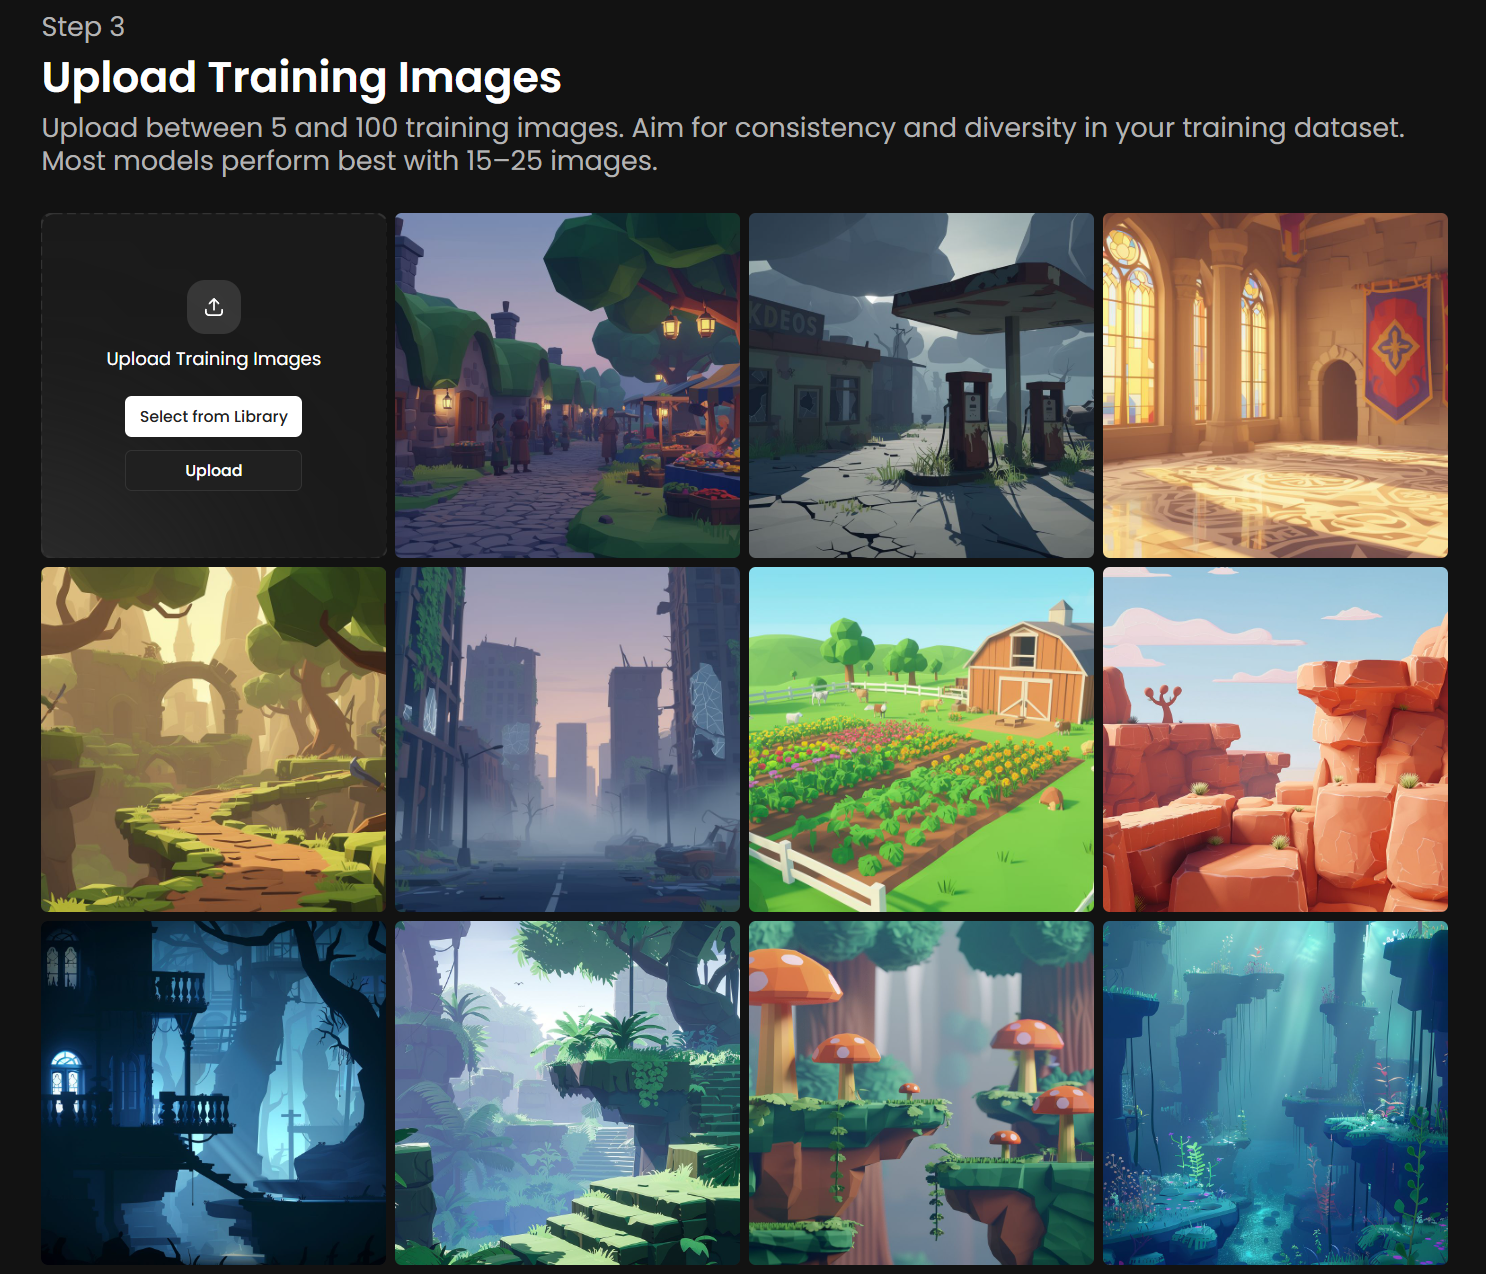
Size: 5 to 15 images is the sweet spot. The maximum is 50. Less is more: a small, well-curated dataset beats a large, inconsistent one. Adding mediocre images to bump the count up usually hurts the result, because the model learns the noise along with the signal.
Resolution: all training images must be at least 1024 x 1024 pixels. Lower resolutions starve the model of detail. Use the Enhance 2x tool on smaller sources before training.
Format: square crops are optimal. If you upload a non-square image, Scenario lets you fit it inside a square (default) or crop directly in the interface to focus on a specific portion.
Consistency: every image should reinforce the same goal. For a character, use the same person in different poses, expressions, and outfits. For a style, vary the subjects but keep the visual language identical. For an edit pair set, use the same kind of transformation in every pair.
Captions
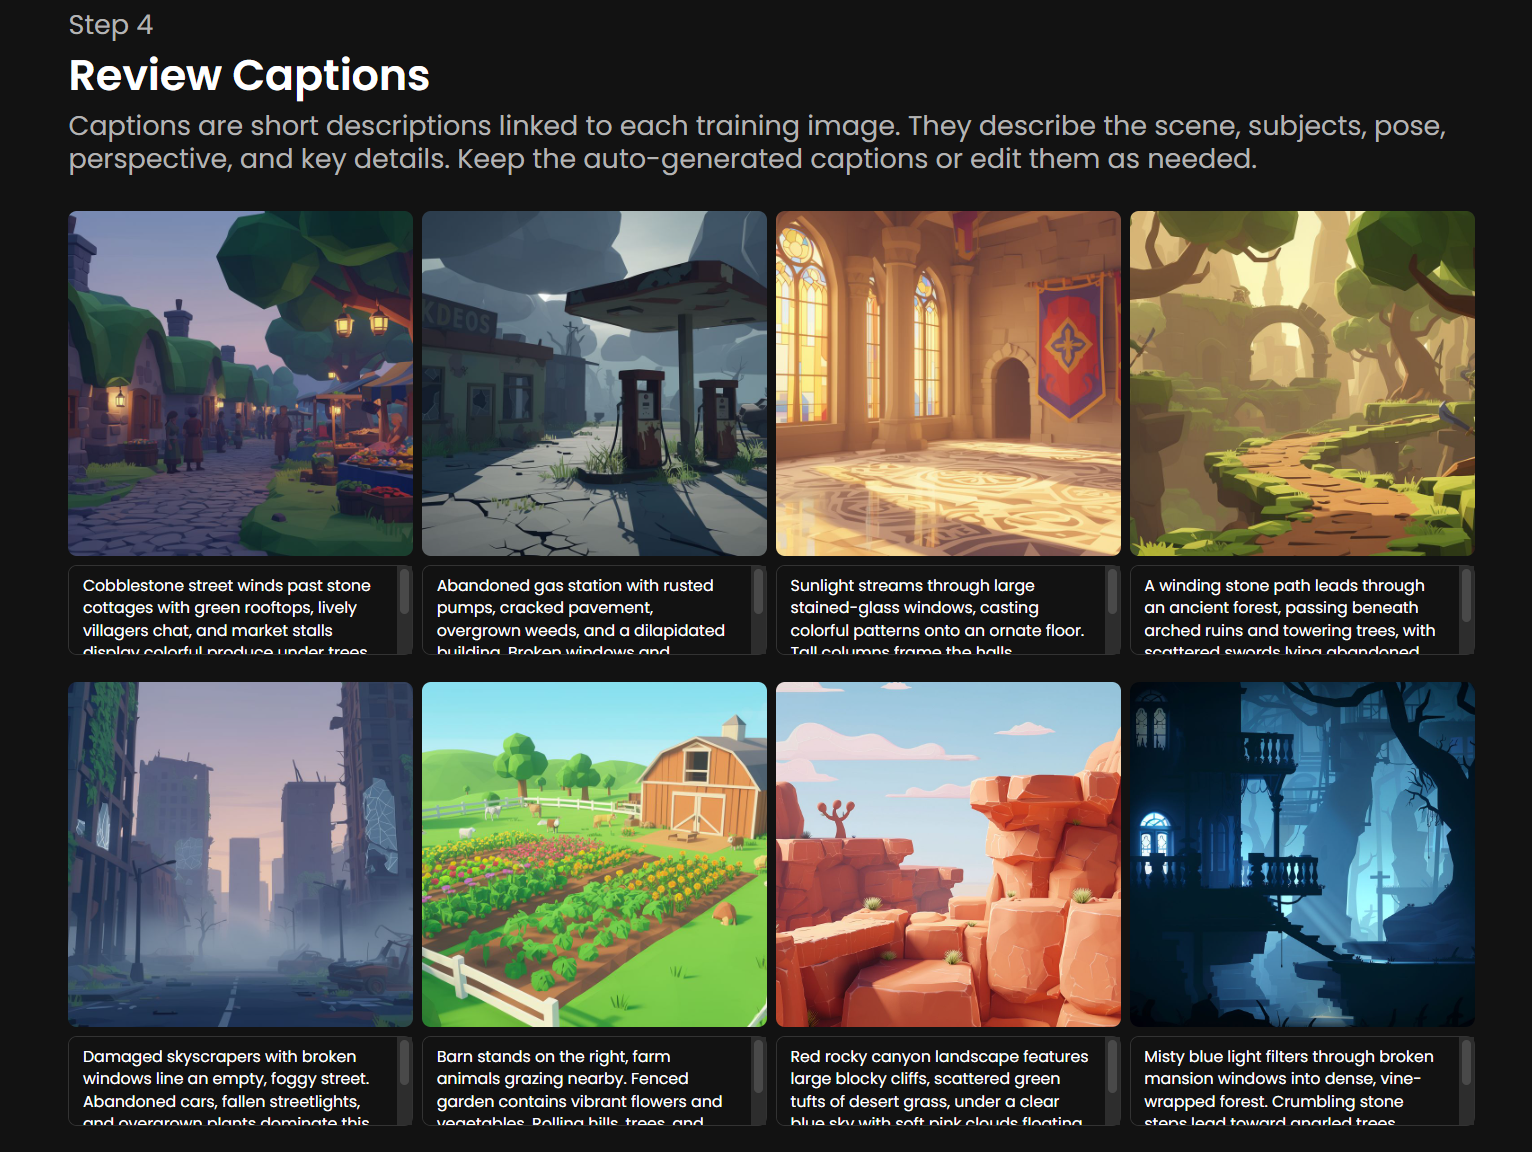
When you click Upload Images, Scenario automatically generates a short caption under each image. Captions tell the model what it is looking at, so good captions lead to a model that responds well to prompts. Auto-captioning is a starting point; always review and refine captions before training.
There are two flavors, depending on the training path:
Single-image LoRAs: captions are descriptive. They describe what is in the image (subject, setting, mood). Keep them faithful and consistent across the set.
Edit LoRAs: captions are instructional. They use a verb plus a transformation ("turn the photo into watercolor", "swap the daytime sky for sunset"). The model learns the action, not the subject.
Understanding Epochs
In machine learning, an epoch represents one full cycle through the entire training dataset. During each epoch, the model processes every training image, learns from it, and updates its internal parameters to better capture the desired style or subject. Training across multiple epochs lets the model iteratively refine its understanding, producing more accurate and consistent results.
Picking the right number of epochs is one of the most important decisions in training. The two failure modes sit at opposite ends:
Too few epochs (underfitting): if you train your model for too few epochs, it does not have enough time to learn the defining characteristics of your training data. Outputs feel generic or inconsistent and do not closely resemble the desired style or subject.
Too many epochs (overfitting): training for too many epochs causes the model to become too specialized in the training data. It loses the ability to generalize to new prompts and starts to reproduce the training images too literally: repeated backgrounds, identical poses, or rigid compositions.
As a general guideline, most LoRA models on Scenario perform well with 10 epochs, which is the default. Stick with the default for your first run, then adjust up or down based on the results.
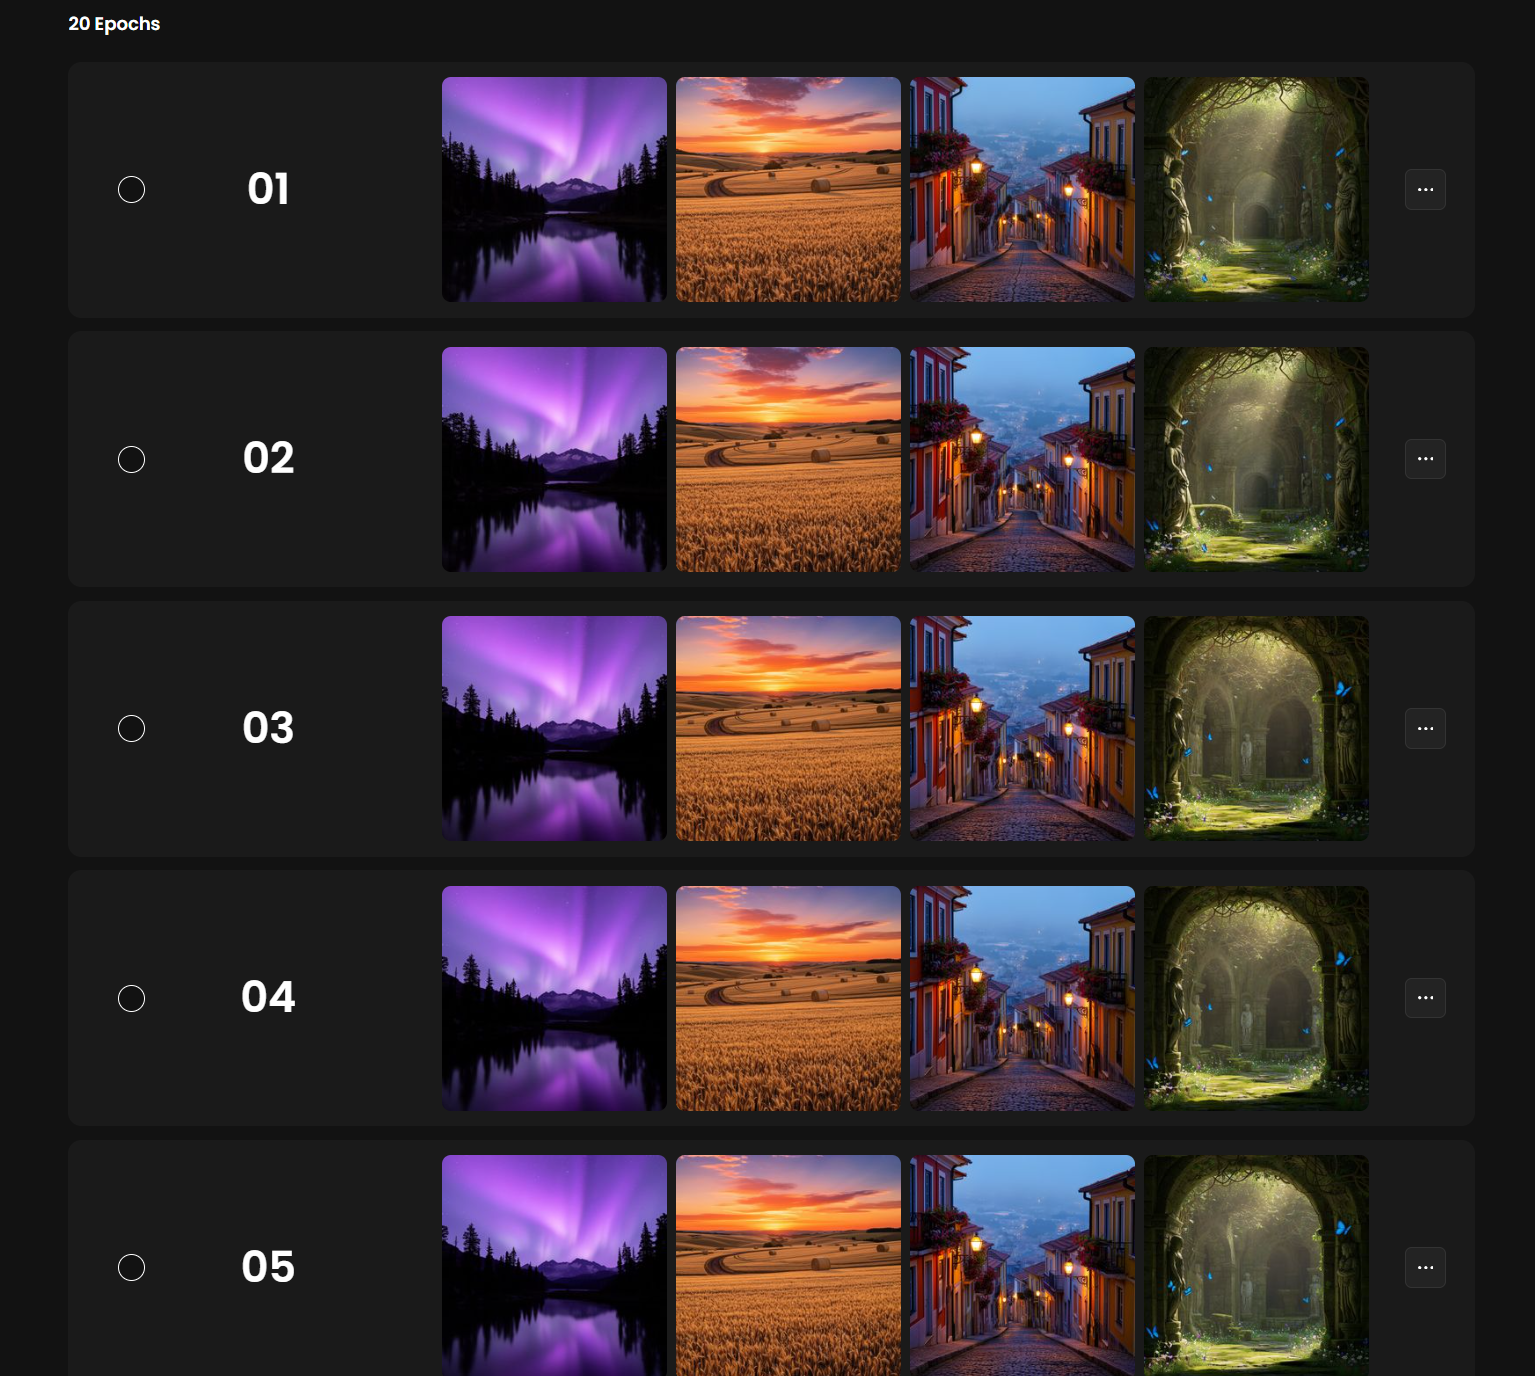
Comparing Epochs with Test Prompts
You do not have to commit to a single epoch upfront. Scenario's built-in comparison system generates intermediate results for every epoch during training, so when the job finishes, you can compare side by side and pick the strongest one.
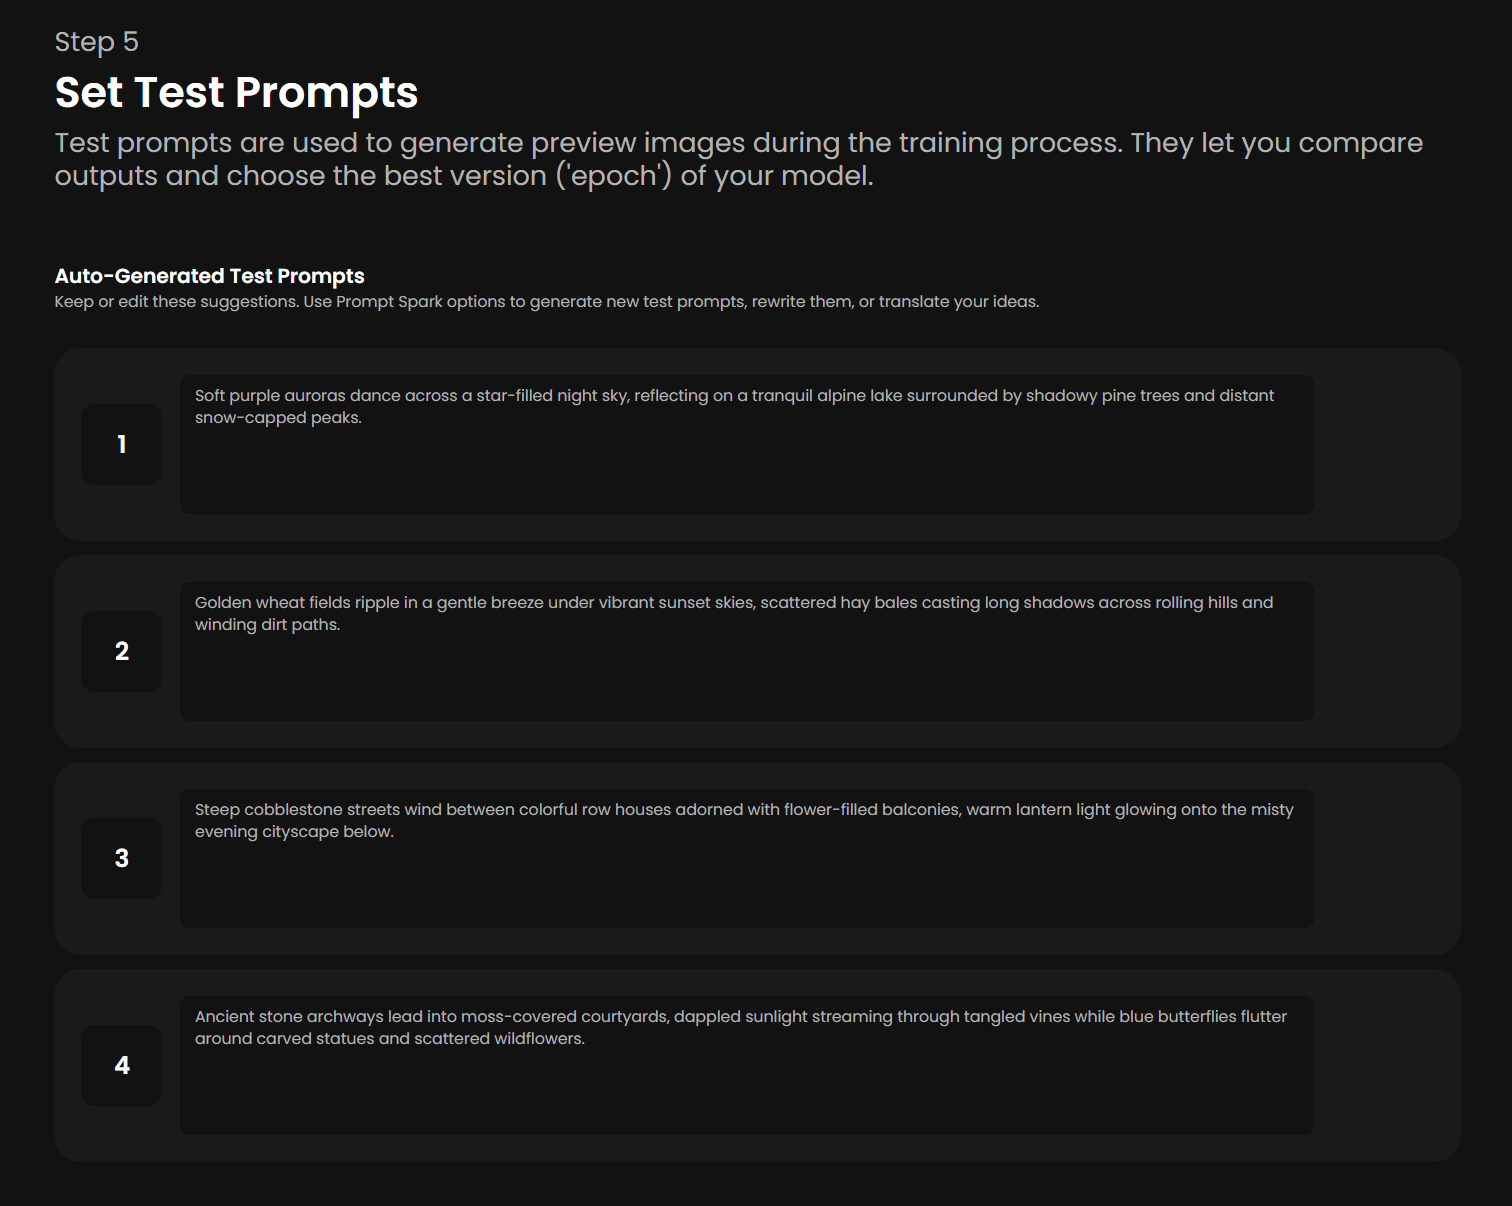
Before starting, add up to four test prompts in the Advanced Training Settings. Scenario will run these prompts at every epoch, giving you a built-in apples-to-apples grid of results.
Set your total epoch count. Choose your desired number of epochs (for example, 10) in the Advanced Training Settings before starting training.
Monitor training progress. As training progresses, Scenario generates results for each epoch individually using your test prompts.
Compare epochs in the interface. Once training is complete, use Scenario's interface to compare different epochs side by side.
Select the optimal epoch. After comparing the results, pick the epoch that performs best with your test prompts: enough learning to capture the subject or style, not so much that it overfits.
Save your epoch comparison view if you plan to retrain or refine the model later. Knowing which epoch worked best for a given dataset shortens the next round considerably.
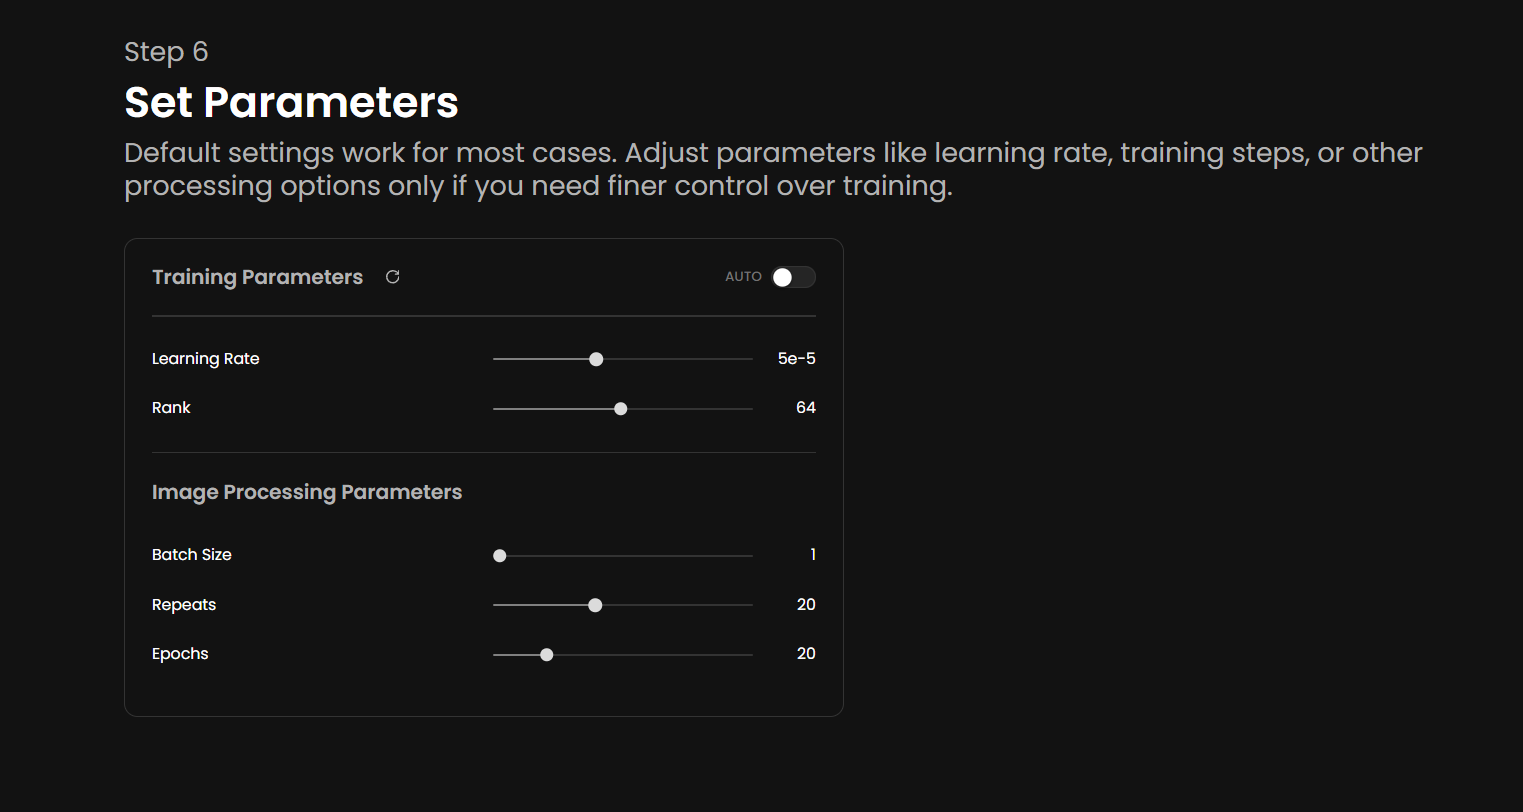
Training parameters at a glance
The defaults work for most cases. Change them only after a baseline run, if the result needs nudging:
Learning Rate:
1e-4Text Encoder Learning Rate:
1e-5Batch Size:
1Repeats:
20Epochs:
10
For deeper control over each parameter, see Advanced Training Parameters.
The training flow, end to end
Once your dataset is ready, training takes you through a handful of steps on a single page. The defaults cover most first runs, so you can focus on the choices that actually shape the result and tune the rest later.
Choose a Model. Pick the base model family that fits your goal: Flux 2, Qwen Image, or Z-Image for single-image LoRAs; Flux 2 Edit, Qwen Edit, or Flux Kontext for edit LoRAs; IVC for voice. See Choose Your Base Model Family for the full decision guide.
Choose a Version. Inside the family, pick the variant that matches your priority. Higher-fidelity versions (such as Flux 2 Dev) train slower and cost more; lighter versions (such as Klein 4B or Z-Image Turbo) train faster and cost less.
Upload your dataset (or your image pairs, for edit LoRAs). Aim for 5 to 15 inputs at 1024 x 1024 or higher, ideally square.
Review and edit captions. Scenario auto-captions every image; keep them short, faithful, and consistent. For edit LoRAs, captions should be instructional (a verb plus the transformation).
Add up to four test prompts. These run at every epoch, giving you a built-in apples-to-apples grid to compare results across epochs once training finishes.
Configure training parameters. The defaults (Learning Rate 1e-4, Epochs 10, Batch Size 1) work for most first runs. Change them only after a baseline run, if the result needs nudging.
Start training. Most jobs take 30 minutes to 2 hours, depending on the family and variant. You will be notified by email and in-app when training finishes.
Compare epochs side by side using your test prompts and pick the one that captures your subject without overfitting (see Understanding Epochs above).
Publish, tag, and share, or use the model directly in Canvas, Live, or via the API or MCP.
What to do next
Read Choose Your Base Model Family to pick the right foundation for your goal.
Pick the matching how-to: Train a Style Model, Train a Consistent Character Model, or Train an Edit LoRA.
For deeper control, see Advanced Training Parameters and Advanced Captioning.
Once you have a model, Improve and Refine Your Models covers retraining and refinement; Merge Custom-Trained Models covers combining LoRAs.