Building Workflows in Scenario
Last updated: April 8, 2026
Introduction
While AI generation models have become incredibly capable, producing exactly the right asset from a single prompt can still be hit-or-miss sometimes. For professionals, this lack of consistency can slow production and increase iteration time.
Scenario solves this by letting users build and organize customizable workflows—sequences of tools and models that work together to create production-grade, style-consistent outputs. A workflow can involve a single model or multiple models and tools chained together, allowing you to move smoothly from training to generation to refinement, all within one environment.
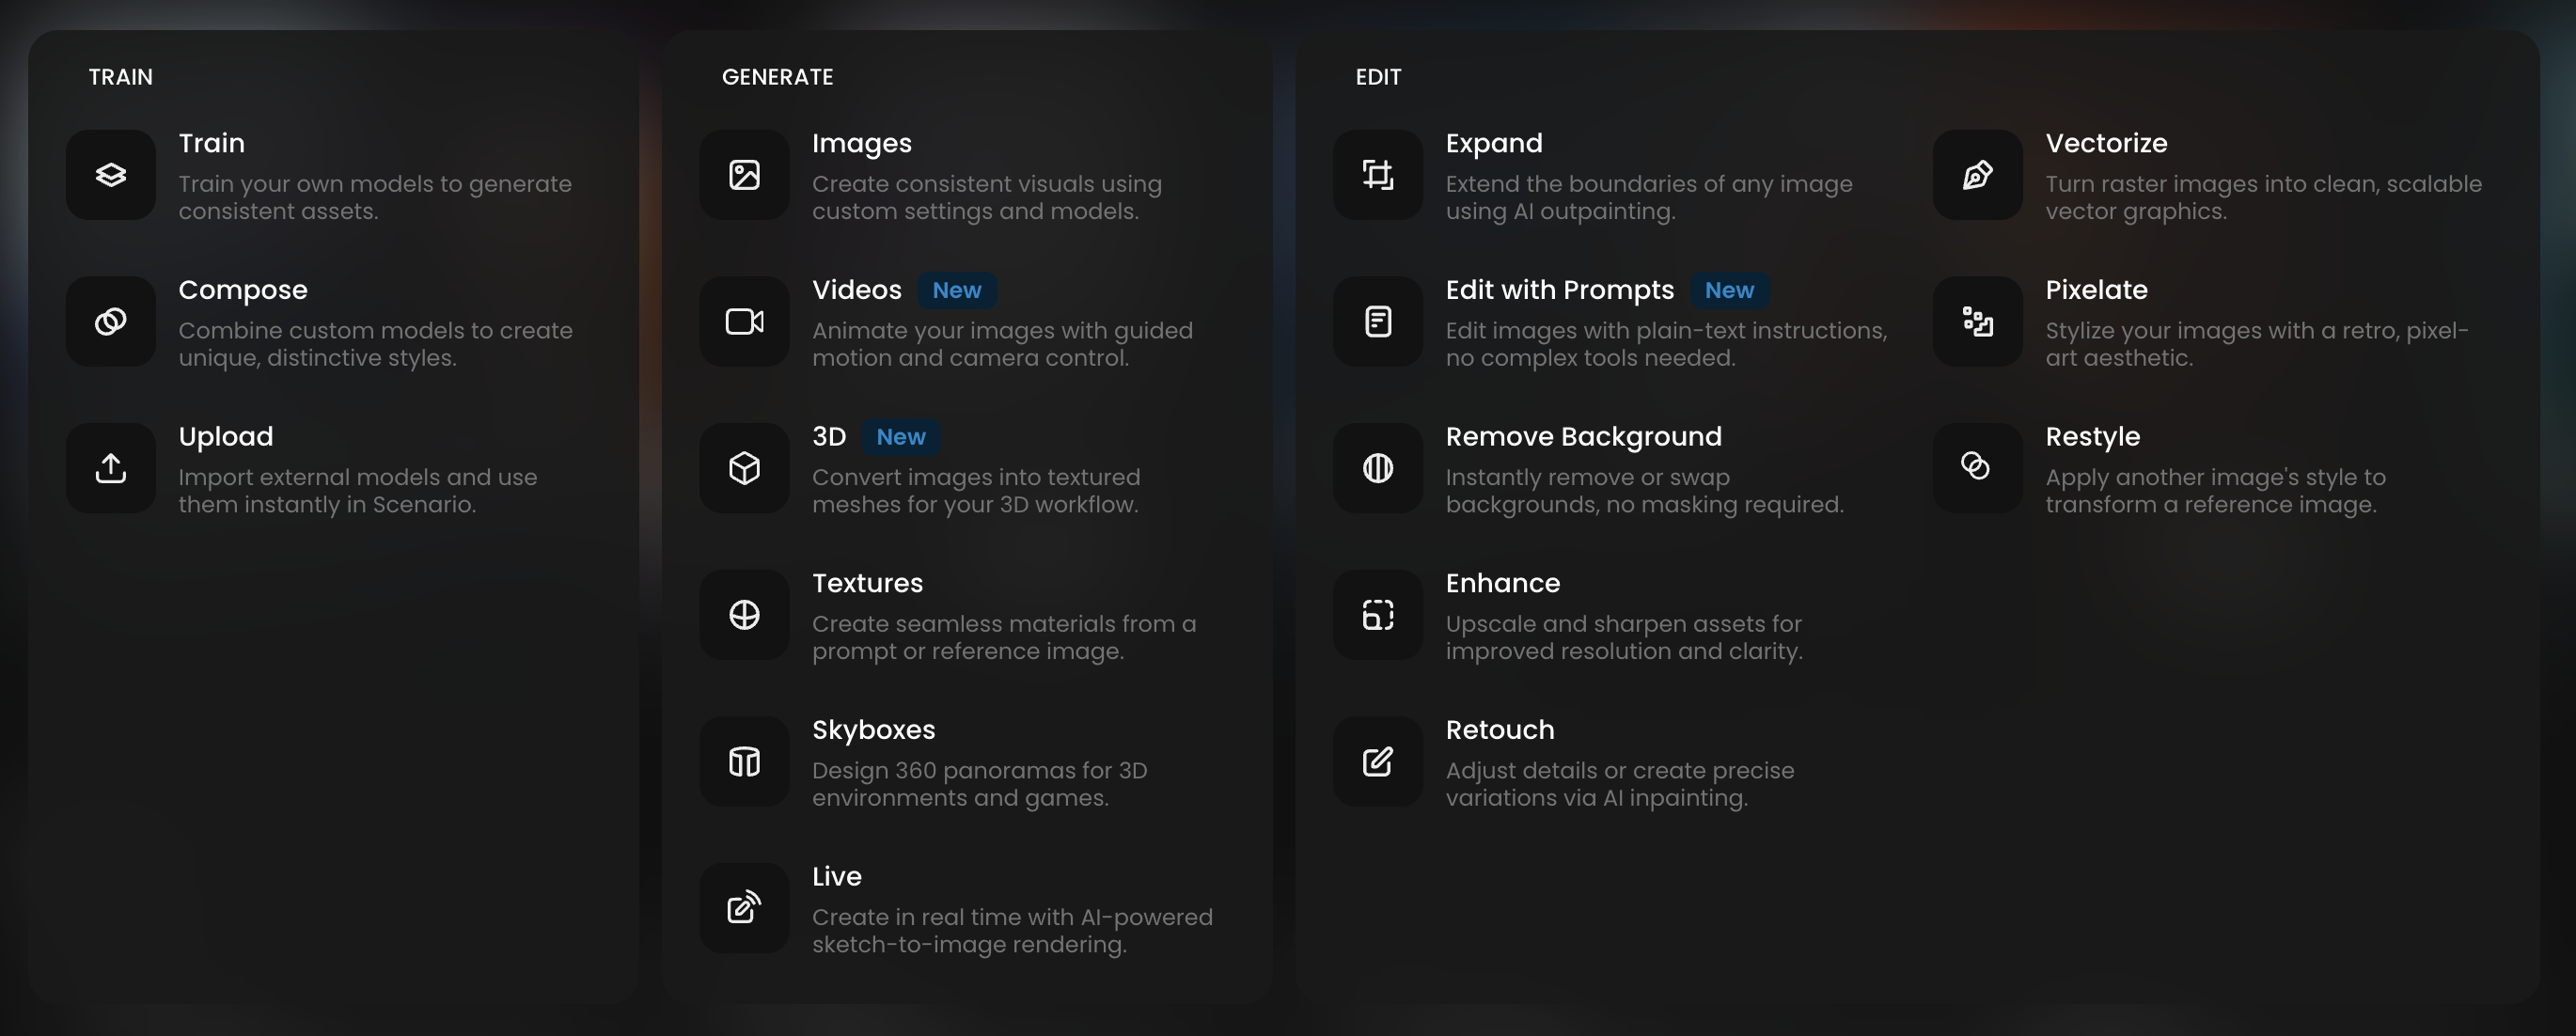
How Workflows Work
Workflows are flexible. They can be simple—just one model and a generation step—or they can combine multiple steps and models to match a professional pipeline. A typical end-to-end flow on Scenario often looks like this:
Train (or Select) a Model
Start with a model trained on your own art, or choose one from the vast library of models available in Scenario — from base models (Imagen, Flux, etc.) to custom-trained LoRA models.
Trained Models can be based on your proprietary images, ensuring both brand and style consistency.
Generate with Advanced Settings
Use powerful generation controls with advanced flexibility — from text prompts and reference images to ControlNet modes and style/character references — to match your creative intent.
Edit & Refine
Polish generated outputs using tools like Edit with Prompts (GPT, Kontext, and more), Retouch (Inpainting), Expand (Outpainting), or try Scenario Live for real-time sketch-to-image generation.
Apply Enhance & Upscale to finalize images at higher resolution with creative or precise detail control — especially if you leverage the same custom model that was used to generate the image.
Beyond 2D: Video and 3D Workflows
For video and 3D generation, workflows often start from processed (generated) 2D images. These base images typically go through the same “train–generate–edit” sequence before being transformed into motion or 3D forms. Examples include:
Video generation with controlled first and last frames.
Video editing workflows that add or refine elements with dedicated video models.
3D creation starting from refined 2D concept art.
Flexible Combinations
You can start without training—using ready-made models to generate and edit right away.
Or start with training, building a fully custom model for maximum consistency.
You can chain multiple models, switching between them in a single workflow.
Editing can happen at any stage, not just at the end.
Below is an example of a complete workflow in action. For more strategies, tips, and best practices, explore the Workflow section to learn how to build and customize workflows that fully leverage the Scenario Suite.
Example: Consistent Character Generation (7-Step)
Here’s an example of how a full workflow can be structured to create a high-quality, style-consistent character model from start to finish.
Prepare Training Images (Dataset) and Train A Character Model
To create a character model, start with at least 5 images you own or generate using a well-crafted prompt and one of our platform models.
Train Your Character Model
Create a new model and add the training images, adjust the captions if necessary, and train.
Test and Refine the Model
After training, test various prompts and fine-tune them to produce images matching the style and traits of your training set.
When you’re satisfied with the results, pin the selected images so that Prompt Spark can use their prompts to help generate or refine your own.
Control Generations with Reference Images
Add a reference image and ControlNet Pose mode to extract a pose from a reference image and generate your character in that precise position.
Use Image-to-Image for subtle variations within the same composition, or Style Reference to incorporate specific clothing.
Retouch with Inpainting & Canvas
Use Retouch to edit images by adding or removing elements, or to make targeted corrections with sketches, leveraging layers for smooth edits.
With Scenario Live, you create a simple sketch on the canvas on the left, while the image is generated in real time on the right based on the model and prompt.
Expand with Outpainting
Expand the scene while keeping the style consistent. Changing orientation and aspect ratio by filling empty areas with newly generated backgrounds.
Enhance & Upscale
Finalize the image by increasing the resolution and adding details using the Enhance tool. With this, you can choose between the Precise, Balanced and Creative presets to control the level of creativity applied to the upscaled image.
Scenario empowers creatives to achieve high-quality, consistent visuals, while providing the flexibility to refine and scale their work efficiently. Refer to the Workflow section for a more detailed explanation of workflows and best practices.