Introduction
In this guide, you’ll learn how to create a step-by-step character transformations using Scenario - starting from a single image.
By generating consistent character variants (such as new poses or outfits) with Edit with Prompts, you’ll build a visual sequence of individual frames, that can be turned into animated transformation clips with a video model (like Pixverse 5). This workflow is great for showcasing power-ups, upgrades, or any kind of visual evolution in games and animation, applicable to characters, scenes or props.
Step 1: Create Variants via Edit with Prompts
Start by generating a base version of your character. From there, you’ll create a sequence of evolution stages by editing that image progressively, using Edit with Prompts: https://app.scenario.com/edit-with-prompts
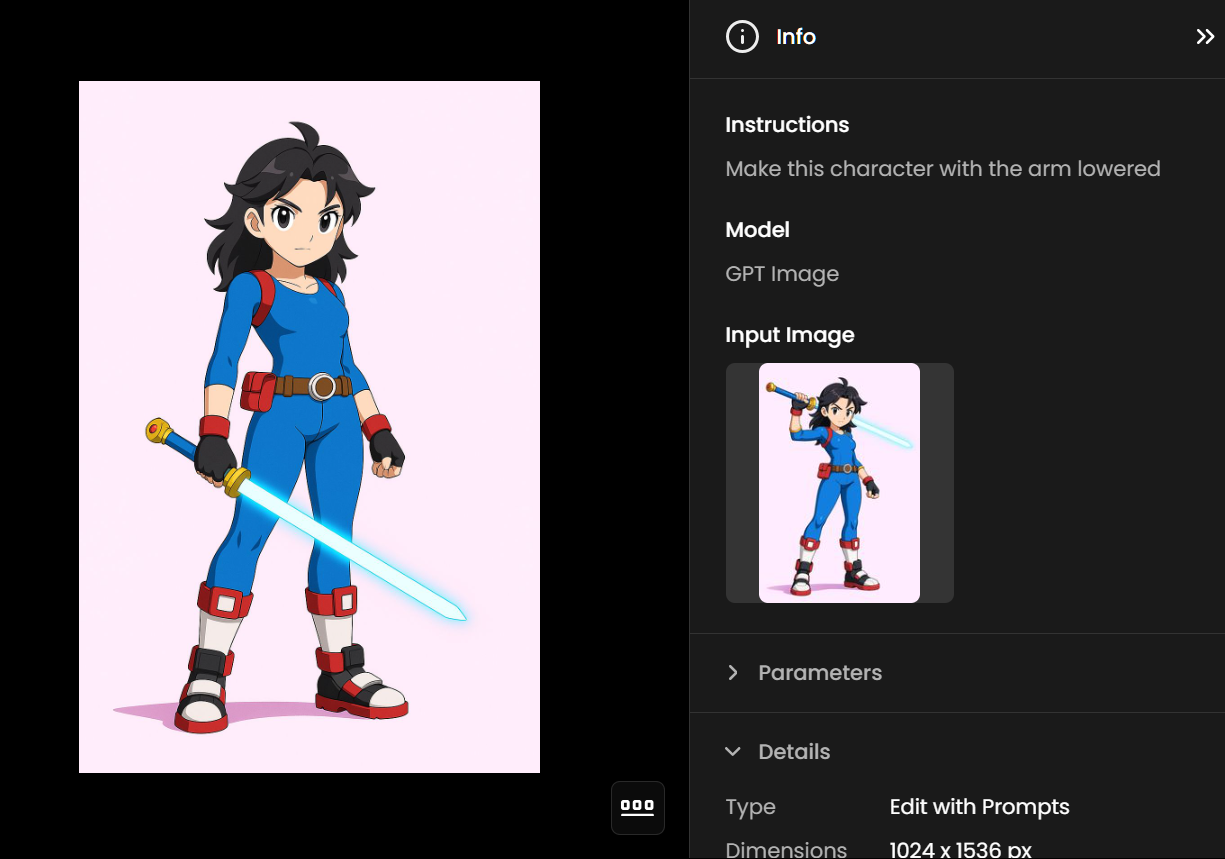
(i) Adjust the Pose
For example, click on the three dot menu, select Edit With Prompts. The image will load automatically. You can select a model like Nano Banana, Flux Kontext or GPT, and change the arm position by entering instructions like:
“Make this character with the arm lowered.”
(ii) Upgrade the Armor
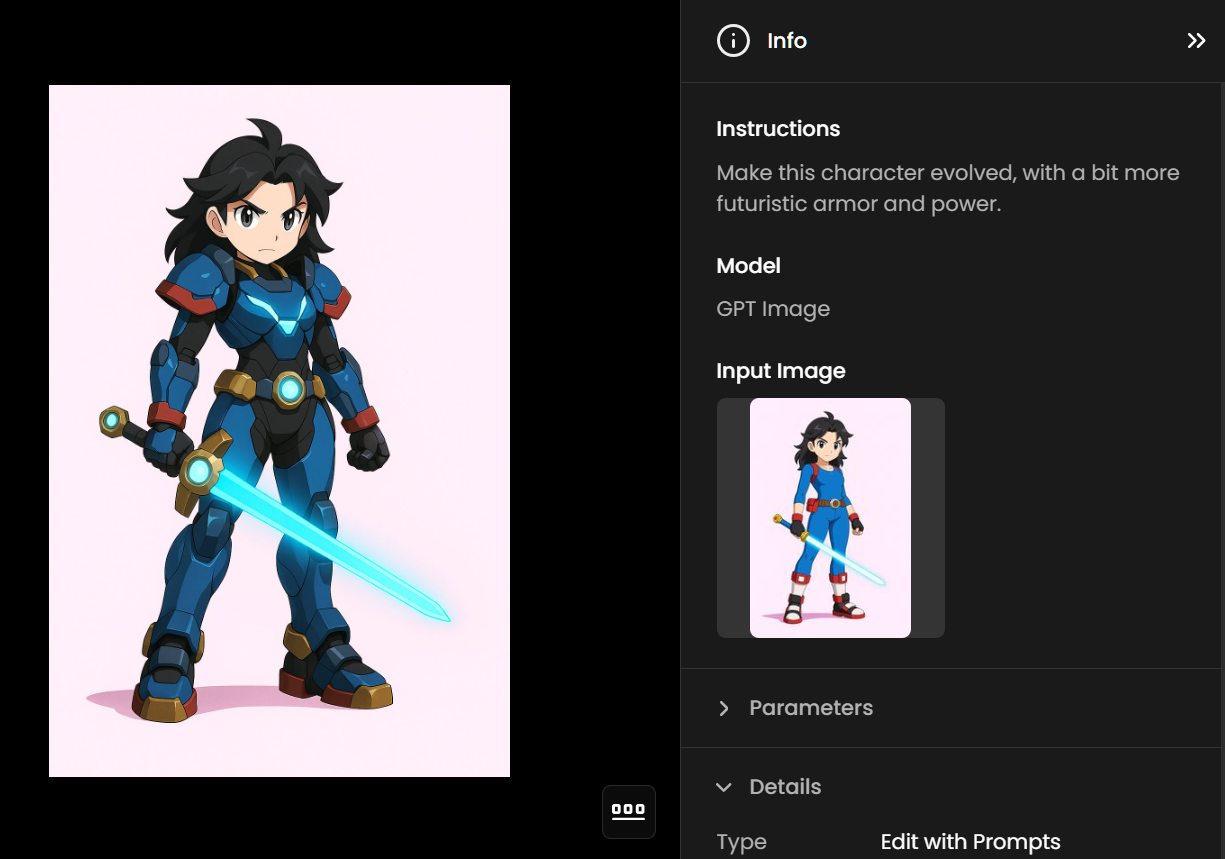
Use new instructions to introduce new character upgrades, like futuristic elements:
“Make this character evolved, with more futuristic armor and power.”
(iii) Continue the Evolution
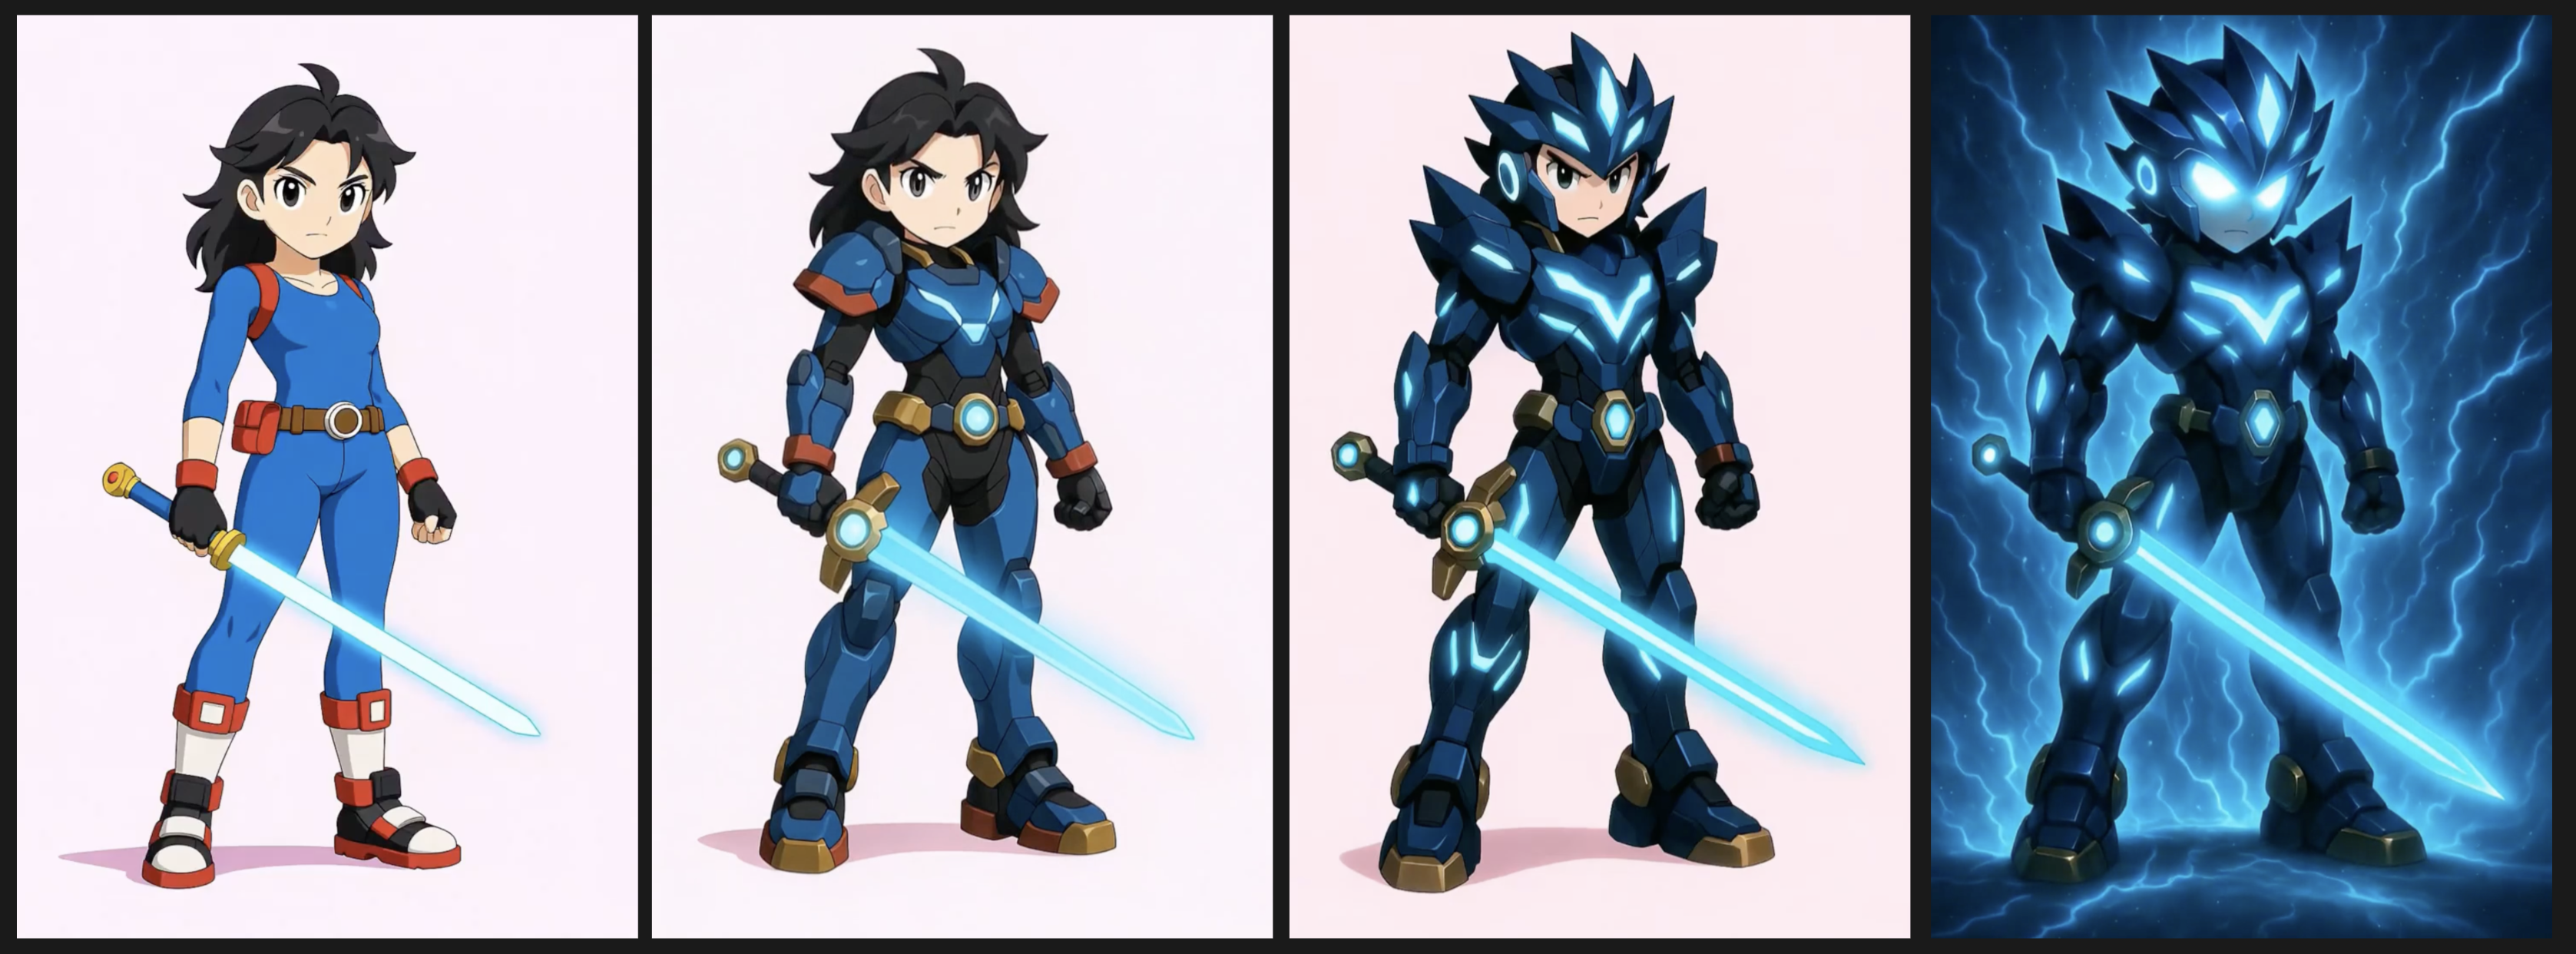
Repeat this process for each new stage—starting from the previous image each time. Update the prompt to reflect the desired upgrade:
Second evolution with increased armor complexity
Final transformation with high-tech or glowing effects
For more details on Edit with Prompts, please check this guide
Step 2: Turn Static Images into Transformation Videos
After you've created your character evolution sequence (individual frames), bring the transformations to life with video:
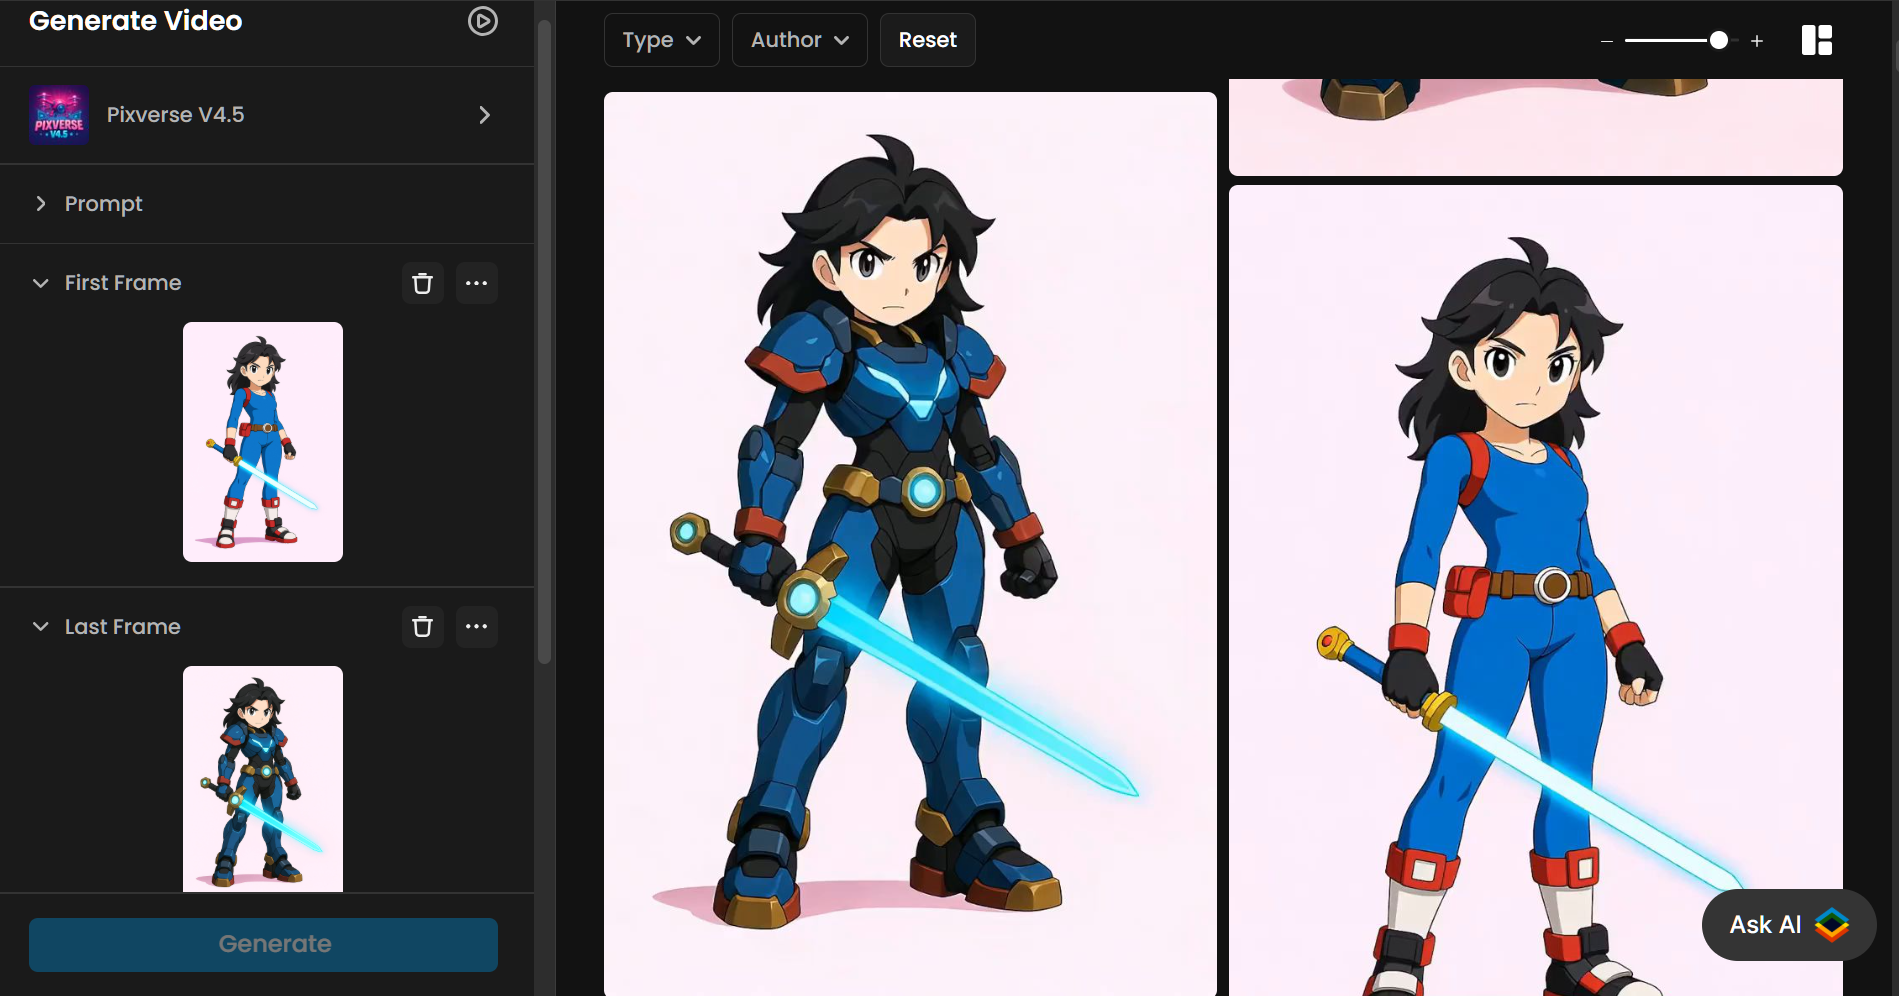
Launch the Video Generation (“Convert to Video”) and select the Pixverse model (recommended for smooth, cinematic transitions).
Set your frames:
Use the earlier stage of the character as the first frame
Use the upgraded/evolved version as the last frame
Describe the transformation in a detailed prompt. Include visual effects, armor changes, lighting shifts, and motion cues.
Generate a video for each transition in your sequence. Each clip will animate the change from one evolution stage to the next, creating a dynamic, step-by-step transformation.
Step 3: Upscale the Final Videos
To polish your videos:
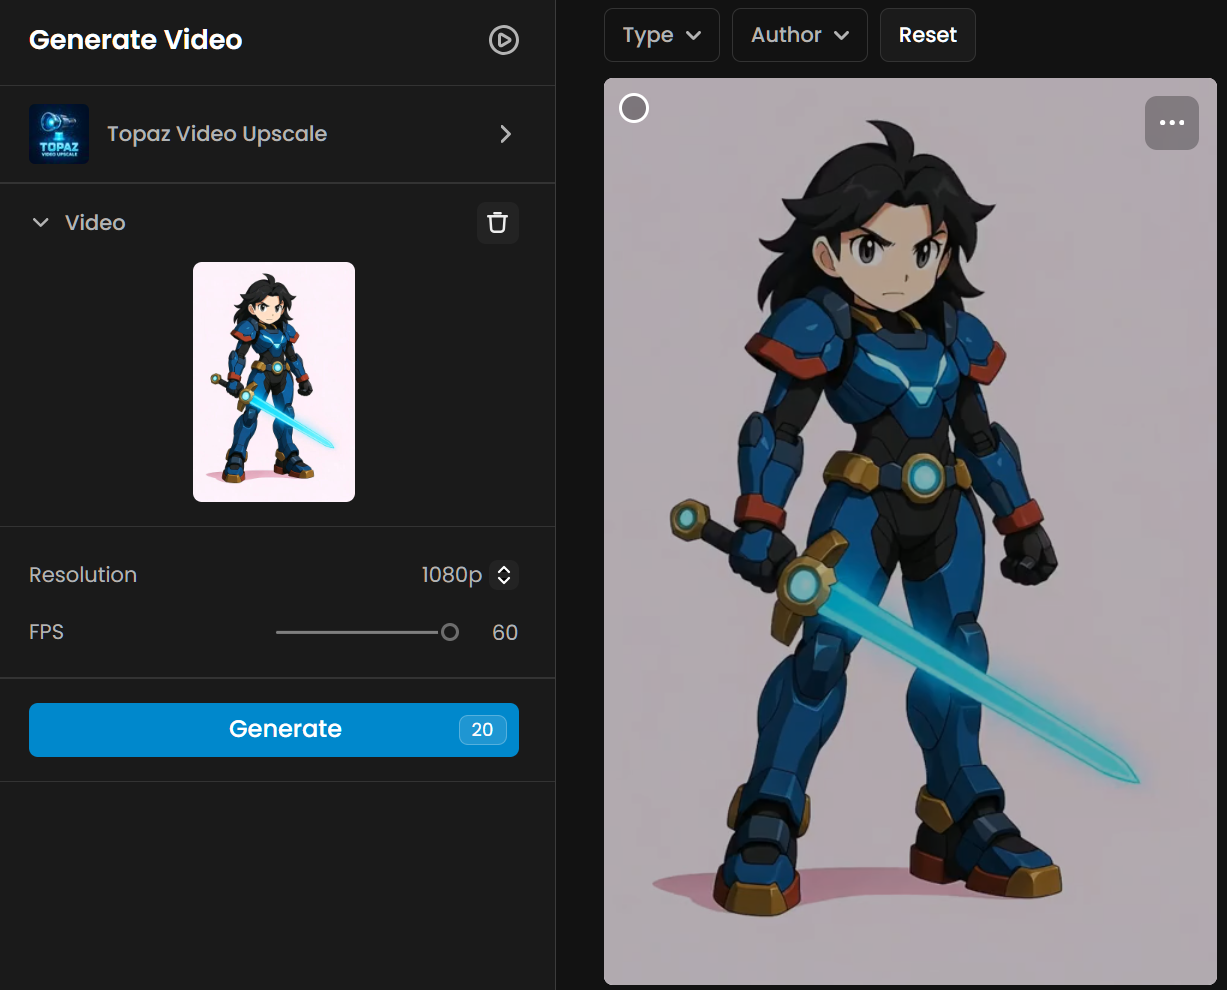
Use the Enhance tool to upscale the video (up to 4k) and increase the frame rate to 60 FPS for smoother animation.
It will improve sharpness and resolution for higher-quality output and will also correct or minimize any visual artifacts introduced during generation.
The Enhance step can easily deliver clean, professional results - perfect for sharing on social platforms, showcasing in portfolios, or using in production.
Final Recap
This workflow also apply beyond characters but also to scene (for example change of time night/day), or animating objects (like a chest or box opening etc). The workflow stays the same
Start from a base image
Generate consistent variants or evolutions using Edit with Prompts
Animate the transitions using Pixverse (or other video model that supports first/end frame).
Don’t forget to use/test “Rewrite your prompt” for optimal prompt quality.
Finish with an upscaling step to polish the final video.
By following this method, you can create engaging transformation sequences with full control over the style, pacing, and presentation. Let your characters evolve with clarity and impact—frame by frame.
Was this helpful?