The Facial Expressions and Animated Portraits workflow described in this article remains fully functional and reliable. However, for improved efficiency and consistency, we now recommend using newer models and dedicated tools.
Models like Nano Banana Pro and Seedream 4.5, as well as the dedicated Emotion Sheet app, often achieve similar or better results with fewer steps, simplifying the process of creating consistent character expressions.
Recommended Guides:
- Gemini 3.0 Pro Image: The Essentials
- Seedream 4: The Essentials
👉 Access the Emotion Sheet app here
This guide walks you through modifying character facial expressions in Scenario, using a range of tools from instruction-based editing to inpainting. Whether you're creating game assets or animated portraits, controlling your character's expressions adds life and emotion to your creations.
We’ll explore three approaches:
Edit with Prompts (no inpainting)
Edit manually with inpainting, without sketching
Edit manually with inpainting and sketching for finer control
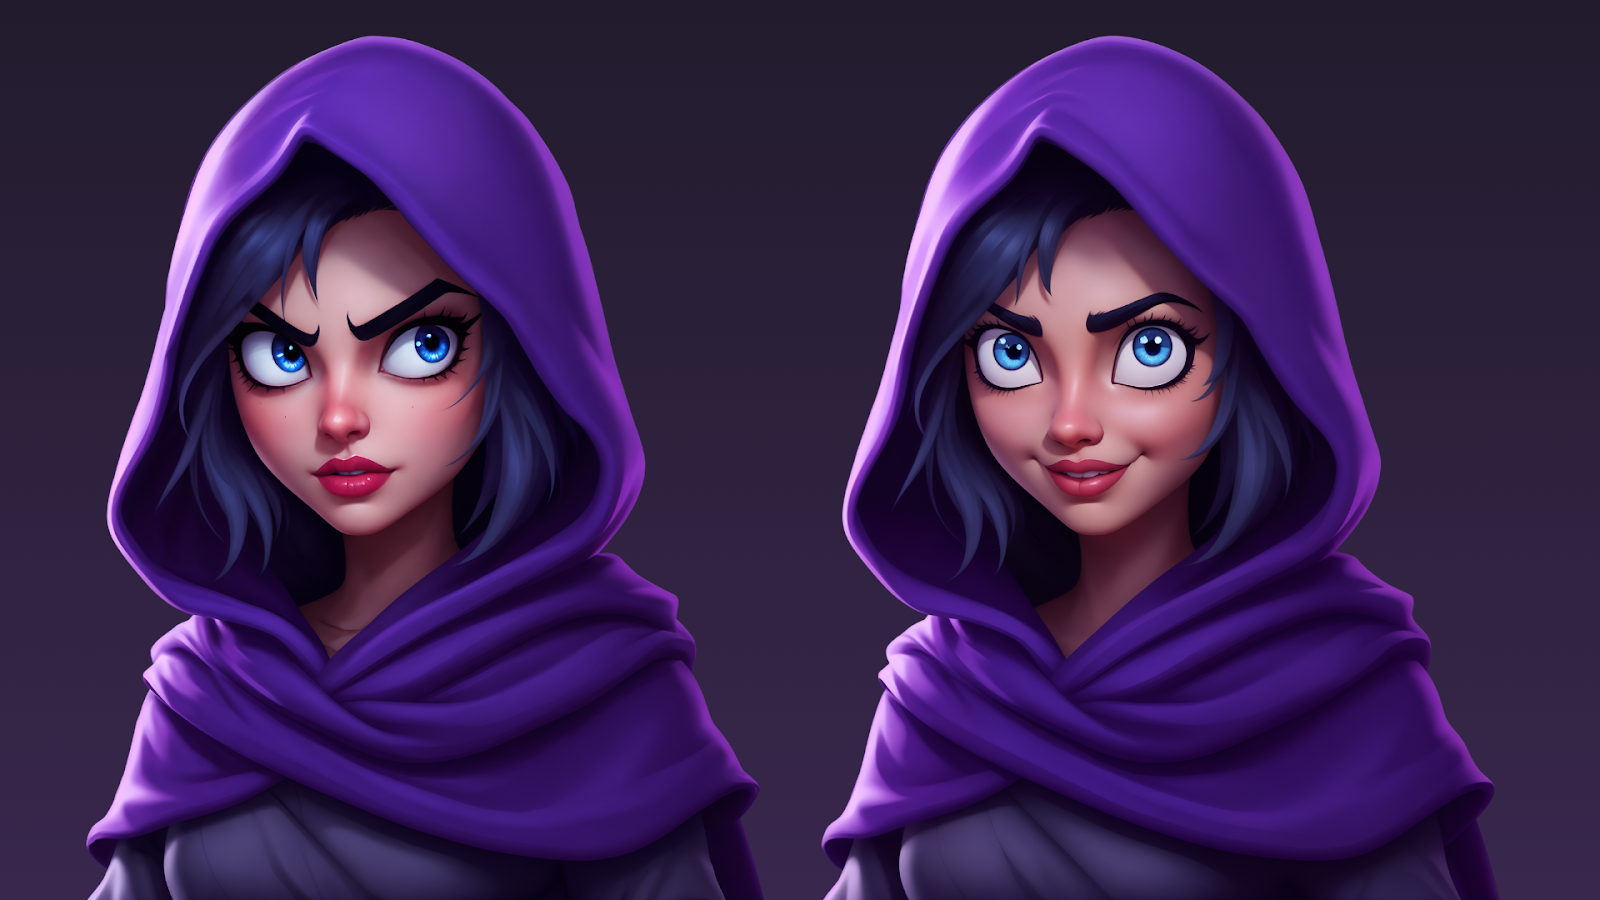
Why Edit Facial Expressions?
Adjusting a character's expression can transform static designs into dynamic, engaging visuals. The ability to modify expressions gives you control over emotional storytelling and character development without starting from scratch. Whether you're creating game characters or refining illustrations, Scenario provides precise tools for expression adjustments.
Method 1 – Edit with Prompts
Open the image, click the three dots (⋯), select Edit with Prompts, and it will load in the Edit with Prompts interface. This lets you describe the desired change in natural language instead of manual painting.
Step 1 - Choose the Best Editing Model
Gemini 2.5 (Nano Banana) – Best for precise shifts with minimal style drift.
Seedream 4 - Good on fast edits.
Flux Kontext – Fast edits with high fidelity.
Runway Gen-4 References: Especially good with realistic style.
GPT-Image (GPT-4o) – Great for complex, expressive, creative, or mood-based changes but more prone to style drift. For maximum quality, select Input Fidelity: High (instead of Low).
Step 2 - Write a Clear Prompt
Be specific about the desired expression or mood.
“Change the character’s face from angry to smiling, friendly.. “Eyes wide open, cheerful expression.”
Step 3 - Generate . Refine if Needed
Click Generate to produce one output. Use the compare slider to check before/after changes. If the result isn’t matching your vision, try another model or refine your prompt. See the full Edit with Prompts guide for more tips.
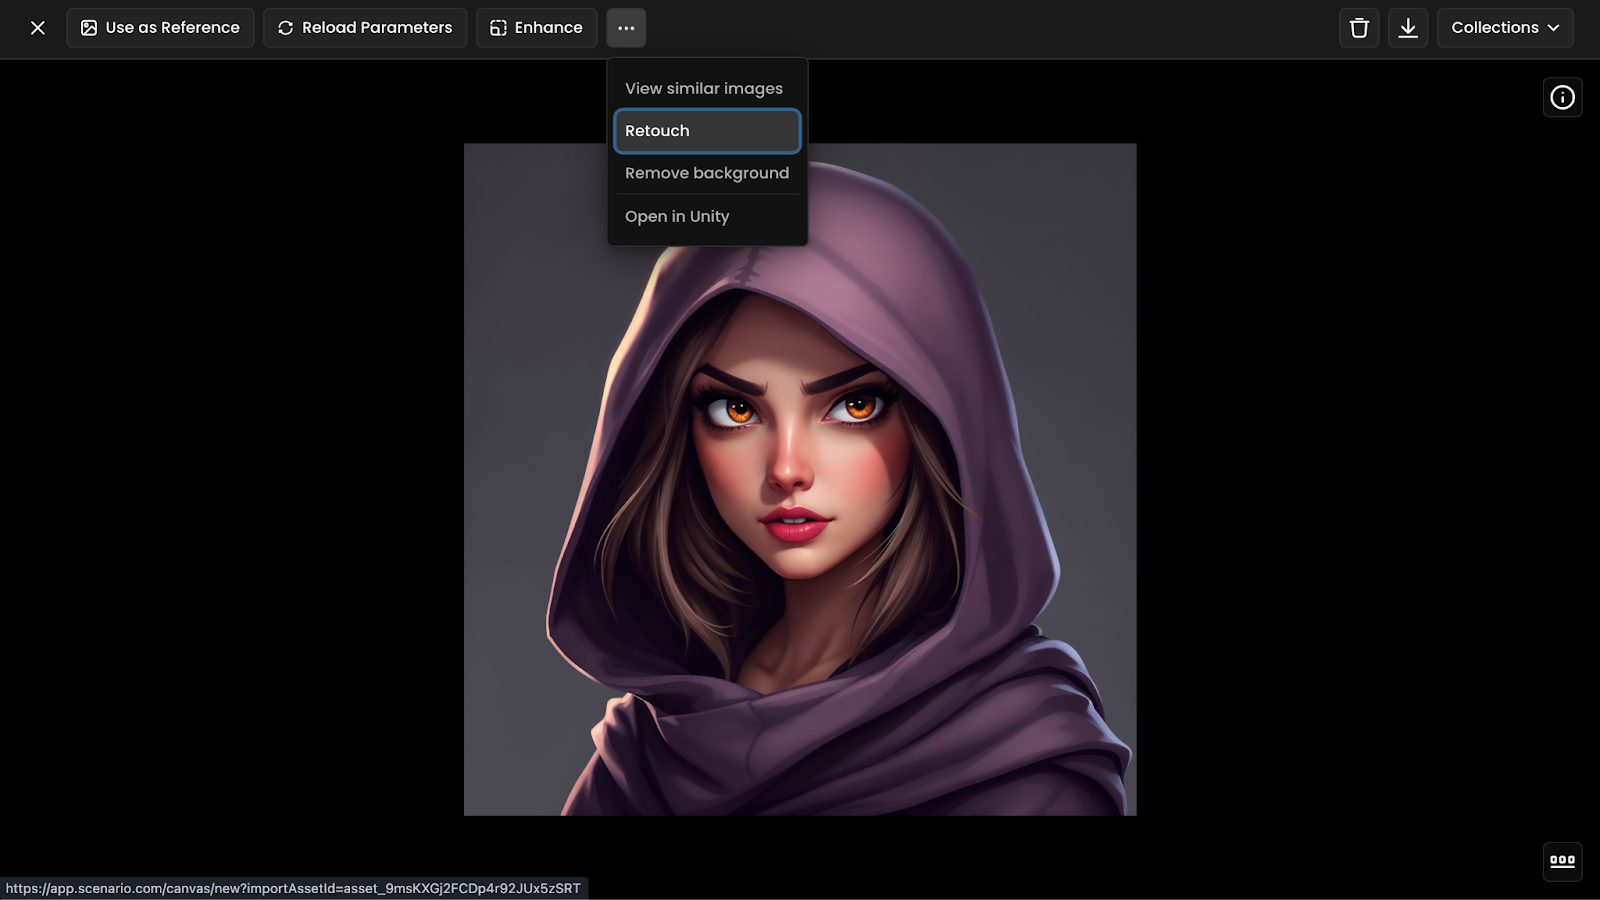
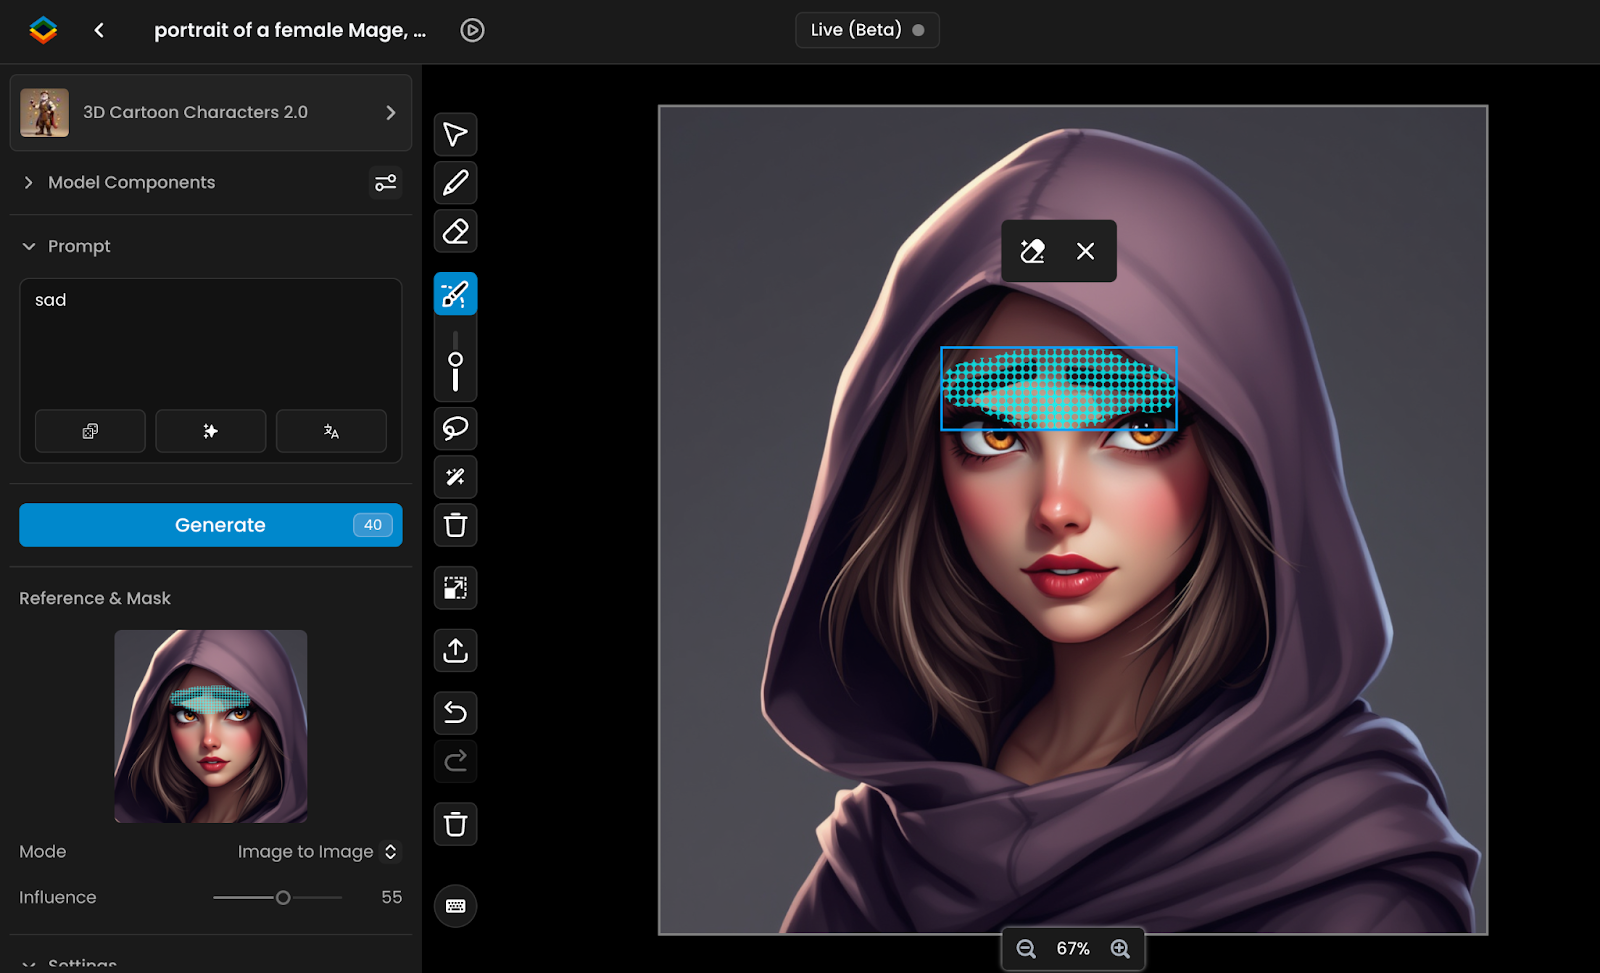
Method 2: Inpainting (No Sketching)
For quick expression adjustments, you can use a first approach using just a mask and a prompt:
Step 1: Open the Canvas
Select the image you want to edit and click "Retouch" to open the Canvas editor.
This loads your image into the Canvas with the original prompt (if generated in Scenario) preloaded, giving you a solid starting point for modifications.
Step 2: Mask the Face
Apply a mask over the specific facial areas you want to change, such as the mouth or eyebrows. Keep the mask focused on just those features for precision.
Refine the prompt to describe the new expression, using clear emotional terms. For example, change "neutral face to angry expression" or “joyful."
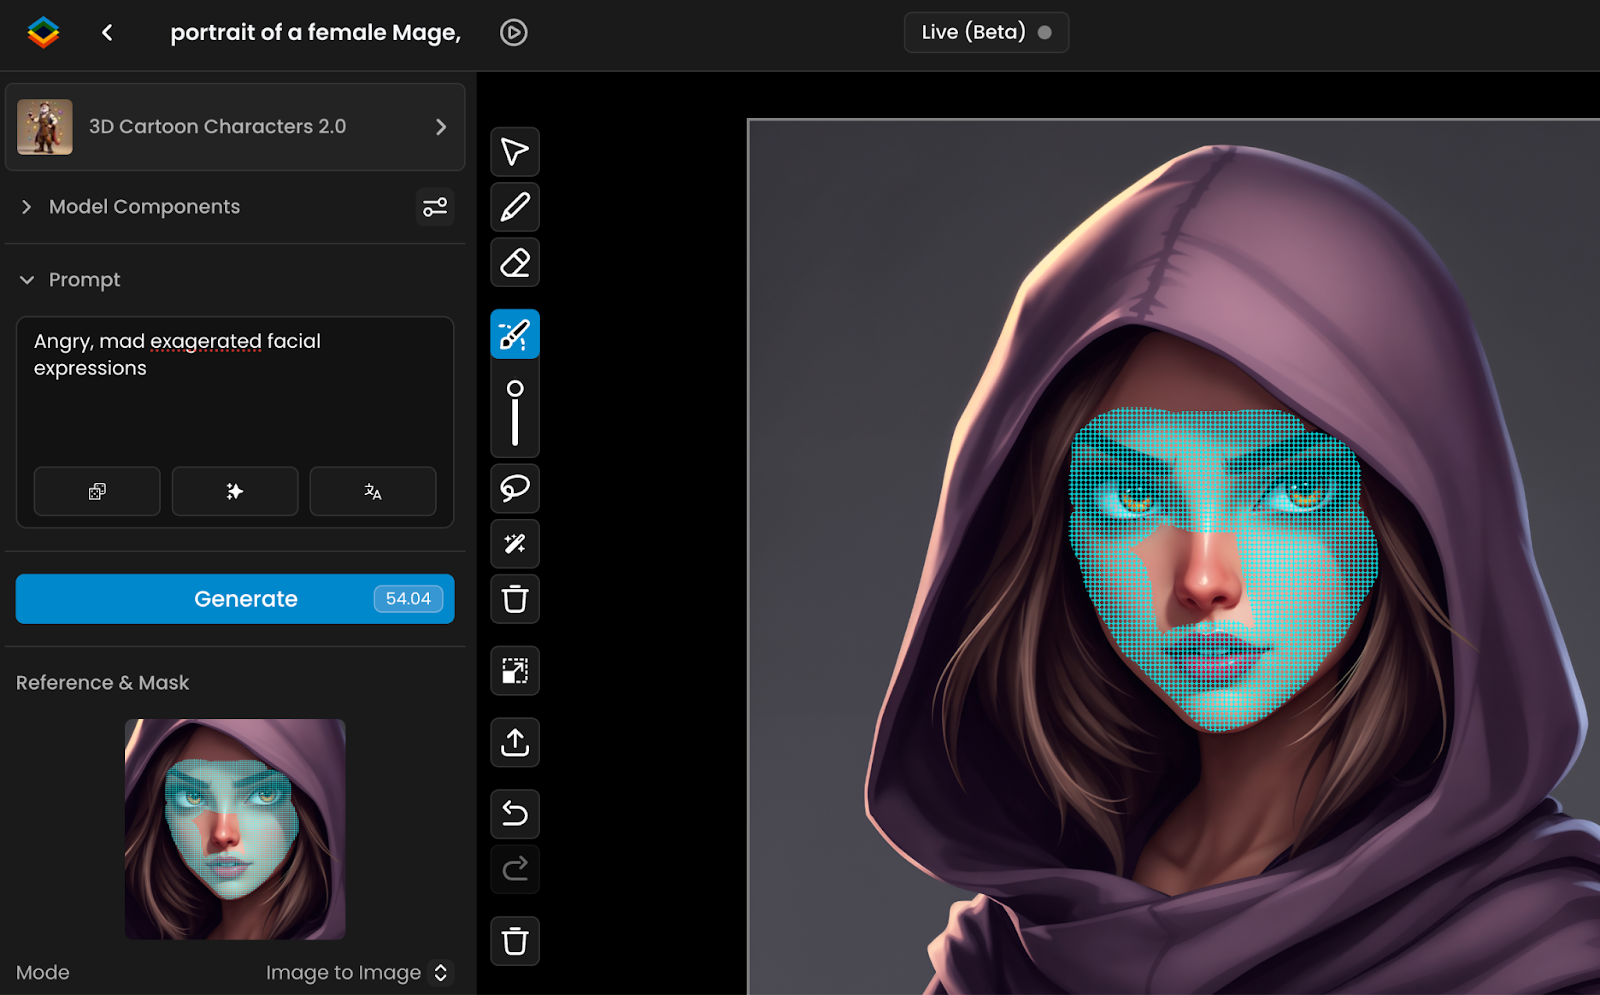
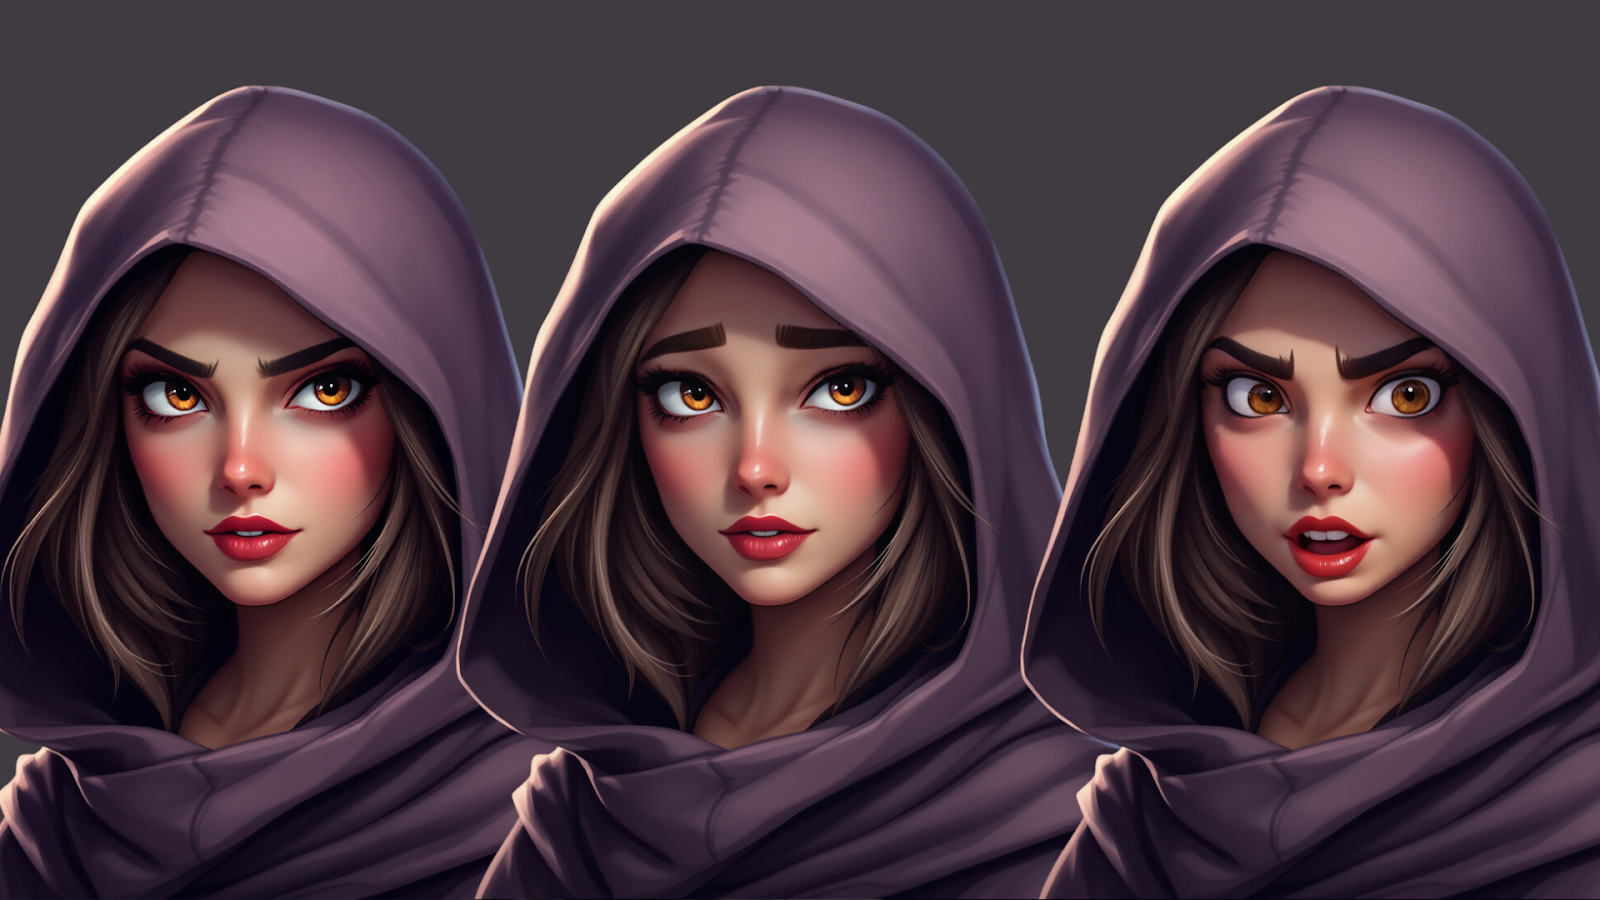
Step 3: Generate the New Expression
Click "Generate" to process the transformation based on your description.
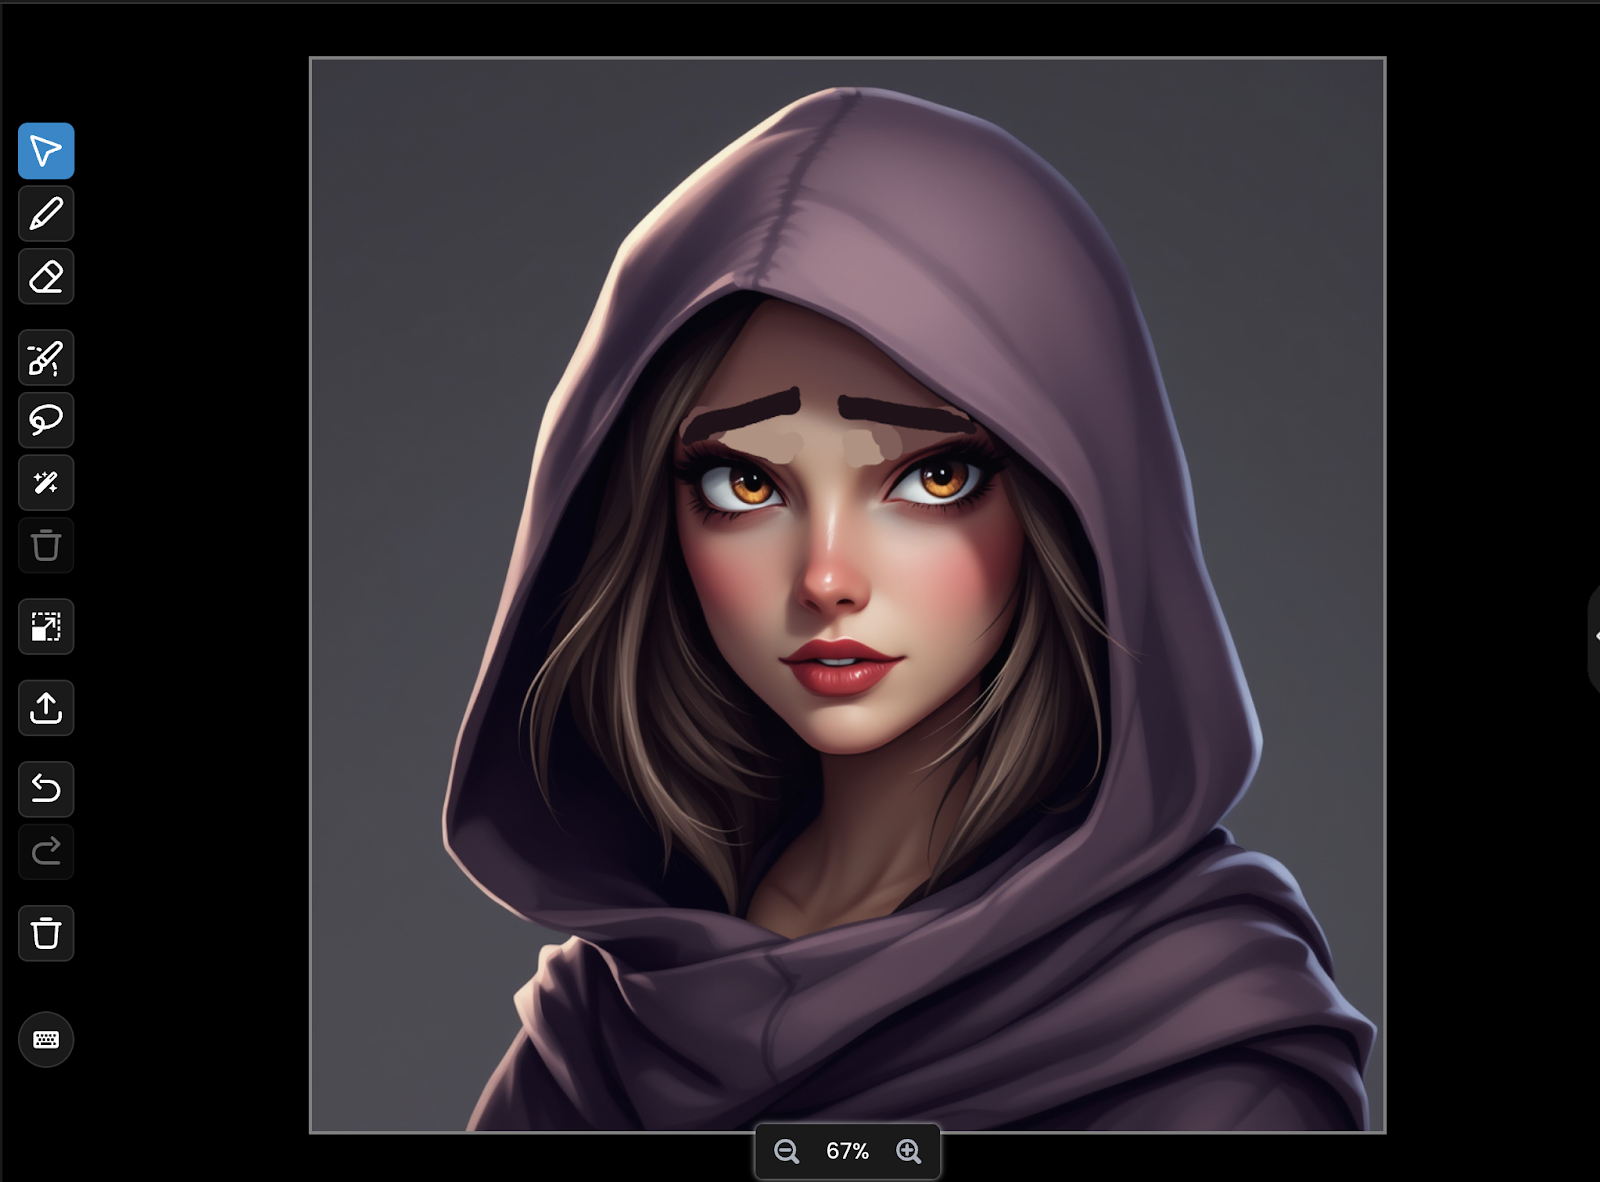
Scenario will create several options for the masked area. Select the best result, remove the mask, and merge layers if necessary to finalize your edit.
This method is ideal for straightforward expression changes when you don't need to make structural modifications to the face.

Method 3: Editing with Sketching
For more precise control over expressions, sketching provides additional guidance:
Step 1: Add a New Layer (to keep the Sketch separate)
Open the Canvas and add a new layer before sketching by clicking "Add layer" in the right panel.. This non-destructive approach keeps the original image intact, allowing for easy adjustments and multiple iterations.
Step 2: Sketch the Adjustments
Use the Sketch Tool to refine facial features, such as raising eyebrows for surprise, or narrowing eyes for suspicion. The Color Picker (shortcut: C) helps match original tones for natural blending. Focus on defining the key features that communicate the desired emotion.
Step 3: Apply Mask & Adjust AI Influence
Mask the sketched areas and refine the prompt to reflect the new expression. Adjust the image-to-image influence to control how closely the AI follows your sketch:
20-30 is ideal for retaining original details while incorporating your changes
Higher values will make the AI follow your sketch more literally
Step 4: Generate & Refine
Click "Generate" to apply the transformation based on your sketch. Review the options, select the best result, remove the mask, and merge layers if needed to complete your expression change. This method gives you precise control over subtle details like the curve of a smile or the arch of an eyebrow.

Finalizing & Exporting from the Canvas
Once you're satisfied with the modified expression:
Click "Export" in the top-right corner to prepare your final asset.
Choose to save to your Scenario gallery or download directly to your computer.
For animation sequences, repeat this process for each frame, maintaining consistency in facial structure while varying the expressions.
Additional Tips
When creating a series of expressions for the same character, save your successful edits as reference images for future modifications.
For subtle emotions, make smaller adjustments to key features rather than dramatic changes to the entire face.
Experiment with different influence values to find the perfect balance between your artistic direction and the AI's interpretation.
Final Notes
With these techniques, you can quickly adjust character expressions to match any scene or emotion. Whether using AI-driven modifications or manual sketches, Scenario gives you the flexibility to create natural, expressive characters.
For more advanced applications, try creating a sequence of expressions that can be combined into simple animated portraits.
Access This Workflow Via API
Upload an Image: Scenario API Documentation - POST /assets
Inpainting Generation: Scenario API Documentation - POST /generate/inpaint
Was this helpful?