Canvas & Retouching Workflows
Last updated: April 22, 2026
Last updated: April 13, 2026

Introduction
Scenario provides powerful tools for precise image editing through its Canvas interface, which powers both the Retouch and Scenario Live features. This guide walks you through using these tools to modify specific elements within an image while keeping the rest untouched, giving you the precision and control to refine your AI-generated visuals with surgical accuracy.
Why it's different: Unlike other inpainting tools, Retouch works with your chosen custom-trained AI models to ensure edits maintain the same style or features as the original generation.
When to Use Canvas & Retouch
Retouch uses a non-destructive, layer-based system to make precise adjustments to your AI-generated images. Use it to:
Fix common issues: Correct hands, faces, or small anatomical details.
Add new elements: Introduce props or characters into an existing scene.
Object Removal: Clean up unwanted background elements or clutter.
Generate Variations: Change a character's expression, outfit, or hair without regenerating the whole image.
How to Access the Canvas
From an existing image: Open any image in your Scenario library. Click the three-dot menu in the top-right corner and select Retouch. The image will load with the original model and prompt already applied.
Starting fresh: In the main Scenario interface, open the left sidebar menu. Under the "Canvas" section, click New. Then, select a model and upload/import an image.
Understanding the Canvas Interface
The Canvas interface is organized into four main areas that work together for precise editing control:

The Interface Breakdown
Area | Name | Purpose |
A | Inference Panel | Set your AI model, prompt, reference images, and generation parameters (Influence, Steps). |
B | Vertical Toolbar | Essential editing tools: Selection, Sketch, Erase, Masking, and Import. |
C | Canvas | Your main workspace where you create masks, draw, and see edits in real-time. |
D | Layer Panel | Manage, reorder, lock, or merge multiple layers for non-destructive editing. |
The Vertical Toolbar (Area B)
Selection Tool (Arrow): Used to select, move, and manipulate elements or layers.
Sketch Tool (S): Draw directly on the canvas. Adjust brush size by holding Shift and moving the mouse up/down.
Erase Tool (E): Remove portions of the selected layer.
Masking Tools: Define edit areas using the Brush, Lasso (L), or Smart Selection (AI-assisted edge detection).
Color Picker (C): Select colors directly from the canvas.
Layer Management & Options (Area D)
The layer panel behaves like professional design software. You can:
Toggle Visibility: Use the Eye Icon to show/hide layers.
Isolate: Use the Target Icon to focus on one specific layer.
Apply Effects: Access a horizontal menu to add Blur, Brightness, Shadows, or change Opacity (0-100%).
Remove BG: One-click background removal for a specific layer.
Basic Principles of Retouching
Retouching follows a logical four-step relationship to ensure the AI understands your intent:
The Mask(A): Only the area inside the mask will be modified.
The AI Model(B): Ensures the new generation matches the existing art style.
The Prompt(C): Describes exactly what should appear only inside the masked area.
Surrounding Context: The AI looks at the pixels just outside the mask to blend the edges seamlessly.

Layer Context Menu
When right-clicking on your image in Canvas, you'll access a context menu with various options to manipulate your layer:
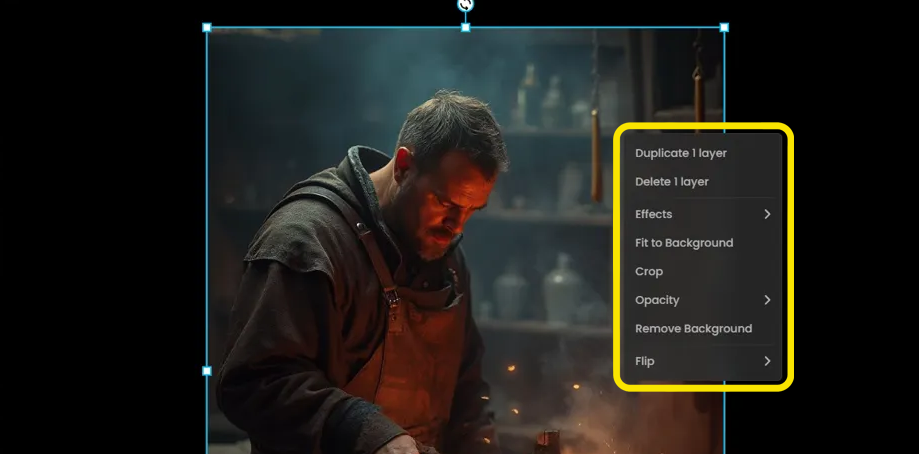
Duplicate 1 layer: Creates an exact copy of the current layer
Delete 1 layer: Removes the current layer from your project
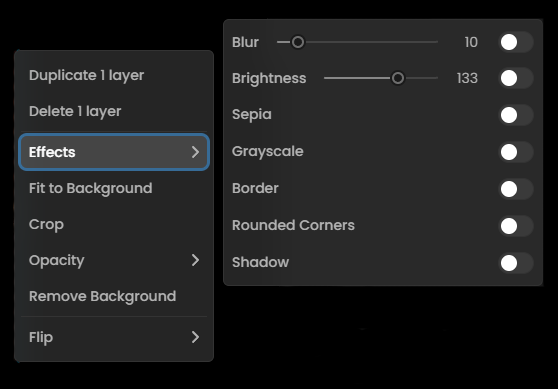
Effects: Opens a submenu with visual effects options:
Blur: Adjusts the softness of the image (slider from 0-10)
Brightness: Controls the image luminosity (slider)
Sepia: Applies a warm, brownish tone to your image
Grayscale: Converts your image to black and white
Border: Adds a frame around your image
Rounded Corners: Softens the corners of your image
Shadow: Adds a drop shadow effect
Opacity: Controls the transparency of your layer with a slider (0-100%)
Flip: Offers mirroring options:
Flip Horizontally: Mirrors the image left to right
Flip Vertically: Mirrors the image top to bottom
Fit to Background: Automatically adjusts the layer to cover the entire background area
Crop: Allows you to trim unwanted areas from the image
Remove Background: Automatically isolates the main subject by removing the background
Export Options
Click the blue "Export" button in the top right corner
Choose to export the entire canvas view as a PNG, or export selected layers as separate PNG files
Either save your creation to your Scenario gallery (optionally adding it to a collection), or download it directly to your computer

Step-by-Step Workflows
Workflow 1: Adding a New Element
Create a new layer to keep your original image safe.
Sketch a rough outline of the object (e.g., a sword) using appropriate colors.
Mask the sketched area with a small margin for blending.
Prompt: Describe the addition specifically (e.g., "a medieval steel sword with an ornate golden hilt").
Adjust Influence: Set to 25-50%. Lower values follow your sketch less strictly; higher values follow it more closely.
Generate and choose your favorite.
Workflow 2: Removing an Object
Method A (Sketch and Inpaint): Sketch over the unwanted object using colors from the background. Mask it, and leave the prompt empty or describe the background environment.
Method B (Adaptive Fill): Select the element and use Adaptive Fill (Shift+E). The AI analyzes the context and fills the area automatically without a prompt.
Workflow 3: Creating Facial Variations
Mask only the face or head of your character.
Prompt: Describe the new expression (e.g., "surprised expression, wide eyes, raised eyebrows").
Adjust Influence: Use 30-40% to keep the character's core features while changing the expression.
Additional Features & Tips
Mode Switching: You can fluidly move between Retouch and Live modes. Your canvas becomes the starting point for real-time Live generation.
Keyboard Shortcuts: Press H to view the full list. Use Cmd/Ctrl+Enter to trigger a generation quickly.
Character Consistency: Use Retouch to fix specific features across multiple "turnaround" images to ensure your character looks identical from all angles.
Exporting: Click Export to save individual layers or the entire composition as a high-quality PNG.