Remove Background
Last updated: September 23, 2026
Introduction
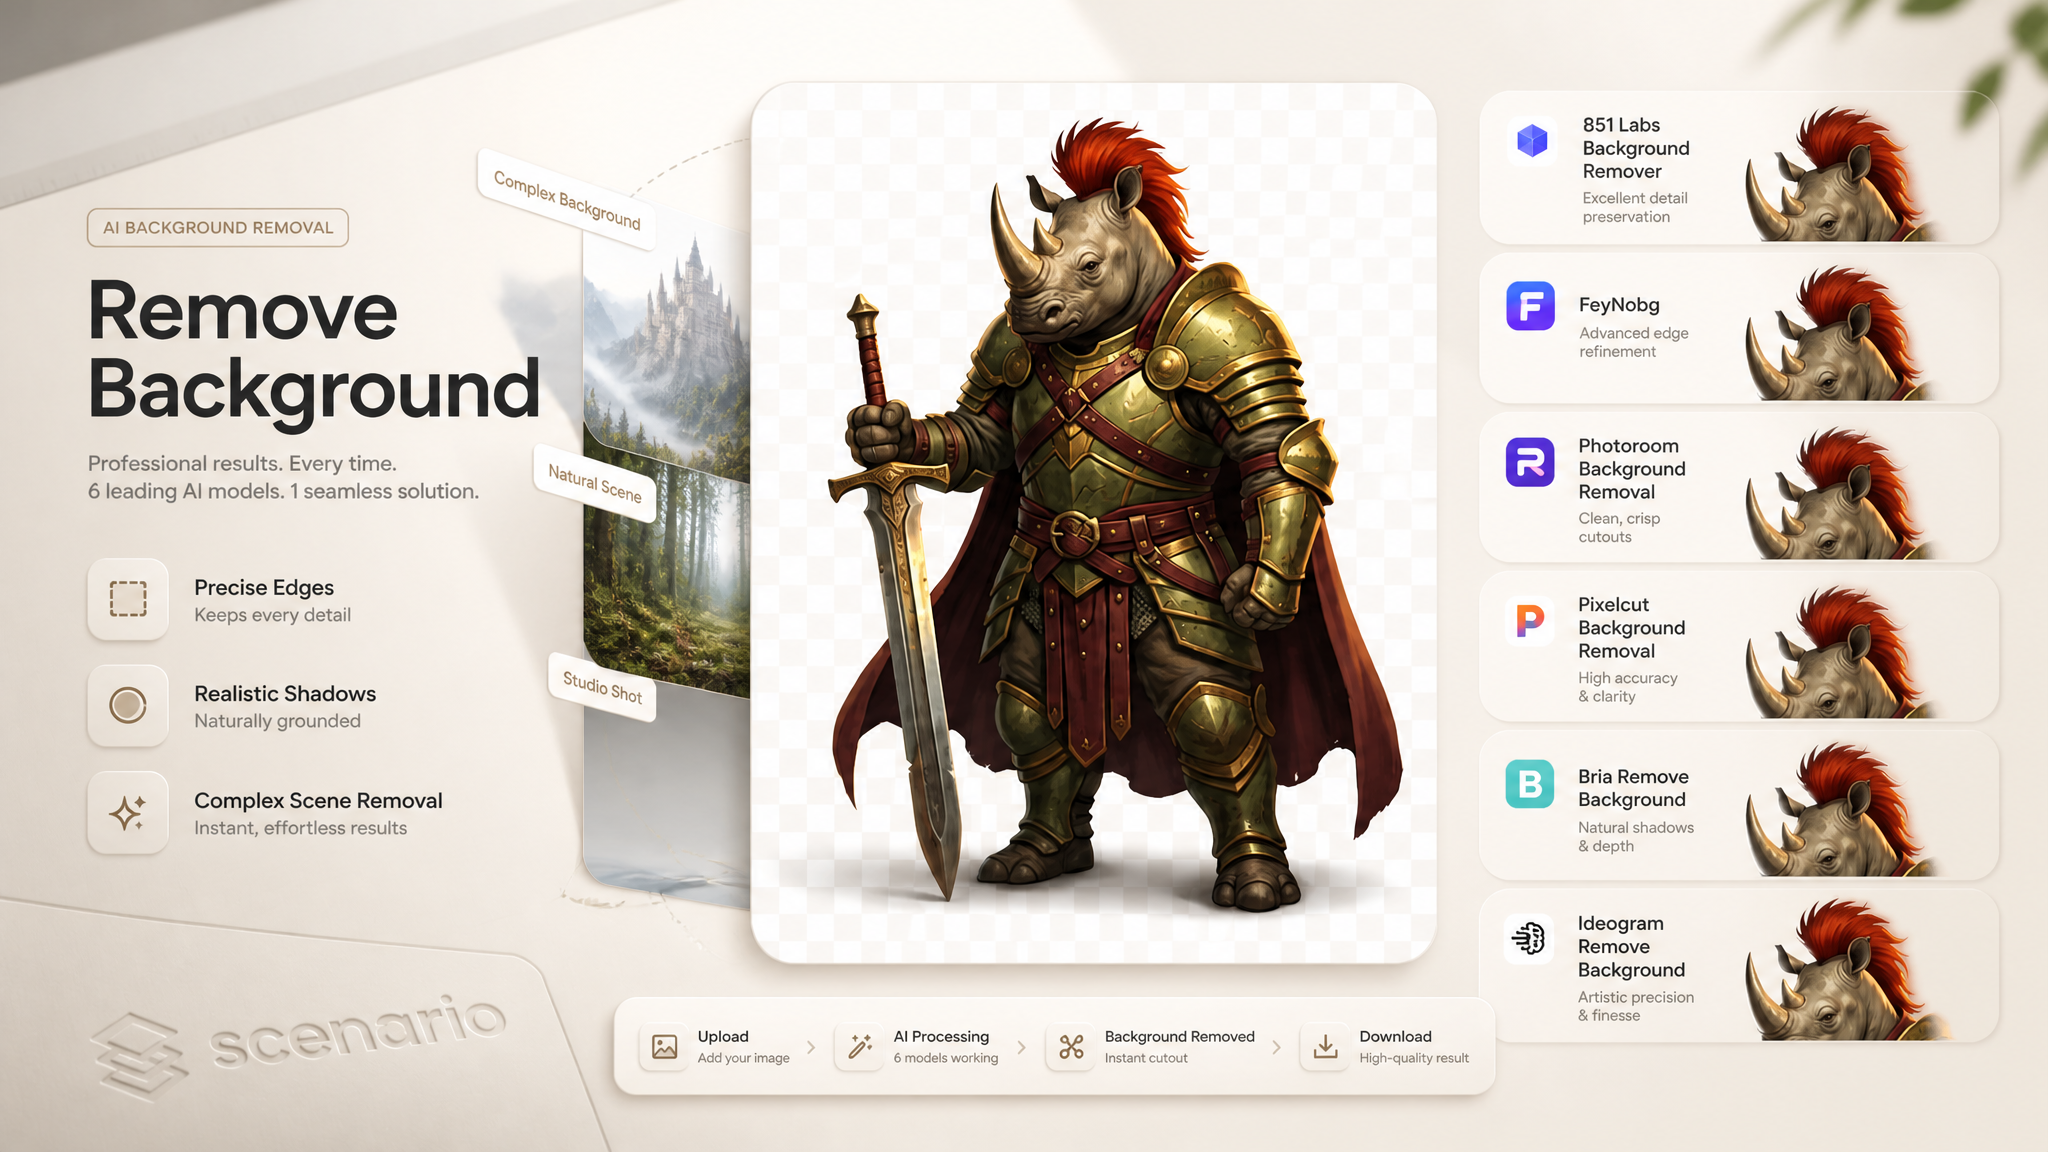
The “Remove Background” tool in Scenario allows you to quickly isolate a subject from its background. Remove Background yields the best results with high-resolution images (1k or 2k) that have a clear contrast between the subject and background. This is useful for creating clean assets for AI model training, canvas composition, and preparing reference images across creative workflows.
Note: Background removal in Scenario is fully automated. At the moment, there is no option for manual adjustments, such as selecting specific areas to keep or remove. For more advanced editing, use Scenario Canvas where you can manually delete parts of a layer with the “Erase” brush tool.
How to Access Remove Background
Scenario provides multiple ways to remove backgrounds, depending on where you are working:
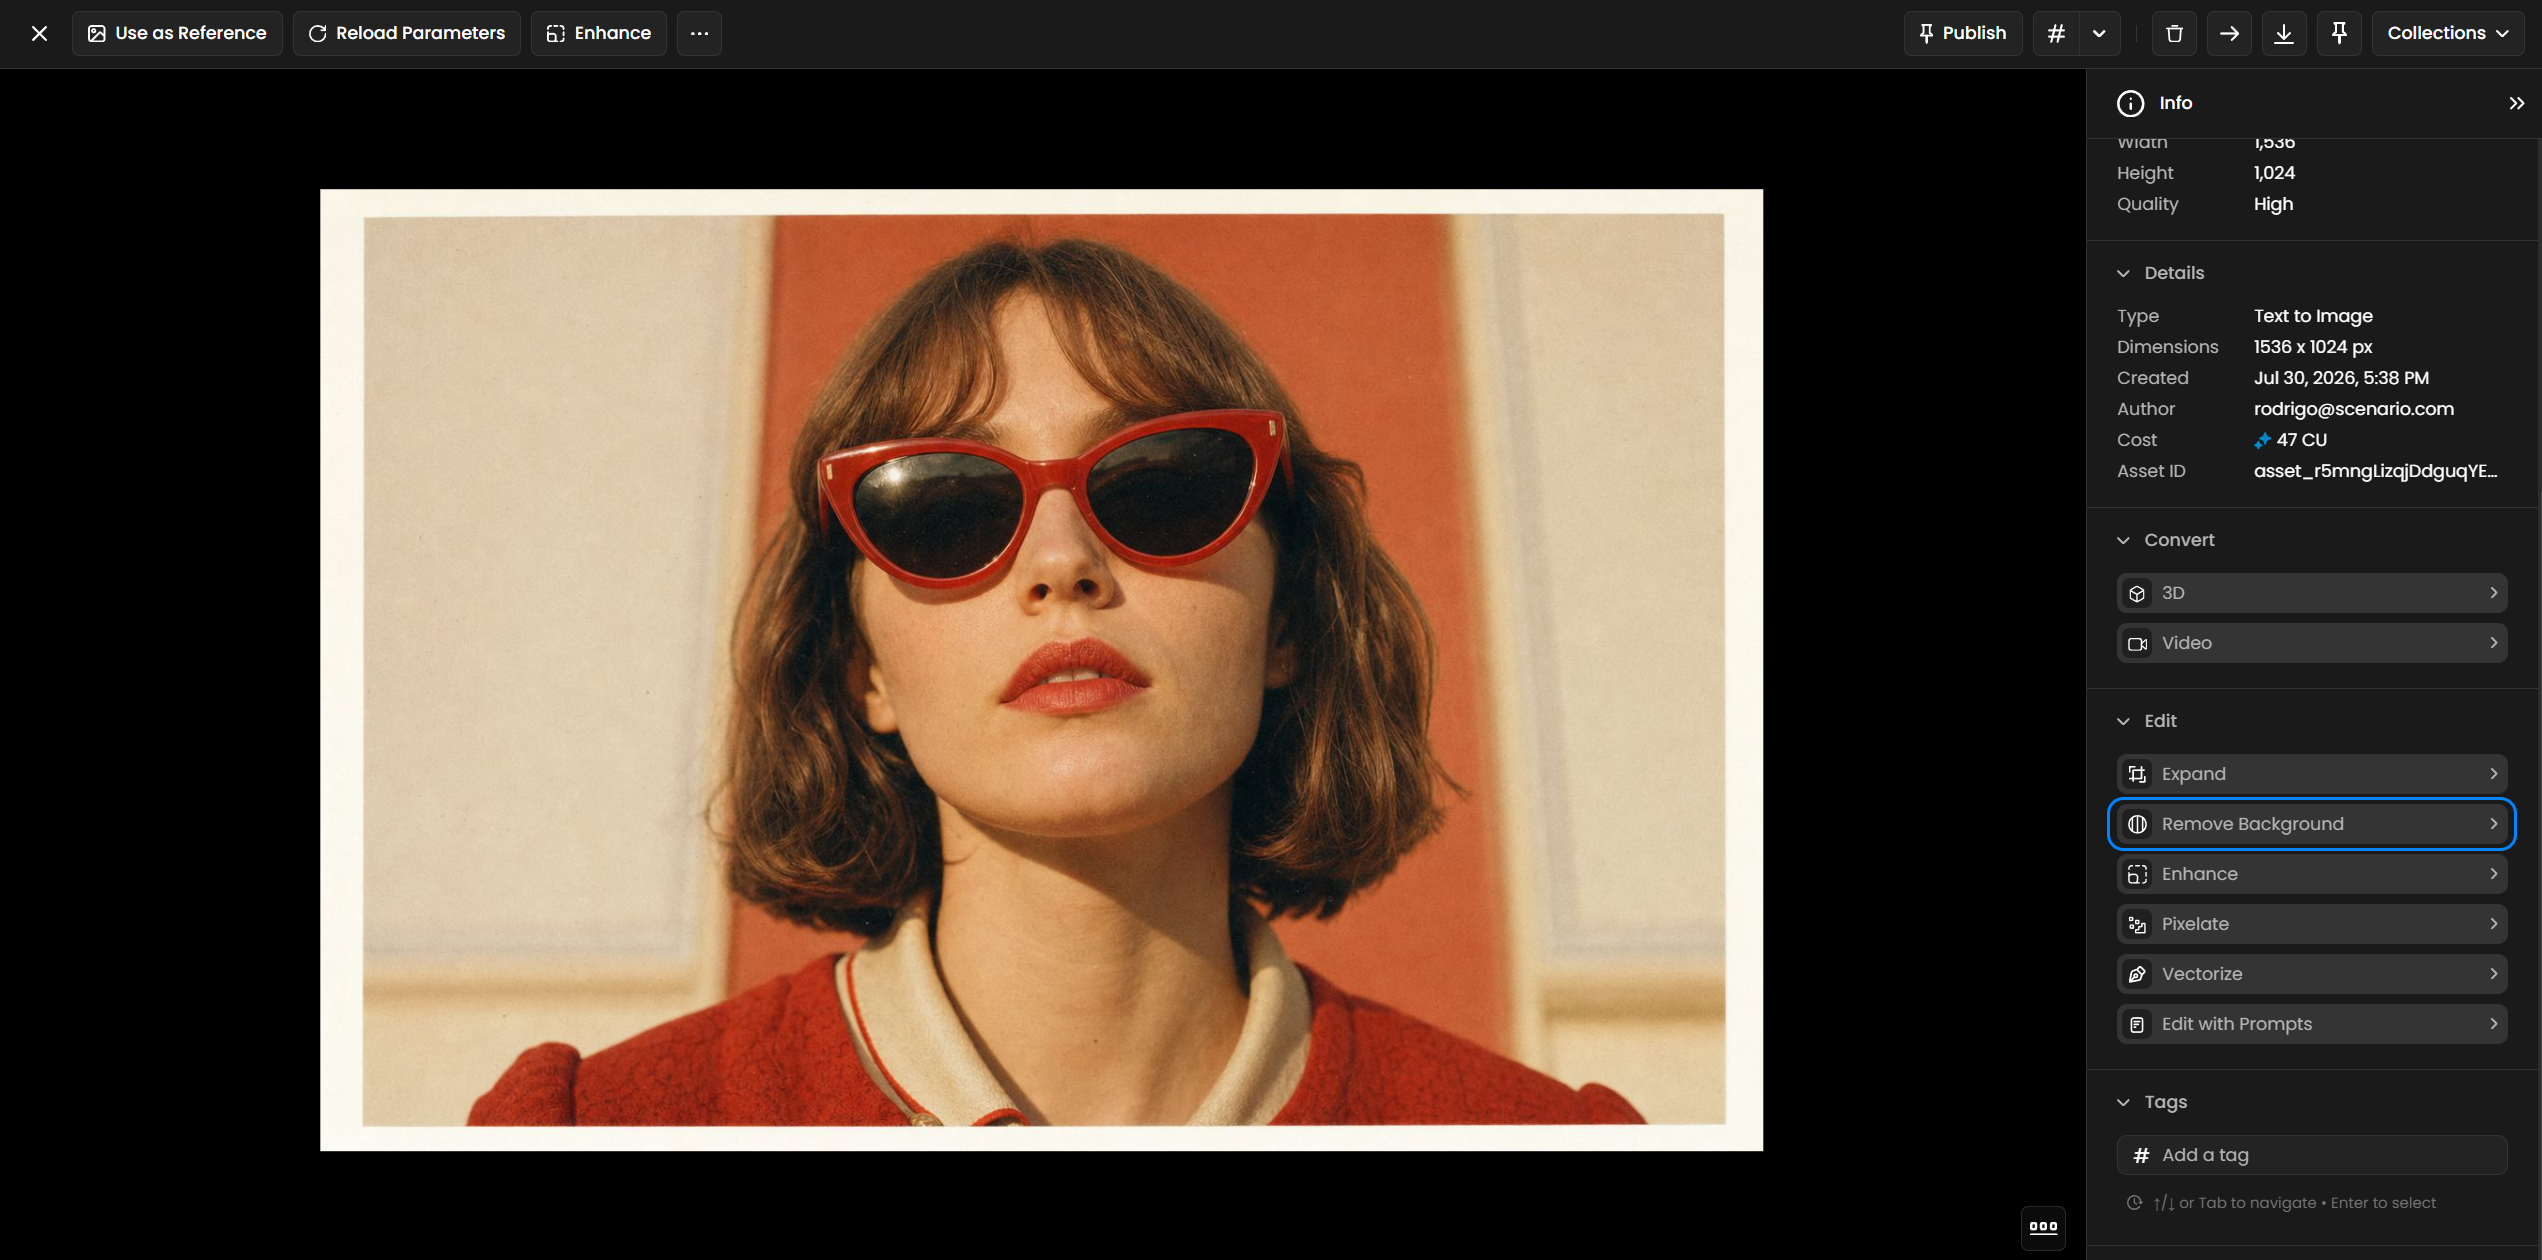
(i) From the Image Page (“Edit” Sidebar)
Open the image you want to edit. Select Remove Background from the Edit tab on the right-hand sidebar, or from the three-dot menu accessible via the top bar.
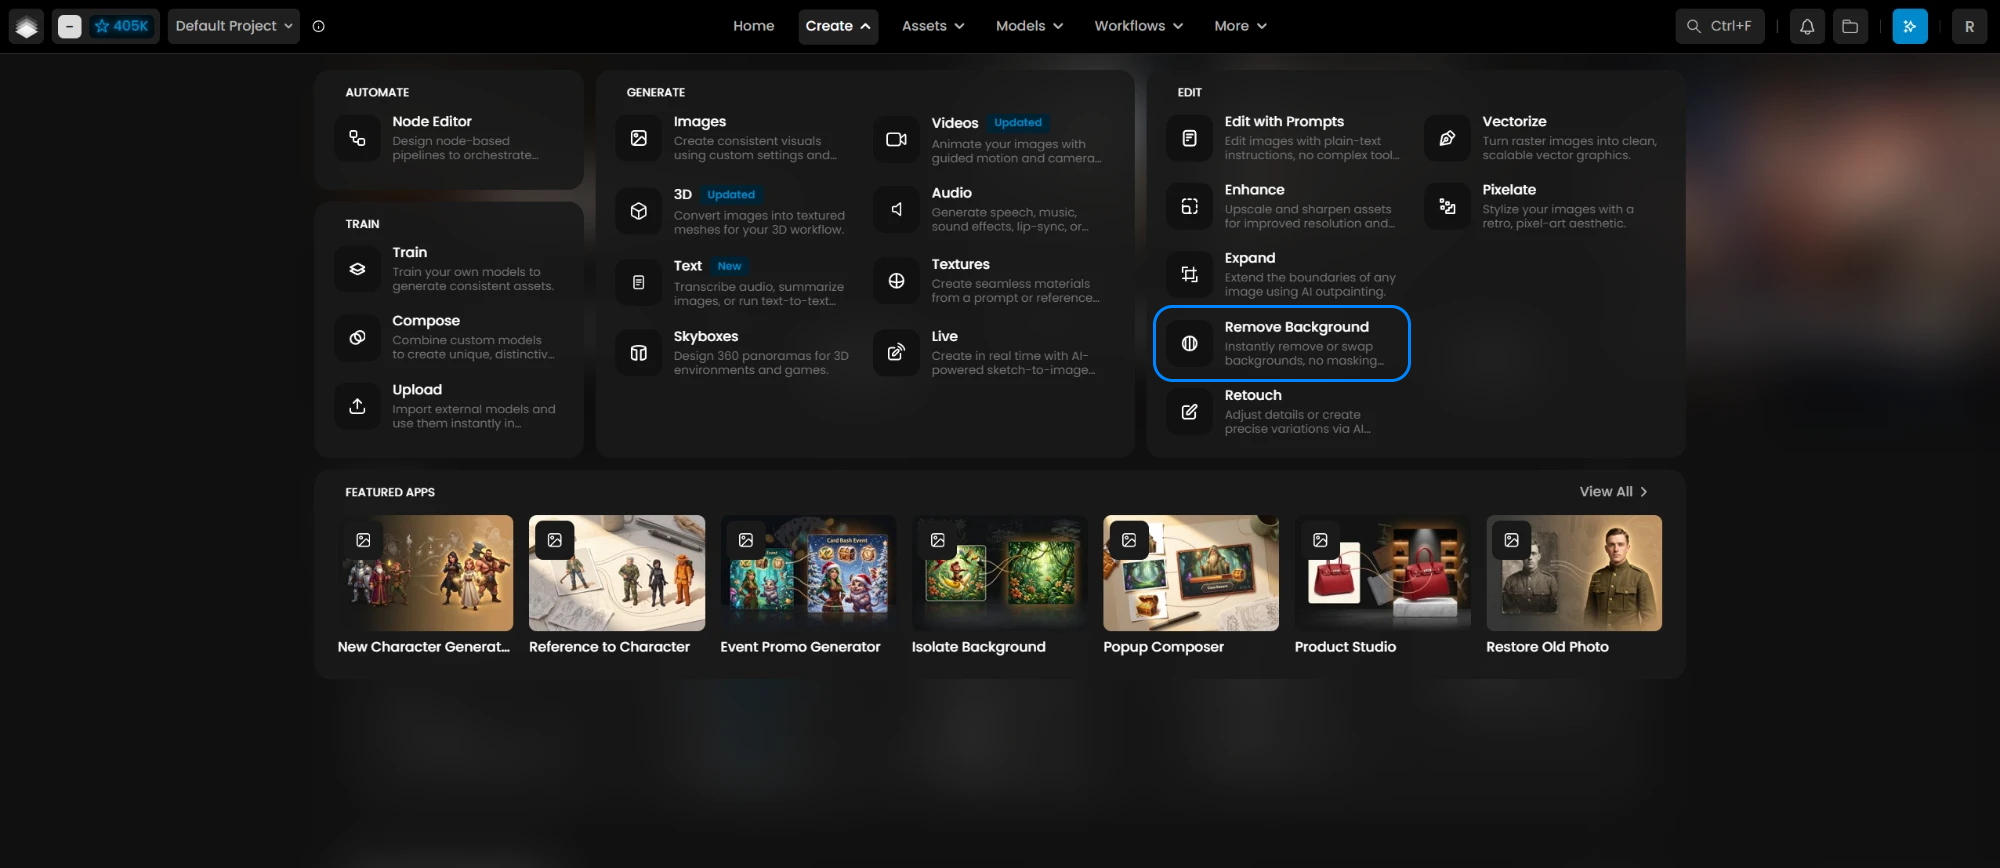
From the Main Menu (Left-Side Panel)
Go to Images > Remove Background. Upload a new image or choose one from your Scenario library.
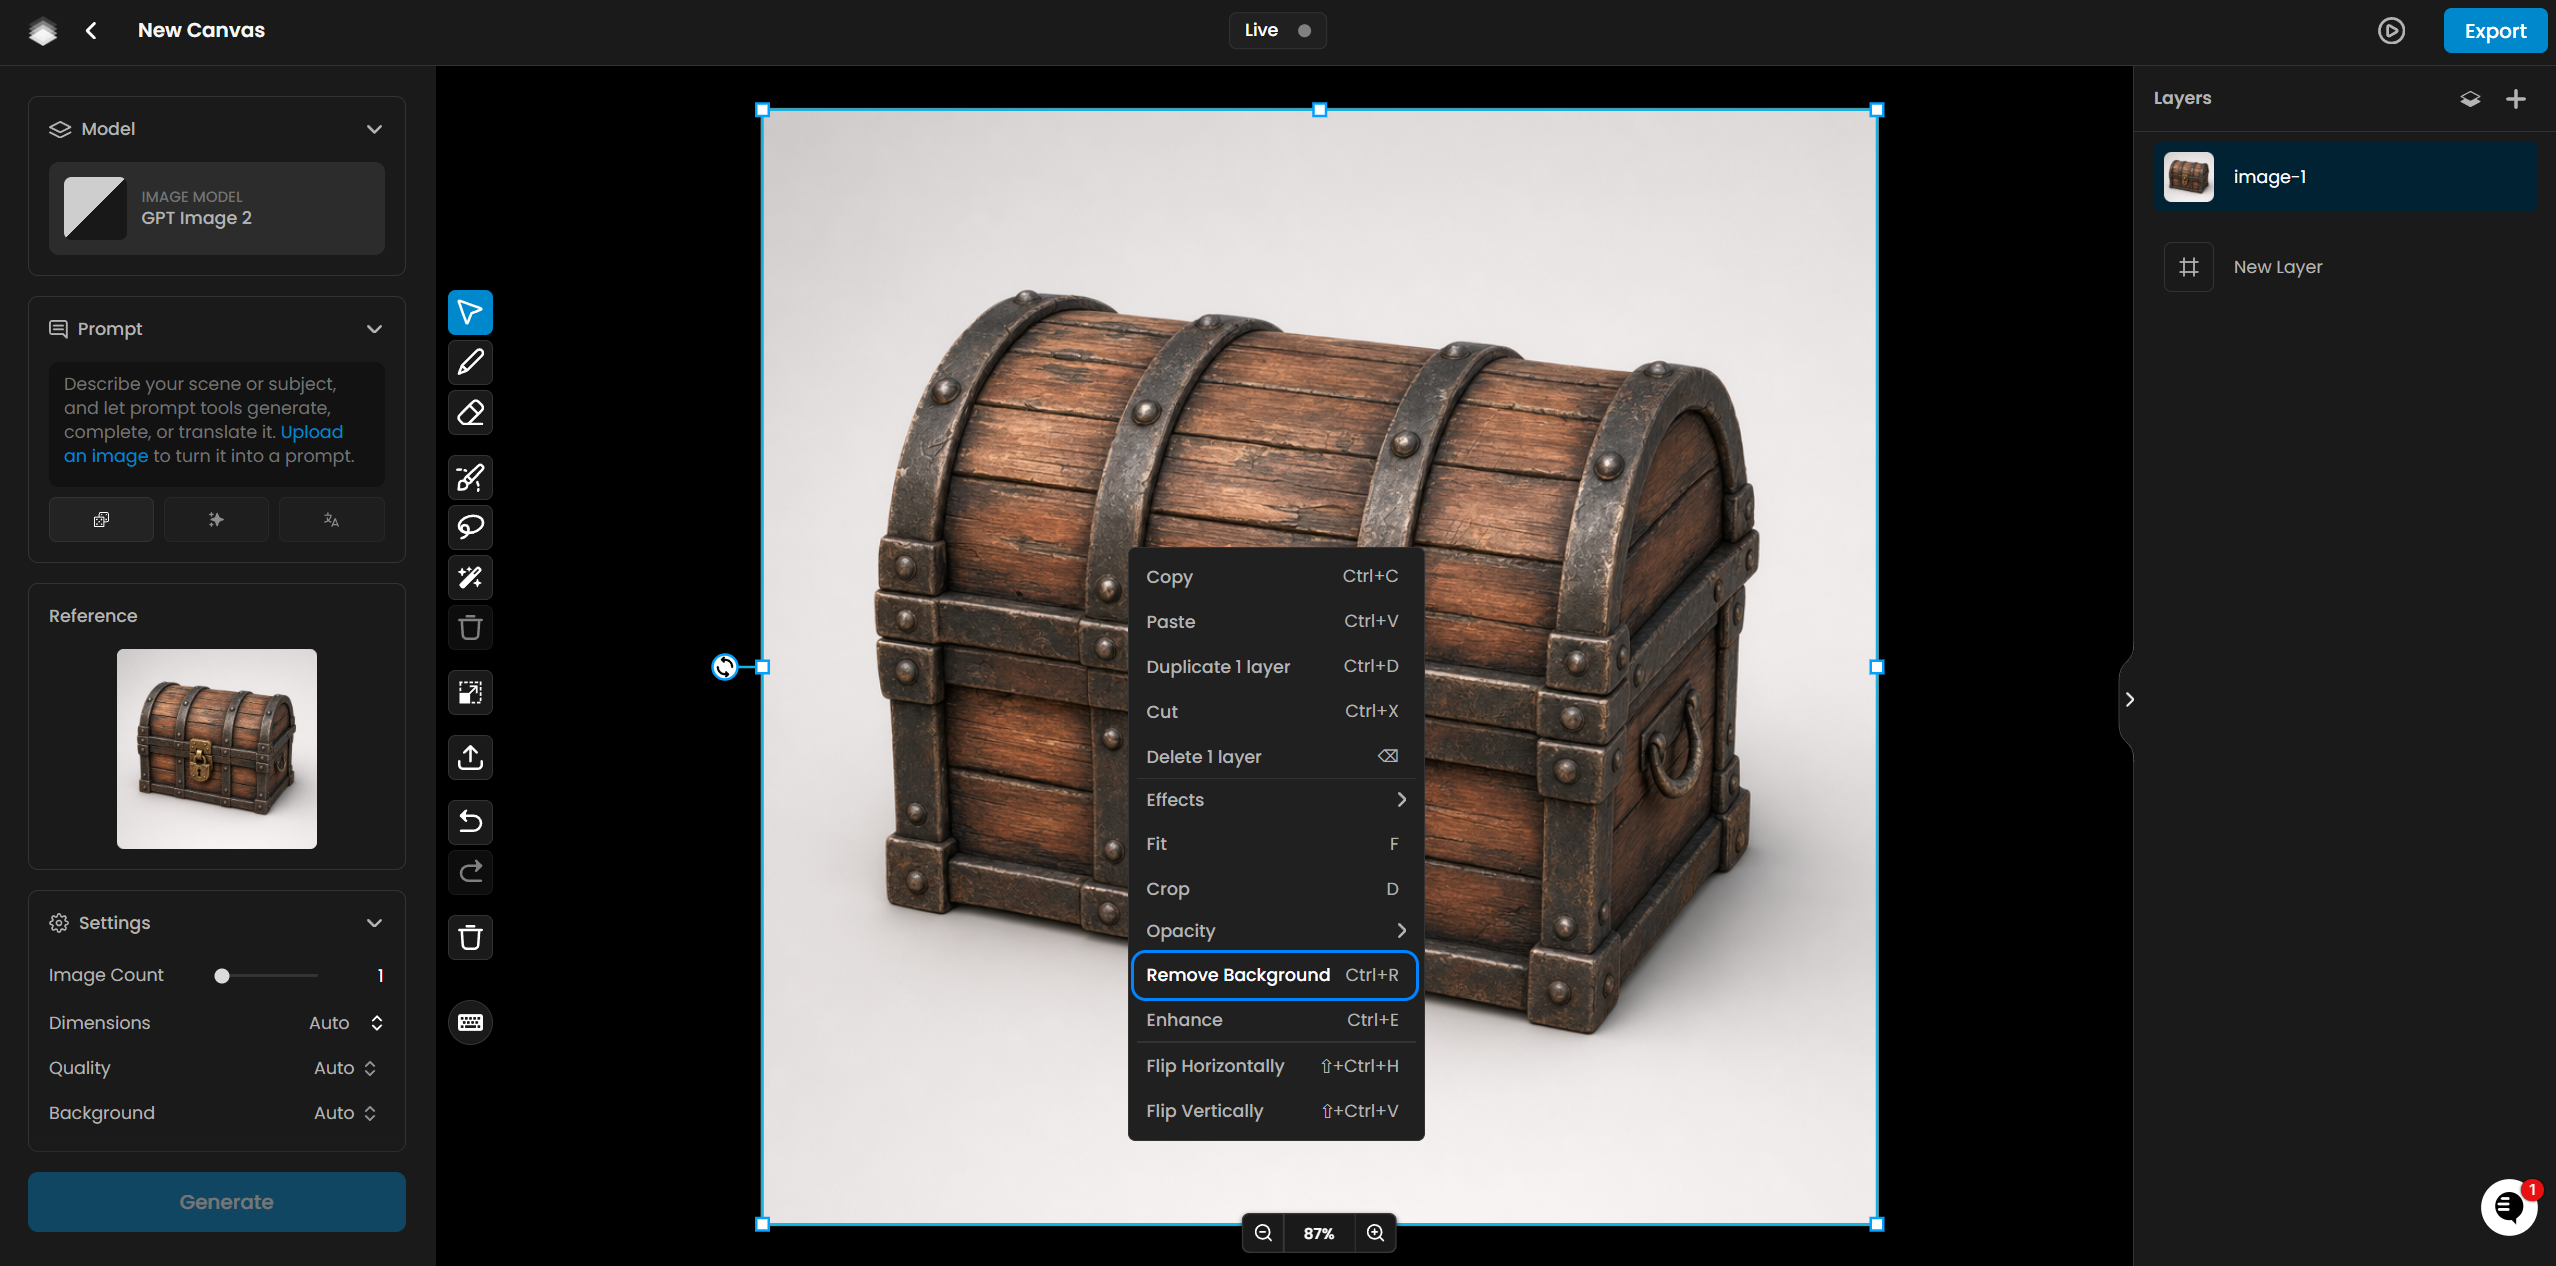
From the Scenario Canvas (Retouch)
When editing an image in Canvas (“Retouch” mode), you can remove the background of a specific layer while keeping the rest of the composition unchanged.
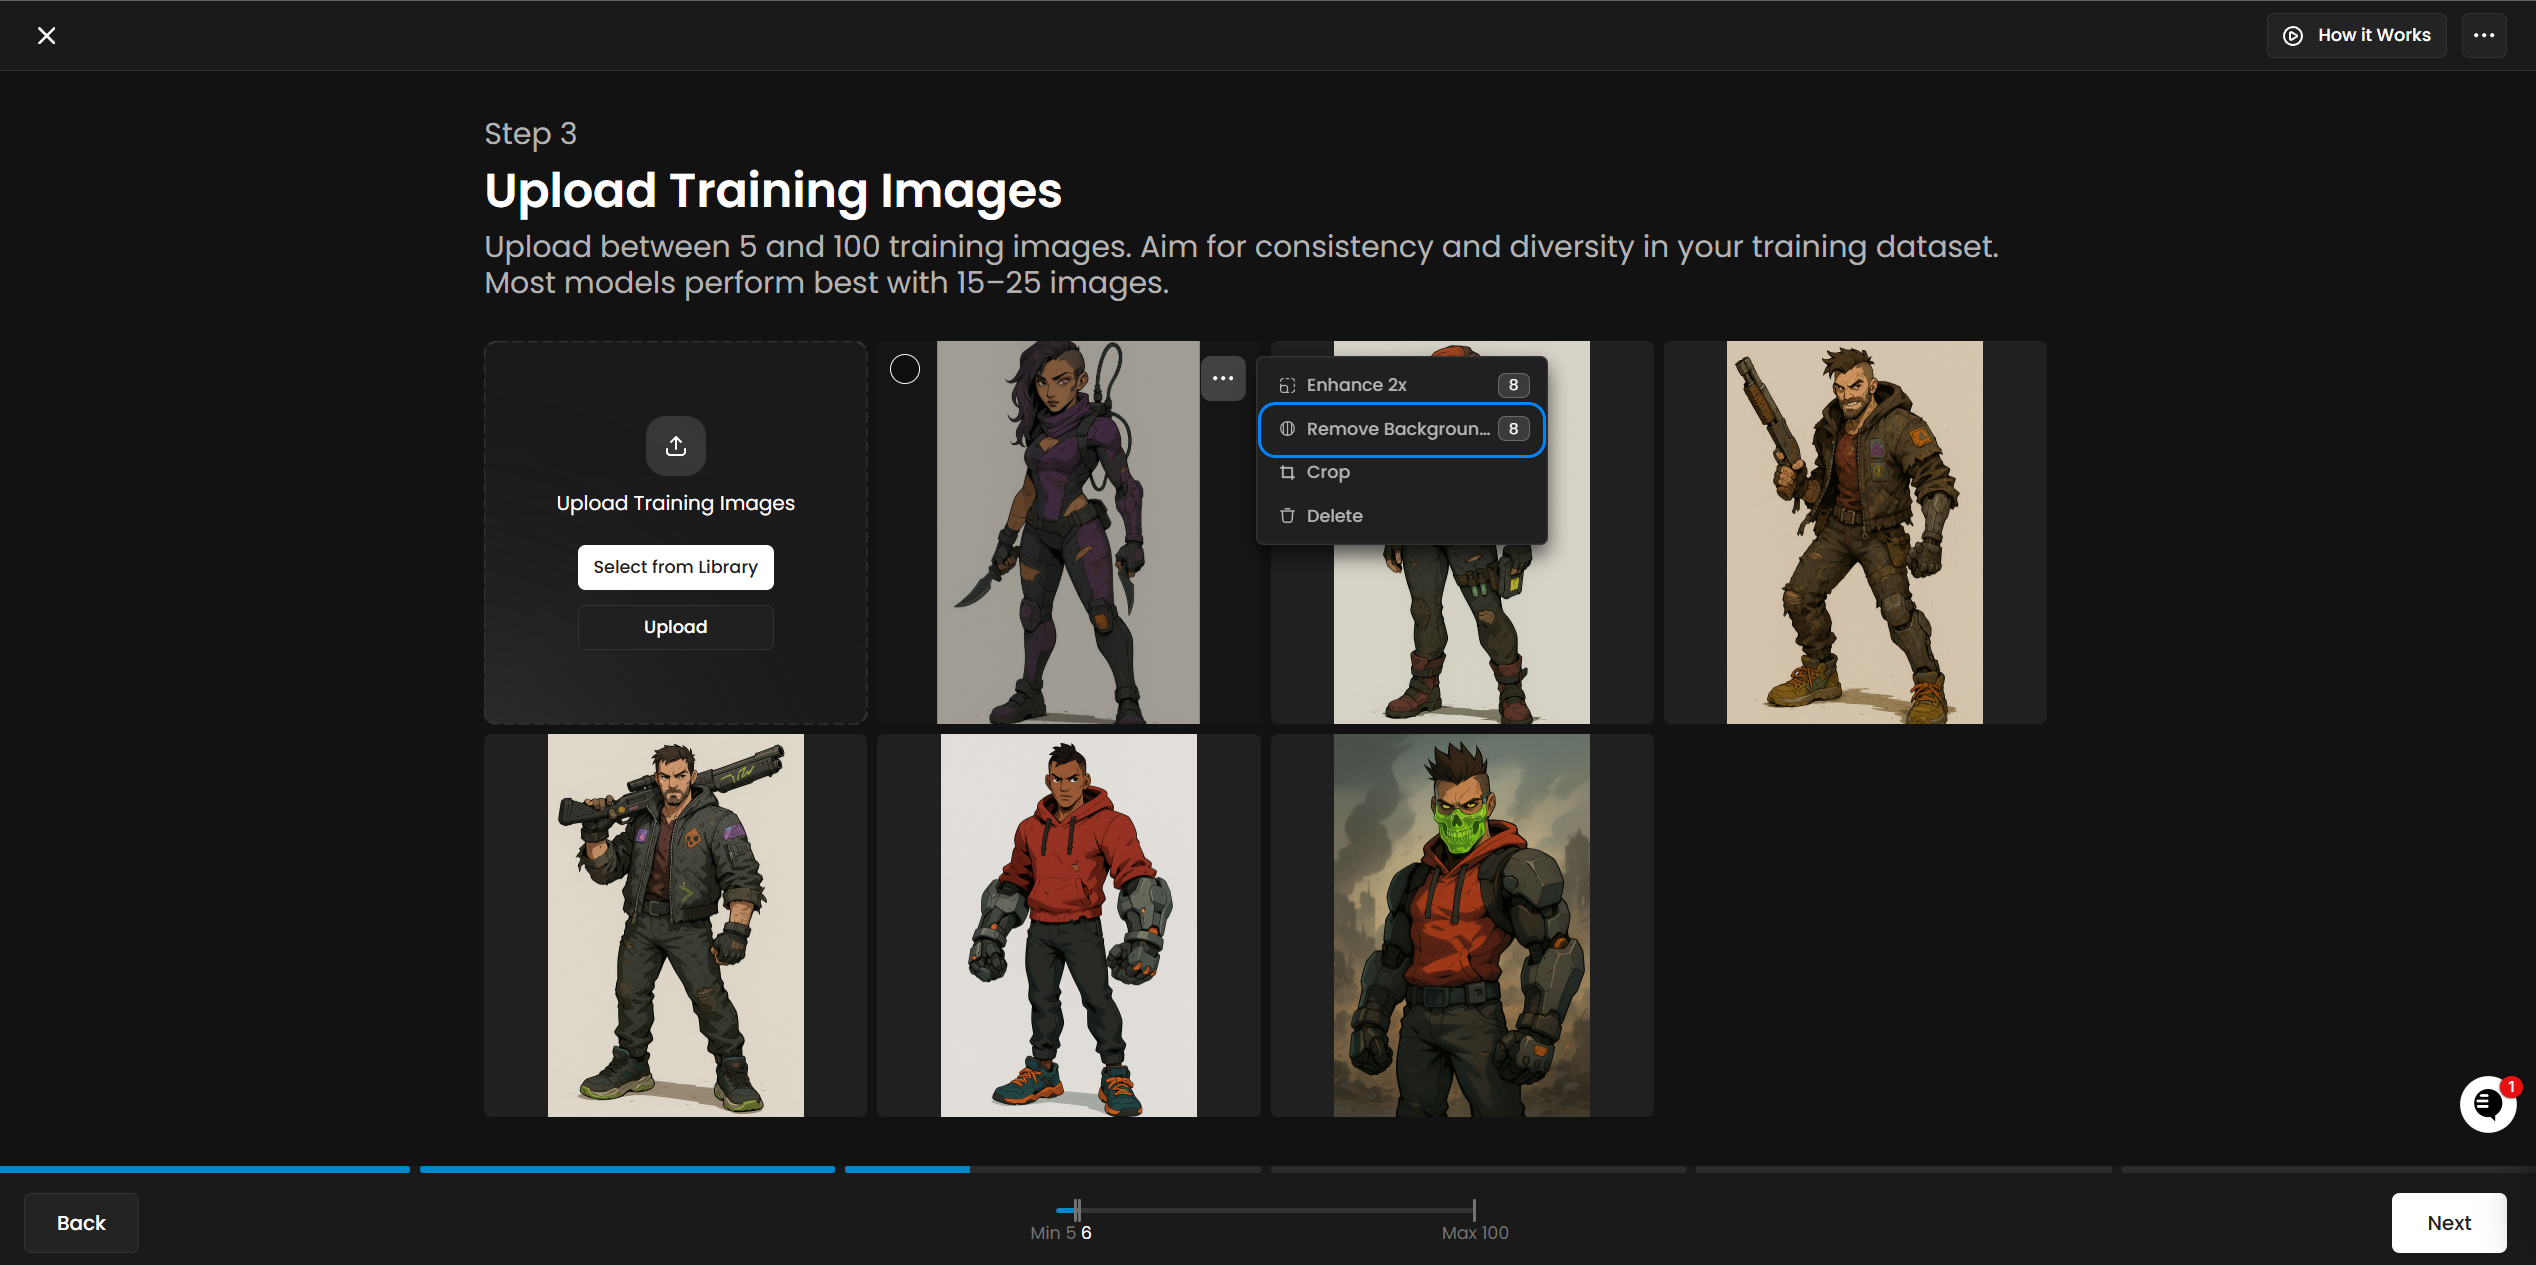
From the Model Training Page
When preparing training images, you can remove backgrounds directly from the Model Training page to optimize dataset quality.
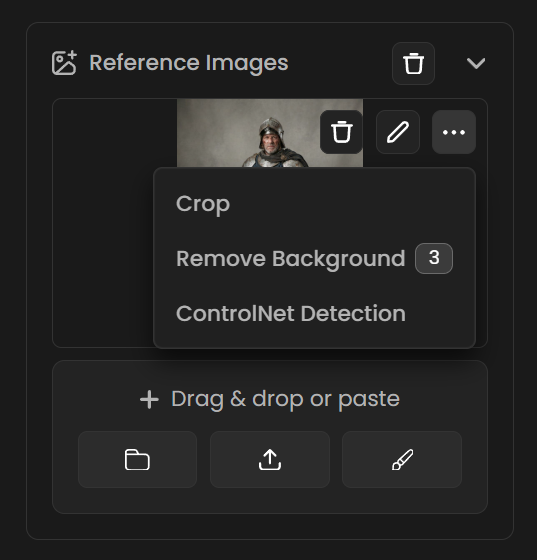
From the Image Generation Screen (Reference Images)
If you are using reference images in an AI generation, you can remove their background before applying them in the inference process.
Background Options
Once you apply the Remove Background tool, you can choose between different options:
Transparent Background (Alpha Channel): Removes the background completely, leaving an alpha channel for transparency.

Solid Color Background: Replaces the background with a selected color to create contrast or match an image to a specific design theme.
After selecting a background option, click Remove Background, and Scenario will process the image automatically.

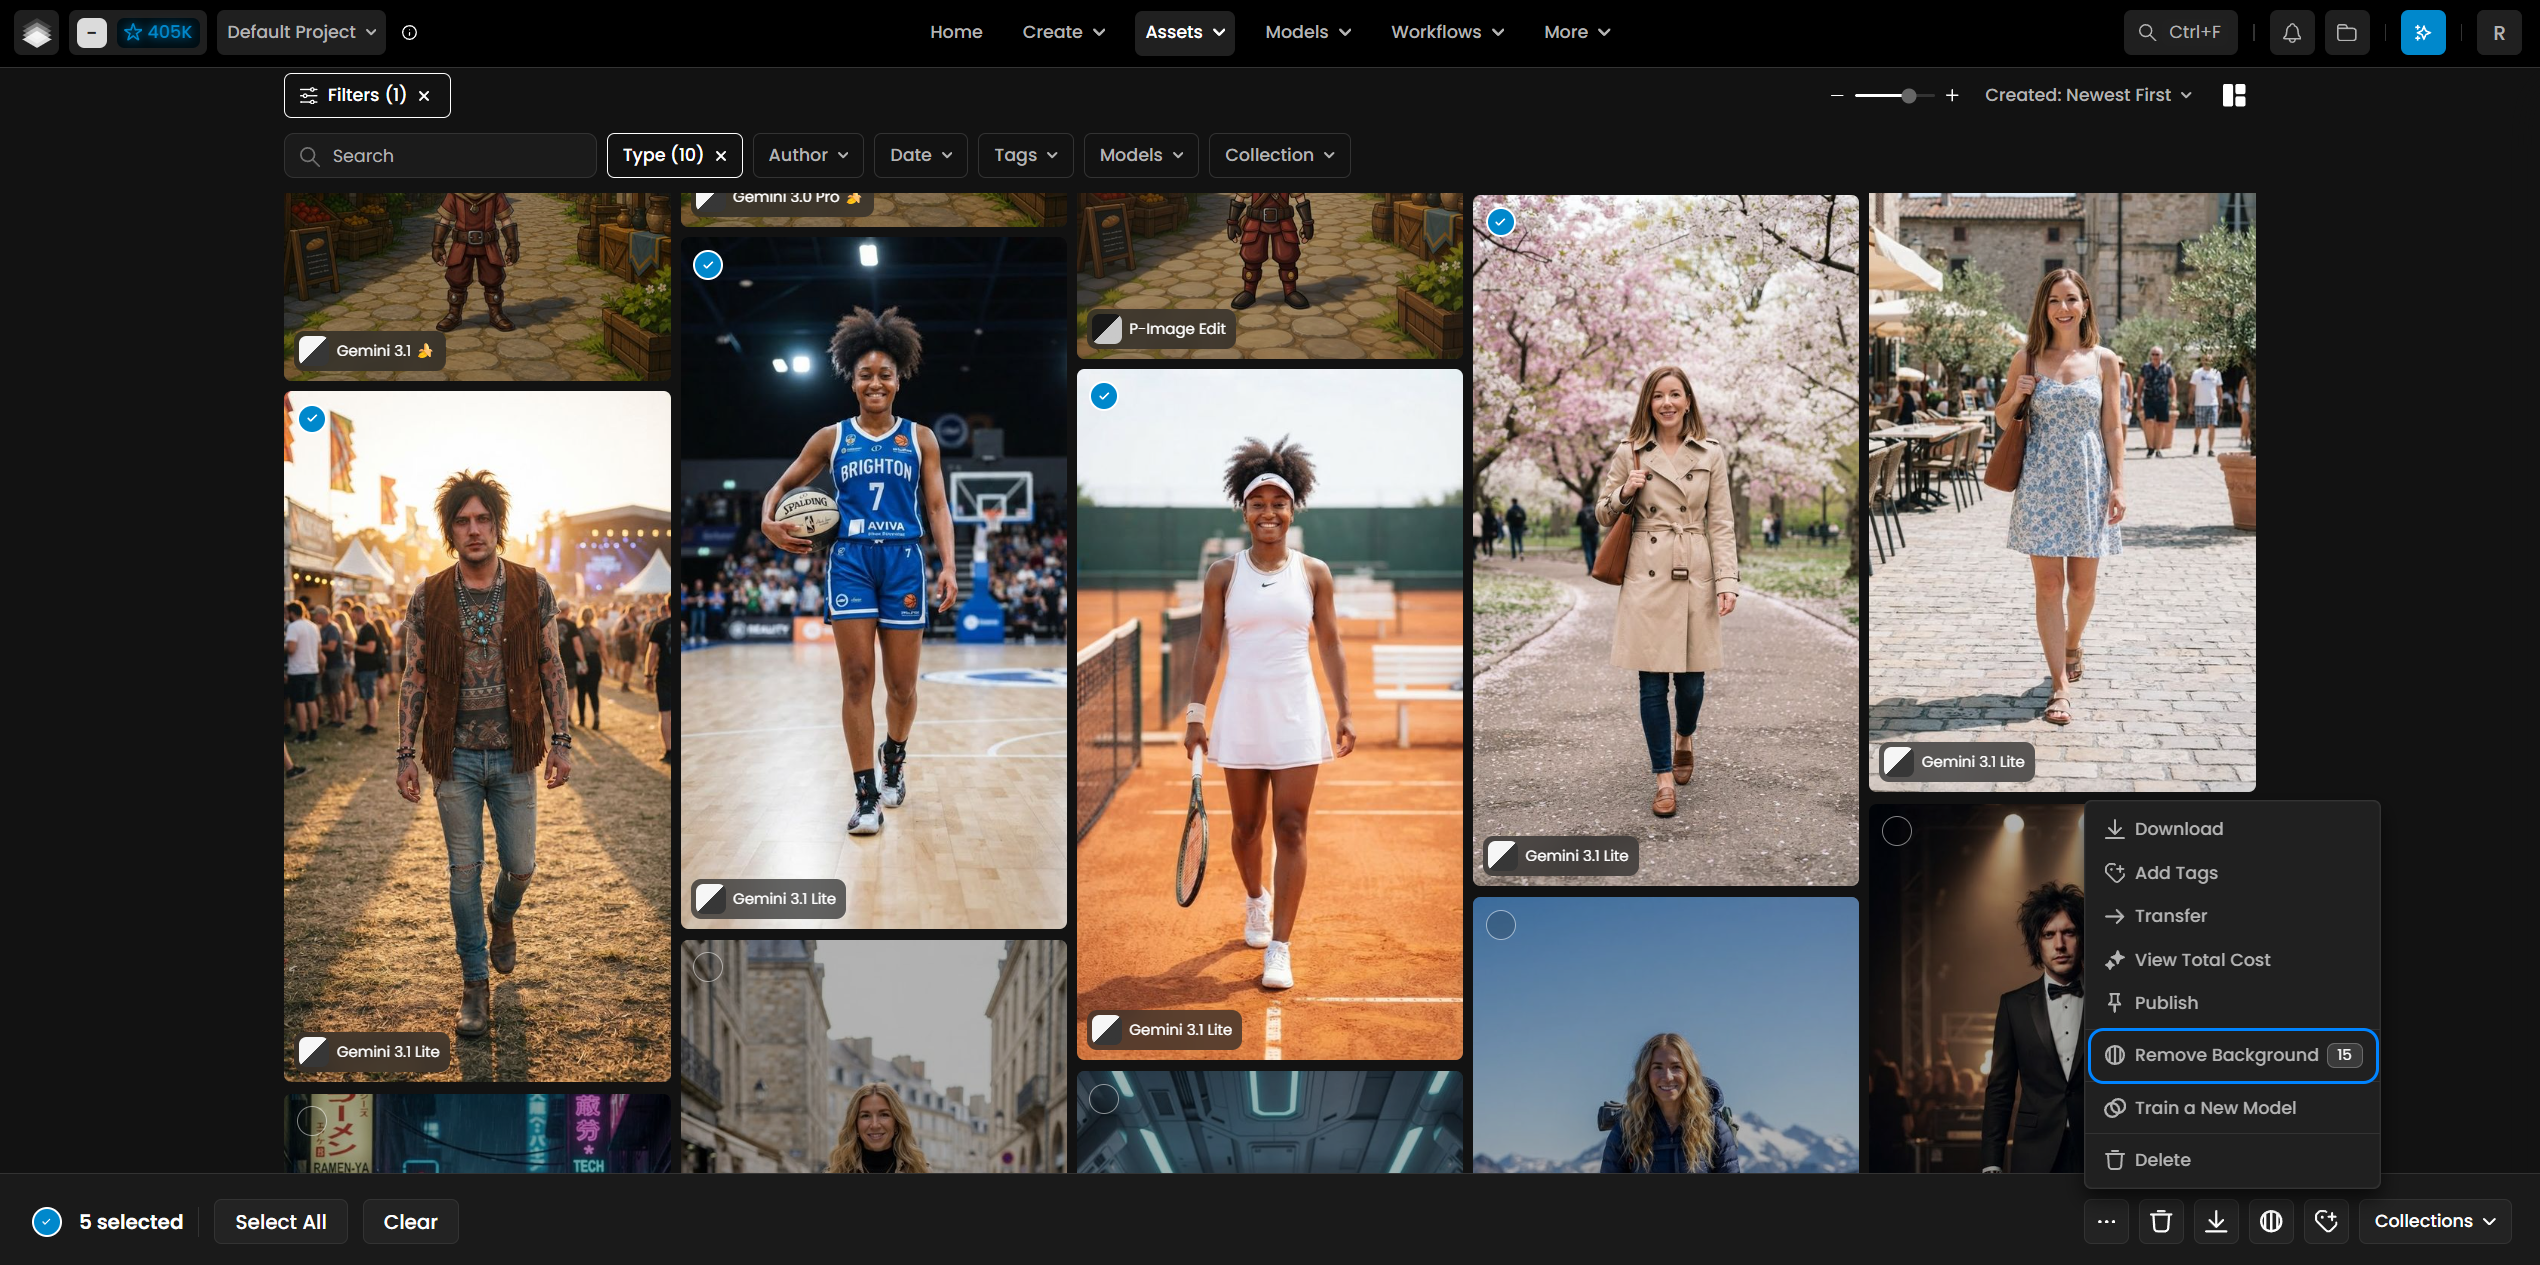
Batch Background Removal
Scenario allows you to remove backgrounds from multiple images at once, streamlining the process for large batches. To use Batch Removal, select multiple images in your library (or from the Search interface). Click “Remove Background” (available via the 3-dot menu to the bottom right). All your images will automatically process and be available for download.
Using the 851 Labs Background Remover Model
Alongside the built-in Remove Background tool, Scenario exposes 851 Labs Background Remover as a standalone model you can run directly or wire into a workflow. It is an open-source, image-to-image cutout model powered by InSPyReNet (the transparent-background package), and it is a strong choice when you want fast, automatic subject isolation with a little more control over how the edges are cut and what gets placed behind the subject.
Because it runs as a model, it fits naturally into batch pipelines and multi-step generation flows, giving you the same one-click cutout as the sidebar tool while letting you tune the result per image.
Key Parameters
Image: the source image you want to isolate the subject from. This is the only required input.
Threshold: controls how sharply the subject is cut out. At 0 (the default) edges stay soft and natural, which is ideal for hair, fur, and fine detail. Higher values, up to 1, produce a harder, cleaner cutout with more defined edges.
Reverse: when enabled, keeps the background and removes the subject instead, the inverse of the usual result.
Background Type: chooses what sits behind the subject. Transparent (the default) leaves an alpha channel, or you can pick White, Green Screen, a Blurred version of the original, an Overlay, or Map, which returns the cutout mask itself.
Examples
The portrait below keeps soft, natural hair edges against a busy red backdrop, using the default transparent background.
Before | After |
 |  |
Transparent cutout with soft hair edges · Open on Scenario
It also handles multi-subject sheets, isolating a full lineup of characters in a single pass, which is handy when preparing game-ready assets.
Before | After |
 |  |
Multiple subjects cut out in one pass · Open on Scenario
Where It Fits
For most day-to-day work, the built-in Remove Background tool and batch removal described above are the quickest path, and they use this same class of cutout under the hood. Reach for the 851 Labs Background Remover model when you want to run background removal as a model, whether that means tuning the Threshold and Background Type per image, inverting the selection with Reverse, or chaining automatic cutouts into a larger generation or workflow pipeline.
Using the FeyNobg Model
FeyNobg, by Feyninc, is a second standalone background-removal model on Scenario. Like the 851 Labs remover, it runs as an image-to-image model you can call directly or wire into a workflow, but it is tuned for one job: a clean, compositing-ready transparent PNG straight out of the box, with almost nothing to configure.
Where the 851 Labs model gives you dials for edge hardness and what sits behind the subject, FeyNobg keeps it deliberately simple. Feed it an image and it returns the subject on a transparent background, holding on to fine detail like flyaway hair and thin cables. It is a dependable default when you just want a solid cutout without tuning anything.
Key Parameters
Image: the source image you want to isolate the subject from. This is the only required input.
Seed: an optional value for reproducible results. Reuse the same seed to get the same cutout across runs, or leave it unset for the default behavior.
Examples
Even against a dark, moody backdrop, FeyNobg keeps the fine hair strands and the thin earbud cable intact, returning the subject on a transparent background.
Before | After |
 |  |
Fine hair and a thin cable preserved in a transparent cutout · Open on Scenario
It is just as reliable on hard product edges, cleanly lifting this electric car, roof-rack bars and all, off its studio background.
Before | After |
 |  |
Crisp product cutout with clean edges · Open on Scenario
Where It Fits
Reach for FeyNobg when you want a no-fuss, high-quality transparent cutout and do not need to change the background type or invert the selection. If you want control over edge hardness, or a solid color, green screen, blur, or the raw mask, use the 851 Labs Background Remover above. For quick one-off edits inside the app, the built-in Remove Background tool remains the fastest path.
Using Photoroom Background Removal
Photoroom Background Removal is a commercial-grade cutout model built for e-commerce and product photography. Beyond a clean transparent cutout, it can drop a realistic shadow under the subject and drop in a solid background color in the same pass, which makes it a strong pick for packshots and catalog images.
Key Parameters
Image: the source image. This is the only required input.
Background Color: a hex value or an HTML color name to fill behind the subject. Leave it empty for a transparent PNG.
Shadow Mode: adds a realistic shadow to ground the subject. Soft gives a professional studio look, Hard mimics direct sunlight, and Floating creates a 3D hover effect.
HD Background Removal: enable it for images at 2K or larger to keep edges crisp at high resolution.
Keep Existing Transparency: set to Auto to preserve transparency already present in the input, or Never to ignore it.
Examples
On this glass perfume bottle, Photoroom lifts the subject cleanly while keeping the transparent glass and its reflections intact.
Before | After |
 |  |
Transparent cutout with the glass and reflections preserved · Open on Scenario
Using Pixelcut Background Removal
Pixelcut Background Removal focuses on fast, precise edge detection. It is a lightweight option when you want a dependable cutout and the choice between a full color composite or just the mask on its own.
Key Parameters
Image: the source image. This is the only required input.
Output Format: RGBA returns the subject on a transparent background. Alpha returns the cutout mask on its own, which is handy when you want to composite or refine the selection elsewhere.
Examples
Pixelcut cleanly separates these headphones from their backdrop, cutting right through the open gap in the headband.
Before | After |
 |  |
Clean cutout through the open headband gap · Open on Scenario
Using Bria Remove Background
Bria Remove Background is a commercial model known for clean cutouts that hold on to fine detail like hair. It can return a transparent PNG or a fully opaque image, depending on how you plan to use the result.
Key Parameters
Image: the source image. This is the only required input.
Preserve Alpha: keep this on to output a transparent PNG. Turn it off when you want a fully opaque image with no alpha channel.
Examples
On this studio portrait, Bria isolates the subject while keeping the loose strands of hair clean against a transparent background.
Before | After |
 |  |
Hair edges kept clean on a transparent cutout · Open on Scenario
Using Ideogram Remove Background
Ideogram Remove Background is a generative remover that keeps hair, fur, glass, and other fine edges clean. It takes a single image up to 10MB and returns the subject on a transparent background, with nothing to configure.
Key Parameters
Image: the only input. It accepts images up to 10MB and returns the subject on a transparent background.
Examples
This fluffy cat is a hard case for any remover, and Ideogram keeps the individual fur strands and whiskers intact around the whole silhouette.
Before | After |
 |  |
Fur and whiskers preserved on a transparent cutout · Open on Scenario
Using Birefnet Background Removal
Birefnet Background Removal runs the BiRefNet segmentation architecture directly on Scenario, the same model family FeyNobg is also built on. Feed it one image and it returns the subject on a transparent background, with nothing to configure: no threshold, no background type, no seed.
Because BiRefNet segments at high resolution before matting the edges, it holds on to thin, fiddly structures, fur, bow strings, woven straw, thin straps, that flatten into rough blobs in less careful removers.
Key Parameters
Image: the only input. There are no other settings to configure.
Examples
On this anthropomorphic fox violinist, Birefnet Background Removal keeps the individual fur texture and the thin violin bow strings crisp on a transparent background.
Before | After |
 |  |
Fur texture and thin bow strings preserved on a transparent cutout · Open on Scenario
It handles fine woven material just as well, cutting out this straw sun hat without losing the individual strands at the brim edge or the thin ribbon band.
Before | After |
 |  |
Woven straw texture and a thin ribbon band kept intact · Open on Scenario
Where It Fits
Reach for Birefnet Background Removal when you want a fast, no-configuration transparent cutout with strong edge fidelity on fur and fine detail, similar to FeyNobg. If you need control over edge hardness or a specific background type (solid color, green screen, blur, mask), use the 851 Labs Background Remover above instead.
Choosing a Background-Removal Model
All seven models take an image and return a cutout. They differ in the controls they expose and what they are tuned for. Use this table as a quick guide.
Model | Best for | Notable controls |
|---|---|---|
Flexible cutouts with edge and background control | Threshold, Reverse, Background Type (transparent, white, green screen, blur, overlay, mask) | |
A no-fuss default transparent cutout | Seed only | |
A raw BiRefNet cutout tuned for fur and fine detail | None, image only | |
E-commerce and product shots | Shadow, background color, HD mode | |
Fast cutouts and mask output | RGBA or alpha-only | |
Portraits and fine hair detail | Transparent or opaque output | |
Hands-off cutouts with fine edges | One image in, no settings |
Removing Backgrounds from Video
The models above all work on still images. For footage, Scenario has dedicated models that keep the cutout stable across frames, with no flicker and no green screen: Pixelcut Video Background Removal and Video Foreground Extractor. Both are covered, with examples and settings, in our Remove Video Backgrounds guide.