The Consistent Outfit workflow described in this article remains fully functional. However, for improved efficiency and consistency, we now recommend using newer models that handle clothing variations and character consistency more natively.
Models like Nano Banana Pro and Seedream 4.5 offer advanced editing capabilities, making it easier to generate consistent outfits and character styles with fewer steps.
Recommended Guides:
- Gemini 3.0 Pro Image: The Essentials
- Seedream Models: The Essentials
Introduction
Let's see how to create multiple characters wearing similar clothing while maintaining consistent style elements across different character types.
This workflow is for creating team uniforms, military squads, or any group of characters that need to share a cohesive look. It allows you to maintain consistent elements like colors, logos, and accessories while varying the characters themselves.
This guide will cover two approaches:
Using Edit with Prompts - a simpler, more direct method for quick results with simple instructions.
Using Custom Models - a slightly more complex approach that provides greater control over the image generation process.
Each method has its advantages, and this guide will walk through examples of both workflows to help you choose the best approach for your specific needs.
Choosing a Reference Image
For best results, try to use reference images that:
Show the outfit or uniform clearly.
Don't include visible faces.
Have good lighting so details are visible.
Include both front and back views if possible (especially helpful for detailed uniforms).
Using faceless references gives you much more freedom to create different character types without the reference's facial features bleeding into your results.
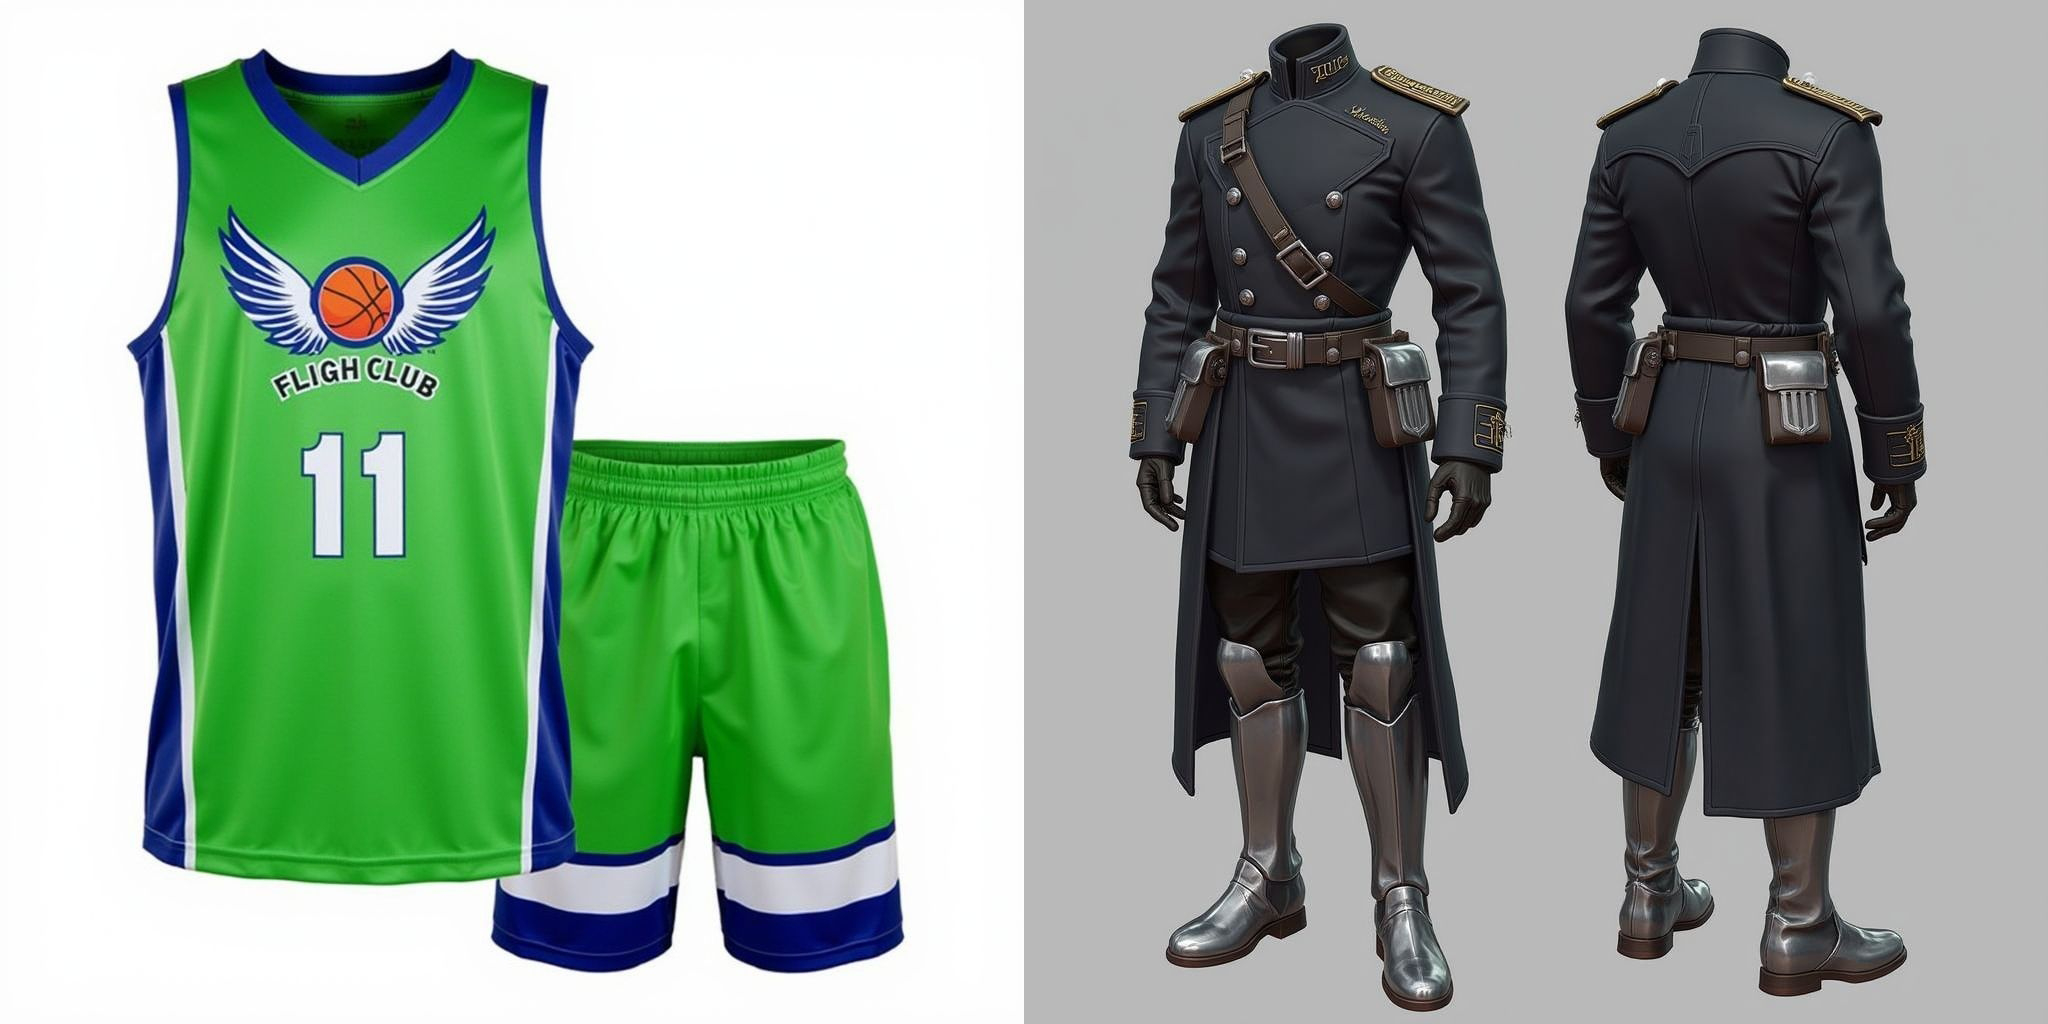
Below are the reference images we used in the examples.
Edit with Prompts
Let's start with the simplest approach: generating characters with similar uniforms using Edit with Prompts.
This method allows you to guide the model using natural language prompts, directly within the "Edit with Prompts" panel:
Navigate to the side menu and go to the Images icon.
Select "Edit with Prompts" from the menu.
Upload your character image as Reference and the uniform as Additional Images to give the AI visual context.
Select GPT Image 1.
Describe what you want in conversational language in Instructions. You can use a language other than English and translate it directly into the prompt box using the Translate button.
See the image below for an example of the workflow and prompt.
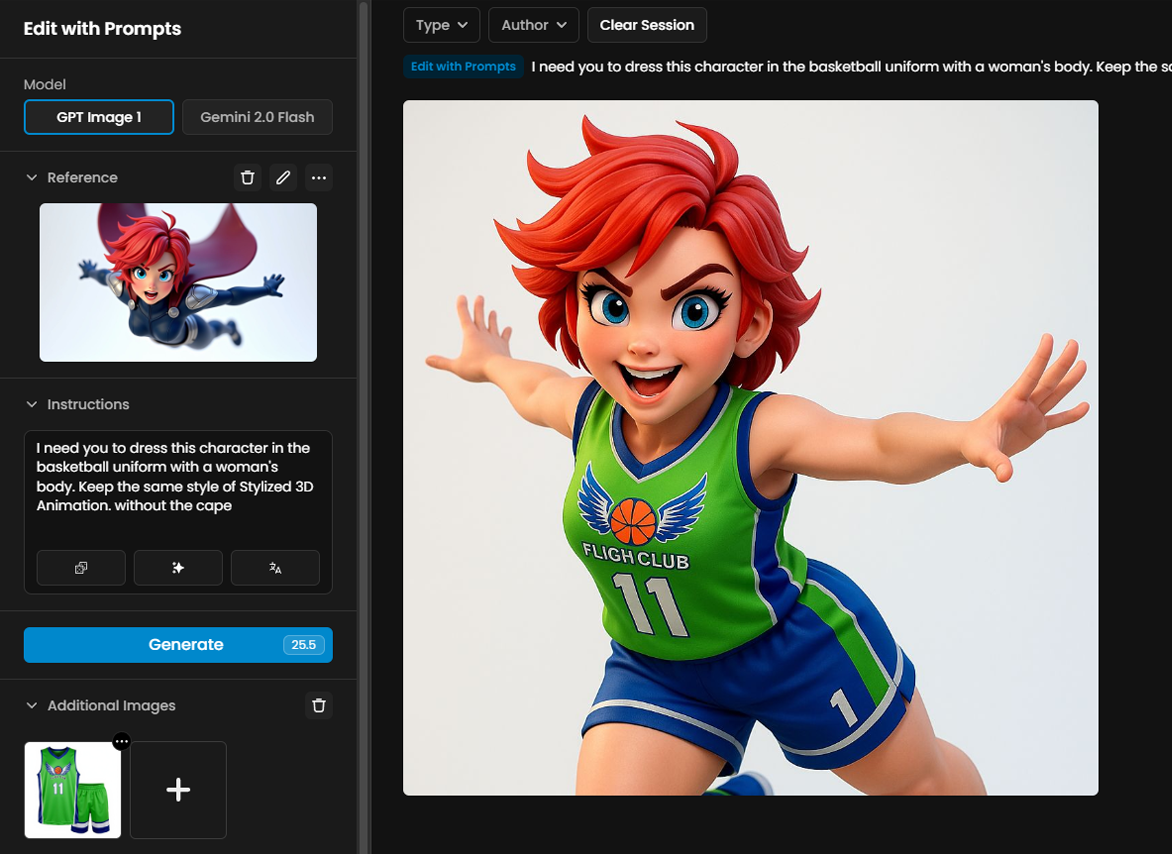
You can simply tell the AI what you want ("Dress this character with this basketball uniform") rather than crafting technical prompts. It's perfect for quick iterations and exploring different character variations with minimal setup.
It was possible to generate the characters in both uniforms by simply changing the uniform reference image and making minimal edits to the prompt. This highlights the tool's flexibility in adapting to different outfits with very little effort.
In some cases, depending on the style and features of the reference character, the generated result may show slight variations from the original.
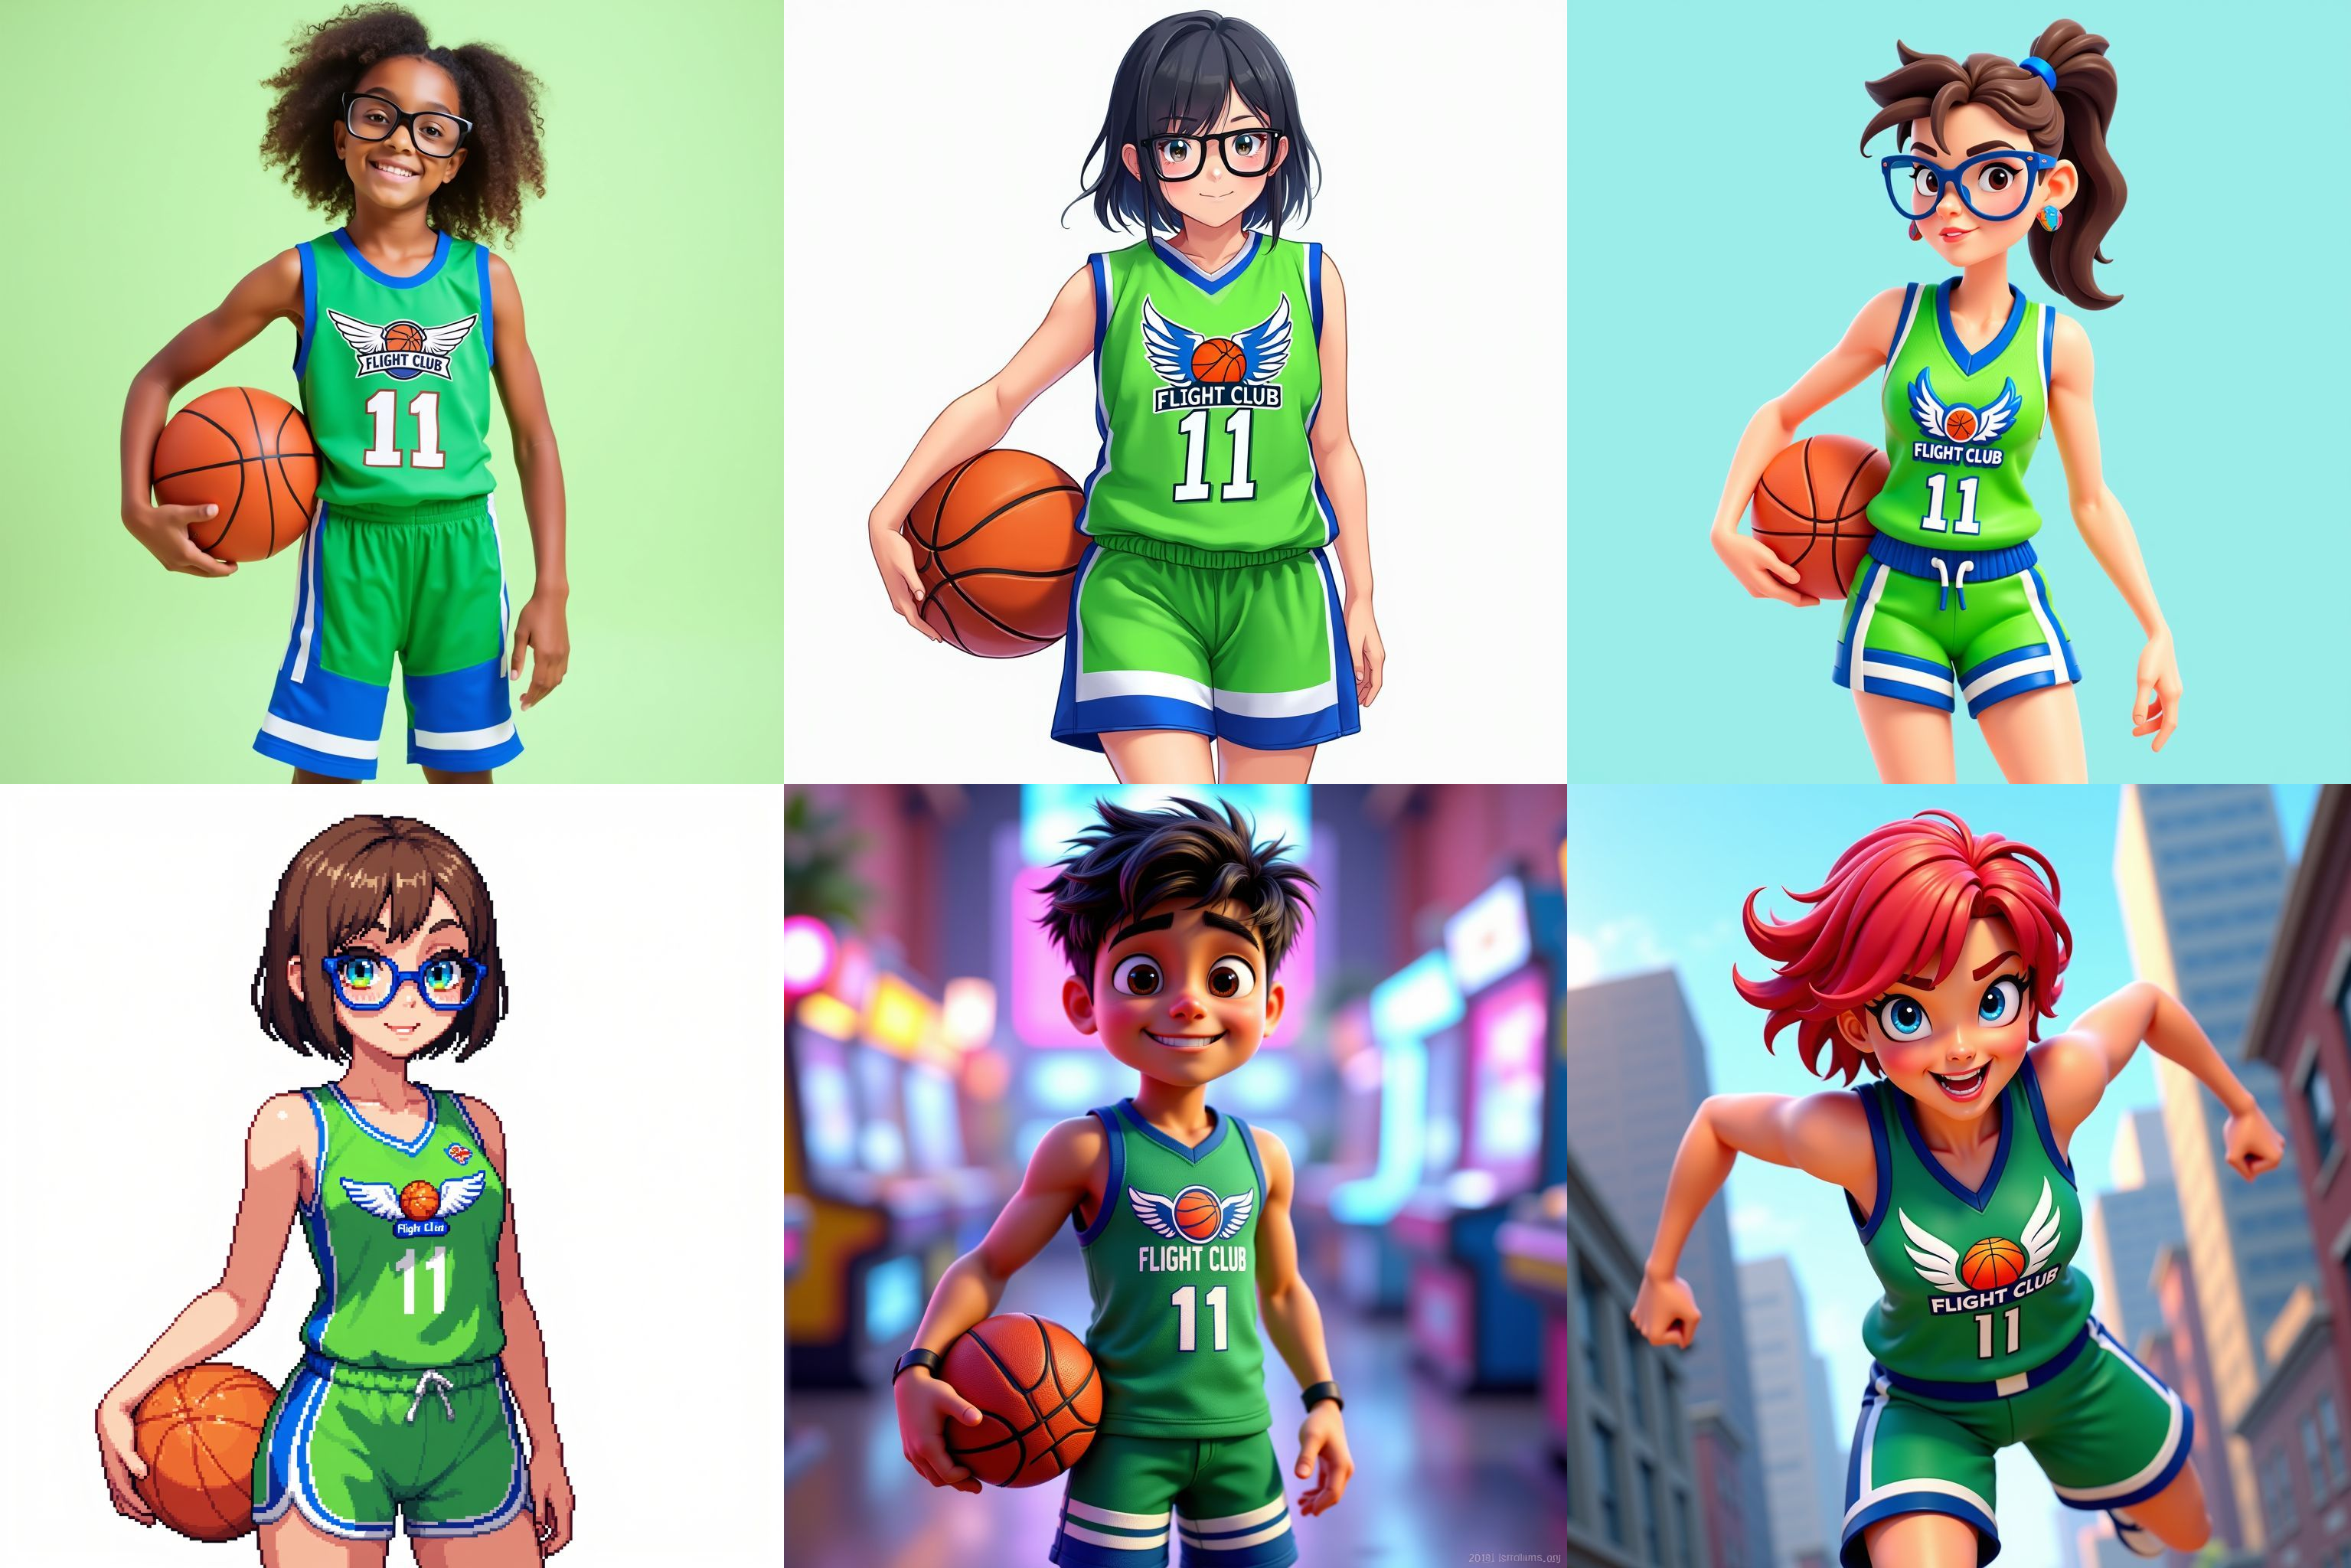
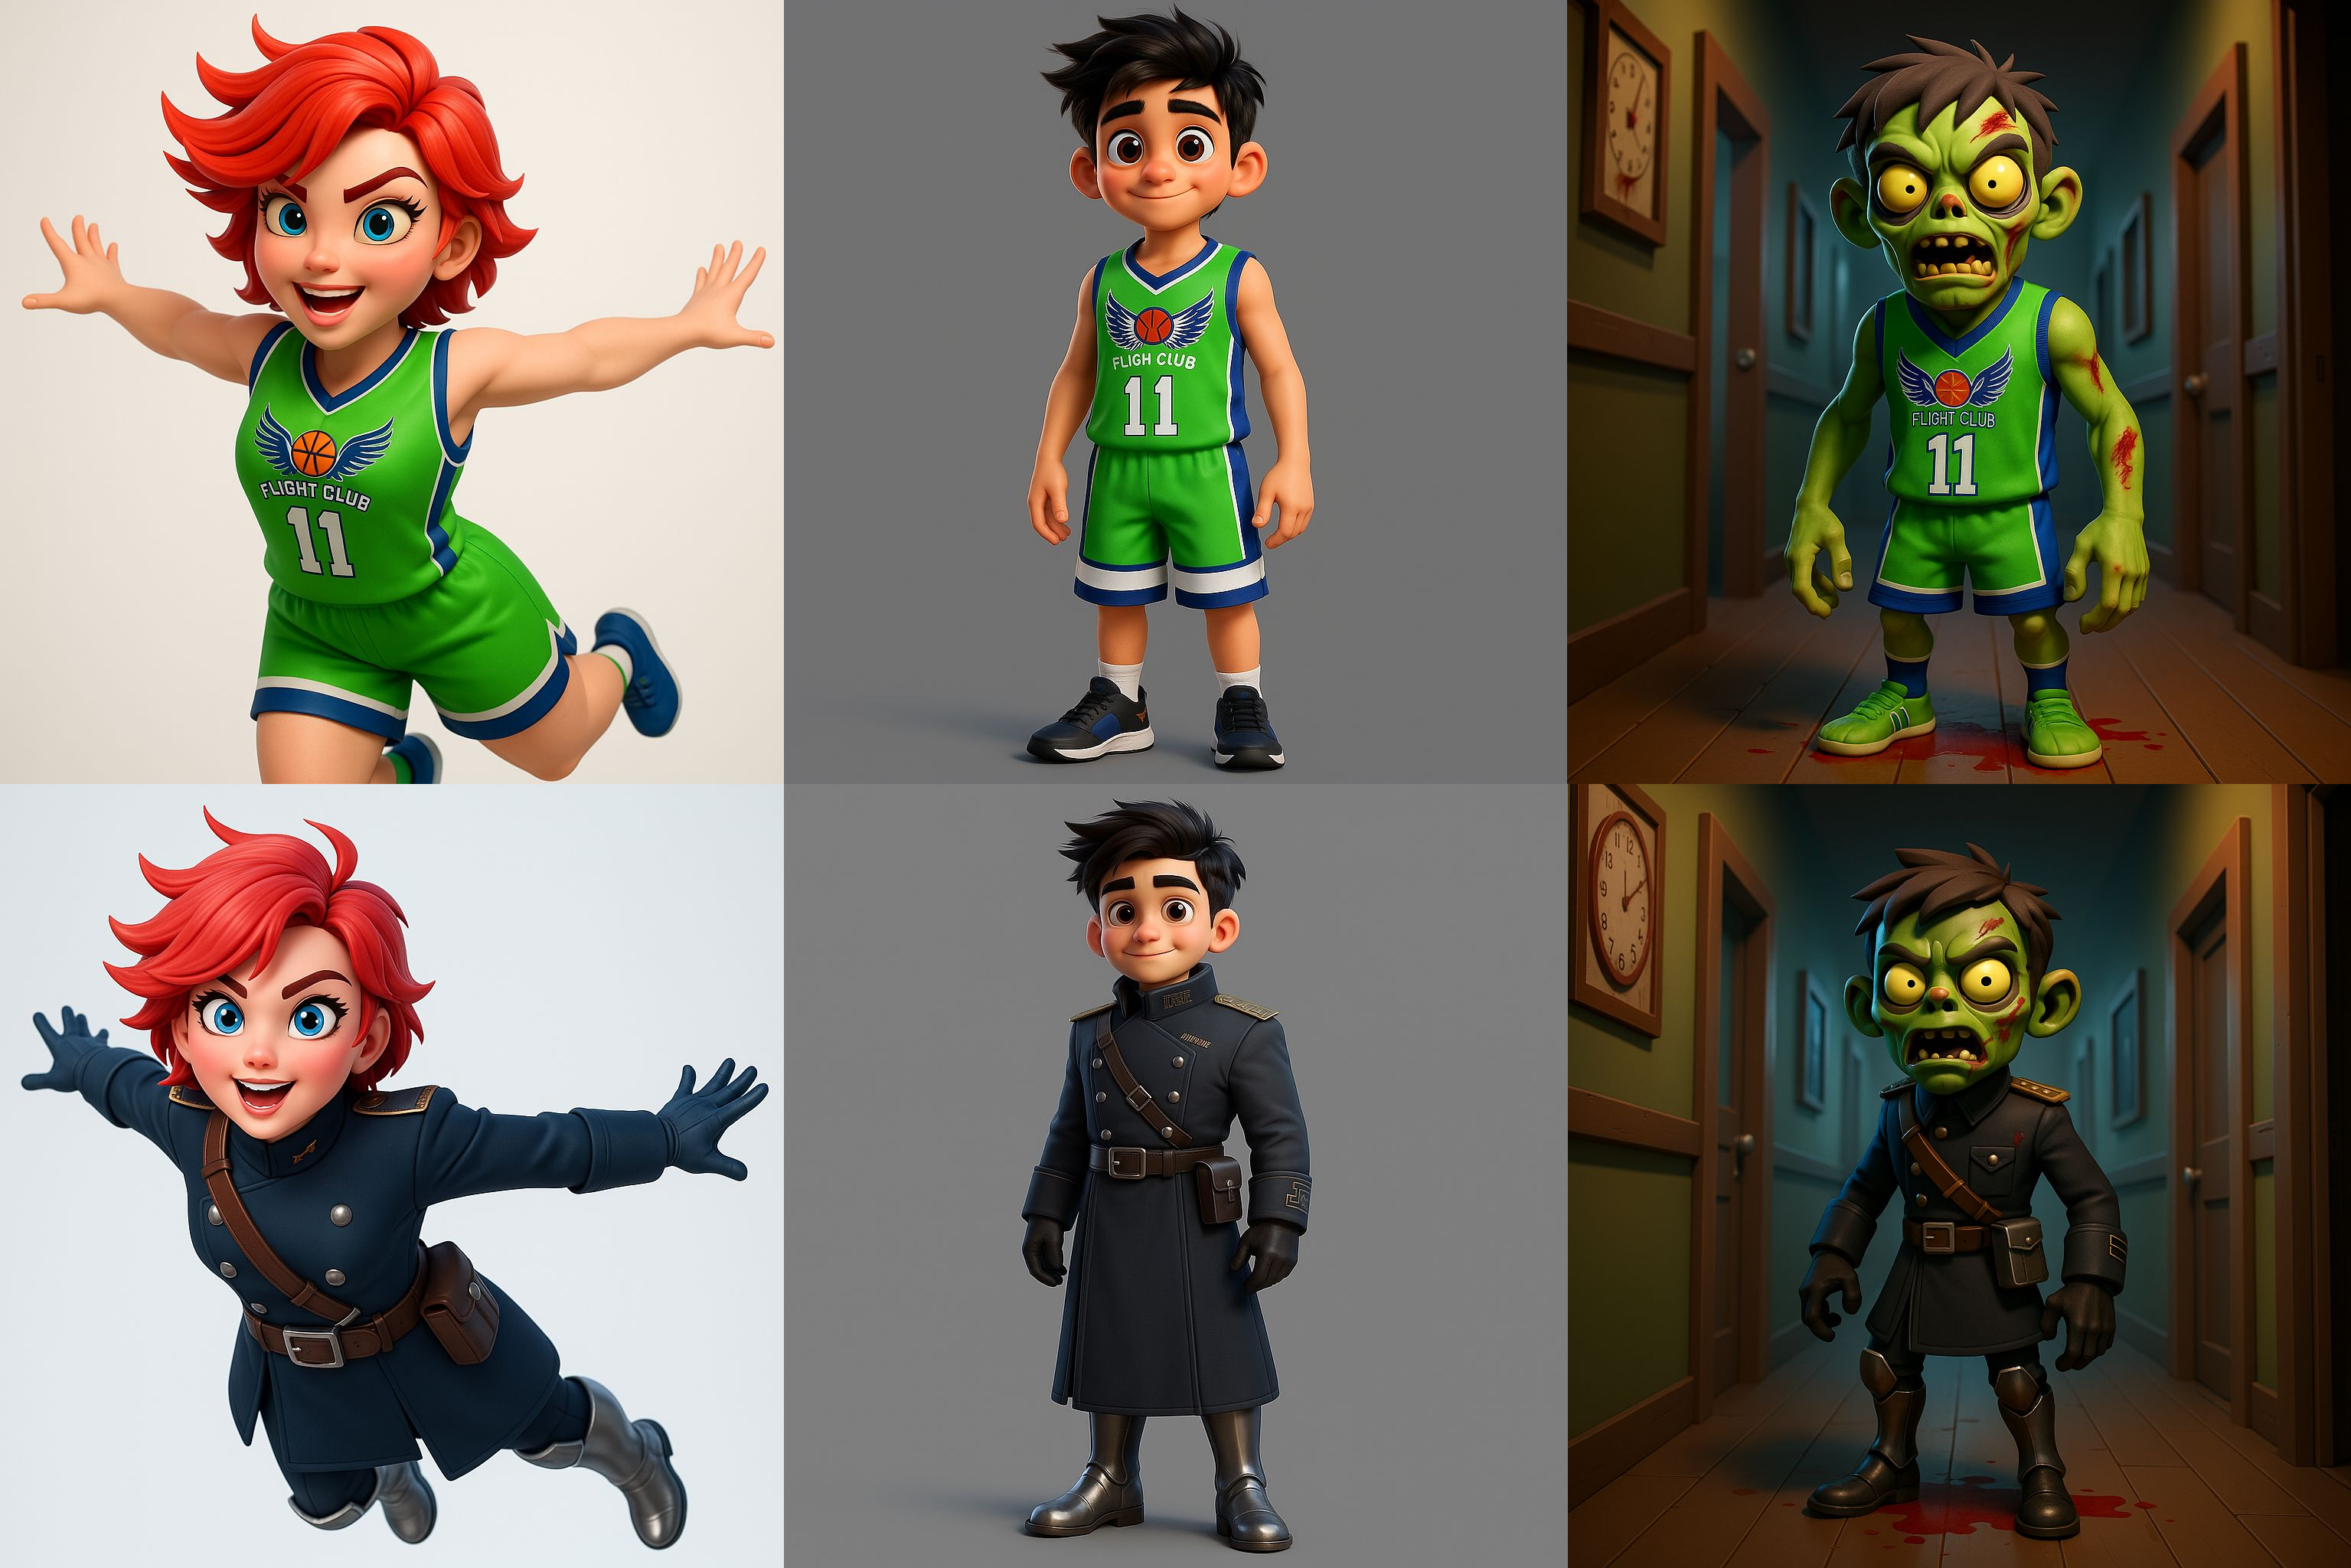
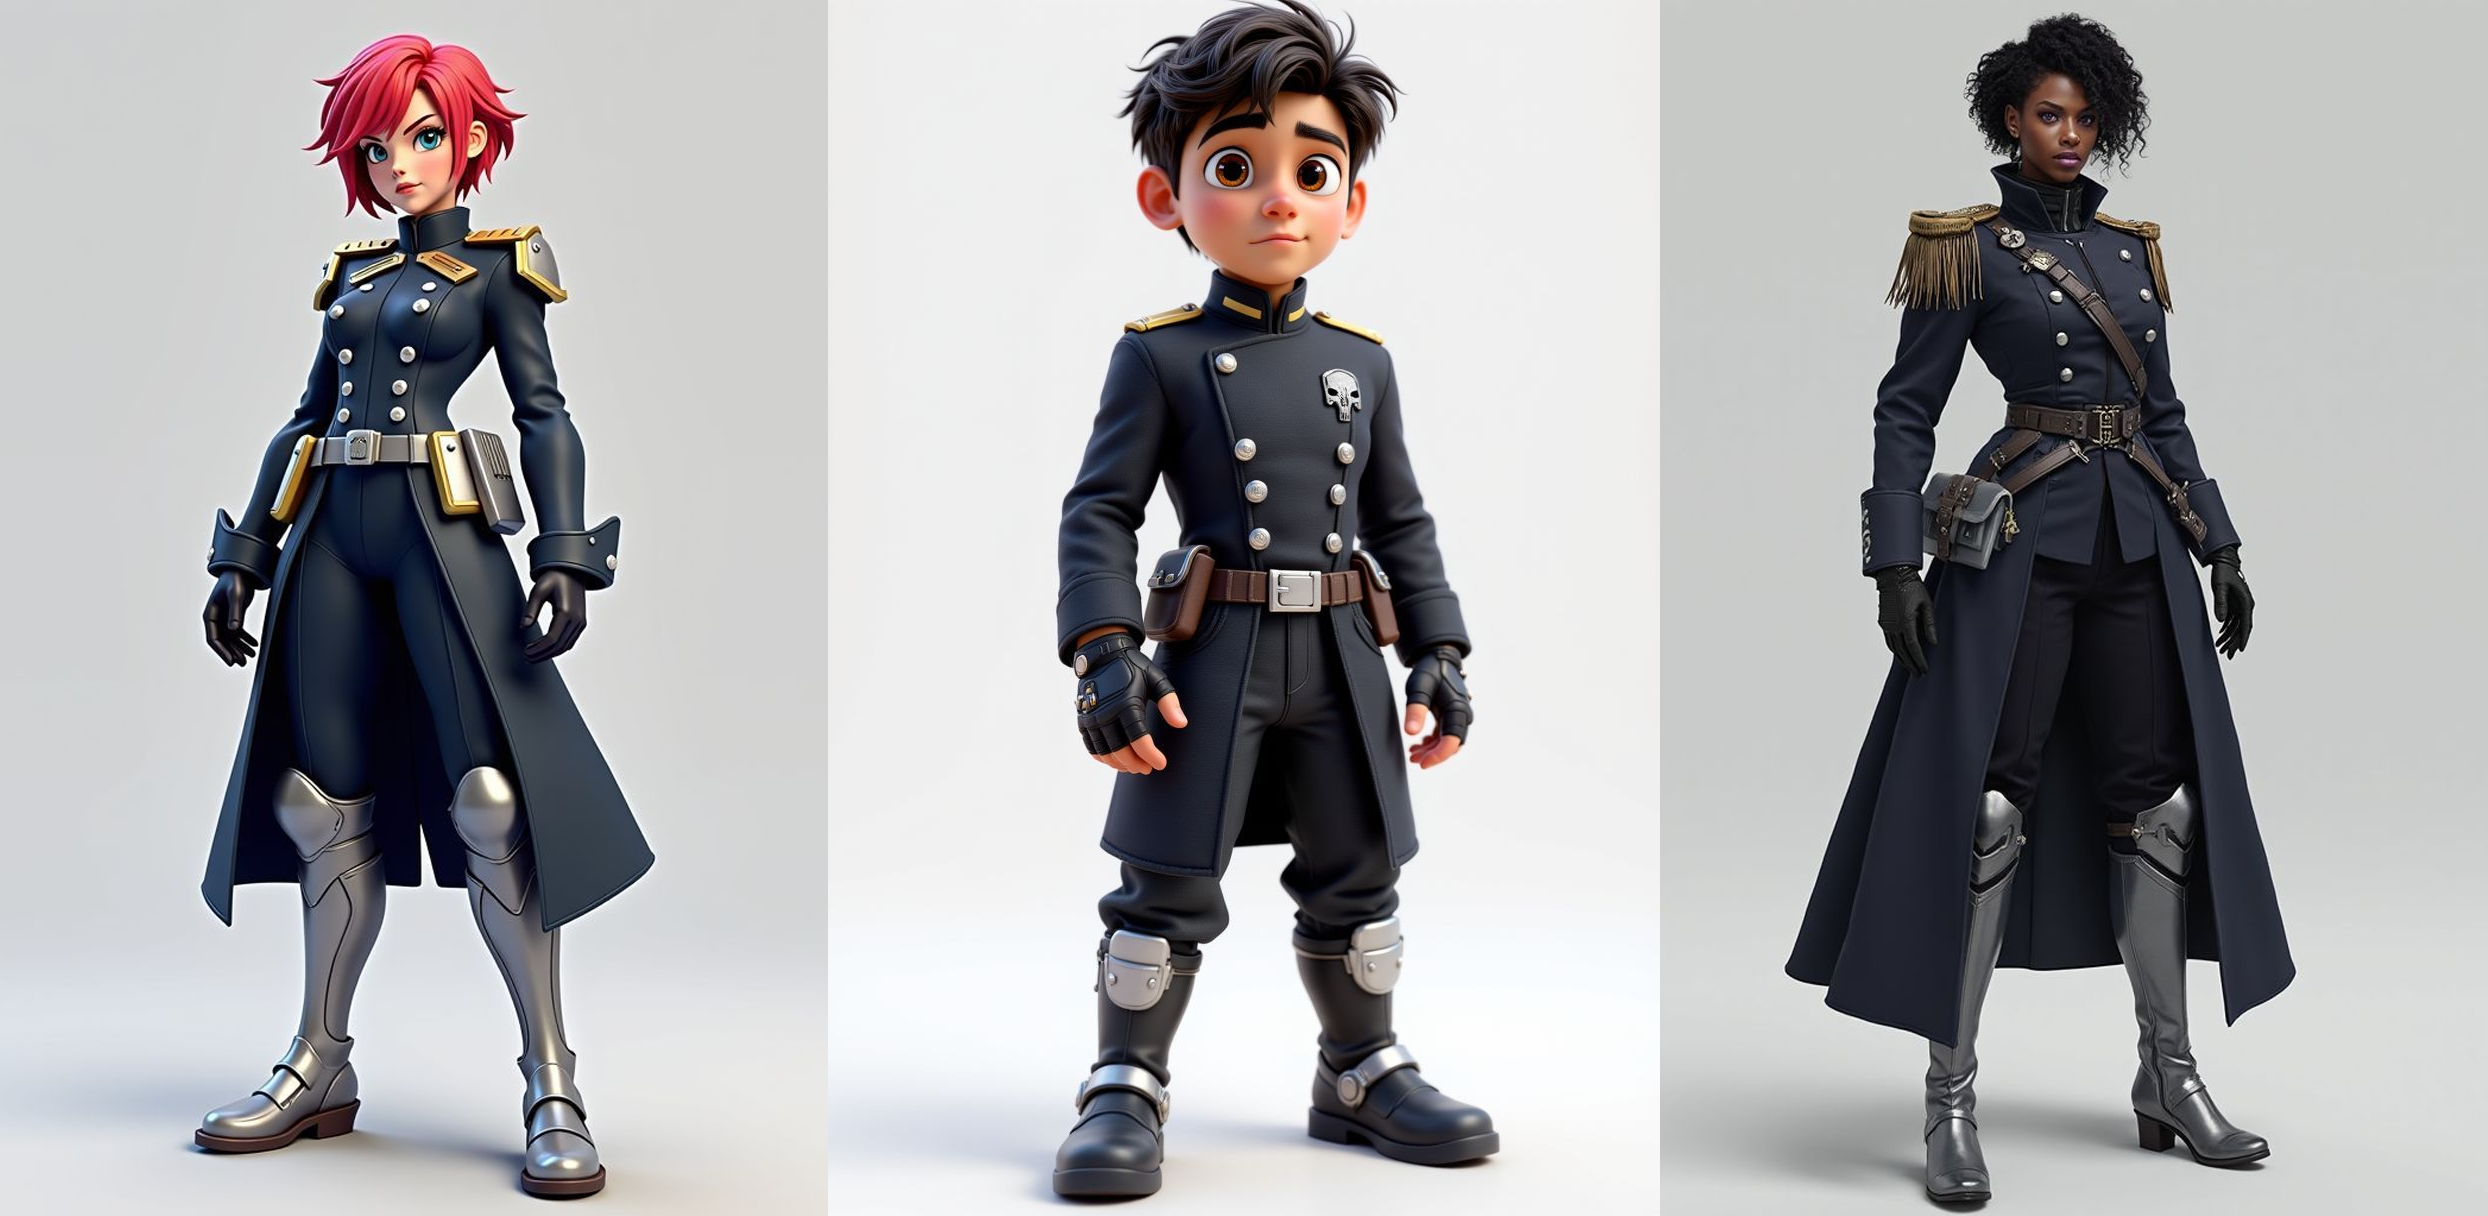
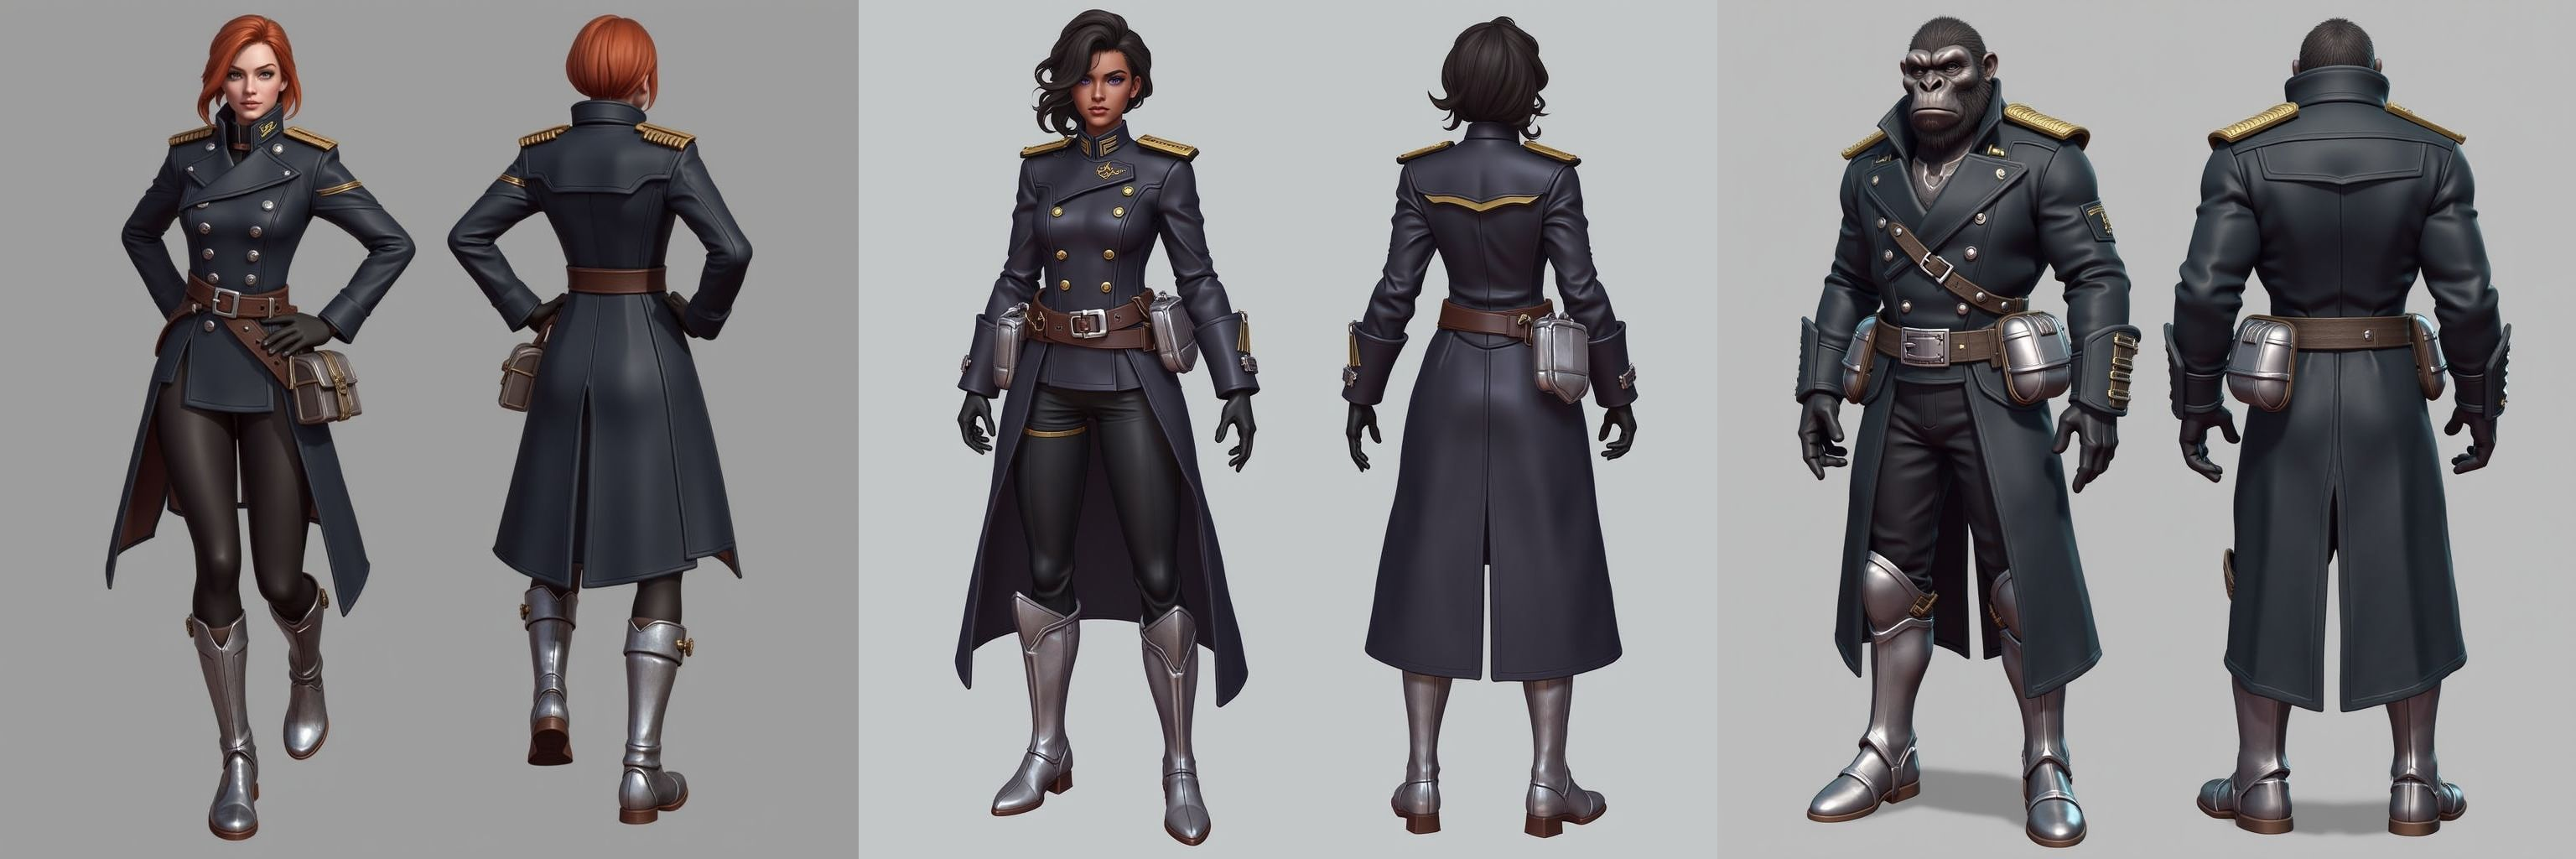
Here are a few examples generated with platform characters using both uniform types.
Now let's explore how to use trained models with reference images to generate characters with higher visual fidelity and more control over the output.
Style Reference
Let’s see how to use models with reference images to generate characters with high fidelity to the original. This method requires a few extra steps but offers greater control over the details of the generated image.
First, go to the left sidebar and select Images > Generate:
On the image generation page, choose either a custom model or one from the platform.
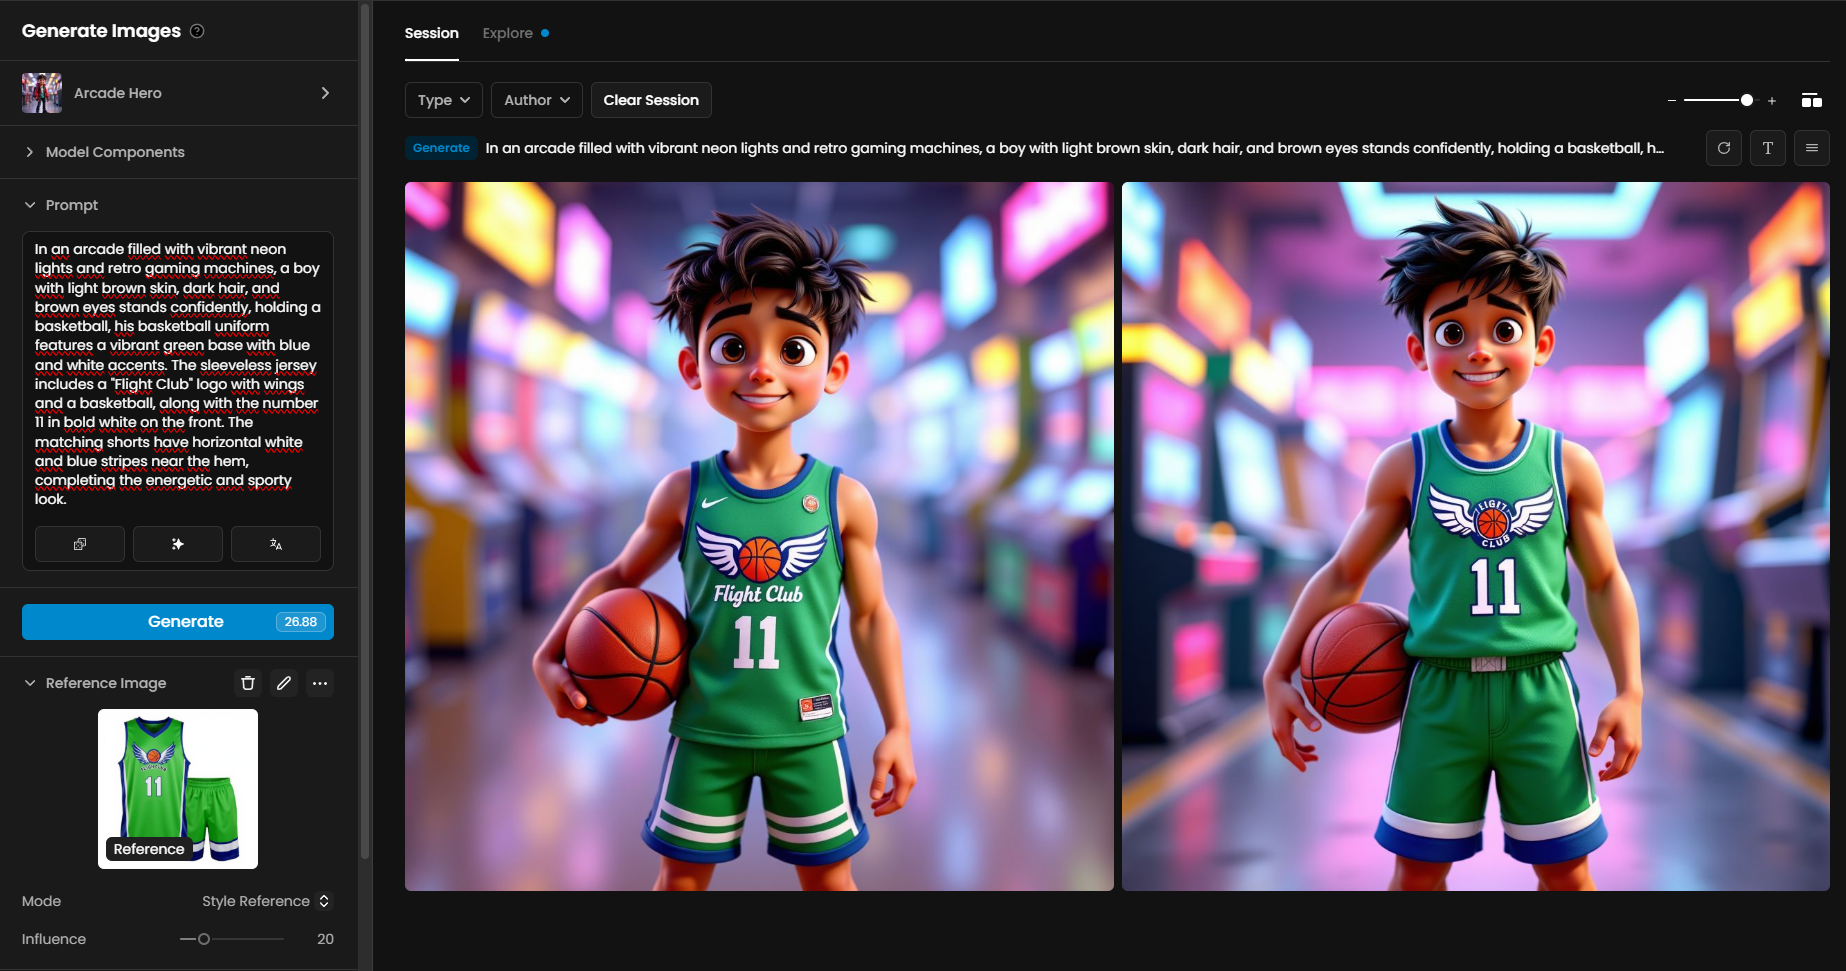
In the "Reference Image" section, upload your uniform image.
Once uploaded, open the "Mode" dropdown and select "Style Reference".
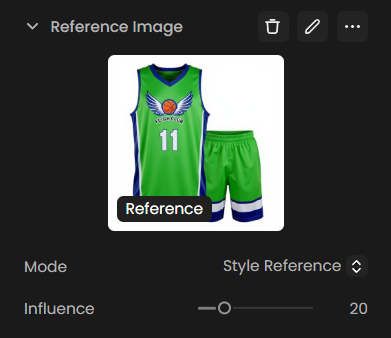
This mode tells Scenario to use your reference image as a style guide rather than trying to recreate it exactly.
Basketball Uniforms
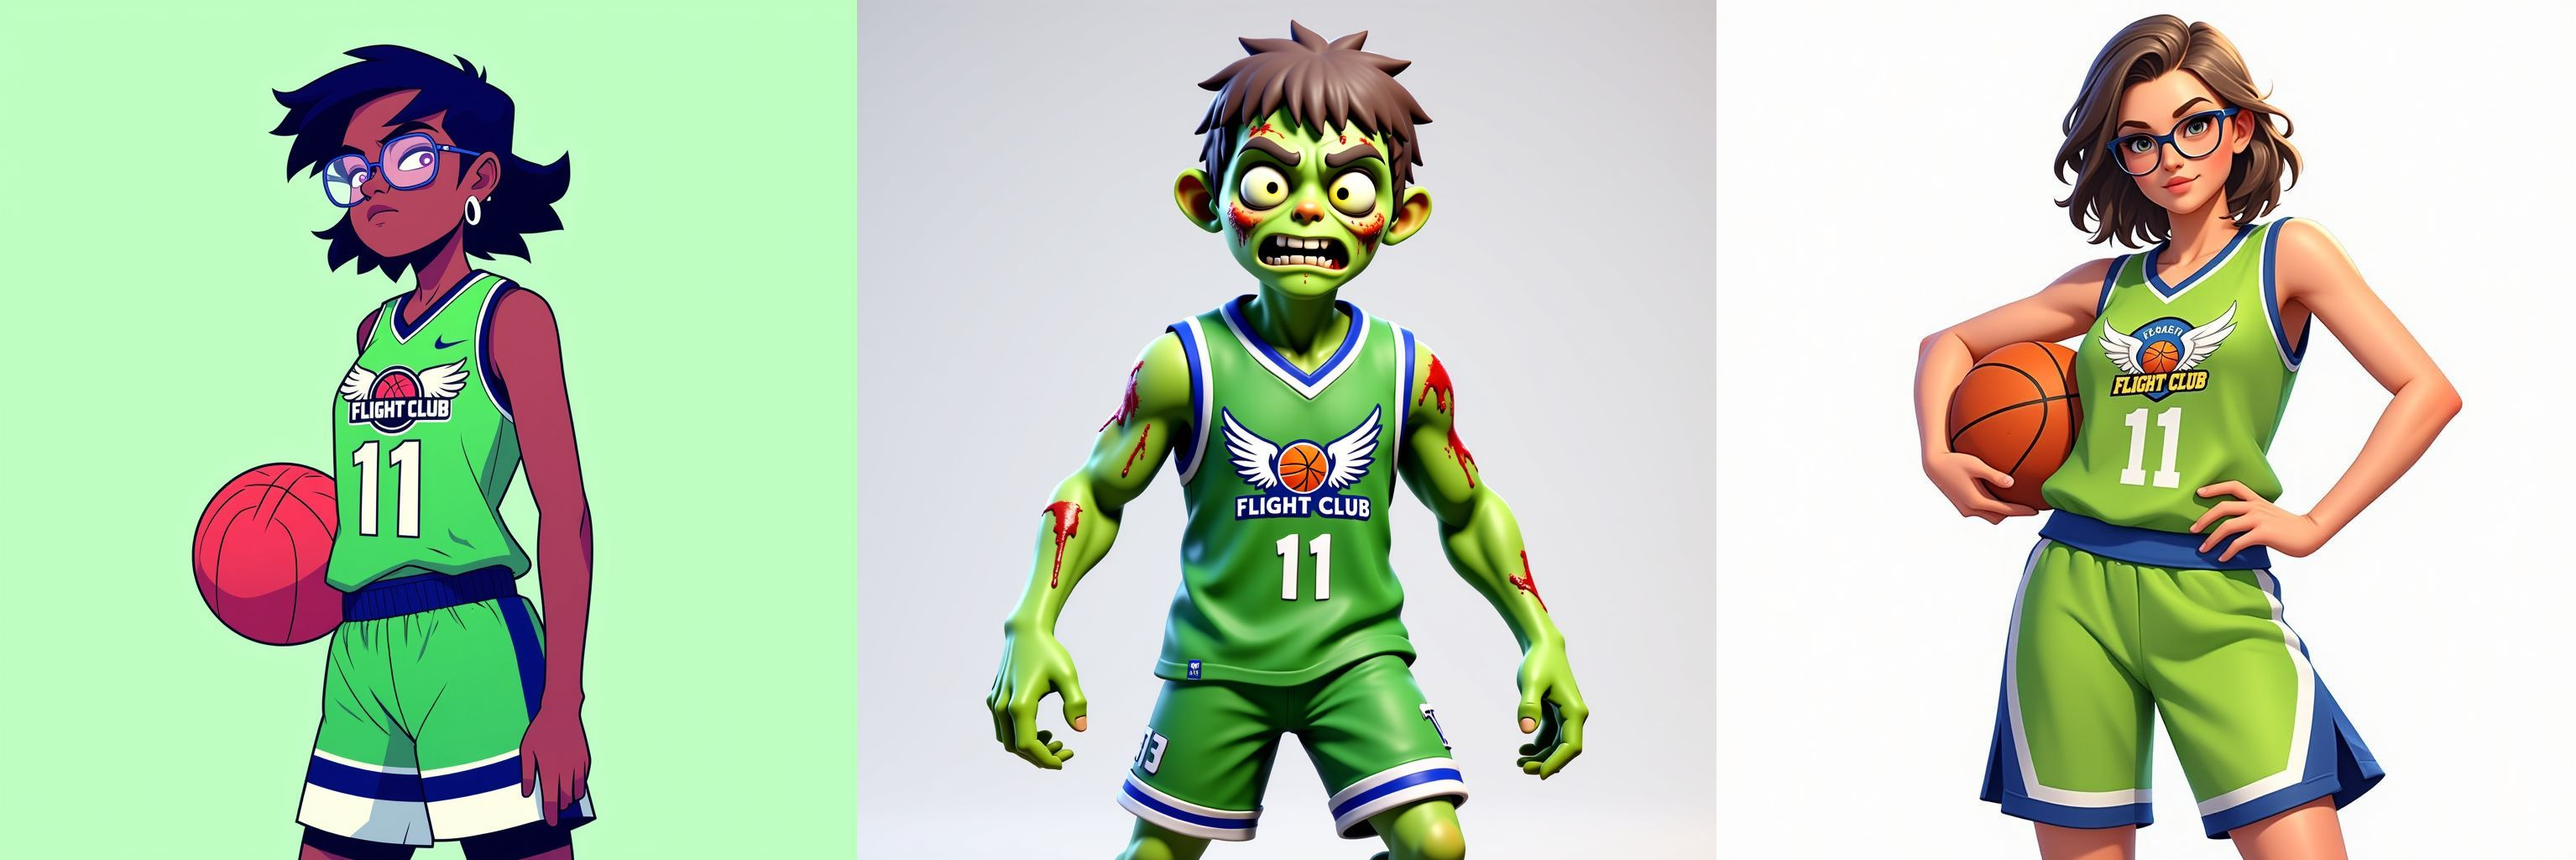
Let's start with replicating a basketball uniform across different character designs:
Upload a reference image of your basketball uniform
Select "Style Reference" mode
Adjust these settings:
Influence: Between 15-20 (this controls how strongly the reference affects your output)
Sampling Steps: 35 (higher values increase detail)
Guidance: Between 4-5 (controls how closely the result follows your written prompt)
In Prompt section, you can use a prompt like this:
A teenager girl wearing big glasses in holding a basketball, her basketball uniform features a vibrant green base with blue and white accents. The sleeveless jersey includes a "Flight Club" logo with wings and a basketball, along with the number 11 in bold white on the front. The matching shorts have horizontal white and blue stripes near the hem, completing the energetic and sporty look.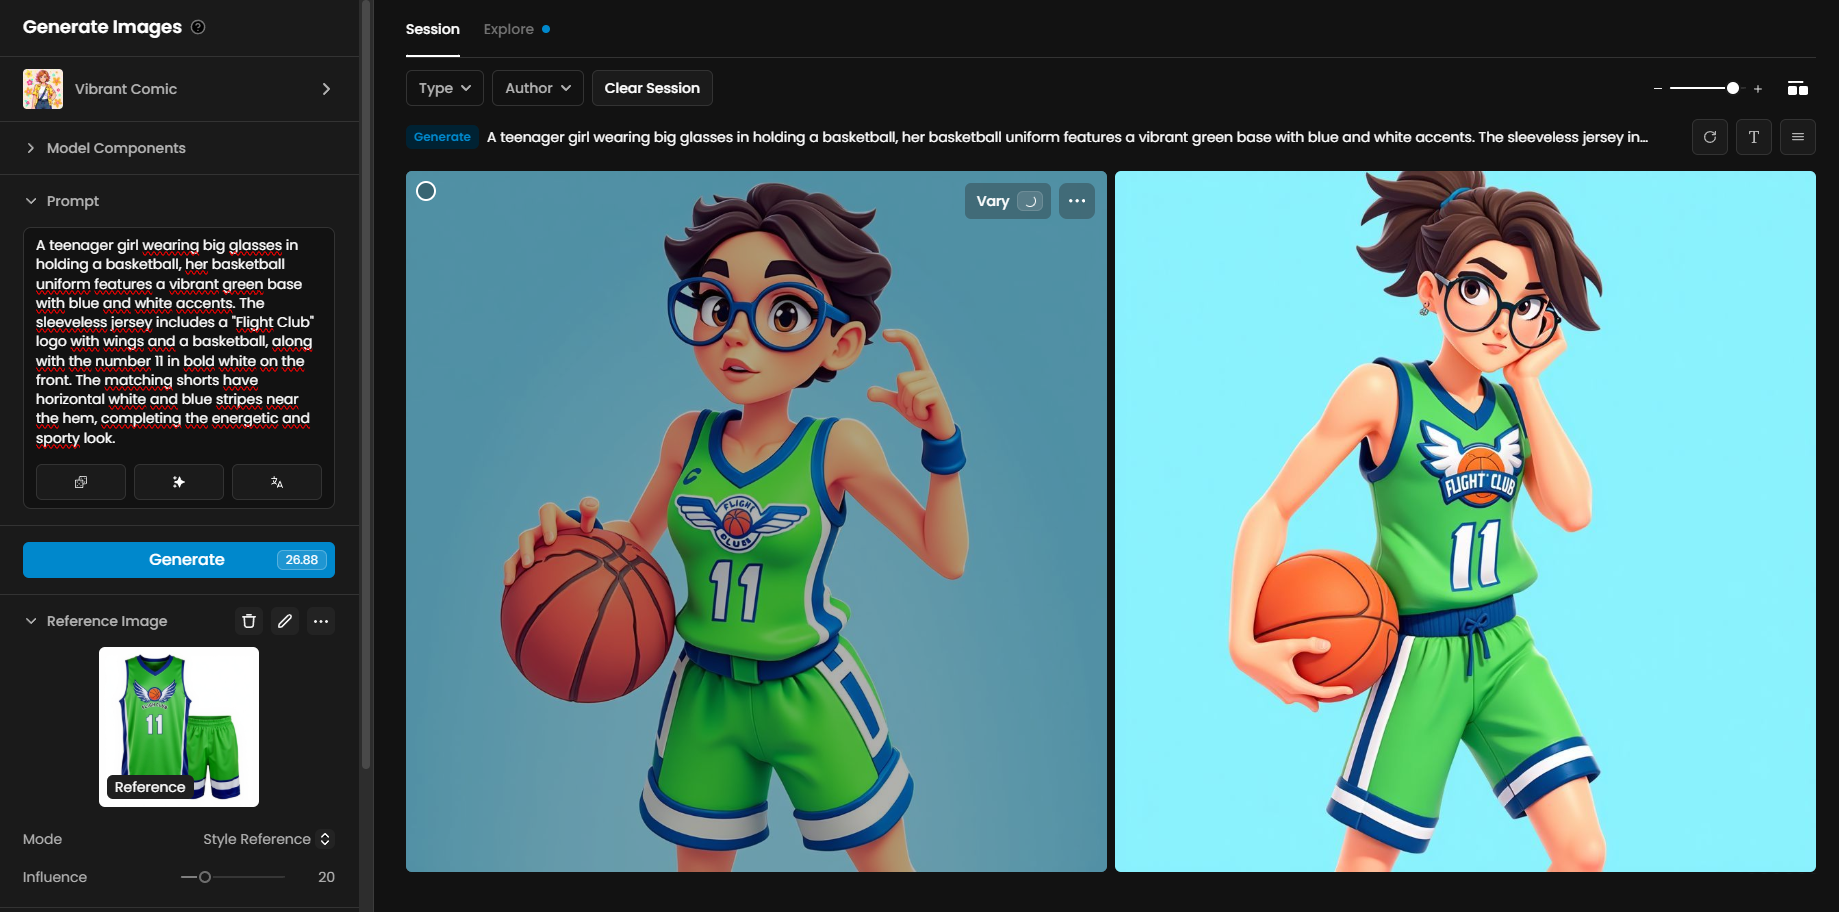
Feel free to change the character description while keeping the uniform details consistent. This way, you'll get different characters all wearing that same green "Flight Club" uniform!
Military Uniforms
Now let's try something more detailed, like military uniforms with all their intricate elements.
Use these settings:
In the Reference Image section, upload your military uniform reference
Select "Style Reference" mode
Adjust these settings:
Influence: 20 (slightly higher than our basketball example)
Sampling Steps: 35
Guidance: Between 5.5-6.5 (higher guidance helps maintain those complex uniform details)
For your prompt:
A Black female soldier with glowing purple eyes and curly hair, striking a victory pose, wearing a uniform that features a dark, tailored military coat with silver buttons, shoulder epaulettes, and decorative chest stripes. Black gloves, knee-high boots with silver armor plating, and tactical pouches add a modern combat edge. Sharp creases and metallic details give it a high-ranking, ceremonial look.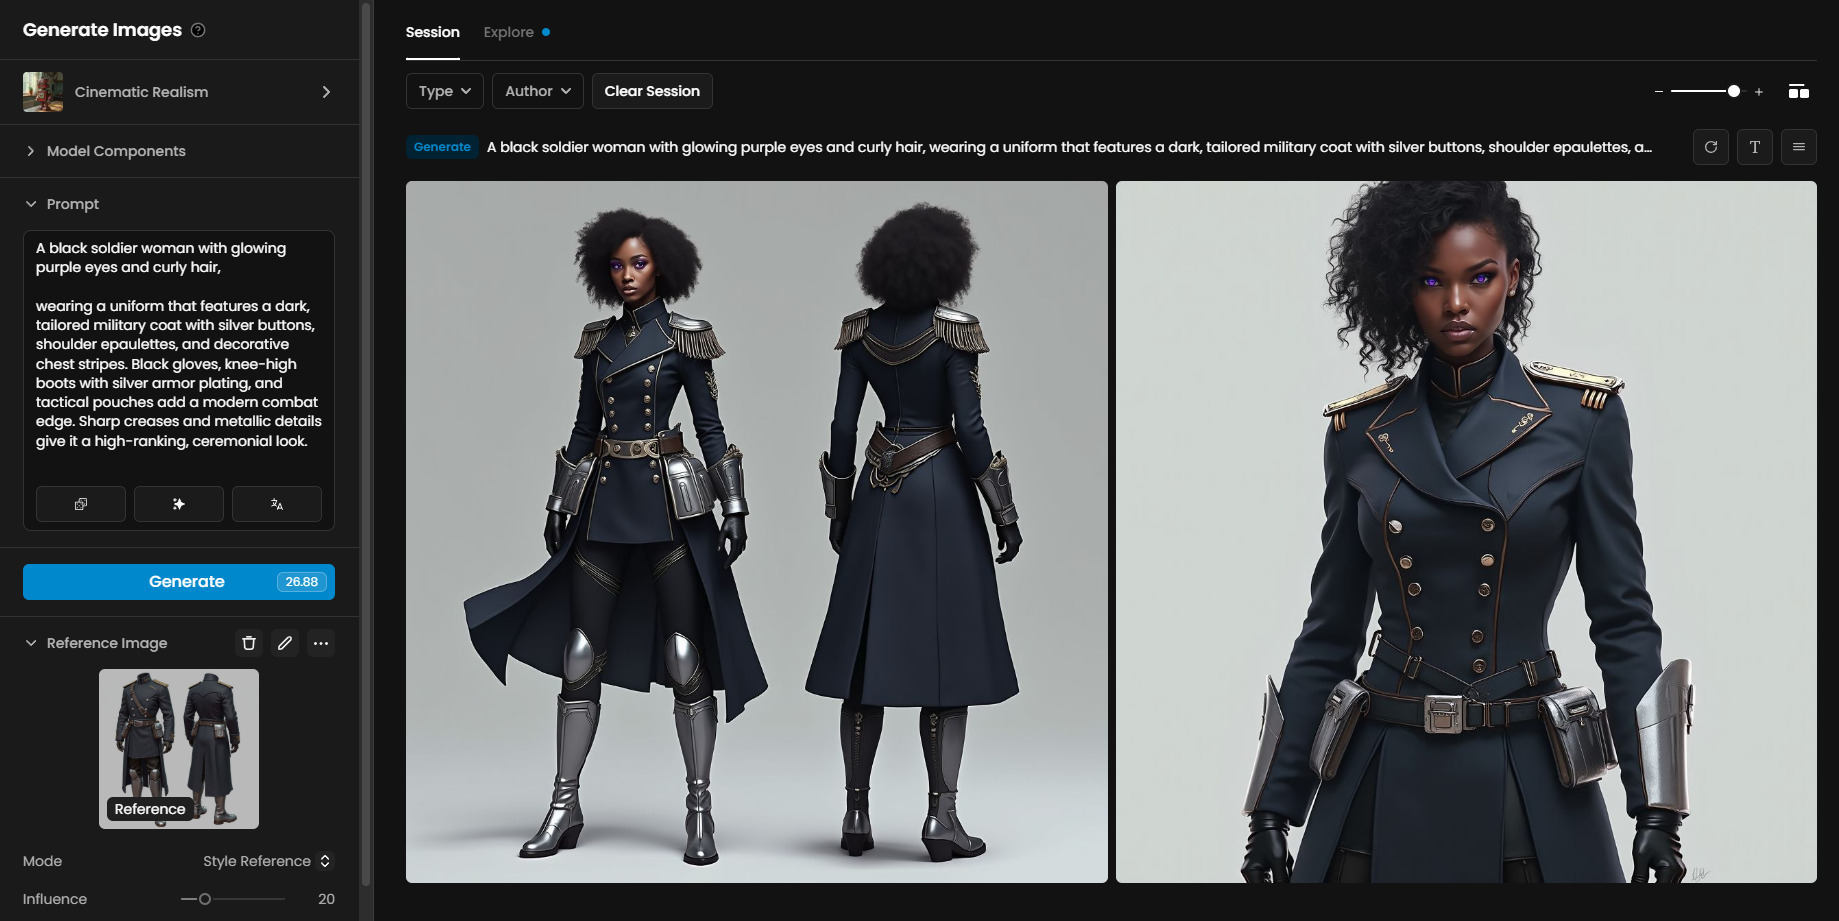
One interesting thing to note: with military uniforms, the reference image often influences not just the outfit itself but also the character's pose and proportions. This can be used to your advantage to create consistent character lineup art!
Key Points to Remember
Here are a few tips that will help you get the best results:
Balance your influence values: If your characters look too similar to the reference image, try lowering the Influence value. If the uniform isn't transferring well, try increasing it.
Be specific in your prompts: The more detailed your description of the uniform elements, the more consistent your results will be.
Different models need different settings: The optimal Influence and Guidance values may vary depending on which model you're using. Don't be afraid to experiment!
Troubleshooting inconsistencies: If uniform elements aren't transferring well, try increasing Guidance and adding more specific uniform details to your prompt.
Poor detail transfer: If fine details are getting lost, try increasing Sampling Steps for better preservation.
Conclusion
This workflow gives you two powerful ways to create consistent character outfits:
Edit with Prompts for fast results using natural language, and Style Reference for greater control and detail through reference images.
Both methods make it easy to generate character variations that share the same visual identity. Try different settings to find the right balance for your project.
For more in-depth tips, check out the tutorial video: Use Style Reference in Scenario to Create Cohesive Visuals
Was this helpful?