Get started with the Scenario MCP server
Last updated: July 9, 2026
The Scenario MCP server puts an AI agent to work inside your Scenario workspace. From one chat, in Claude Code, Cursor, or Claude Desktop, you describe an outcome and the agent picks the model, writes the prompt, runs the job, and manages the result. It exposes 60+ tools and 550+ models over the Model Context Protocol, so the agent can operate almost everything you can do in the Scenario app.
Why work from your agent
The web app gives you the tools. The MCP hands them to an agent, in your workspace, with your models, collections, and settings. That shifts you from operating to directing:
You direct, it operates. State the outcome; the agent plans, prompts, compares, retries, and returns results.
It knows the catalog. 550+ models, their strengths and costs. It recommends, explains, and can challenge your choice.
It runs multi-step work. "Restyle this three ways, I pick one, animate it" is one instruction.
It reaches your files. With a local client (Claude Code, Cursor, Claude Desktop) it can batch-process a folder and put results back where they belong.
You keep using the web app for what it does best: reviewing, curating, training models, and building workflows on the canvas.
Connect your agent
The server is at https://mcp.scenario.com/mcp. Add it to your agent, then authenticate. You need a Scenario account and an MCP-compatible client.
OAuth (recommended)
No credentials in your config. On your first request the agent opens a browser to authorize, then remembers you.
Add the server to your agent (commands below). No credentials in the config.
Make any Scenario request, for example: "List my Scenario teams and projects."
A browser tab opens on scenario.com. Log in, then click Authorize.
Close the tab and return to your agent. You're connected.
Claude Code:
claude mcp add --transport http scenario https://mcp.scenario.com/mcpCursor and VS Code: add the URL to your MCP config, or use one-click install on mcp.scenario.com.
{
  "mcpServers": {
    "scenario": { "url": "https://mcp.scenario.com/mcp" }
  }
}
Claude Desktop, Windsurf, Zed, Warp: bridge through mcp-remote.
{
  "mcpServers": {
    "scenario": {
      "command": "npx",
      "args": ["-y", "mcp-remote@latest", "https://mcp.scenario.com/mcp"]
    }
  }
}
API key
Use this if your client does not support OAuth, or for shared and unattended setups. Open your project's API Keys tab, copy the key and secret, and Base64-encode them:
echo -n 'YOUR_KEY:YOUR_SECRET' | base64Pass the result as an Authorization: Basic YOUR_BASE64 header in your config. The key needs write/generation scope (Contributor or Owner role): a read-only key connects but returns Forbidden when you generate.
Your first session
Once connected, describe what you want in plain language. The agent asks which team and project to use on the first call, that's where your assets land. Below, a real Claude Code session: the agent finds the workspace, picks a model, enhances the prompt with Prompt Spark, generates a base icon, then derives variants after a dry-run cost check.
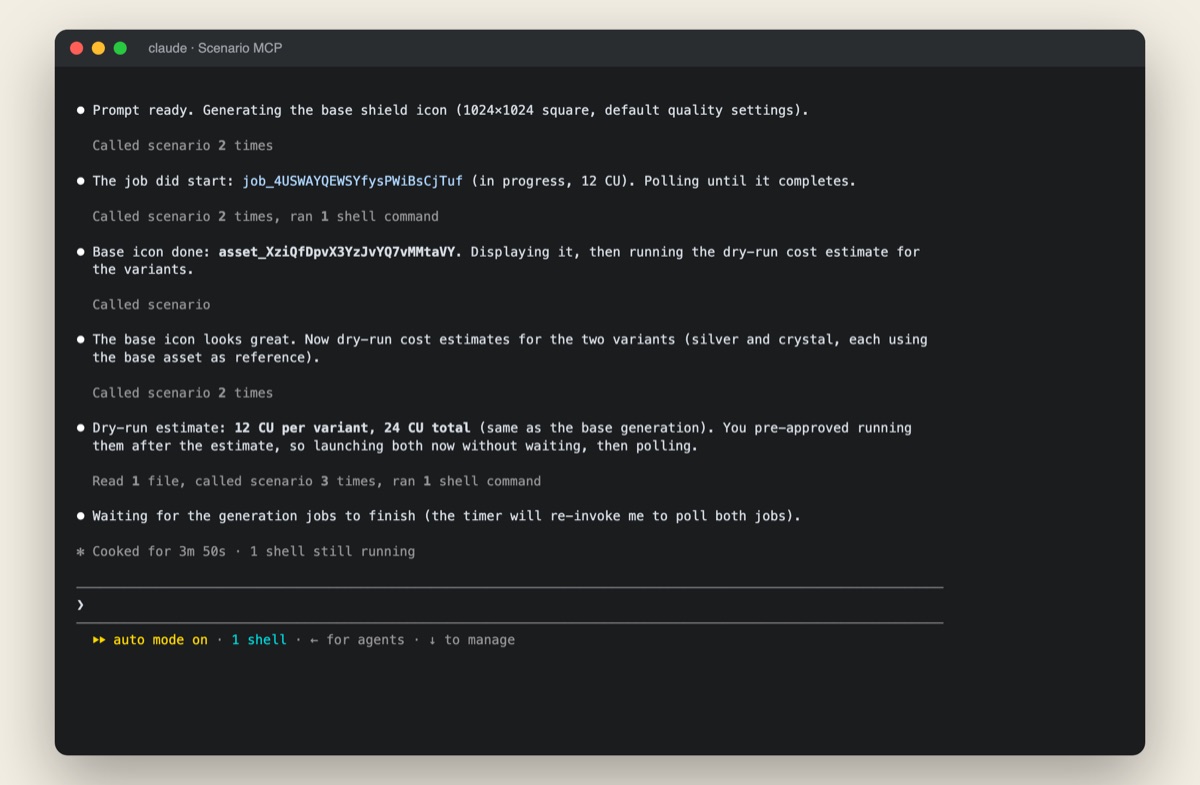
Watch the full 30-second session.
Using Scenario, generate a product packshot of a ceramic mug on a warm background. Square. Pick a strong model and show me the result with the cost.Two habits from the start: ask for a dry-run cost estimate before any batch or video, and reference existing assets by their asset_... ID to iterate instead of starting over.
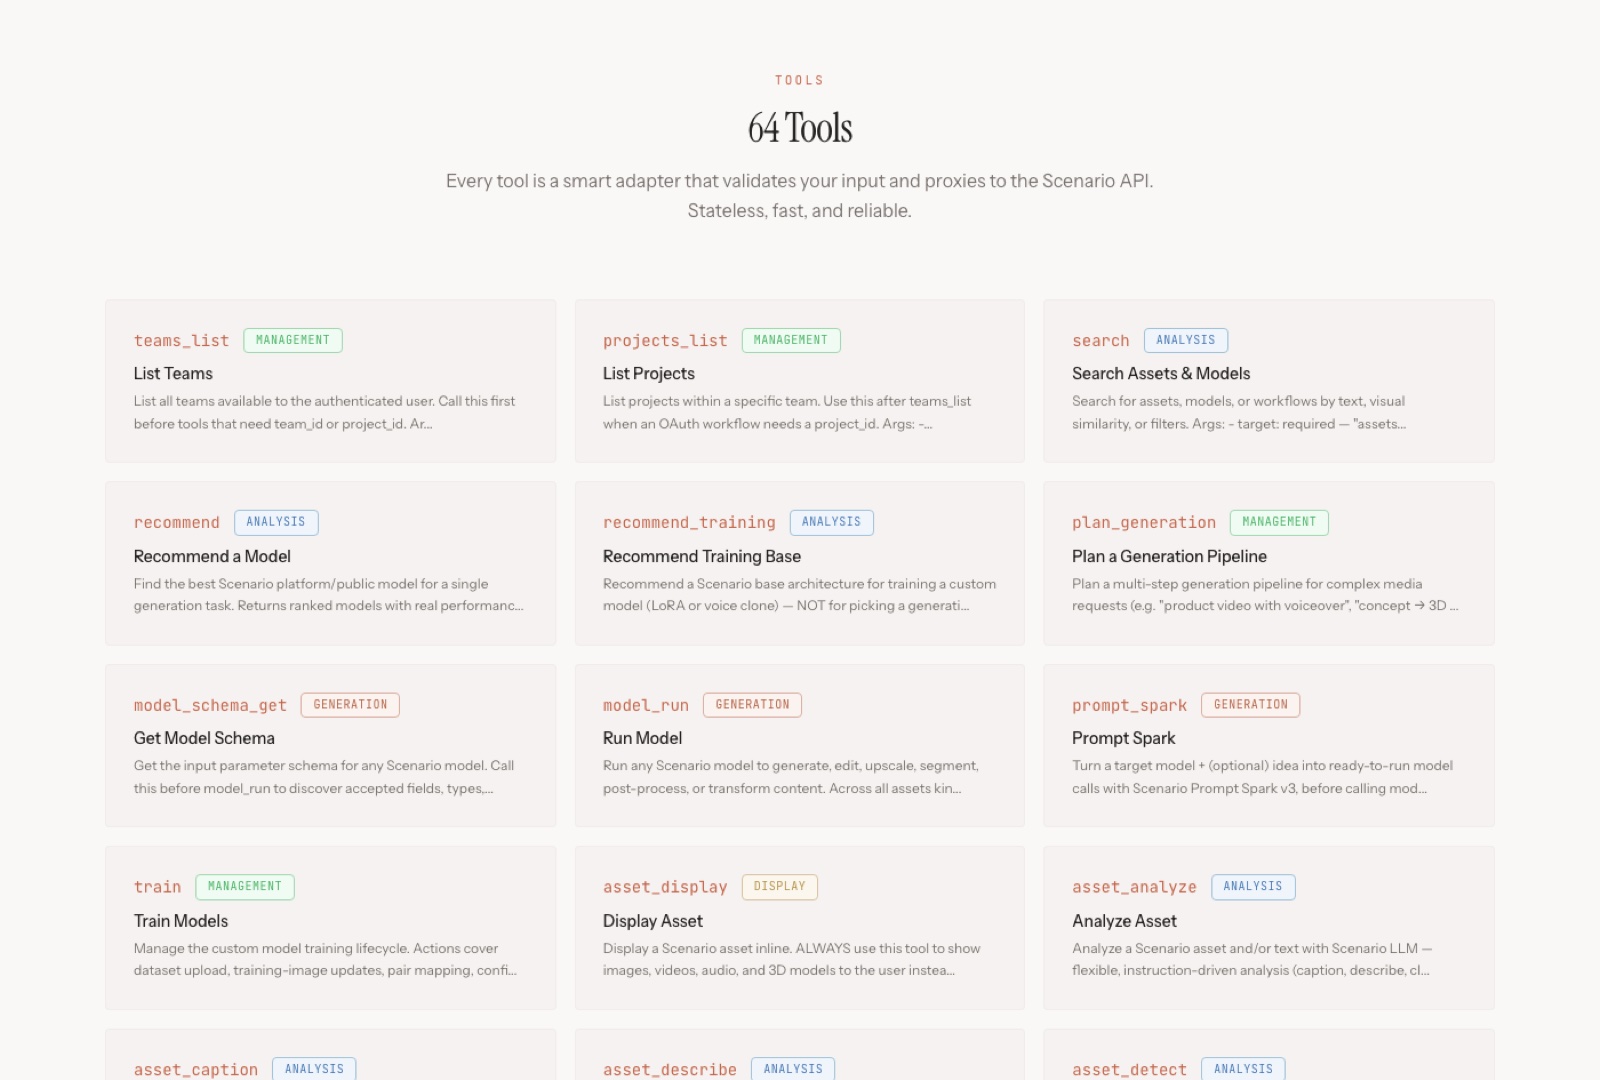
What the tools cover
You never call tools by hand; the agent selects them from your request. The toolset spans the whole platform, from discovery and generation to assets, workflows, and jobs.
Area | What the agent can do |
|---|---|
Discovery | Find teams and projects, search the catalog, recommend models with reasons |
Generation | Run any model, read its parameters, enhance prompts (Prompt Spark), plan multi-step jobs |
Models | Run your trained models, start training, transfer models between projects |
Assets & collections | Tag, caption, analyze, display, download, upload, and organize into collections |
Workflows & jobs | Trigger the workflows your team built, check job status, review usage, run diagnostics |
The full live list is on mcp.scenario.com.
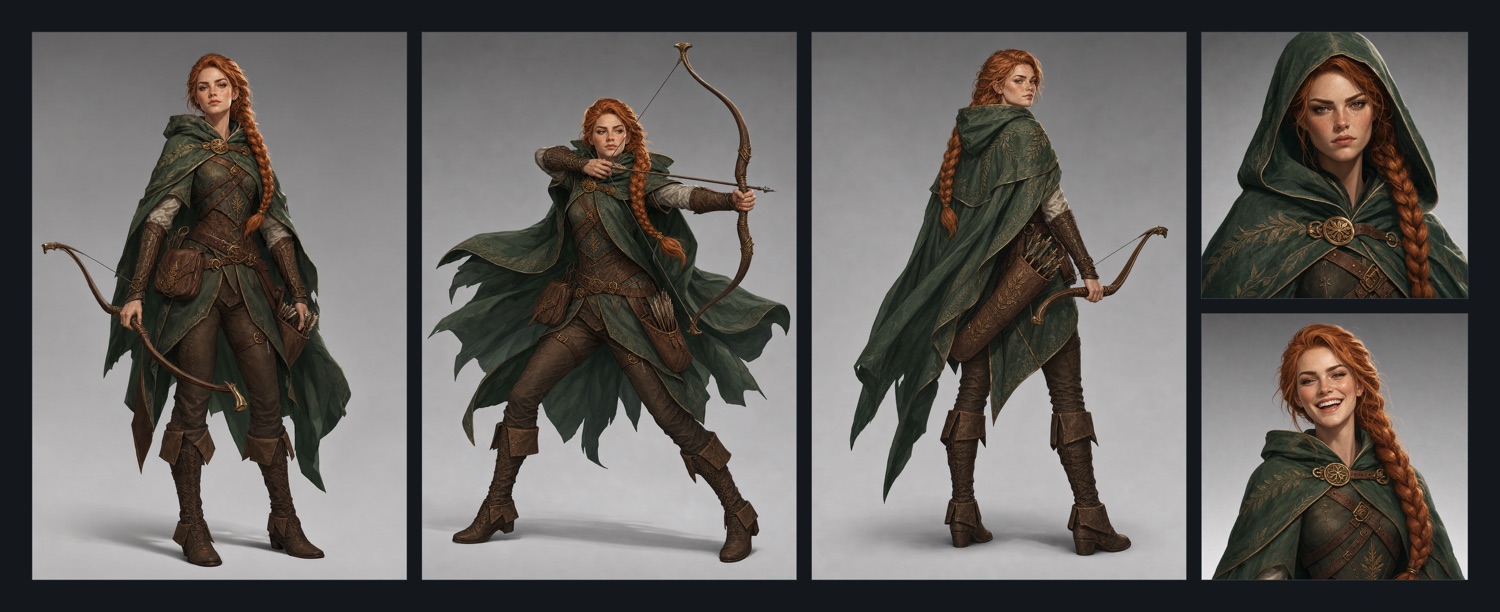
What you can build
Because the agent chains tools, one instruction can run a real production pipeline. Character consistency is a good example: generate a base design, then derive a full set from its asset ID so the character holds across every shot.
The same approach covers batch variations, style matching against a trained model, image-to-video, and filing the results into collections, all without leaving the agent. To use your own images as input, point the agent at the file; it uploads them through a presigned flow and returns an asset_id to reference.
Troubleshooting
First move for any connection problem: ask the agent to "run Scenario diagnostics." It reports the failing layer and a trace ID for support.
Symptom | Fix |
|---|---|
| Your API key is read-only, or your role is below Contributor. Use a key with write/generation scope. |
OAuth 401 or expired token | Reconnect Scenario in your client's MCP settings. If it persists, clear the cache with |
Agent asks for team and project again | Normal in long sessions. Restate which team and project to use. |
Client asks to approve every tool call | Approve once with "always allow", or add the tool names to your client's auto-approve list. |
FAQ
Do MCP generations cost the same as the web app?
Yes. The MCP uses your team's Compute Units (also called Credits), the same meter as the web app. Ask for a dry-run estimate before big jobs.
Do my MCP generations appear in the web app?
Yes. Same account, same asset library. Anything you generate from the agent shows up in the web app moments later, in the project you scoped to.
OAuth or API key?
OAuth for individuals: every asset stays attributed to you, nothing to copy. API keys for shared or unattended automation.
Related
mcp.scenario.com: install snippets for every client and the live tool list.
Scenario API documentation: the REST API behind the MCP.