Webhooks: get notified when a job finishes
Last updated: October 2, 2026
Webhooks let Scenario tell your own server when something happens, instead of your code asking the API over and over whether a job is done. Each time a generation, a training or a download you subscribe to changes state, Scenario sends a signed POST request to a URL you choose. Organization webhooks work the same way for team alerts, such as your Compute Unit balance crossing a threshold.
This article explains the two kinds of webhooks, who can manage them, how to add an endpoint in the webapp, what to do with its signing secret, and how to check that deliveries arrive.
Two kinds of webhooks
Both are found in Settings, in the Organization and Project groups of the sidebar. Both entries are called Webhooks:
Kind | Where to find it | What it sends |
Project Webhooks | Settings → Project → Webhooks | Job events for the selected project: generations, model trainings, asset downloads and model downloads |
Organization Webhooks | Settings → Organization → Webhooks | Team alerts, currently the Credit threshold crossed alert |
Project webhooks never receive team alerts, and organization webhooks never receive job events. If you need both, add one endpoint of each kind (they can point to the same URL).
Who can manage webhooks
Project Webhooks: every project member can see the project's endpoints. Adding, editing, pausing or deleting one requires being an admin of that project, or an organization admin.
Organization Webhooks: only organization admins can see and manage them, because an endpoint URL can itself grant access to the destination.
An organization can have up to 10 organization webhook endpoints. Project webhook endpoints are not capped.
Add an endpoint
1. Open Settings, then click Webhooks in the Project group (for job events) or in the Organization group (for team alerts). Project webhooks belong to the project named in the page title, so switch to the right project first.
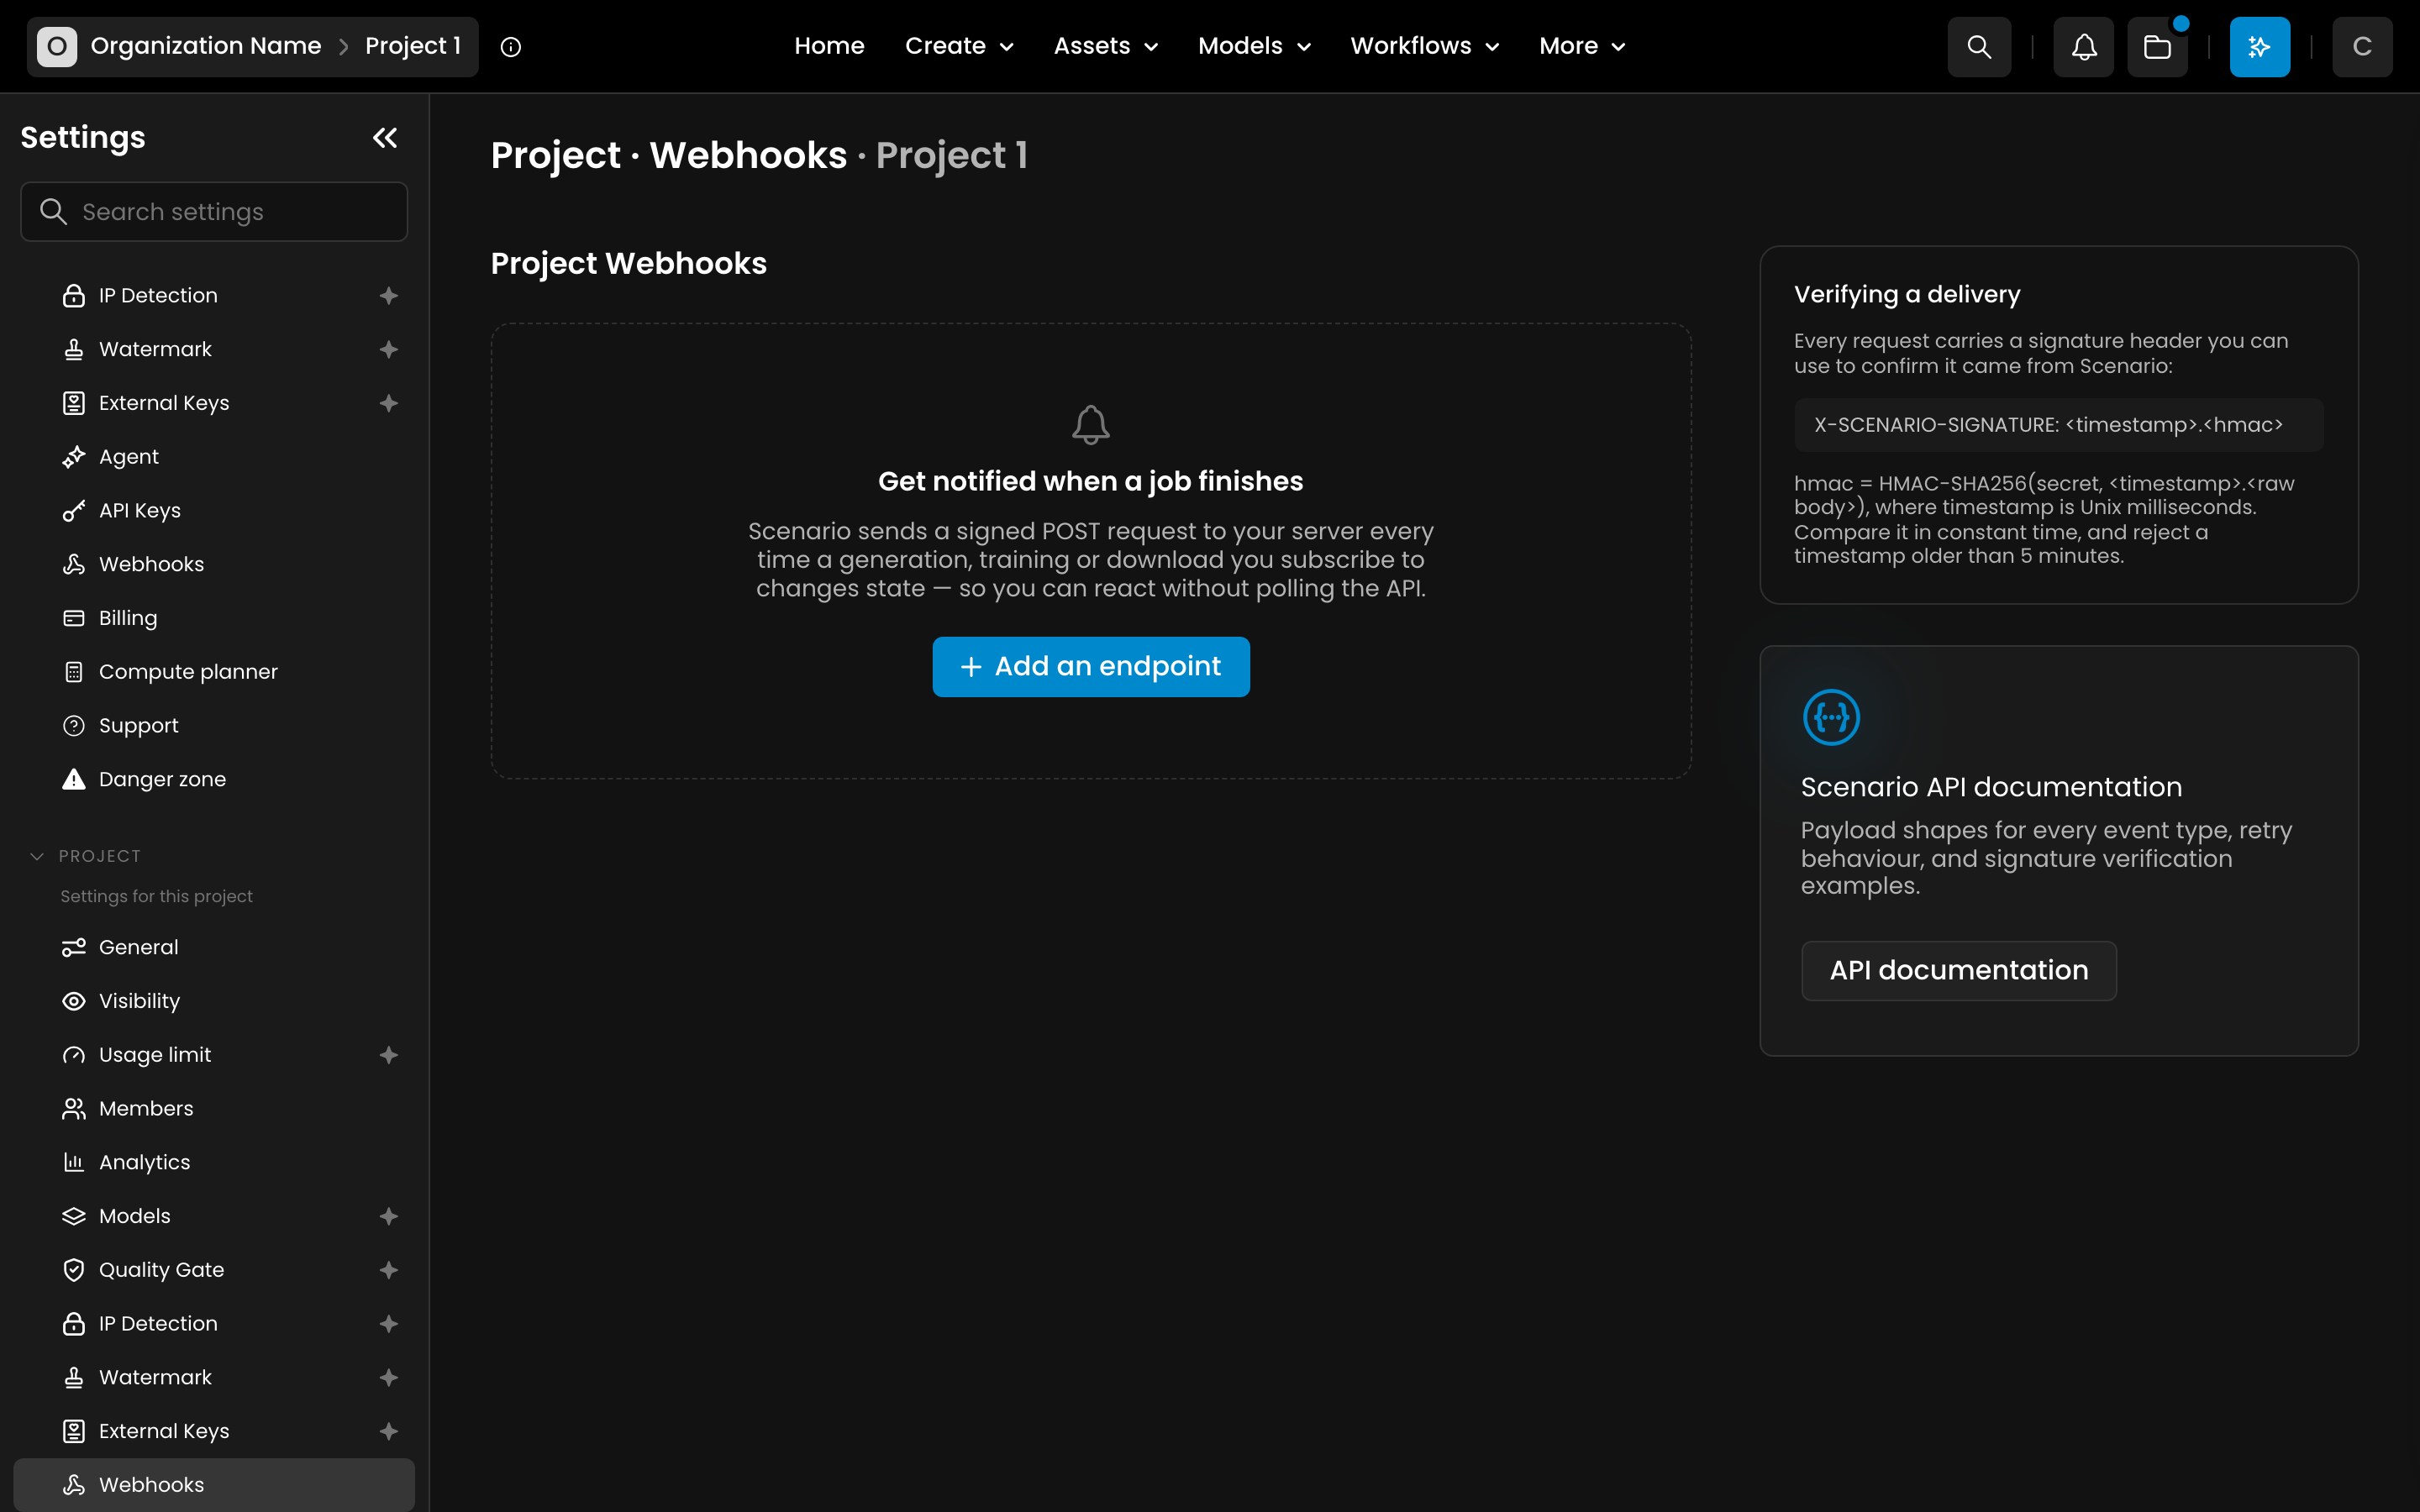
2. Click Add an endpoint.
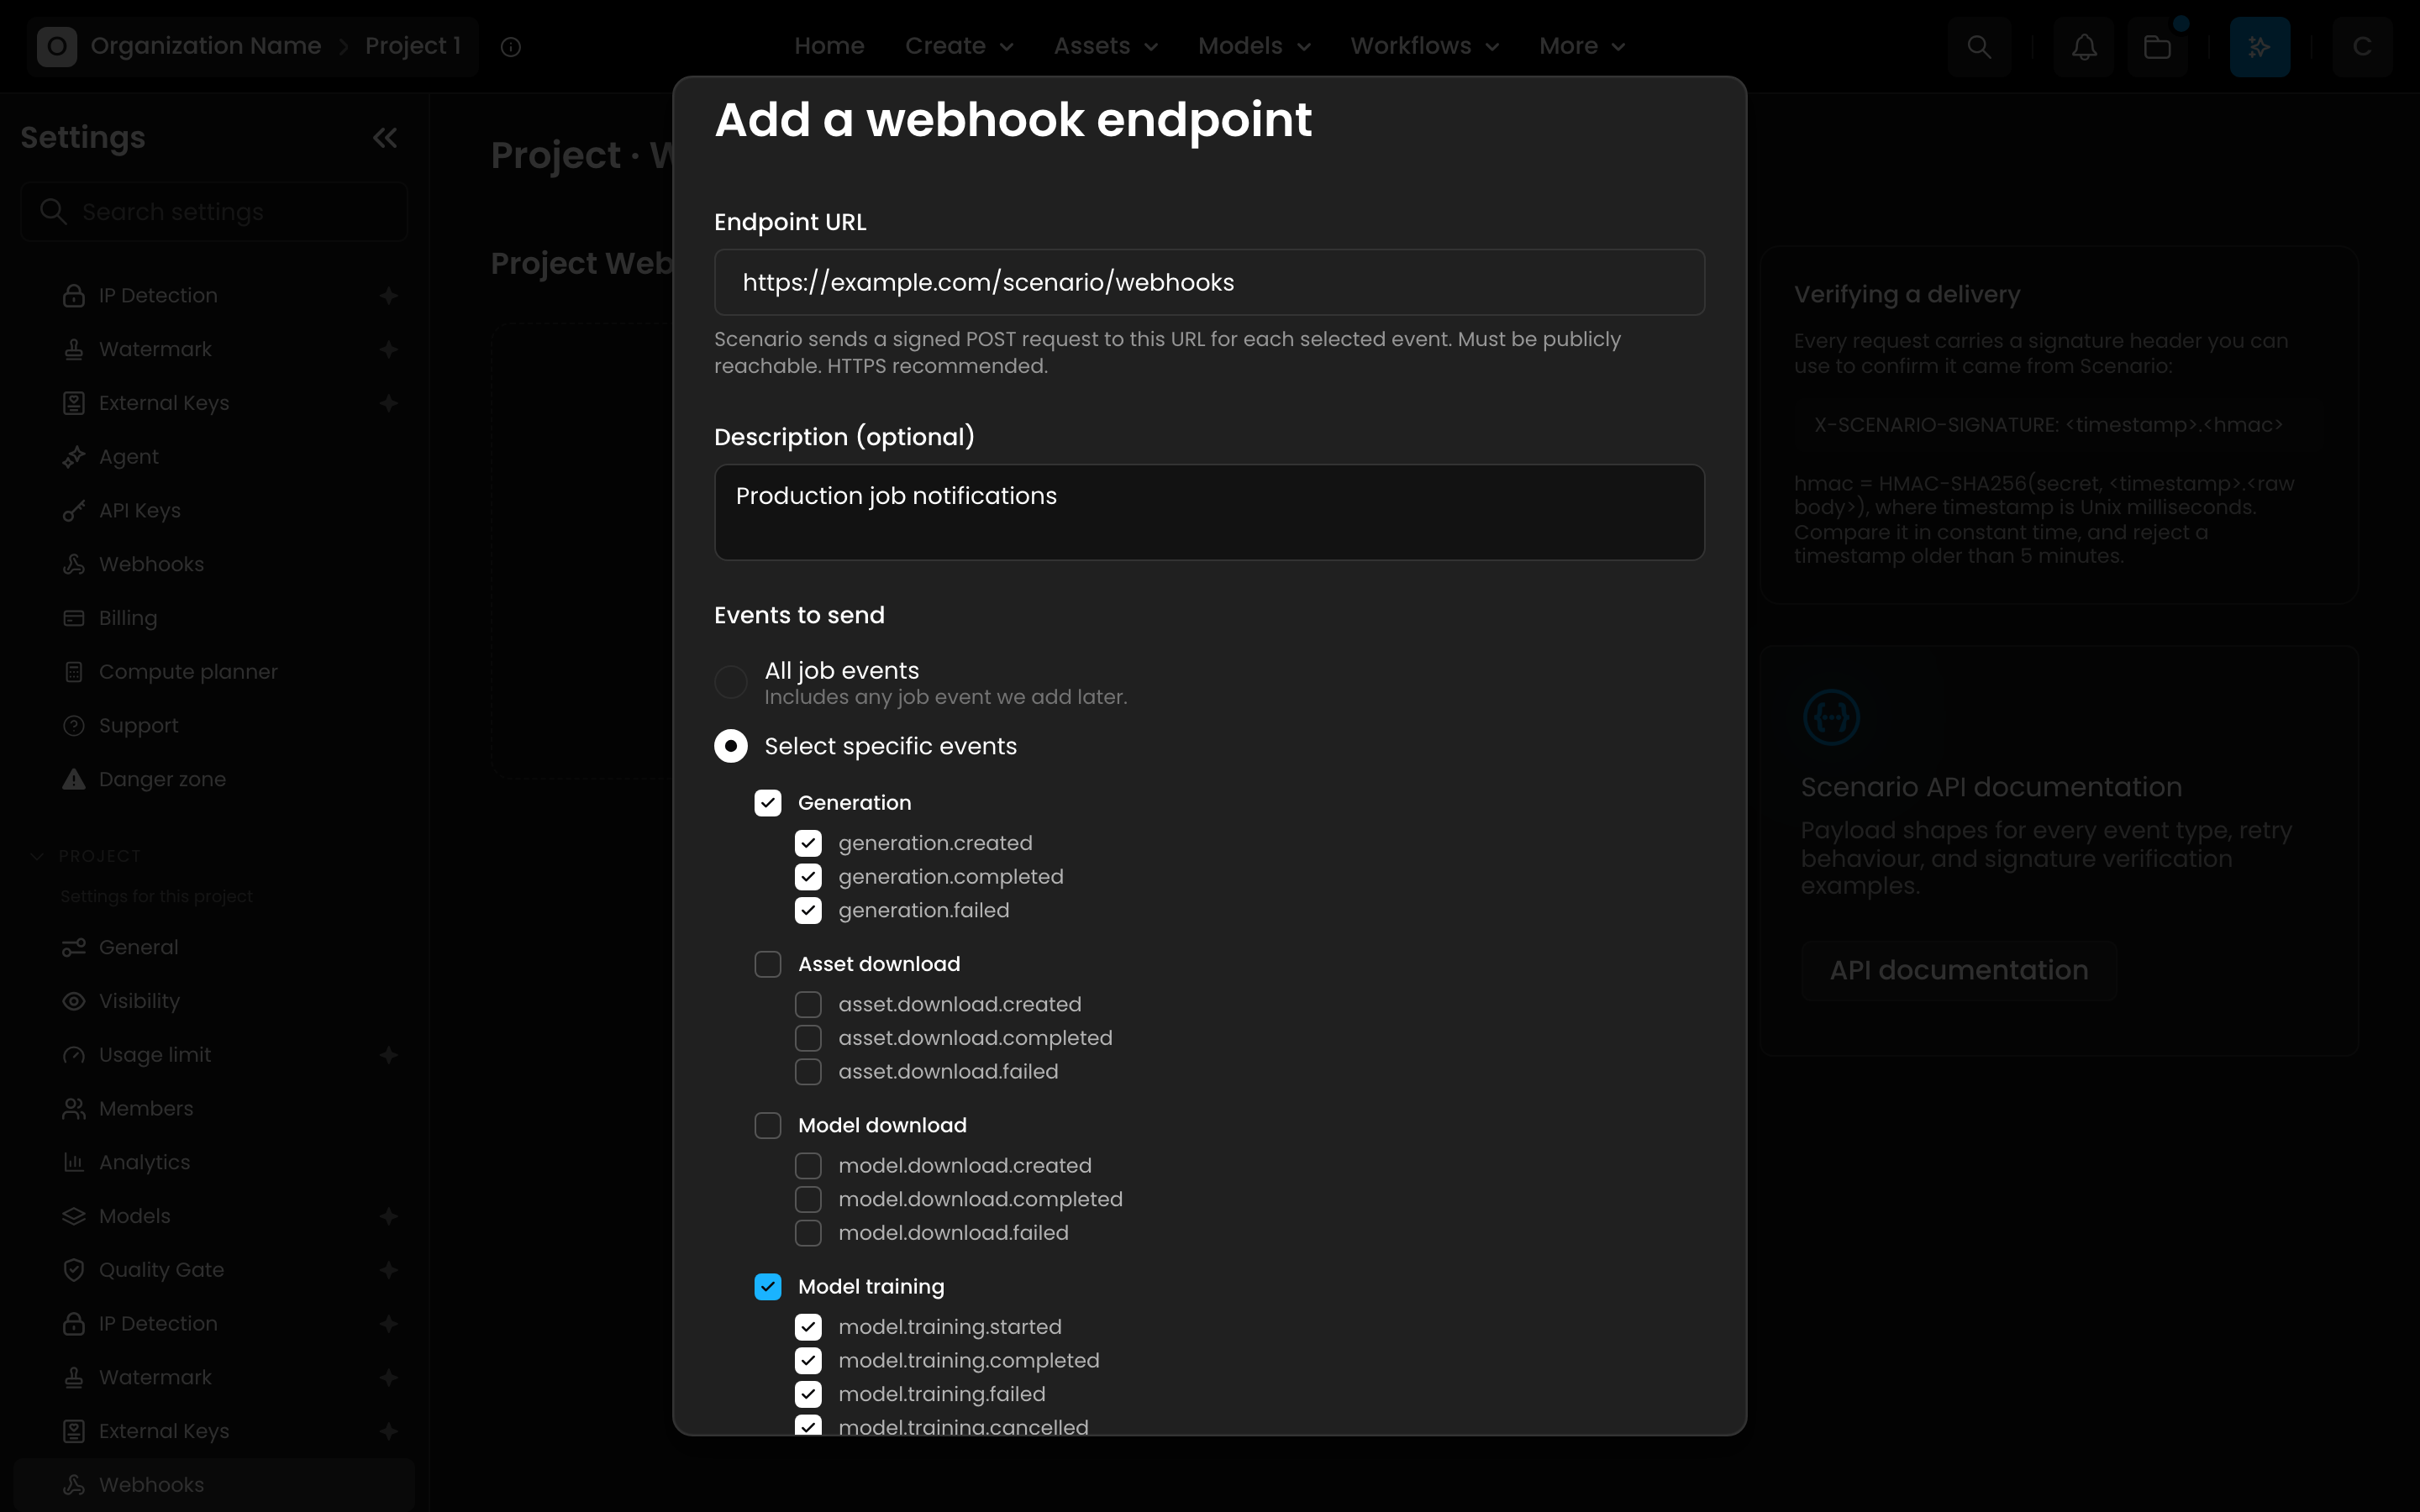
3. Enter the Endpoint URL: the full address of the page on your server that will receive the events, for example https://example.com/scenario/webhooks. Use an https:// address.
4. Optionally add a Description to remember what the endpoint is for (for example "Production job notifications").
5. Choose which events to send:
All job events (or All team alerts) sends everything, including any event Scenario adds later.
Select specific events (or Select specific alerts) lets you tick only the ones you need, grouped by family: Generation, Model training, Asset download and Model download for projects; Credits for organizations.
6. Click Create endpoint.
The same URL can only be added once per project or organization.
Copy your signing secret
Right after you create an endpoint, Scenario shows its signing secret (it starts with whsec_). Click Copy secret and store it somewhere safe, such as your server's secret manager.
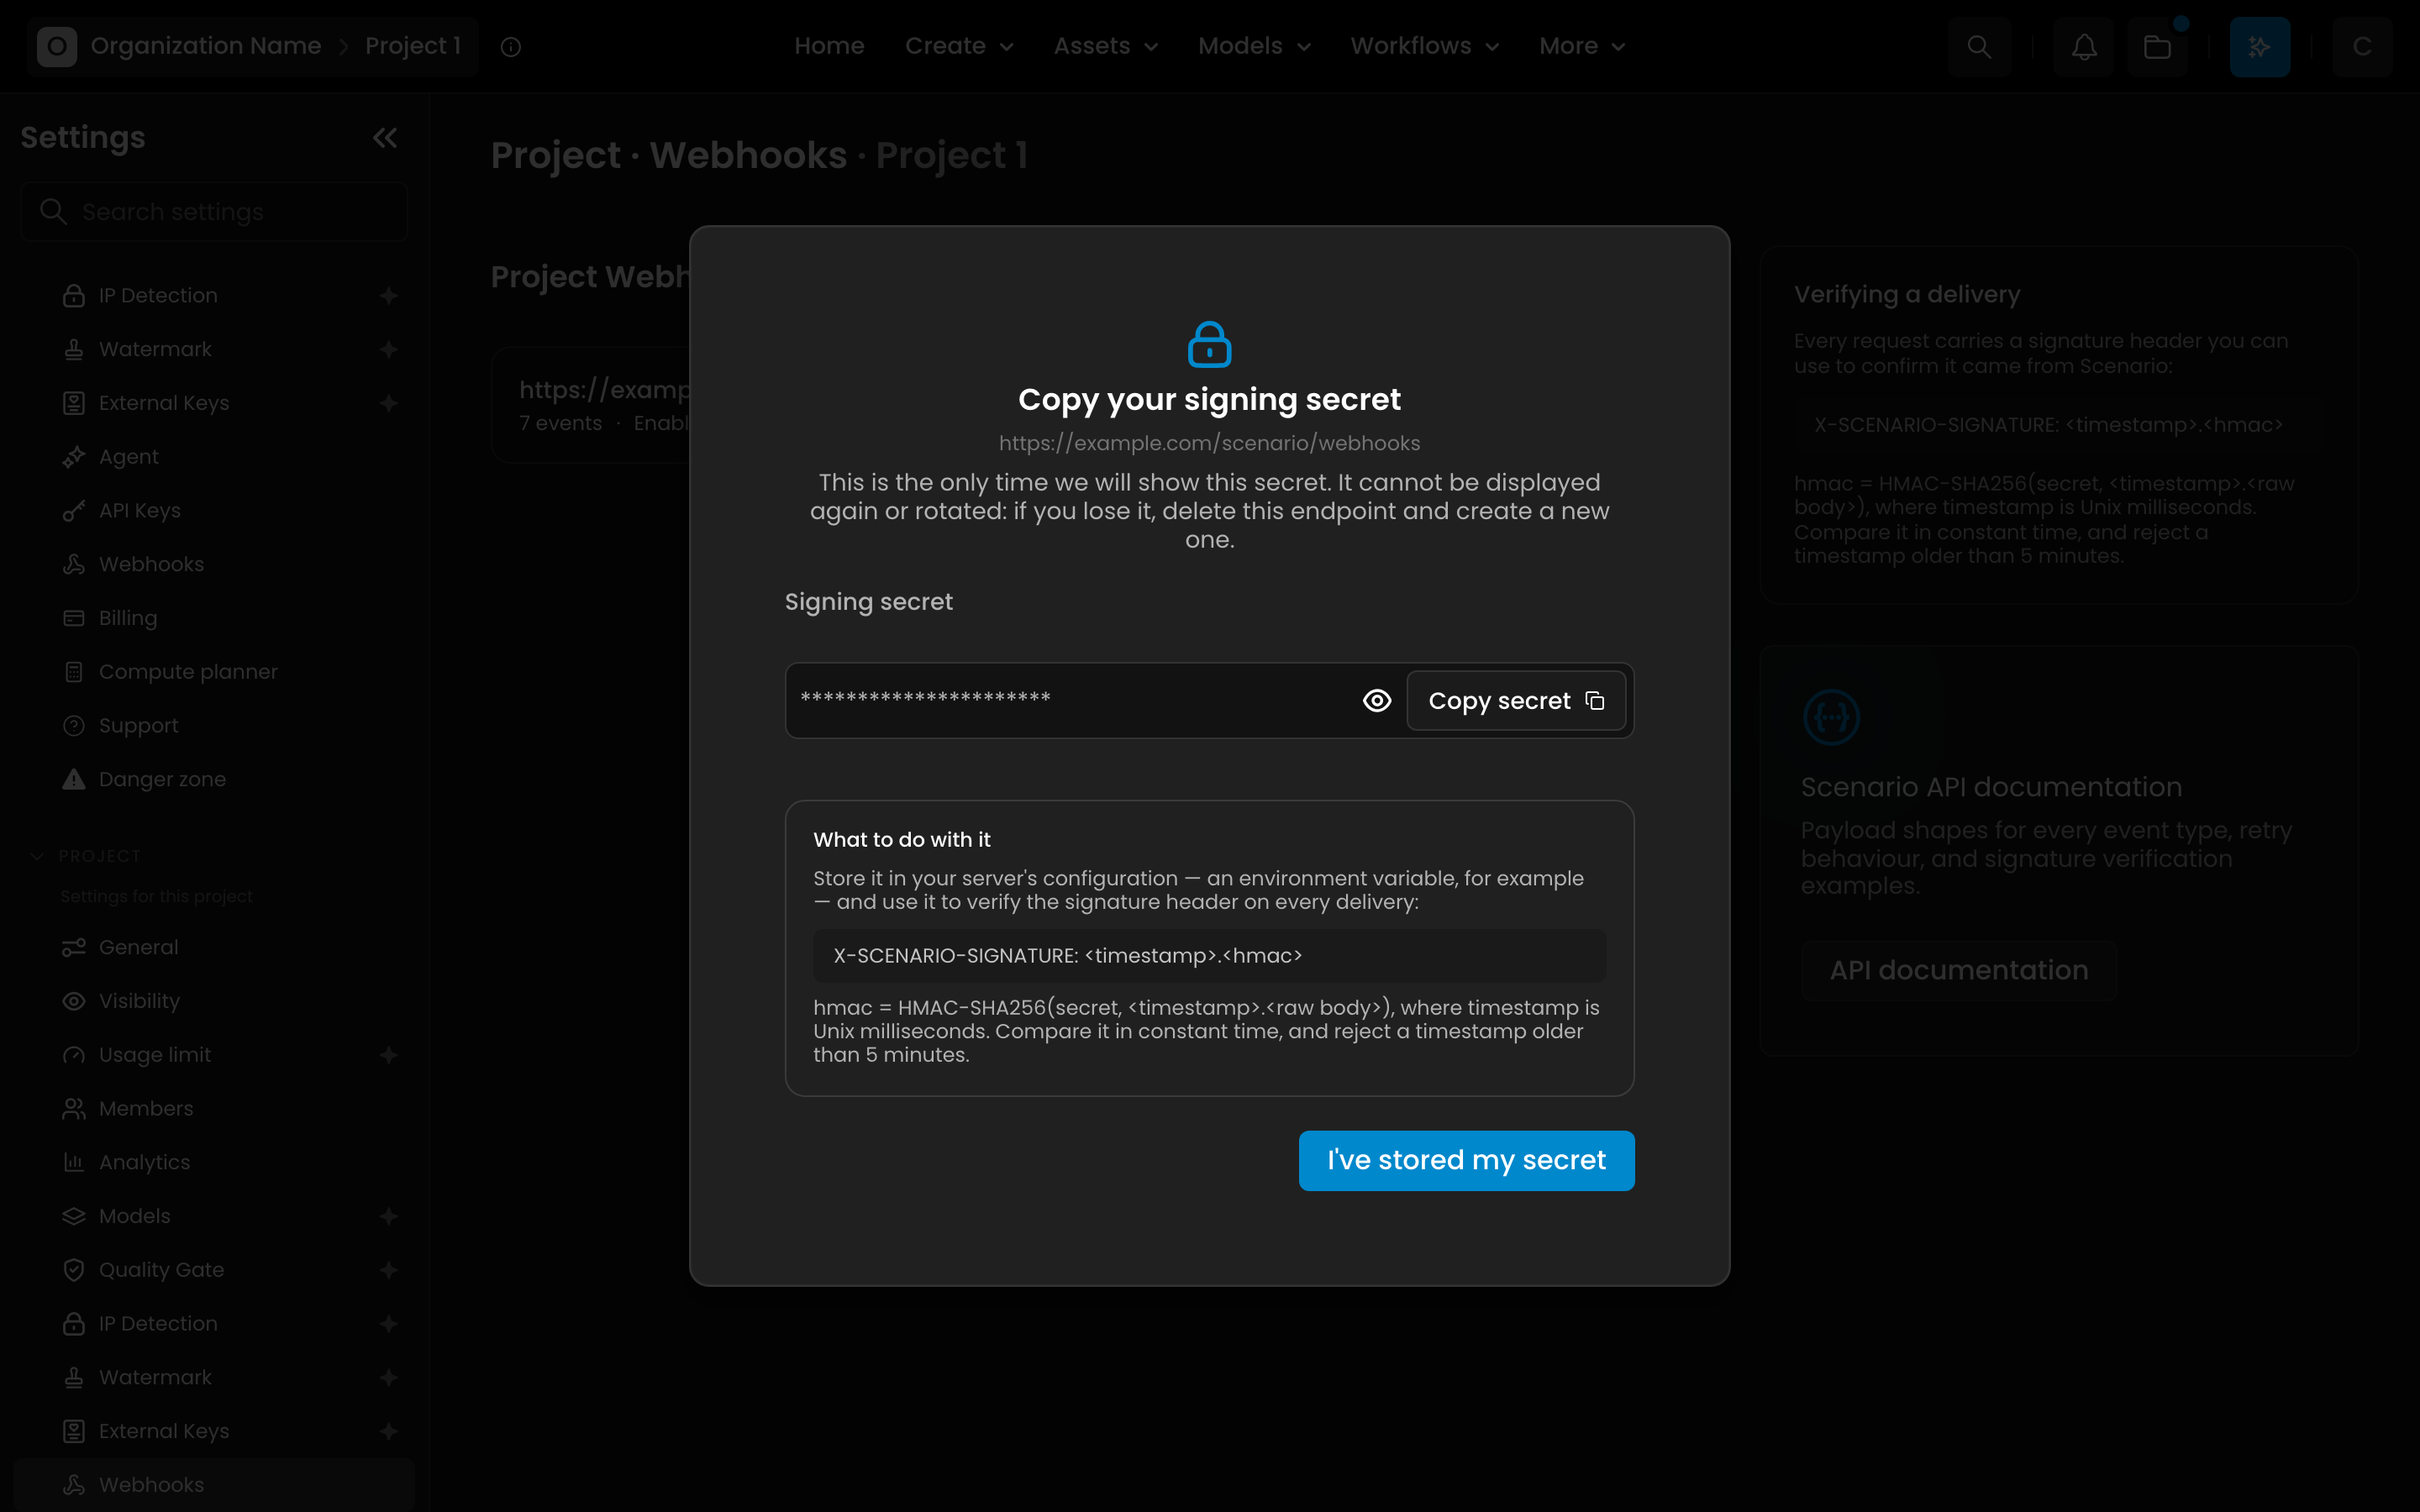
This is the only time the secret is shown. It cannot be displayed again or rotated: if you lose it, delete the endpoint and create a new one.
Your server uses the secret to check that each request really comes from Scenario. Every delivery carries an X-SCENARIO-SIGNATURE header, and your code recomputes it with the secret before trusting the request. The developer guide below has ready-to-use examples.
What each event means
Family | Events |
Generation | A generation job is created ( |
Model training | A training starts ( |
Asset download | An asset archive export starts ( |
Model download | A model export starts ( |
Credits (organization) | Your remaining Compute Units drop below one of your Usage Alerts thresholds ( |
The credit alert only fires for thresholds you have set up. If none is configured, the form warns you that the endpoint will never fire: set one in Settings → Organization → Billing → Usage alerts (see Usage Alerts: get notified before you run low on Compute Units).
Check your deliveries
Click Deliveries on an endpoint to see the events recently sent to it, newest first. Click the refresh icon next to the Deliveries title to load new ones without reloading the page. Each delivery shows one of these statuses:
Queued: the event is waiting to be sent.
Delivered: your server answered with a success status (any
2xx, such as200or204).Retrying: an attempt failed, and Scenario will try again. Each event is attempted up to 3 times: a retry about a minute after the first failure, then another about two minutes later.
Failed: every attempt failed, and the event will not be sent again.
Open a delivery to see each attempt, with its time and the status code your server returned. A 404 usually means the URL is wrong, and a 5xx means your server ran into an error. A 500 can also mean Scenario could not reach your server at all, for example because of a DNS or certificate problem.
Your server has 30 seconds to answer. An attempt that takes longer may not appear in the list, and the delivery can stay on Retrying.
Deliveries are kept for 90 days.
Edit, pause or delete an endpoint
Each endpoint in the list has a Deliveries button, an on/off switch, an edit icon and a delete icon.
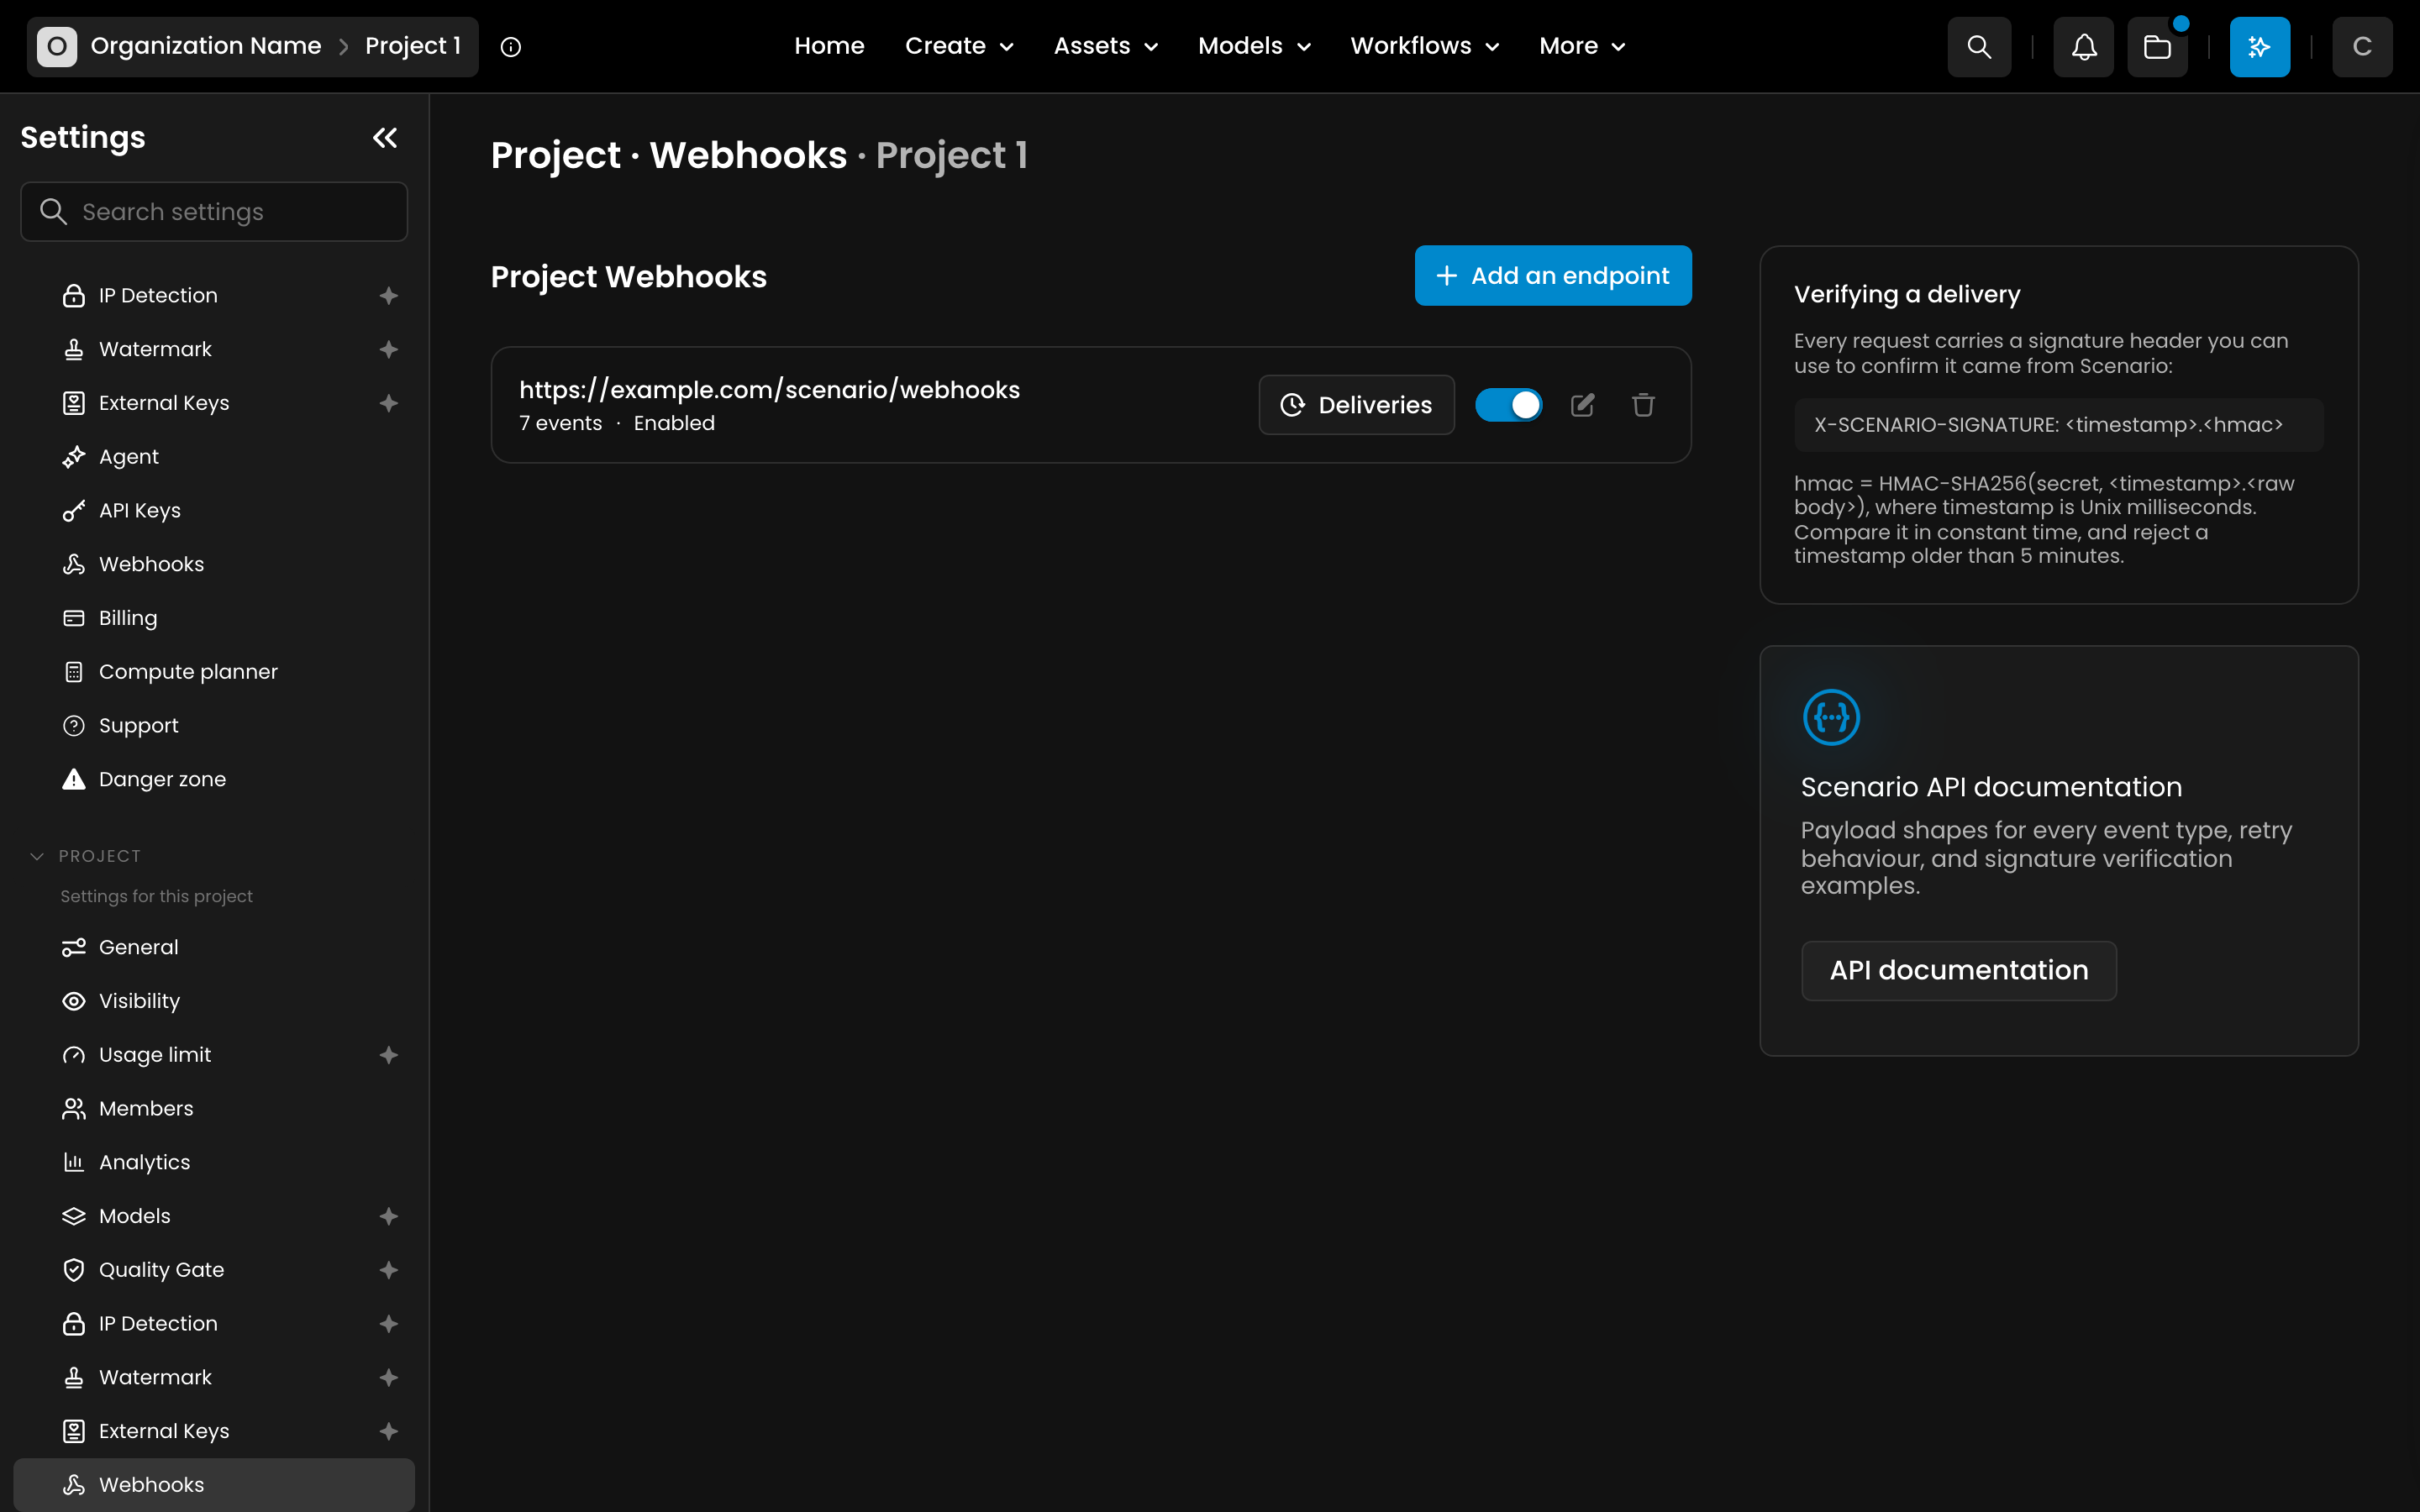
Edit: click the edit icon on an endpoint to change its URL, description or events, then Save changes. The signing secret stays the same.
Pause: switching an endpoint off stops deliveries while keeping the endpoint and its signing secret. Events that happen while it is off are not sent later. Switch it back on with Enable. This is the safest option during maintenance on your server.
Delete endpoint: deliveries stop immediately and the signing secret is lost for good. Deleting cannot be undone, so pause the endpoint instead if you may need it again.
For developers
The Webhooks page shows a short Verifying a delivery reminder of the signature format, and an API documentation link. Webhook endpoints can also be managed through the API. The Webhooks guide on docs.scenario.com covers the payload of every event, signature verification examples in Node.js and Python, retry behavior and the delivery log endpoints.
Good practices
Subscribe only to the events you actually use, so your server is not flooded with requests it ignores.
Always verify the signature before acting on a request.
Make your server answer quickly (a
2xxresponse such as200), then do any heavy work afterwards, so deliveries are not counted as failed.Never share the signing secret or commit it to a repository.