Profile Settings
Last updated: October 5, 2026
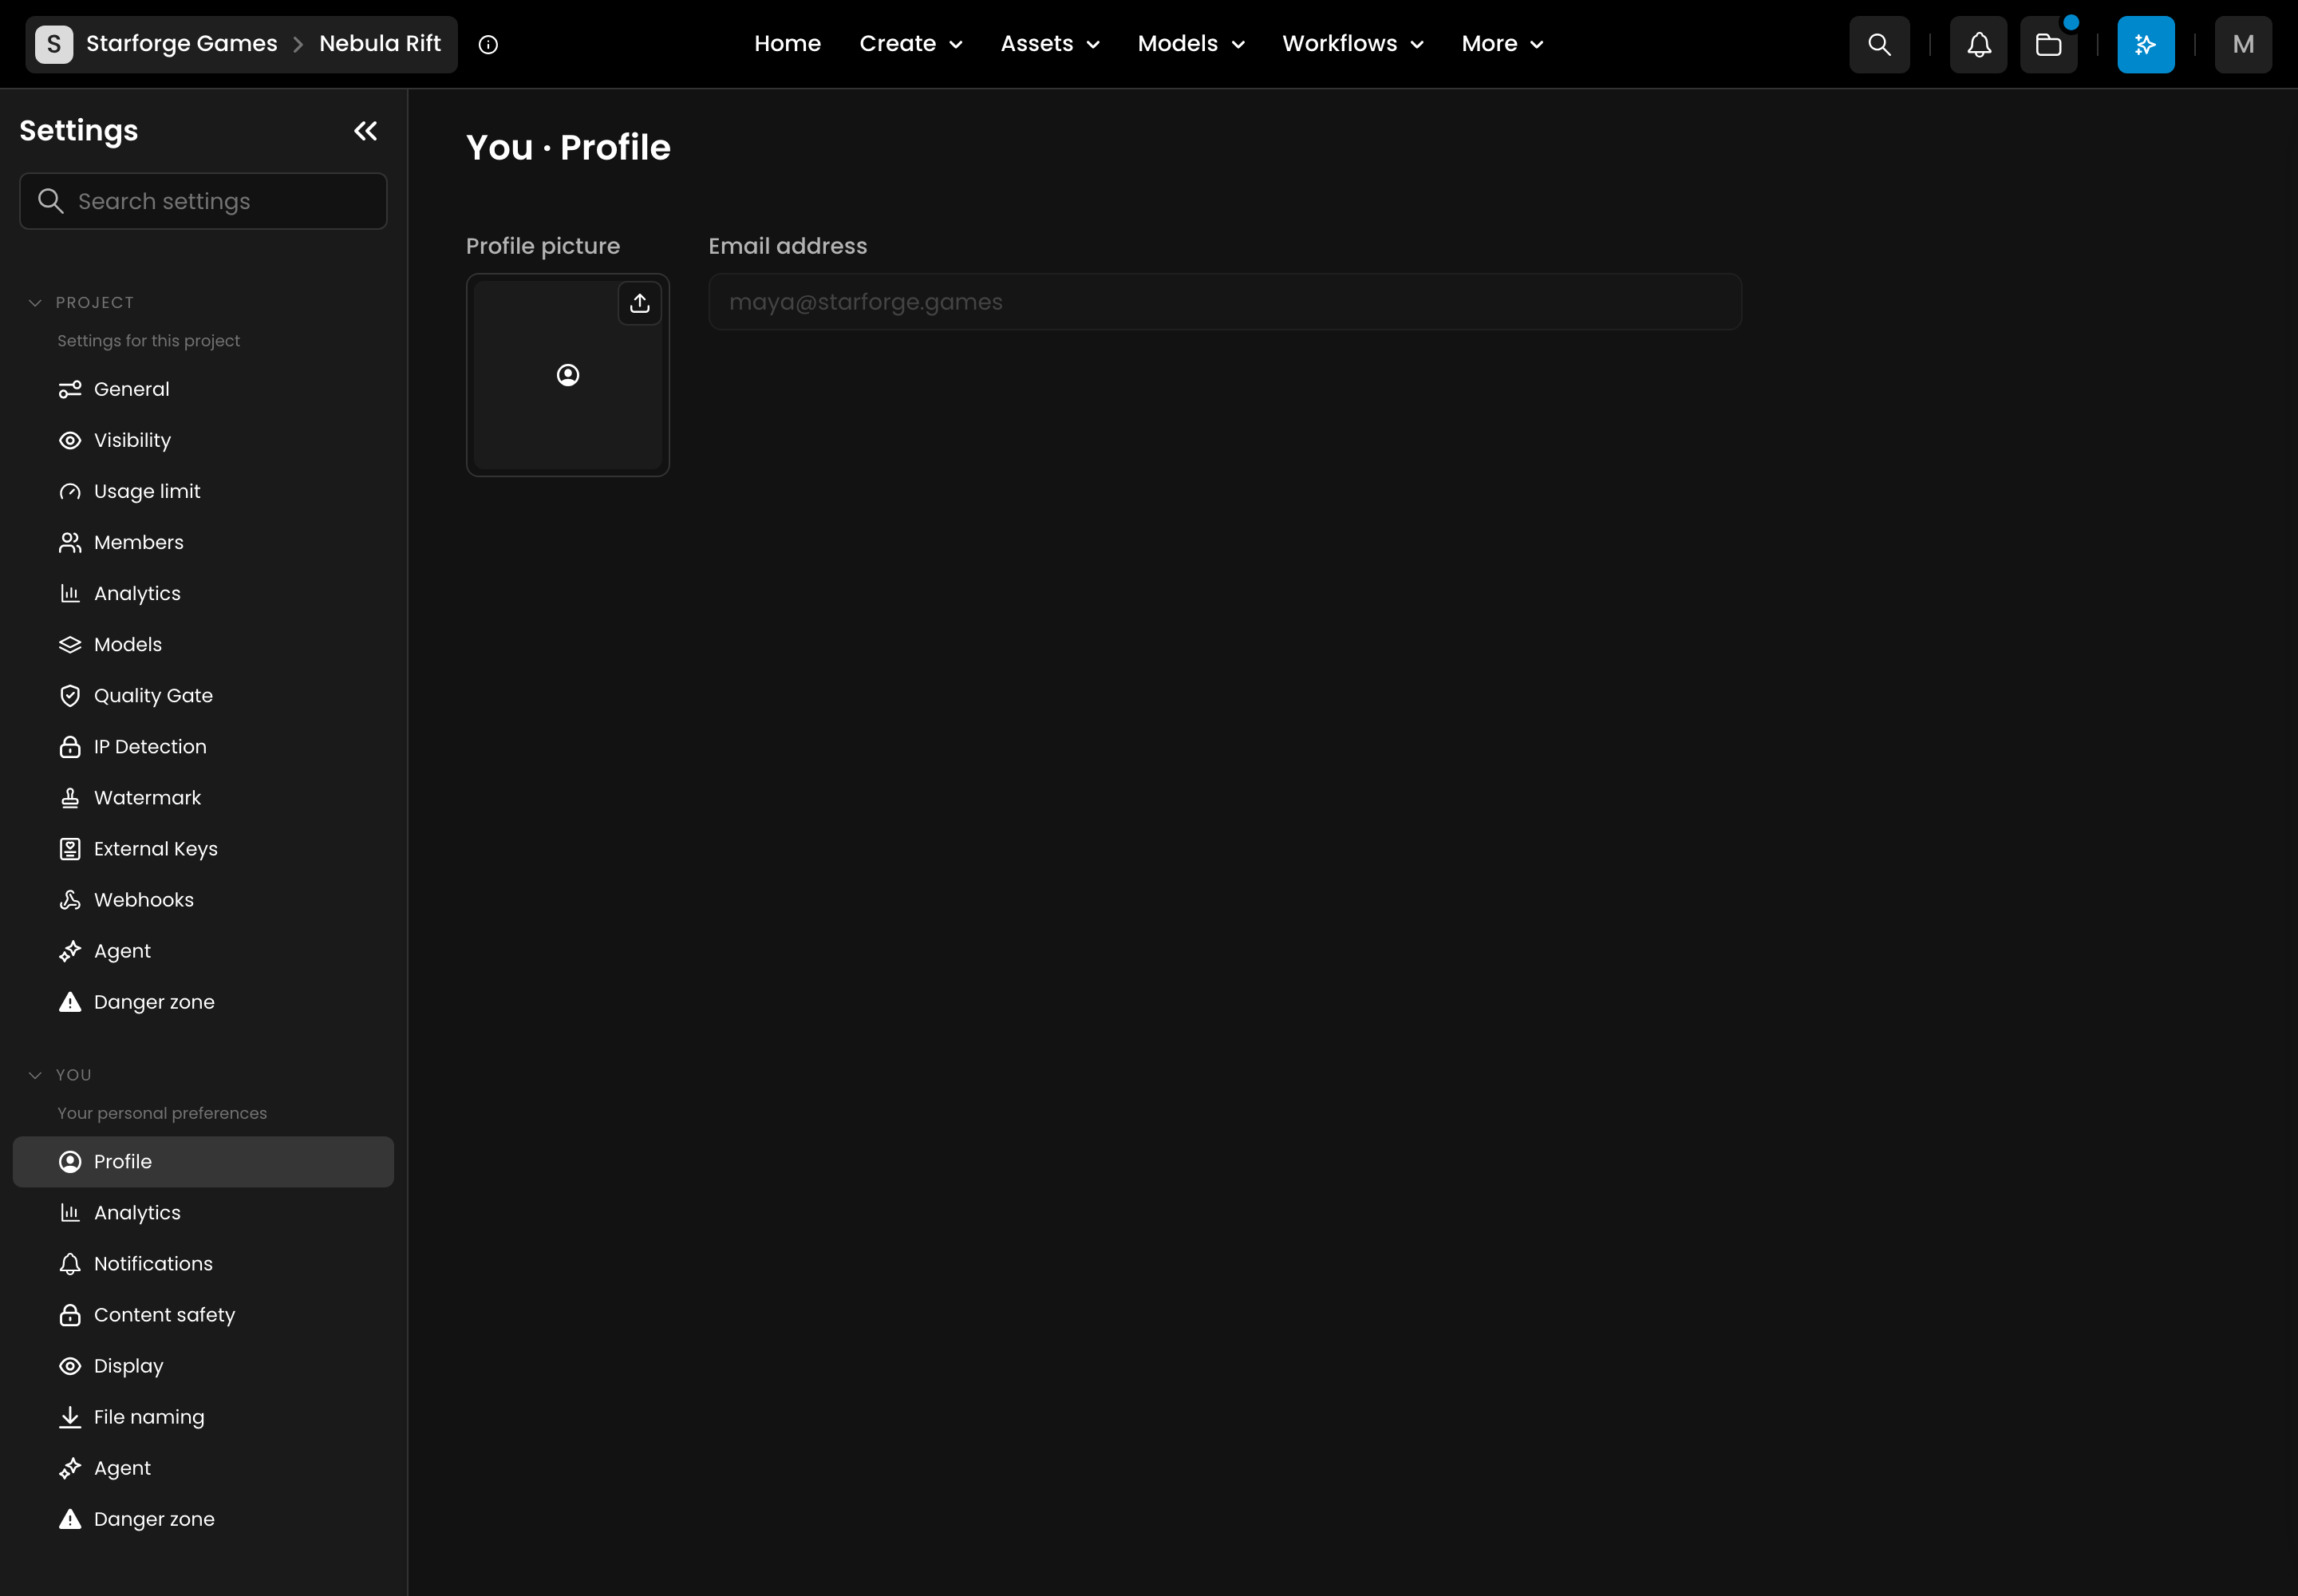
Access to NSFW safety filters, manage your notifications, modify your display preferences, choose how your downloaded files are named and delete your account from your profile page.
Accessing Profile Settings
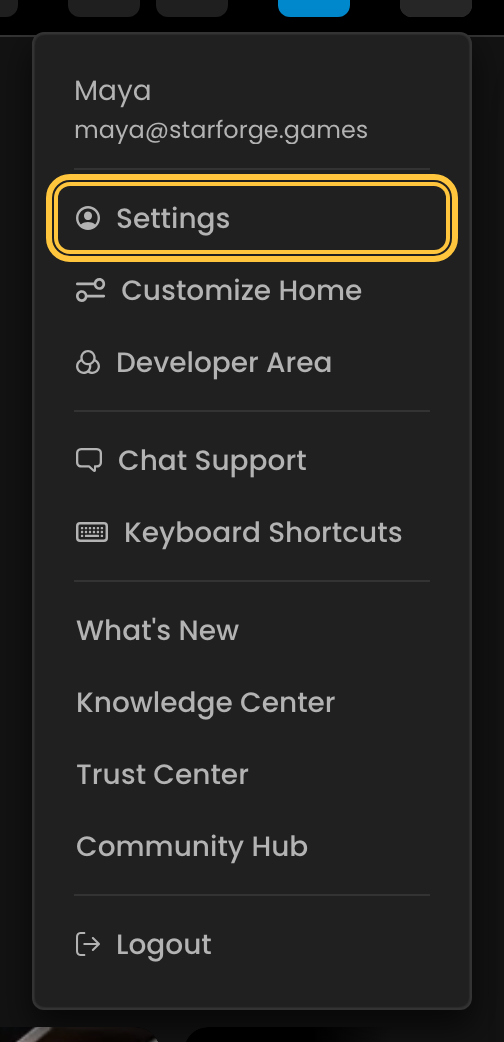
To access your profile settings, click your avatar in the upper right corner of the web app interface and select Settings. This opens Settings → You → Profile.
What you can do in Profile Settings
In your personal settings (the You group), you can:
Customize your content filters
Upload your avatar
Manage notification preferences
Modify your gallery display preferences
Choose how your downloaded files are named
Modify the display of disabled models for your organization if you are admin (in Organization → Models)
Delete your account if needed
Content Safety Filter
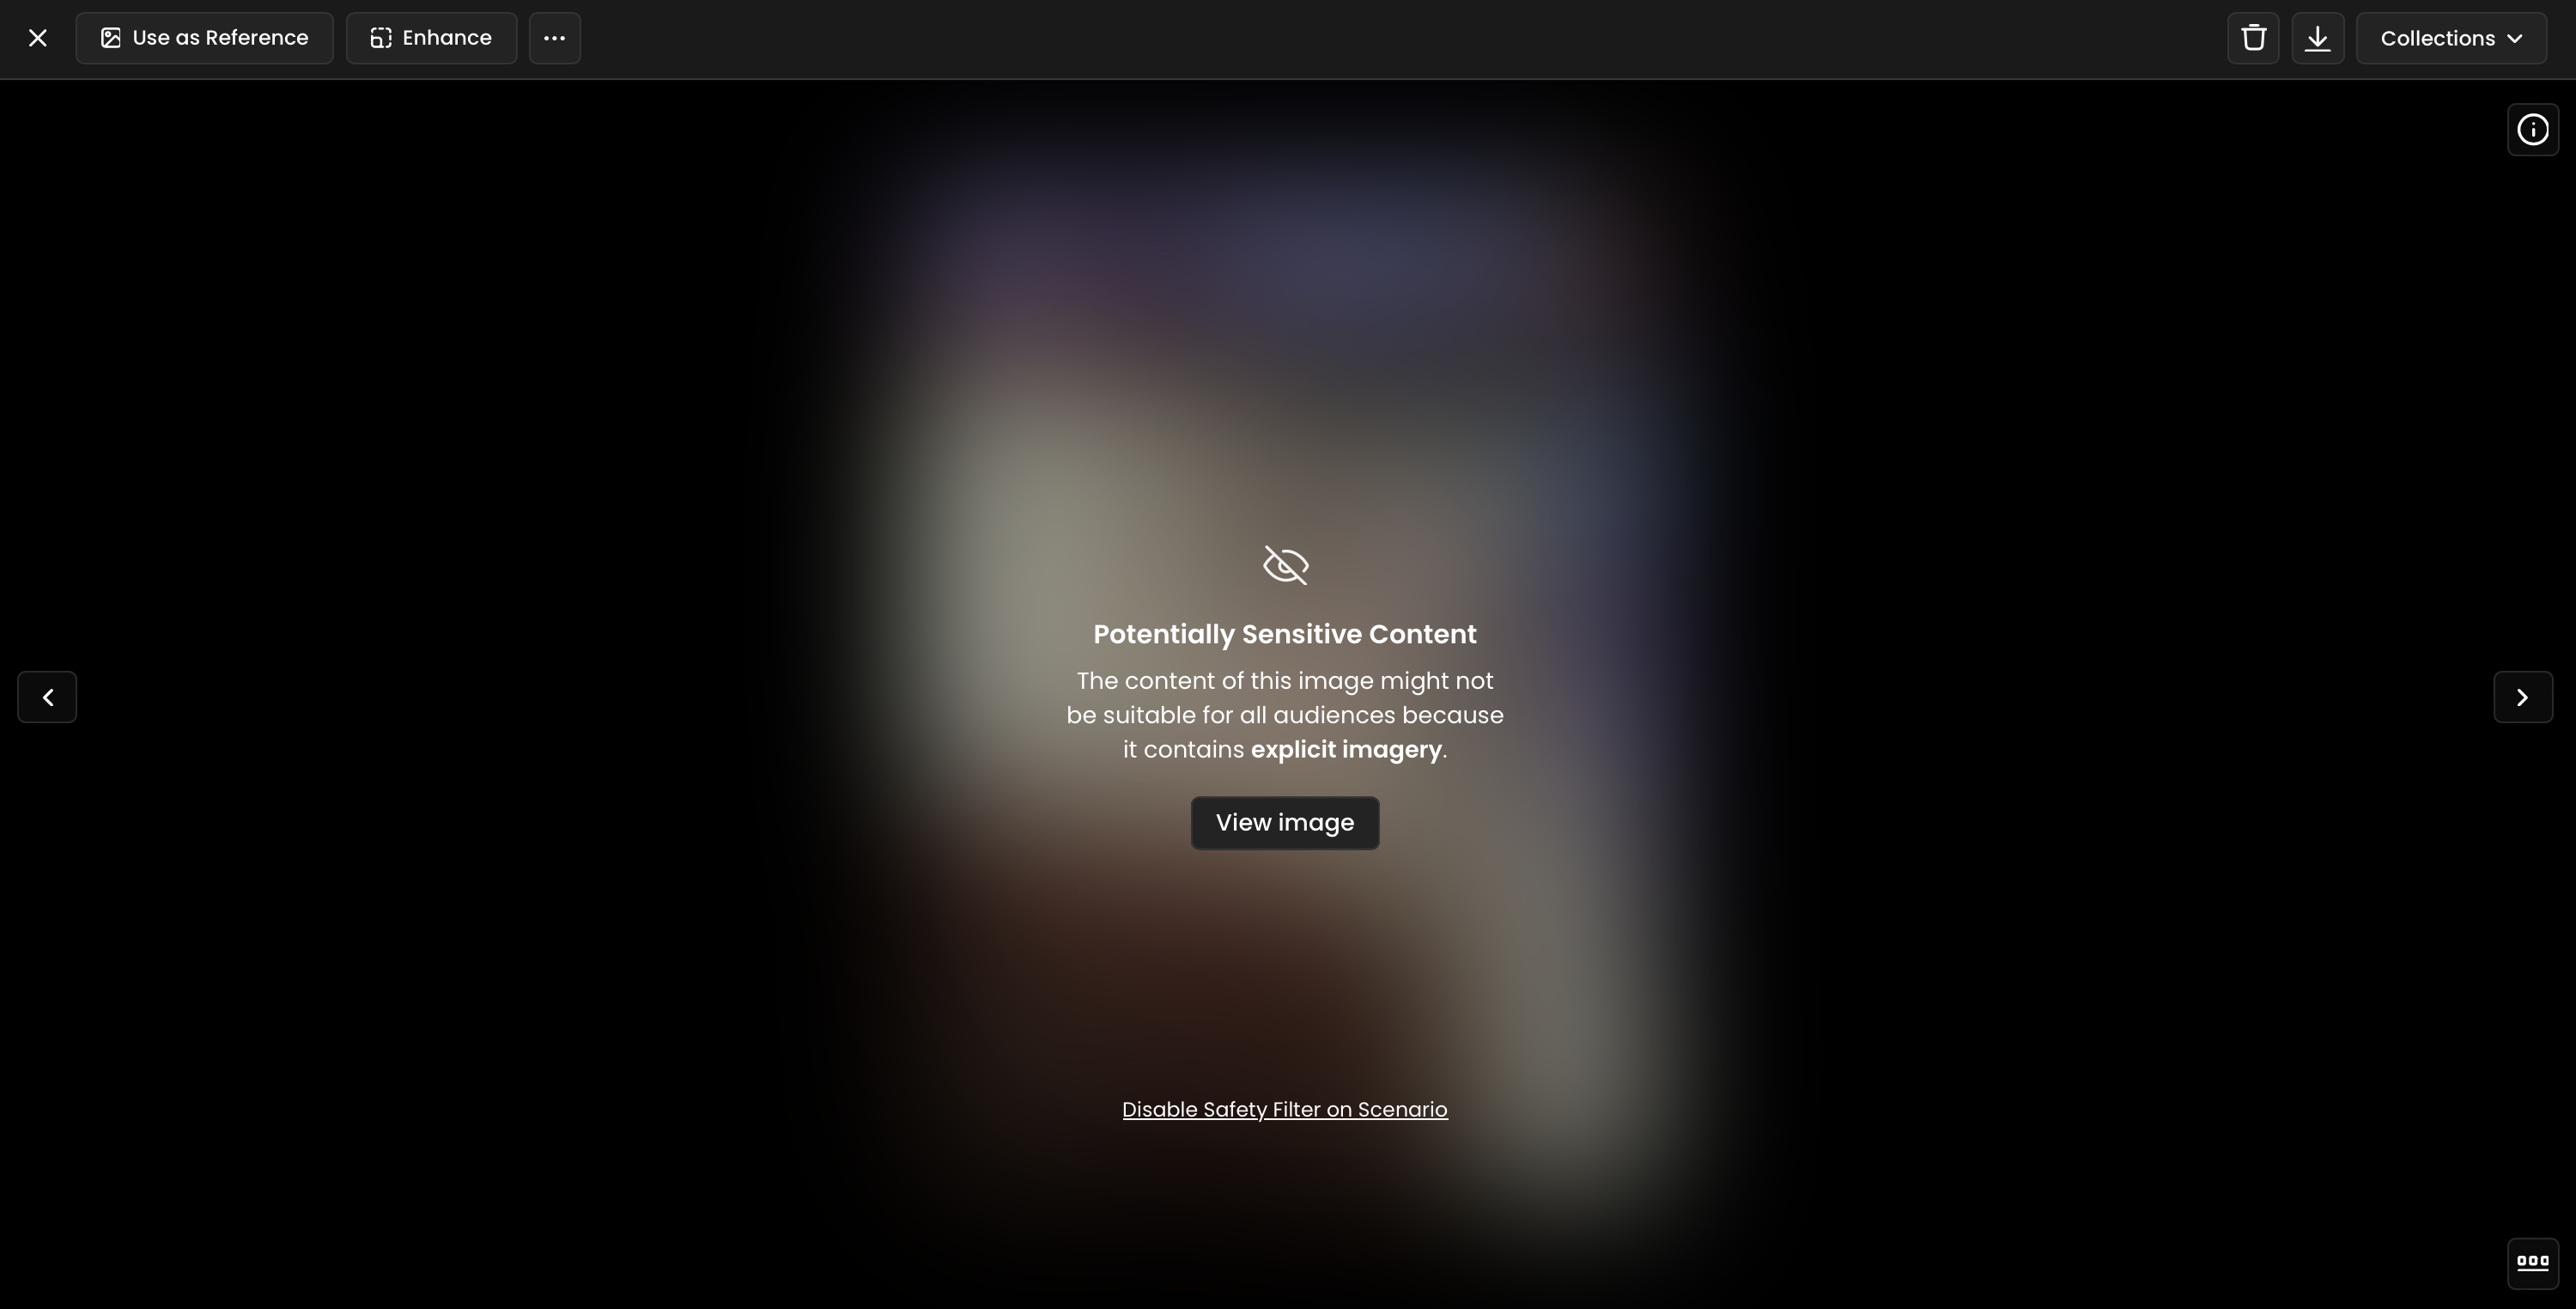
This section (You → Content safety) allows you to filter Not Safe For Work (NSFW) categories when generating content. Any output that matches these filters will appear blurred in your gallery if you opt not to display it. Don’t worry—you can manually display the content at any time if you choose. More info in our dedicated article.
Notification Settings
In You → Notifications, you can manage your email notifications. You can choose whether to receive updates about:
When your Compute Units drop below a certain percentage
Completion of your model training
Completion of model uploads
Simply toggle your preferences to stay informed.
Display Preferences
In You → Display, customize how you view your assets within Scenario.
You can toggle whether to display model-related badges on your assets.
Show Model Badge on Assets – When enabled, a badge will appear on each asset indicating the model it was generated with.
File Naming
In You → File naming (app.scenario.com/settings/user-file-naming), choose how the files you download from Scenario are named. The pattern is personal: it applies to every download you make in the web app, in every organization and project, and it does not change how your teammates’ files are named.
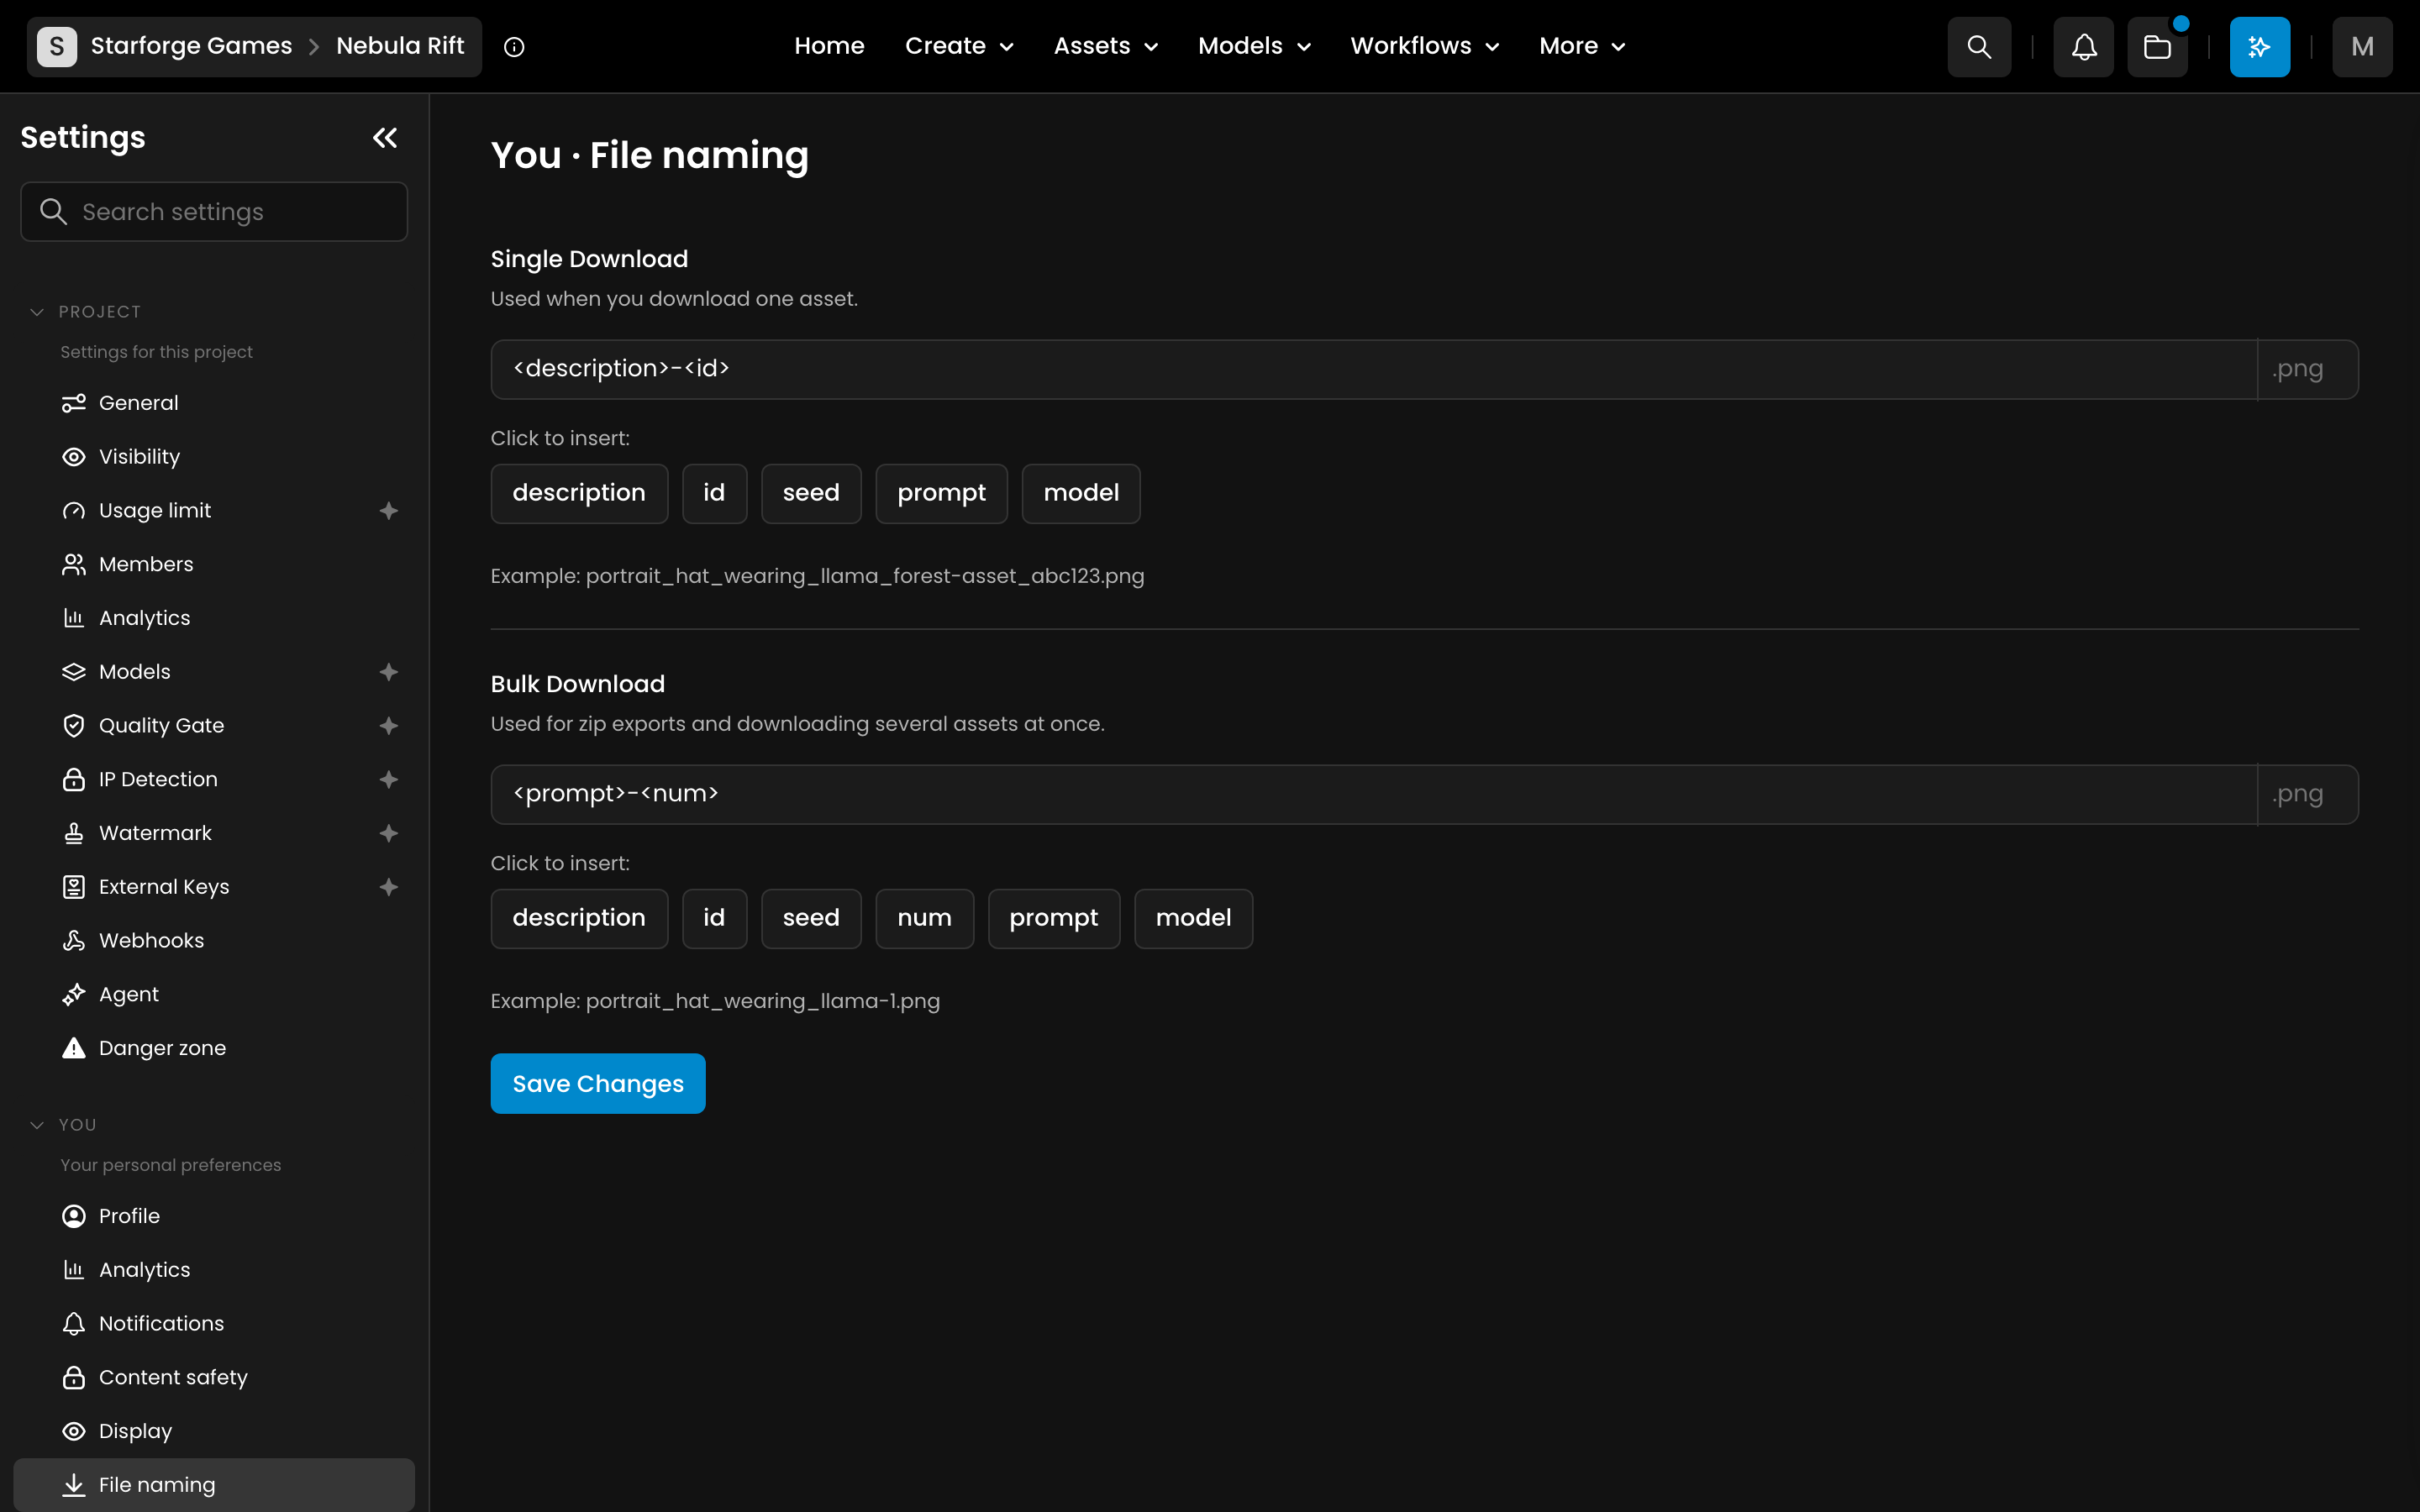
The page has two patterns:
Single Download: used when you download one asset.
Bulk Download: used for zip exports and when you download several assets at once.
Type any text you want in the field, and click a token under it to insert it. The file extension (.png, .mp4 and so on) is added automatically. The Example line shows the result. Click Save Changes to keep it.
<description>: a short version of the asset’s description.
<id>: the asset ID, for example asset_abc123.
<seed>: the generation seed. Images only: for video, 3D, audio and text it is replaced by <num>.
<num>: the position of the asset in the download. Bulk Download only.
<prompt>: a short version of the prompt: up to 8 key words joined with underscores, for example portrait_hat_wearing_llama_forest. Before 28 September 2026 it gave the full prompt.
<model>: the name of the model that generated the asset.
The default pattern is <description>-<id>. A file name is limited to 128 characters, extension included: the description and the prompt are shortened first, so the ID, seed and number stay whole. Spaces and characters that are not allowed in file names become underscores. If two files in the same zip end up with the same name, a number is added to tell them apart.
Go back to the default name
There is no reset button. Replace the pattern with <description>-<id> and click Save Changes.
The File Naming window on your first download
The first time you download one asset, and again the first time you download several, a File Naming window asks for a pattern. Click Save and Download: the pattern is saved for every later download of that kind, not only this one or this project. You can change it at any time in You → File naming. Closing the window cancels the download.

Name a zip export
When you select several assets in your gallery and download them, the Export window opens. Its File name field is your Bulk Download pattern, and its Archive name field names the zip. Leave Archive name empty to get the default, the date followed by -export (for example 20261005-export.zip). The name you enter is remembered for your next export.
The pattern does not apply to canvas exports, video frames you save, training files, or downloads made through the API, which sets its own file name template.
Enable or Disable Models
This section lets admins control which models are active within the workspace. When a model is disabled, it’s hidden from the model list and unavailable for use in new generations.
Access this feature by navigating to Settings → Organization → Models. There, you’ll see a searchable list of all workspace models with filtering options for Privacy, Category, Capabilities, Providers, Sub Processors, Maintainers, Data Processing, Enterprise Status, and Tags. You can toggle each model individually using the Active switch or manage them in bulk with Enable All Models and Disable All Models.
Admins can also choose to keep disabled models visible by turning on the Display disabled models toggle on the same page, ensuring easier model management without exposing inactive models to the rest of the team.
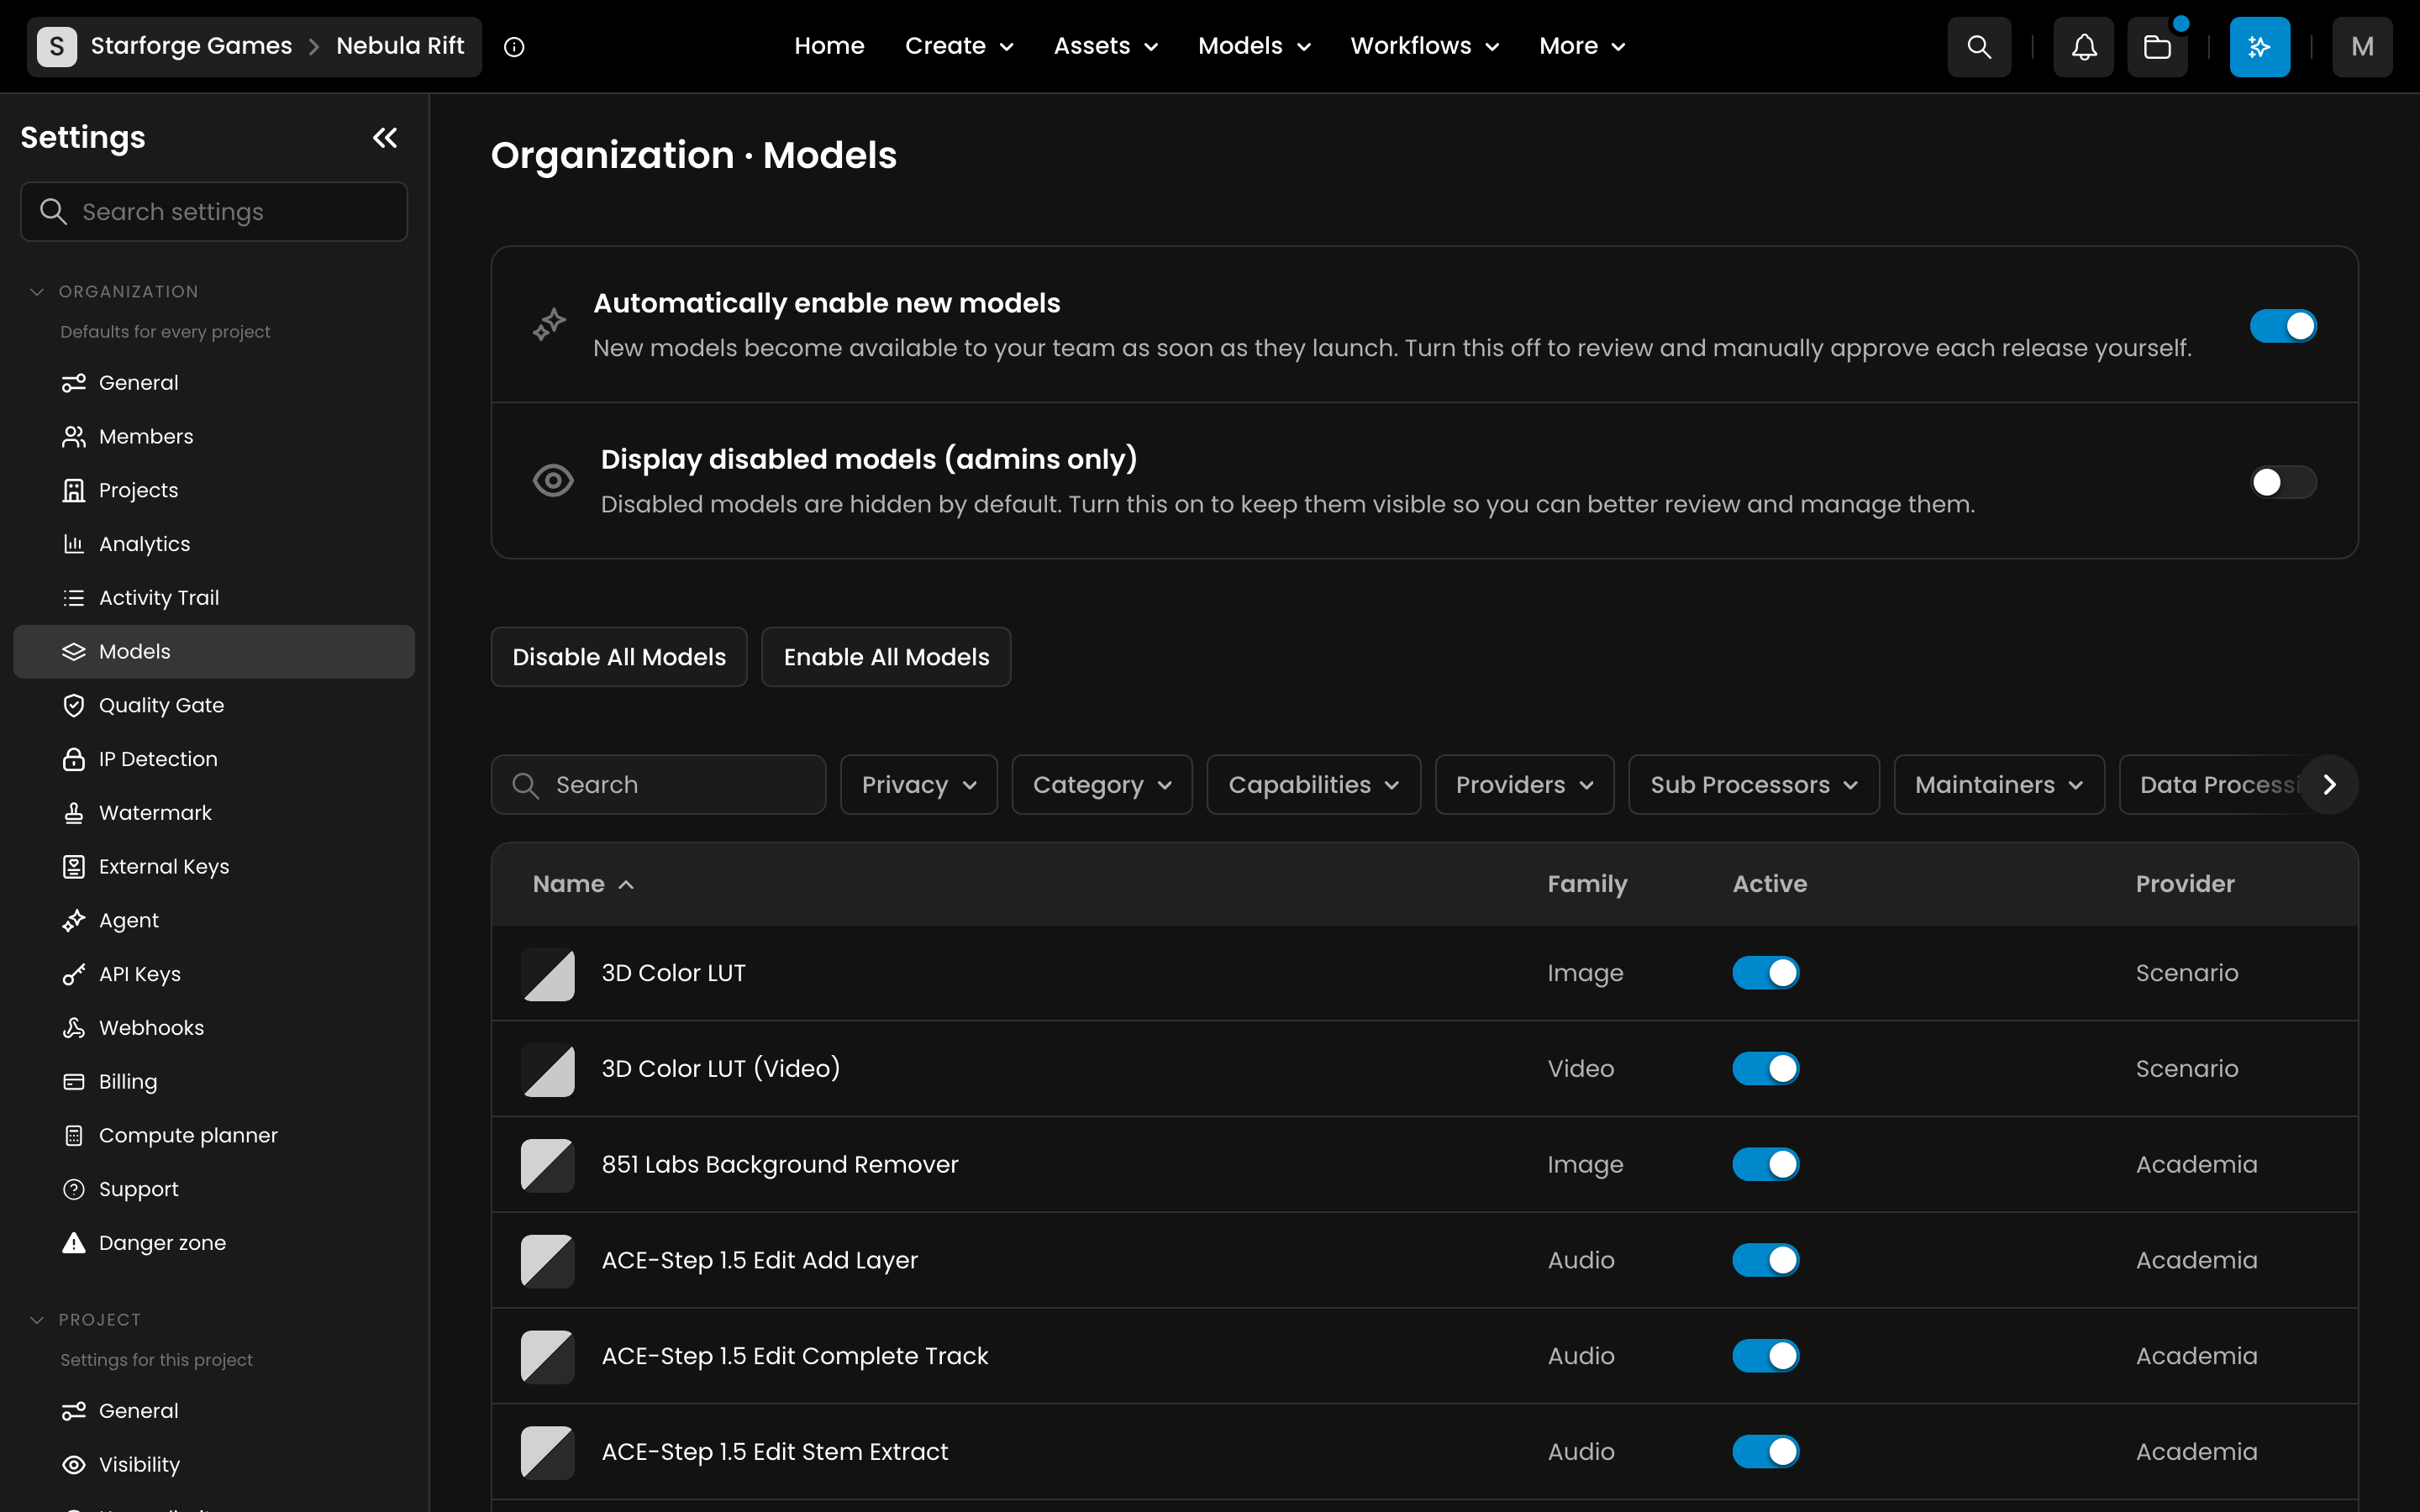
This feature is only available for users on an Enterprise plan.
Delete your account
If you wish to delete your account (You → Danger zone), you’ll need to cancel your subscription to any organizations first. Once you’ve done that, a confirmation email will be sent to you to finalize the account deletion process.