This guide explains how to create and animate scenes featuring two or more distinct characters, with full visual consistency and narrative coherence. Whether you're building interactive story content, gameplay cinematics, or animated visual assets, Scenario lets you leverage structured workflows to generate multi-character outputs with complete creative control.
This workflow is especially useful when animating unique characters across multiple sequences—whether used individually or stitched into a longer animation. Unlike generic figures that may appear unpredictable when using only Text-to-Video tools, these are characters you’ve developed with care and intent, and you can direct them through your scenes with precision.
Combine Characters via “Edit with Prompts”
Edit with Prompt allows you to generate or edit images using natural language instructions. It’s a versatile tool for modifying character details (outfits, poses) or for combining elements—such as merging separately created character images into a single frame.
This process typically uses the Nano Banana model for style-preserving edits. You can also experiment with Flux Kontext and GPT options to compare quality.
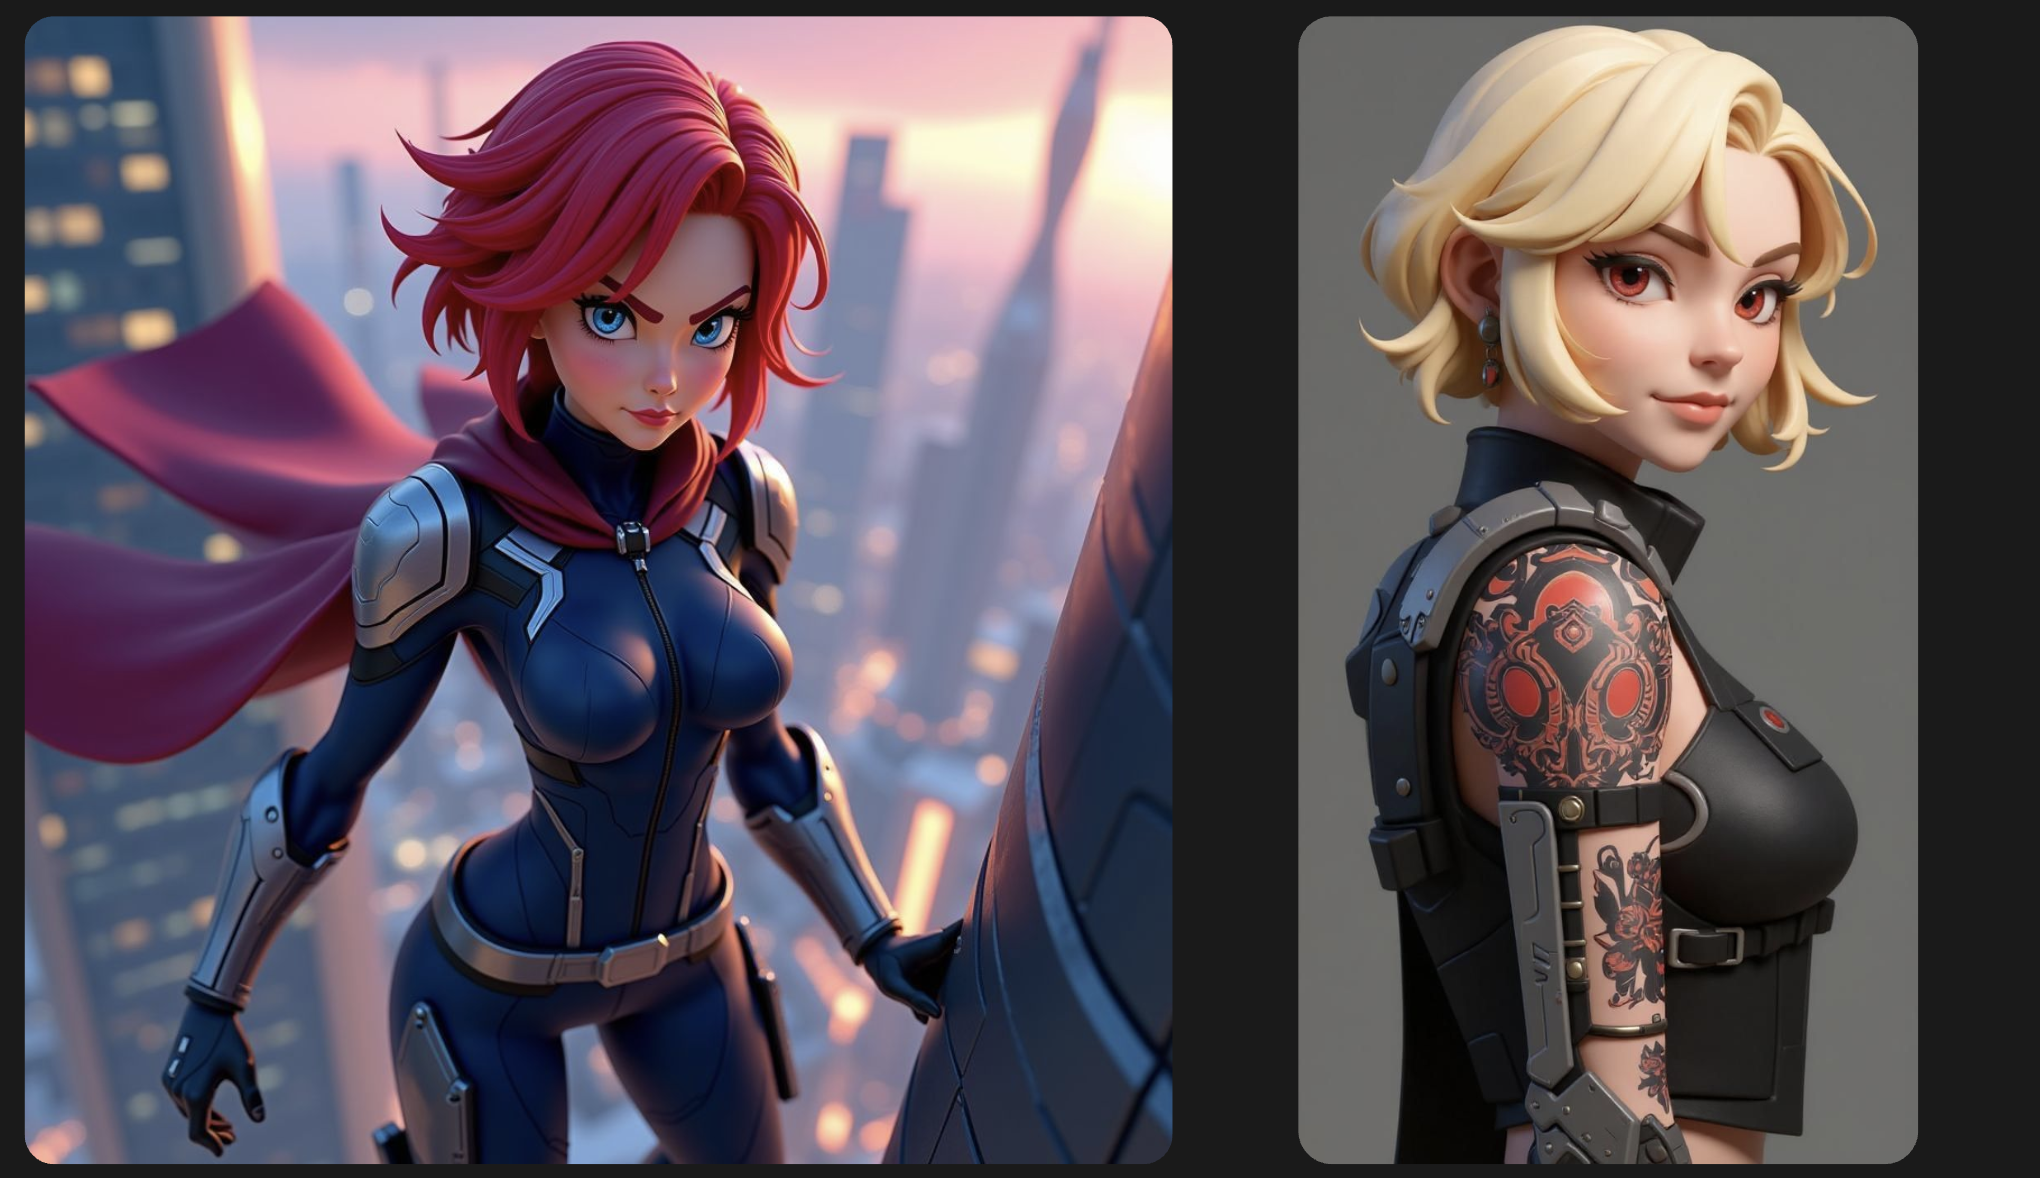
Step 1: Select Character Images
Choose two (or more) individually generated character images.
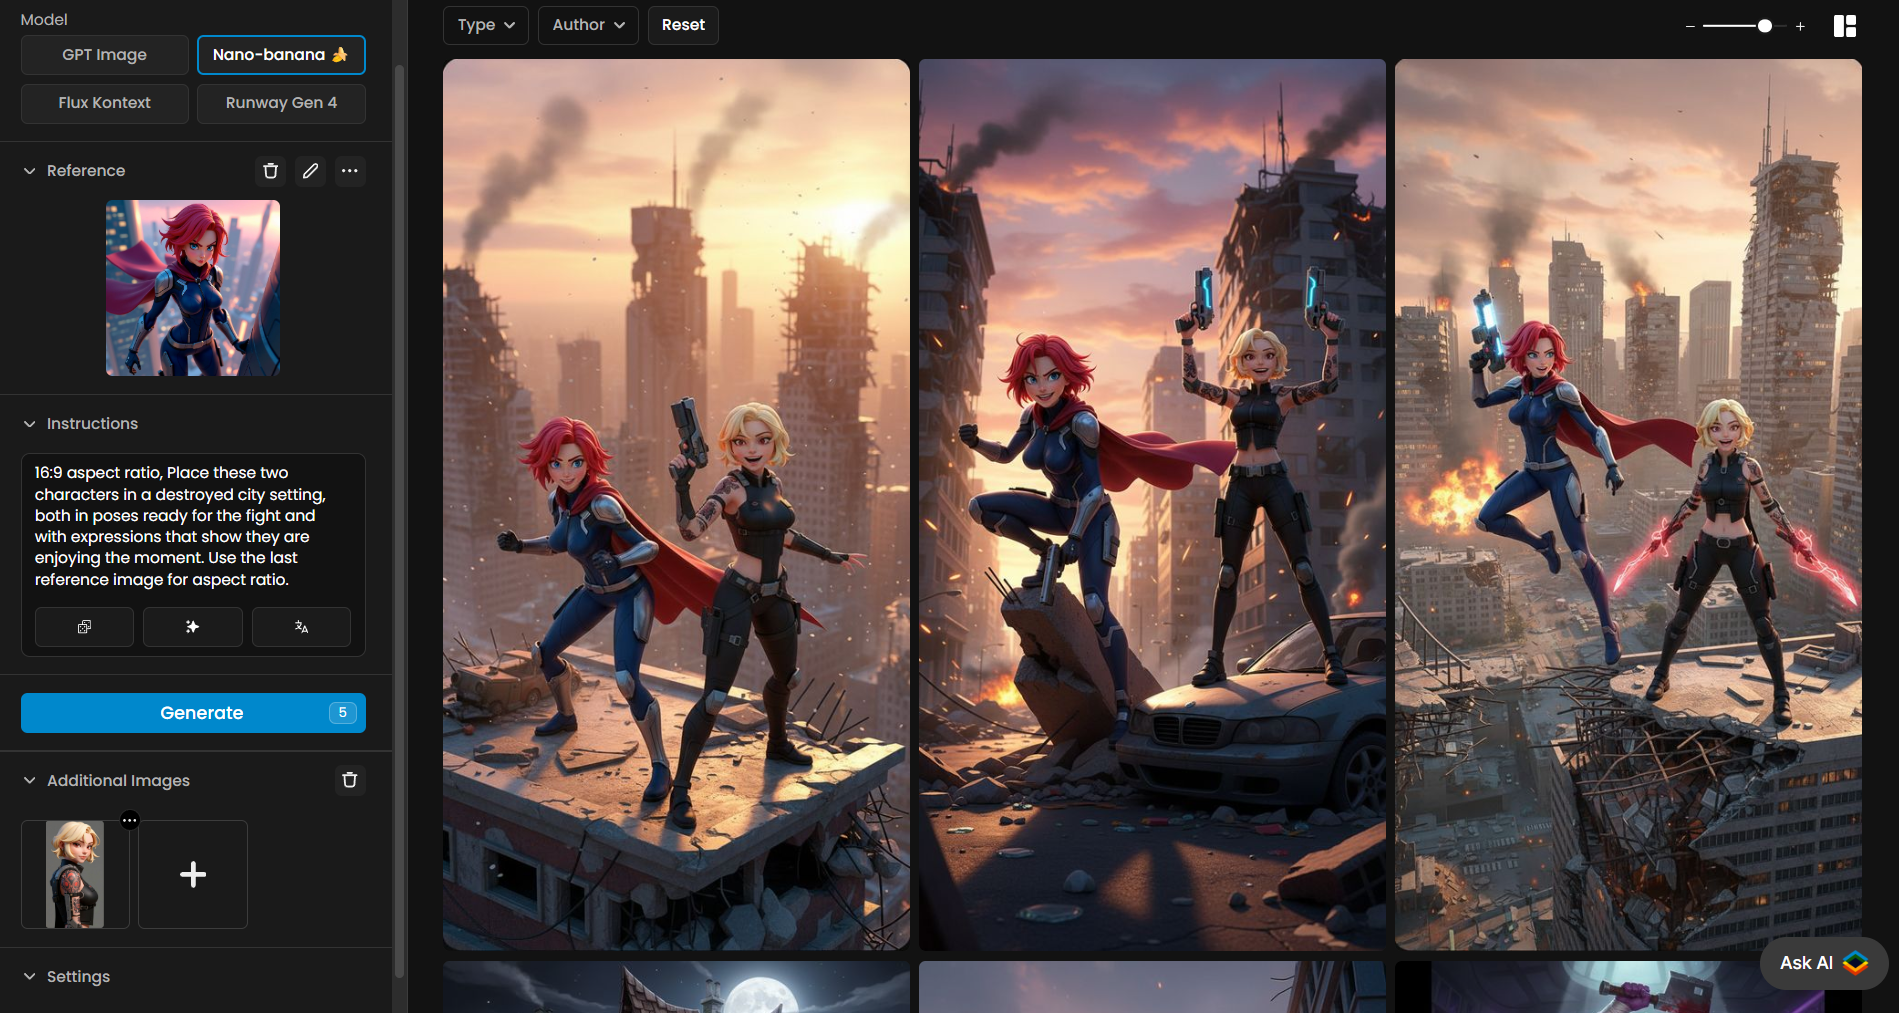
Step 2: Combine Using Nano Banana
Open one base image in Edit with Prompt, and load the second character as an additional image. Provide a detailed prompt describing how they should be positioned, their expressions, and how they interact. For example:
Place these two characters in a destroyed city setting, both in poses ready for the fight and with expressions that show they are enjoying the moment.
Click Generate. Scenario will create a cohesive image blending the characters in a scene-consistent composition. For a full guide, see this article and video on Edit with Prompts.
Step 3: Convert to Video and Animate
Once your edited image is ready, it can be used as an input frame:
Use “Convert to Video” to launch the animation tool with the selected image.
Add an animation prompt describing scene movement.
Select your preferred video model.
Use Prompt Spark again if needed—it adapts the prompt based on your image and video model.
Generate and iterate - as in Option A.
Step 4: Iterate Until It Feels Right
Test different versions using different prompts, video models, or seeds. In the prompt, small adjustments in character behavior or timing can significantly improve the final animation. Iteration is key to refining motion and ensuring consistency.
Try different models (e.g., Kling variants, Miimax, Veo, Pixverse). You can also use both a Start and End frame for greater control over video generation.
Once satisfied, combine all clips into a final sequence.
Tips for Multi-Character Animation
In your prompts, clearly separate character descriptions
Use consistent character names or labels to reinforce identity.
Prefer wide formats (e.g., 16:9) for balanced compositions.
Use Prompt Spark to refine and improve prompt quality.
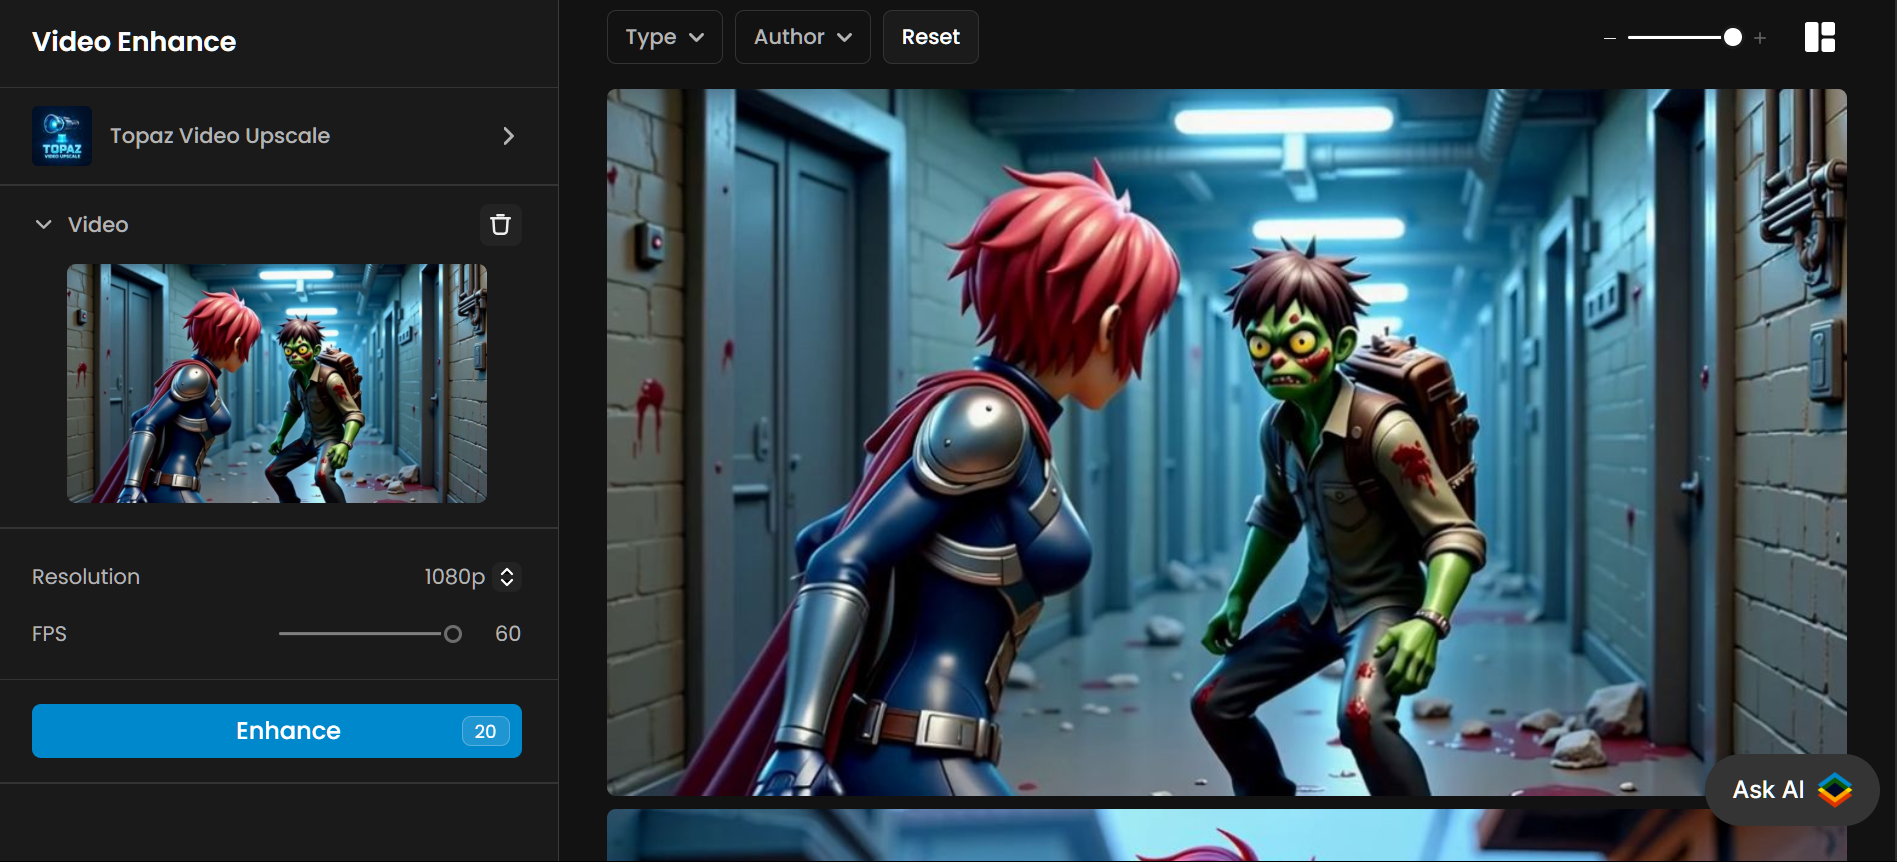
Optional: Upscale the Final Video (Up to 4K)
After choosing your final video, you can enhance its clarity, resolution, and frame rate using the Enhance tool (via Topaz Video Upscale, for instance). This helps reduce artifacts and prepares your video for presentation or publishing. More on this article.
To upscale:
Open the generated video.
Click the “Enhance” button on the top toolbar.
Use the enhancement interface to boost resolution and smooth motion.
Conclusion
Multi-character animation doesn’t have to involve hours of generations or manual editing. These workflows let you animate your characters with more precision and ease, bringing your narrative and visual intent to life.
Was this helpful?