Utility Nodes
Last updated: October 7, 2026
Introduction
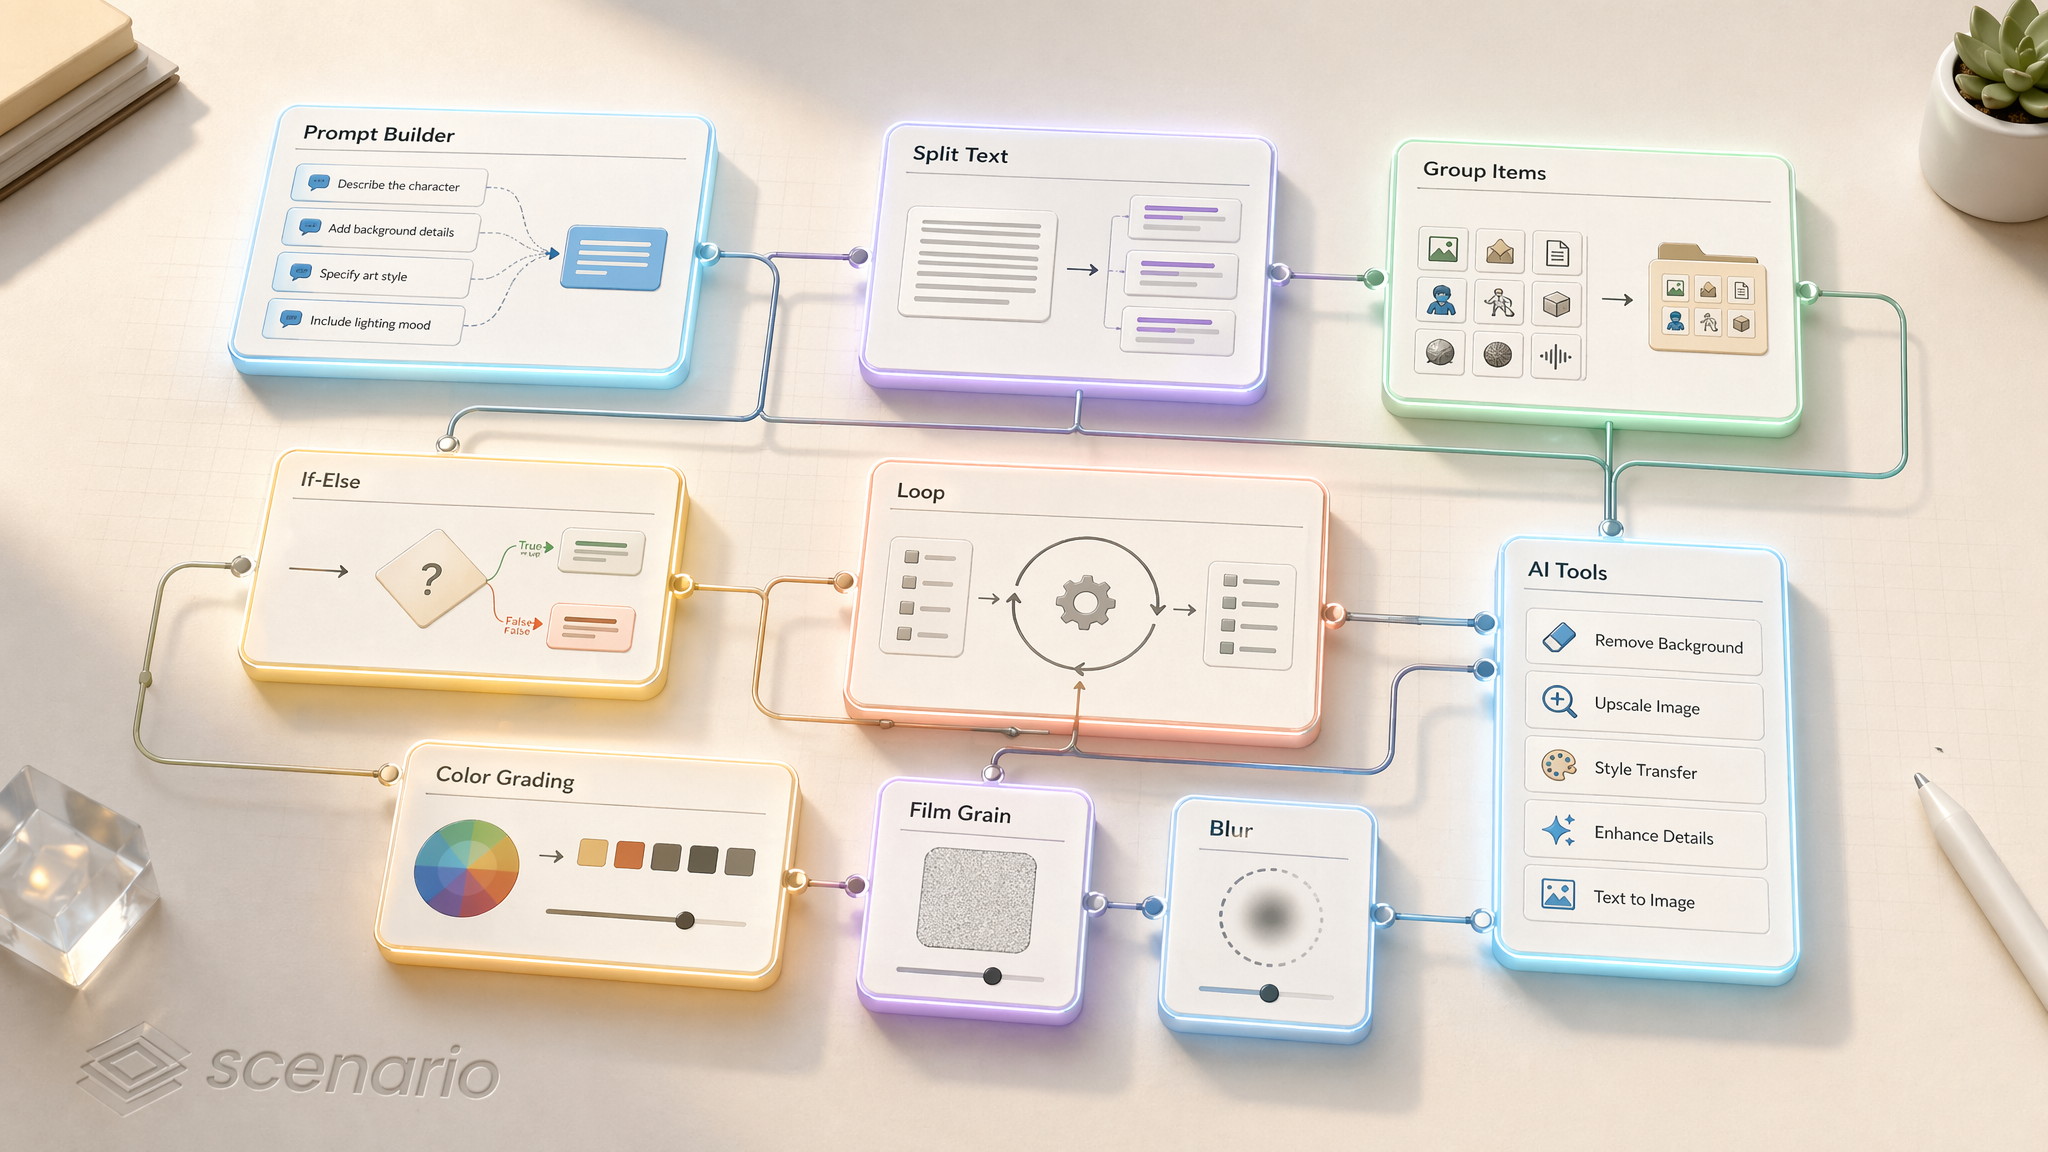
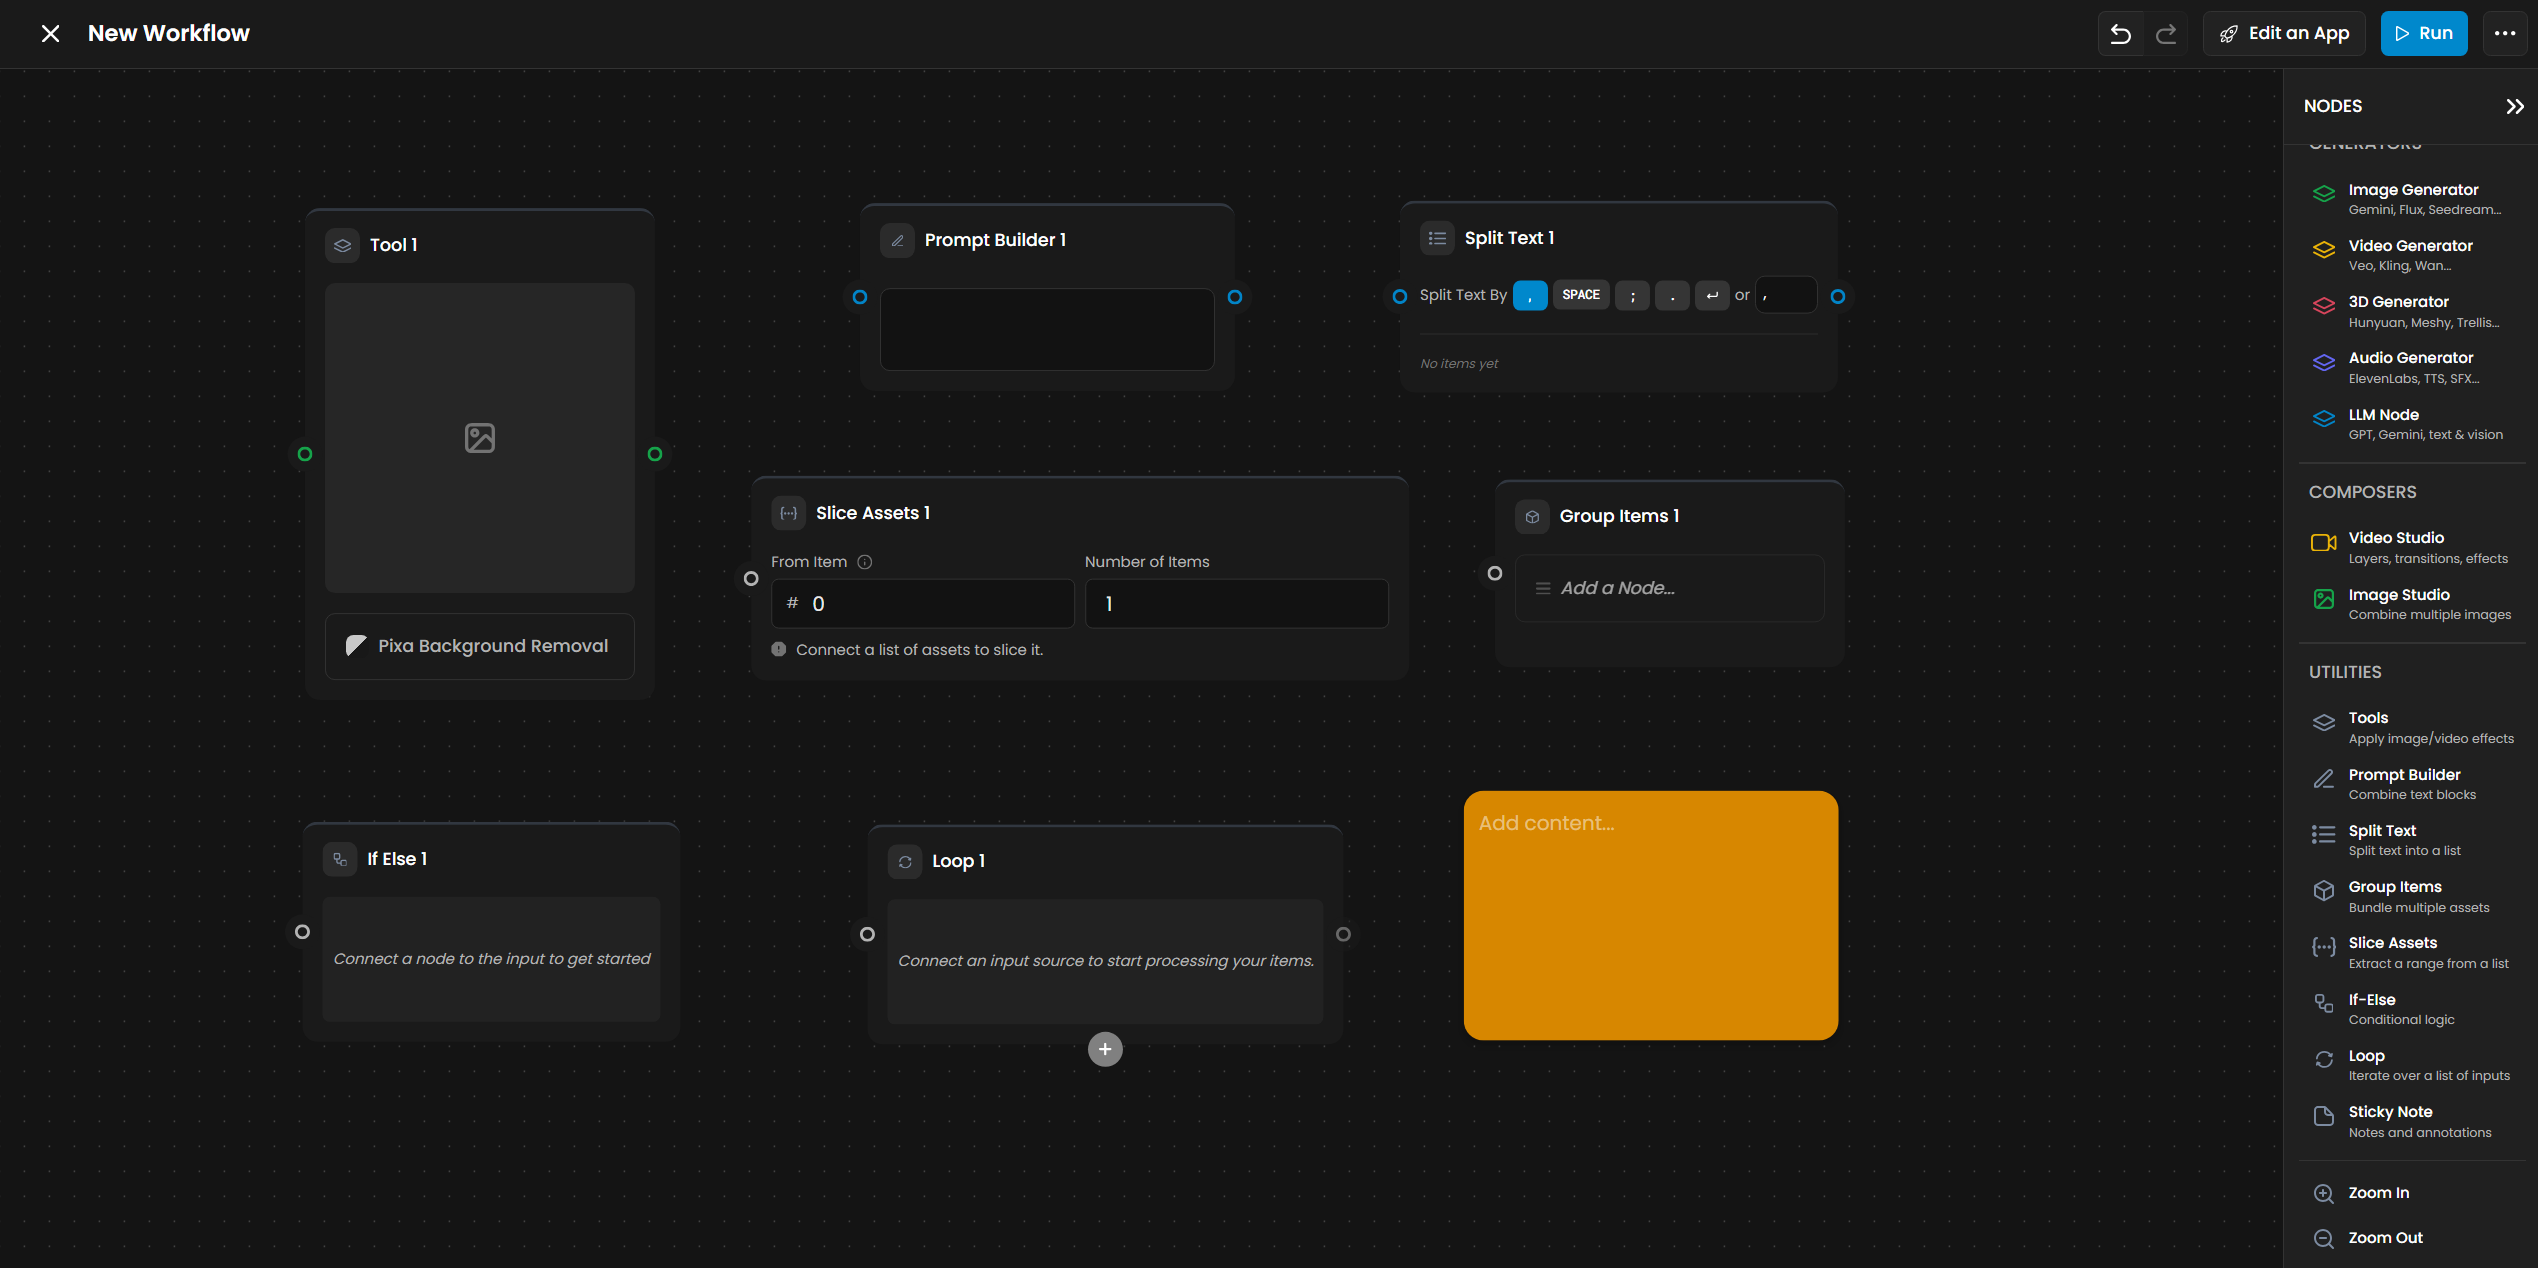
Utility nodes handle workflow logic - combining text, grouping assets, conditional branching, looping, human review, and post-processing. They connect generators and inputs into automated pipelines.
Tools
AI-powered:
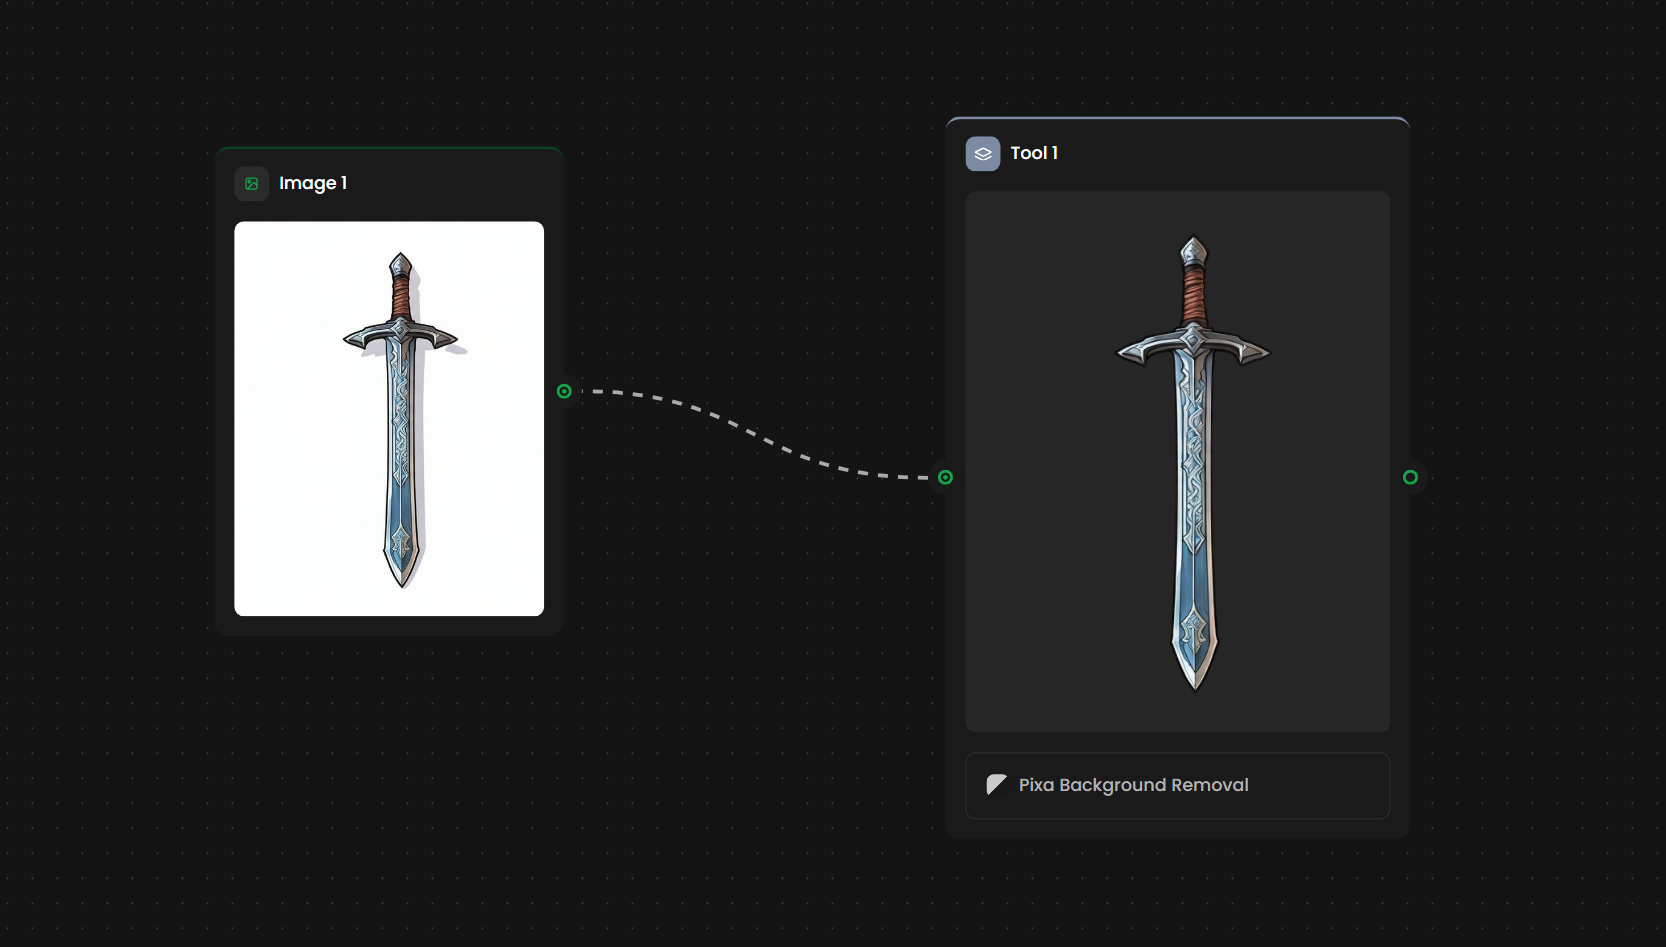
Background Removal
Smart Object Eraser
AI Upscale (up to 4x)
Style Transfer
Vectorize (convert raster images to vector format)
Video to Image Sequence (extract individual frames from video clips)
Processing effects (16+):
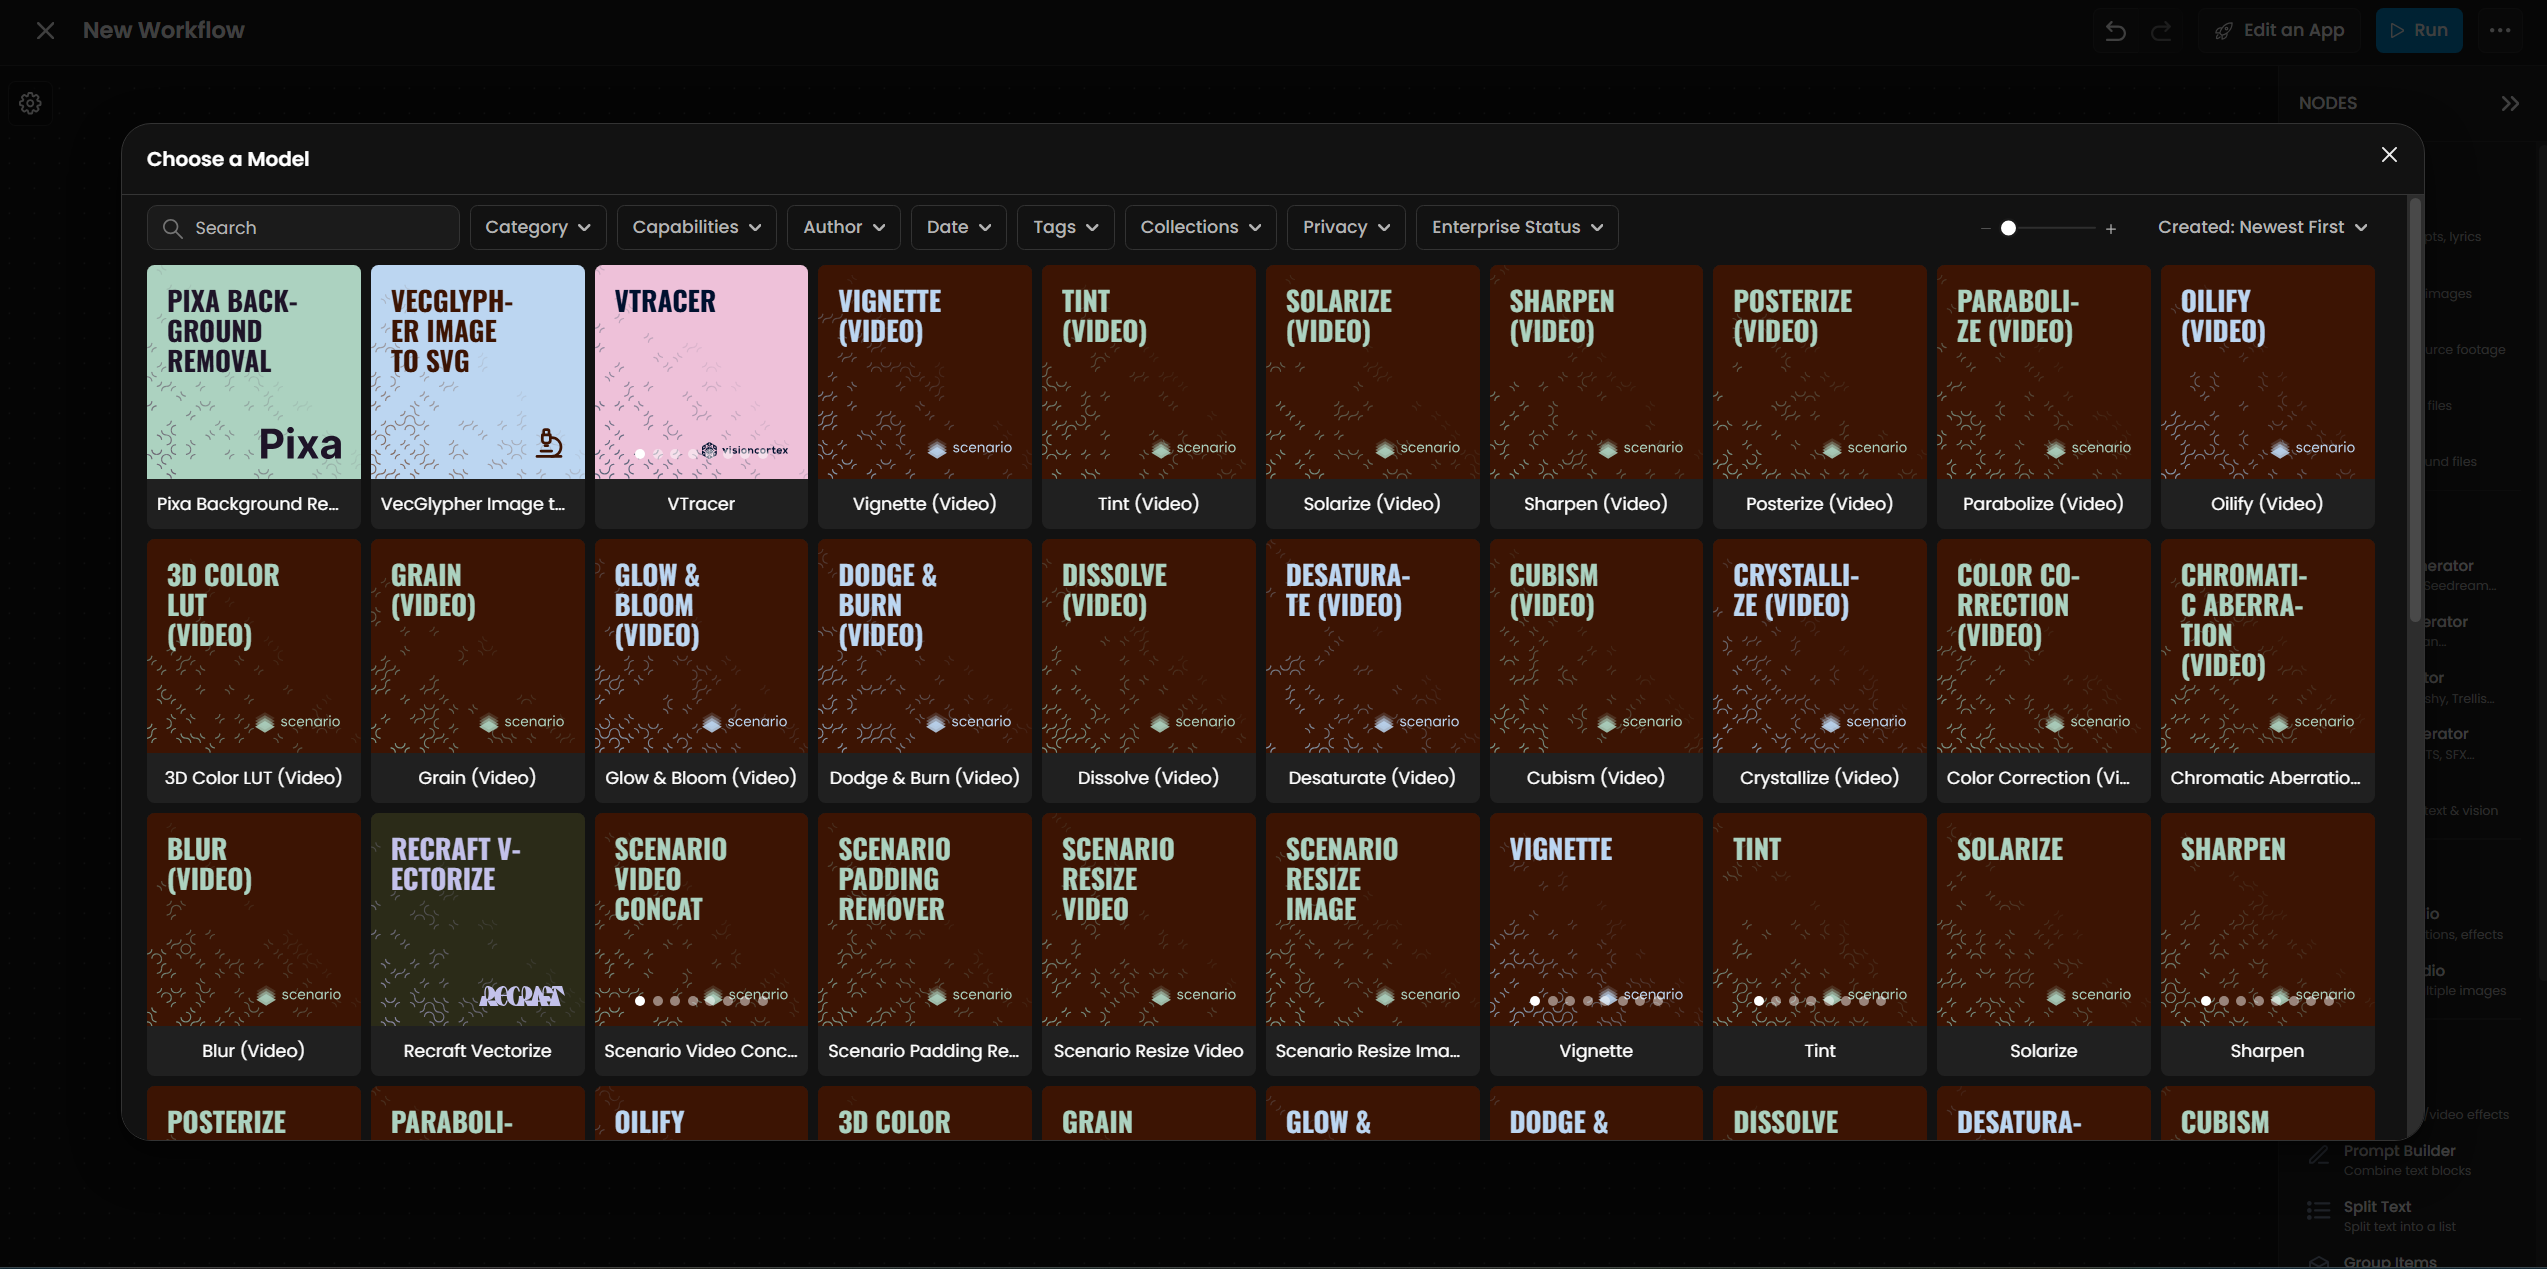
Color Grading with LUTs
Padding Remover
Film Grain
Halation (light bloom)
Bloom
Vignette
Chromatic Aberration
Additional standard post-processing effects
Notes
When a generation node connects to a Tools node, images are automatically converted to the required format.
Each tool has its own parameter controls accessible in the settings panel.
Effects can be chained: apply background removal, then upscale.
Prompt Builder
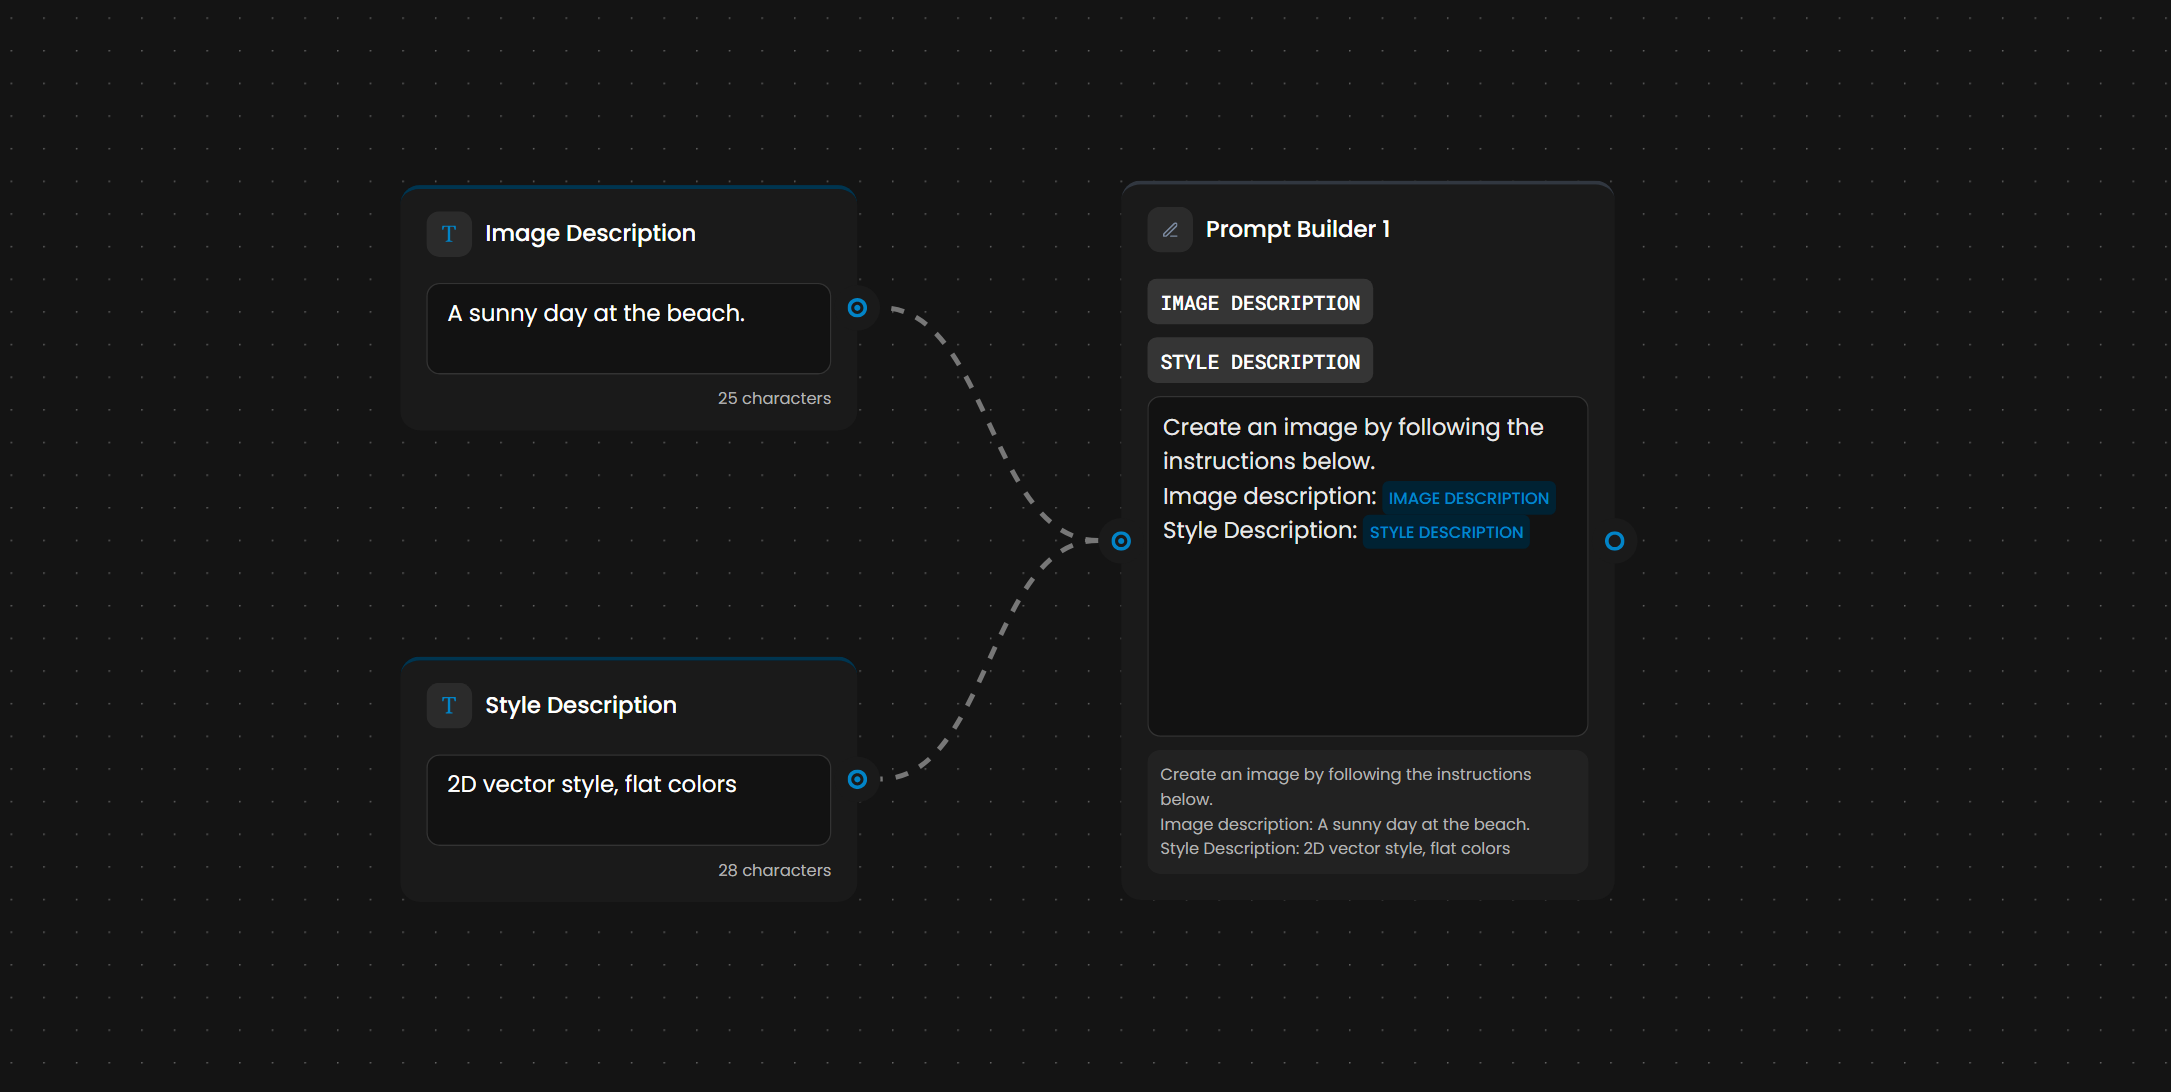
Combines multiple text inputs into a single text output using a template.
Inputs and Outputs
ItemTypeColor | ||
Text 1, Text 2, ... | Text | Blue |
Output | Combined Text | Blue |
How It Works
The Prompt Builder has a template area where you arrange variable chips representing each connected text input. You control the order, add literal text between them, and include line breaks.
It also accepts an optional Instructions input. When connected, the Instructions text is embedded in the template alongside the variable chips.
Example:
Text 1 (from LLM output): "A cheerful blonde woman wearing a blue polka-dot blouse..."
Instructions (optional): "Additional user instructions"
Template:
[STYLE PROMPT GENERATOR - FIRST RESULT] Additional user instructions: [INSTRUCTIONS (OPTIONAL)]Output: The combined prompt string
Notes
Add as many text inputs as needed.
Character limits: ~1000–2000 per input, ~5000 combined (depends on downstream node).
Useful for combining static templates with dynamic user inputs, LLM outputs, or variable content.
Split Text
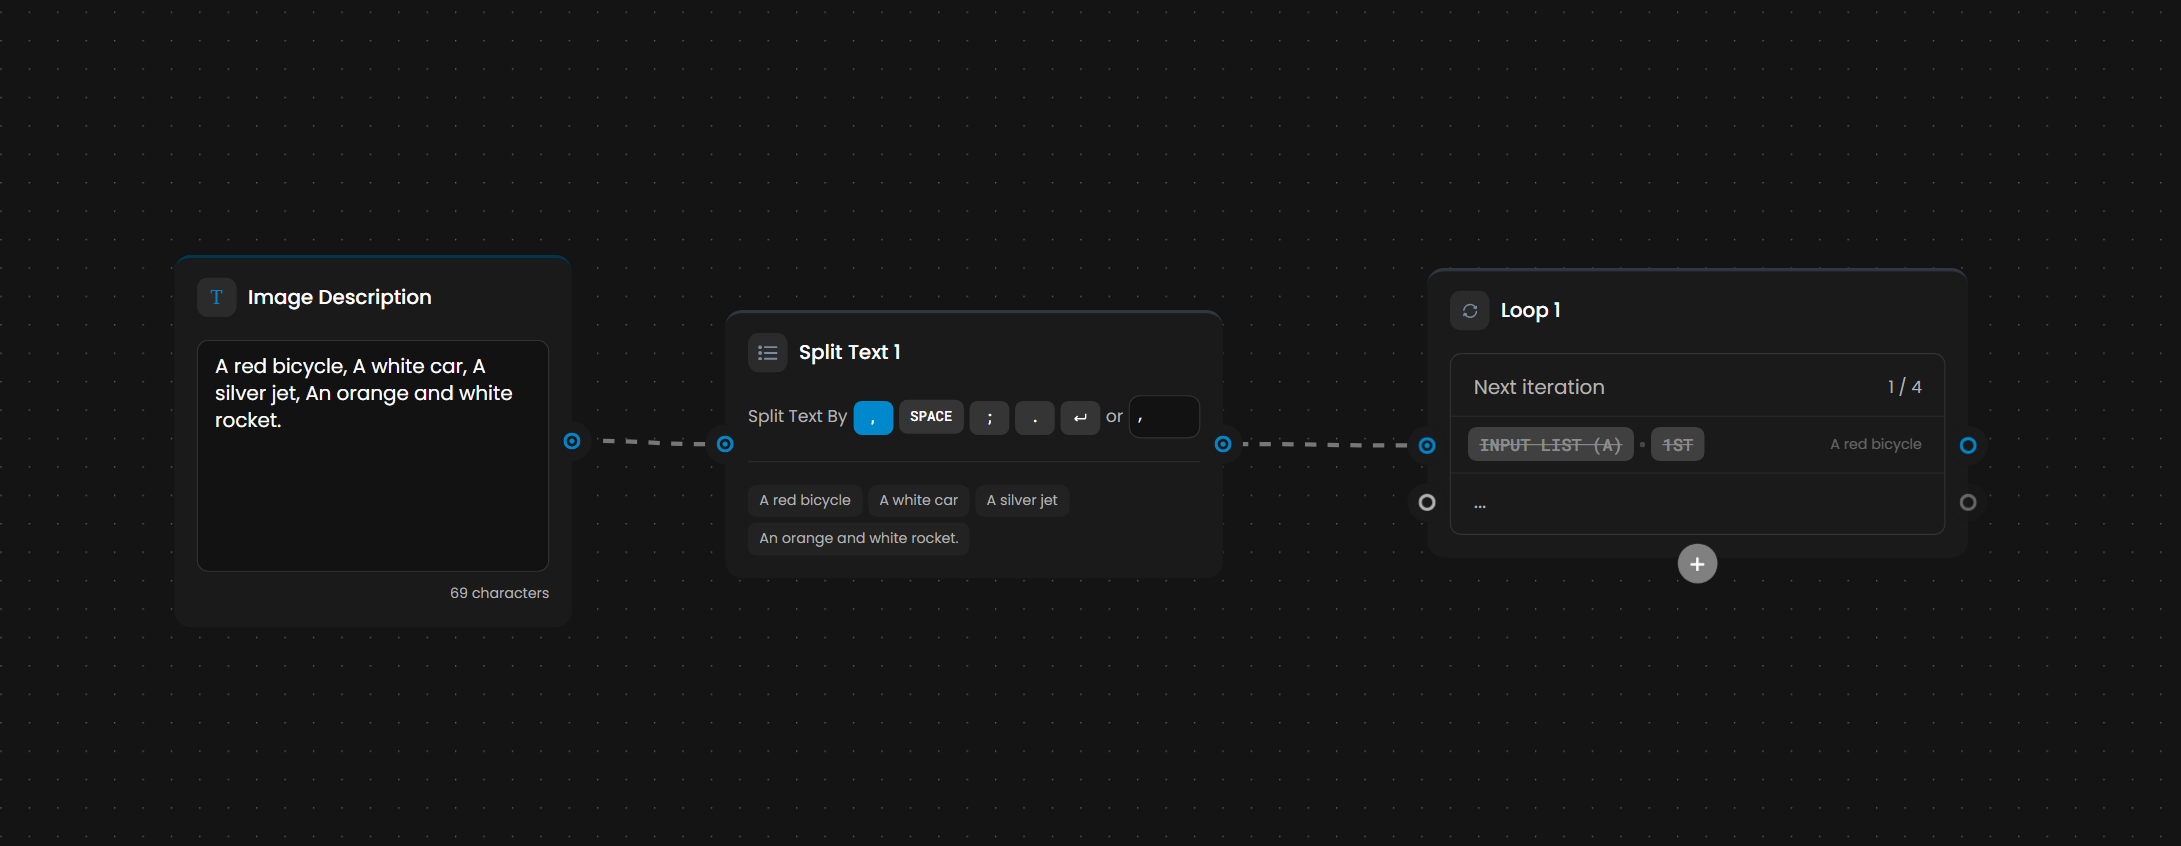
Breaks a single text string into a list of items based on a delimiter. This node is designed specifically for use with the Loop node. It takes a single text block and divides it into a list. The output connects directly to the Loop node's input port.
Inputs and Outputs
ItemTypeColor | ||
Input | Text | Blue |
Output | List of Text Items | Blue |
Delimiter Options
DelimiterExample | |
Comma | "cat, dog, bird" → 3 items |
Space | "cat dog bird" → 3 items |
Semicolon | "item one; item two" → 2 items |
Period | Sentence splitting |
Newline | Line-by-line splitting |
Custom | Any character or string |
The output shows a preview of split items as chips so you can verify the result before connecting downstream.
Primary Use Case
Split Text → Loop → Process each item individually. This pattern enables batch generation from a single text input.
Example: A text input with "sunset landscape, urban street, portrait photography" split by comma produces three items. Each item is then processed in a Loop, feeding into an Image Generator to produce one image per subject.
Group Items
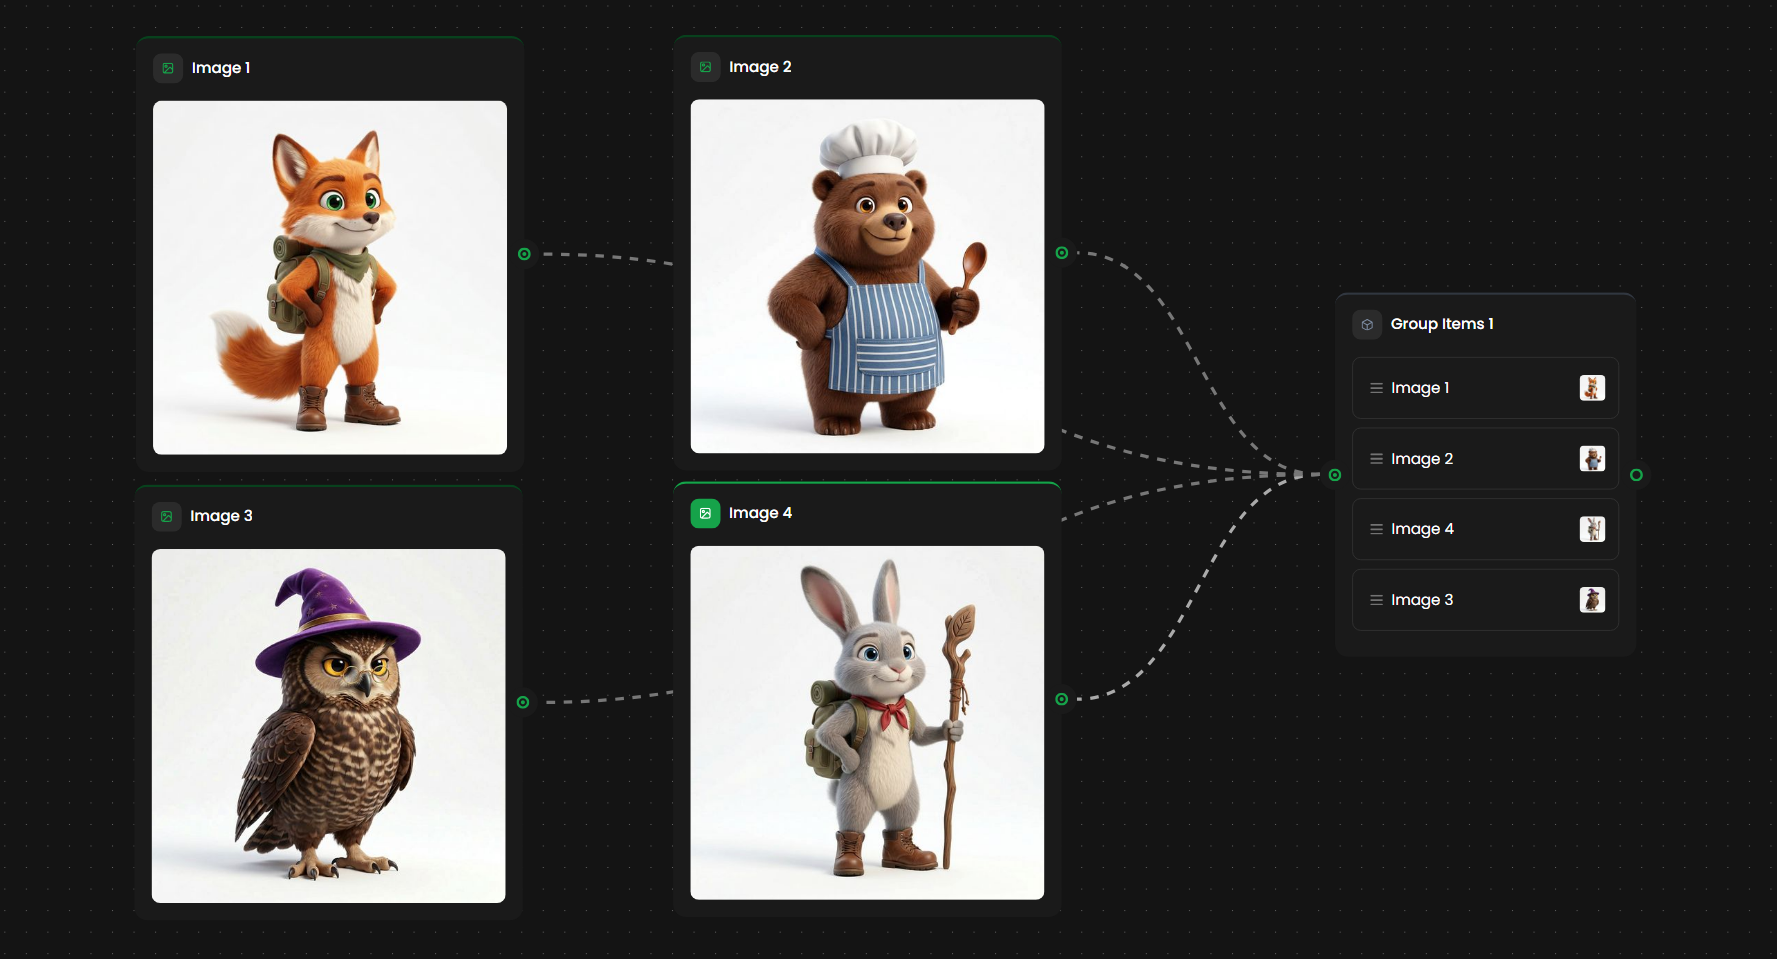
Bundles multiple individual assets into a single collection. Use it to gather outputs from parallel generation branches, different sources, or uploaded assets into one group for batch operations or convenience.
Inputs and Outputs
ItemTypeColor | ||
Image 1, Image 2, Image 3, ... | Assets | Green |
Output | Asset Collection | Green |
How It Works
Add as many input slots as needed. Each slot accepts an asset. The node bundles them into one output collection.
Notes
Items are ordered by input slot position.
Combine with Slice Items to extract subsets.
Combine with Loop to process each item with the same downstream pipeline.
Useful for organizing assets from parallel branches before applying consistent processing.
Slice Items
Takes part of a list of assets or texts and passes only those items on. It slices by position, picks a random sample, or pauses the run so you choose the items yourself. This node used to be called Slice Assets.
Inputs and Outputs
ItemTypeColor | ||
Input | Asset or text collection | White/Gray |
Output | Sliced Collection | White/Gray |
Modes
Pick a mode at the top of the node.
Default - keeps Number of Items items starting at From Item. From Item is zero-based (0 is the first item), and a negative value counts from the end (-3 starts at the third item from the end).
Randomize - keeps a random sample of Number of Items items. Lock the seed to get the same sample on every run, or unlock it to draw a new sample each time.
Choose - pauses the run when the list arrives and asks you to pick exactly Number of Items items. Only the items you pick continue downstream. The optional Message is the instruction shown while the run waits (by default, "Select the items to continue").
Choose Mode
Choose mode puts a person in the loop: generate several candidates, then keep the best one (or the best few) before the expensive steps run.

In the Node Editor, a picker opens with your message when the run pauses. Pick the items and click Confirm, and the next nodes start. If you close the picker, Select to Continue on the node opens it again.
In a published app, the same picker opens during the run. Select the items and click Confirm, or click Stop Workflow to end the run.
Inside a Loop, every iteration asks for its own selection. When several iterations finish together, their selections queue and appear one after another.
From Item is not used in Choose mode, and the node does not connect to an Approval node: Choose already is the human step.

For a step-by-step example, see Choose Which Results Continue in a Workflow.
Examples
Collection of 10 items:
Default, From 0, Count 3 → items 0, 1, 2
Default, From 5, Count 3 → items 5, 6, 7
Default, From -1, Count 1 → item 9 (the last item)
Randomize, Count 3 → three random items, the same three on every run while the seed is locked
Choose, Count 1 → the run pauses until you pick one of the ten
In Default mode, if the range goes past the end of the collection, you get fewer items than requested (no error).
Notes
Default mode uses zero-based indexing. The first item is index 0, not 1.
Use Default mode for batching: process large collections in chunks (for example, 5 items at a time).
Combine with Loop for paginated processing.
If-Else
Adds conditional branching to the workflow. Evaluates a condition and routes execution down different paths. This enables workflows that adapt based on content, user input, or data properties.
Inputs and Outputs
ItemTypeDescription | ||
Condition | CEL Expression | Written in Common Expression Language |
Input Data | Mixed types | Variables to evaluate |
True Output | Any type | Executes if condition is true |
False Output | Any type | Executes if condition is false |
Else-If Branches | Optional | Chain additional conditions |
CEL (Common Expression Language)
Conditions are written in CEL. Supported operations:
OperatorMeaningExample | ||
>, <, >=, <= | Comparison | input.quality > 0.8 |
==, != | Equality | style == "portrait" |
&& | AND | quality > 0.8 && style == "landscape" |
! | NOT | !isApproved |
String operations: string.contains(prompt, "landscape"), prompt.startsWith("A photo"), prompt.endsWith("4K")
Collection operations: length(assets) > 5, size(tags) == 0
Branching
You can chain multiple conditions:
If condition_1 → path A
Else If condition_2 → path B
Else If condition_3 → path C
Else → default path
Example
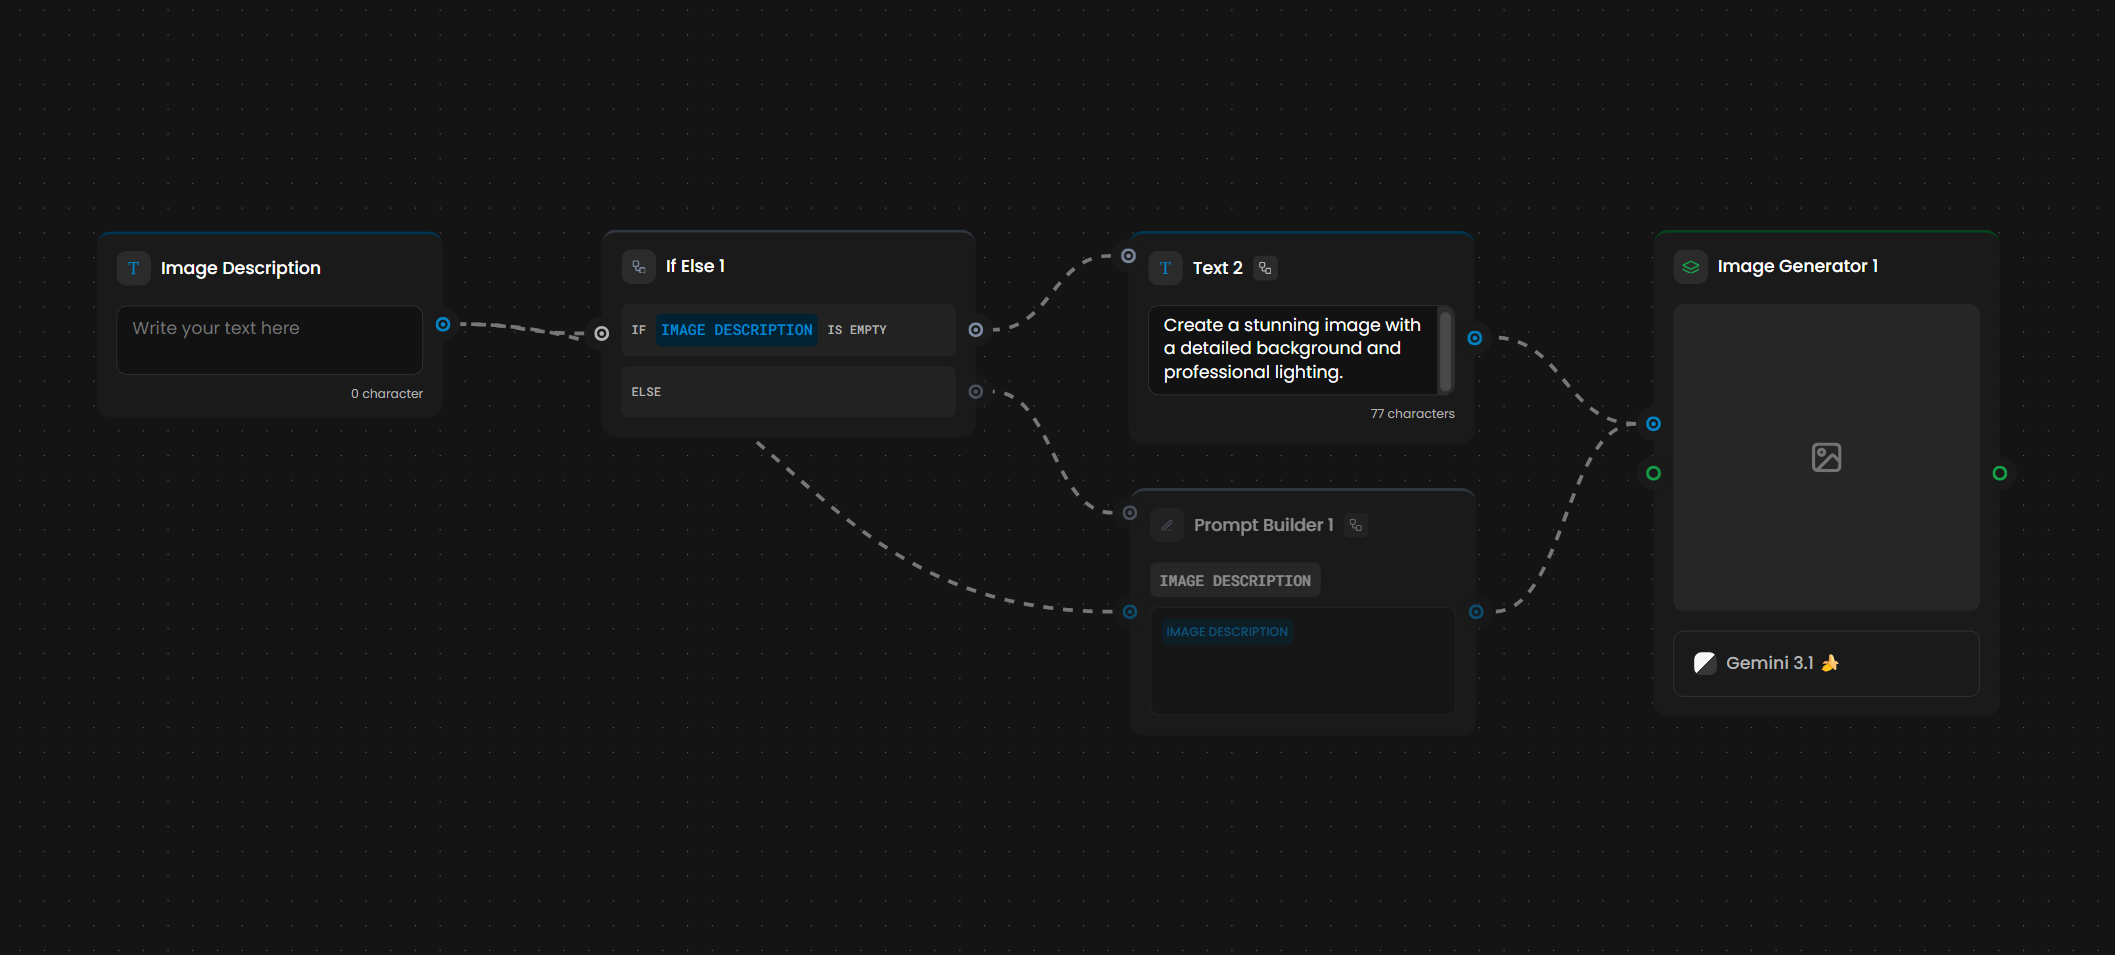
In the Game Scene Builder workflow, an If-Else node checks whether the user provided a prompt:
IF PROMPT IS EMPTY→ use a default text descriptionELSE→ use the user's prompt
This allows the workflow to function with or without user input.
Notes
CEL is case-sensitive.
Always provide an else/default path to handle unexpected cases.
Test conditions with simple expressions first, then add complexity.
Loop
The Loop node allows you to run a set of workflow nodes repeatedly over a list of inputs - such as images, text items, or assets. Instead of building separate workflows for each item, you define your processing logic once and let the Loop node handle the repetition automatically. If you have ever needed to apply the same generation, edit, or transformation to twenty images, the Loop node eliminates that manual work entirely.
How the Loop Node Works
At its core, the Loop node works like a "for-each" loop in code. You provide a list of inputs, and it passes each item through the internal nodes - one at a time - until the list is complete. Results are then collected and passed to the next part of your workflow.
The Loop node accepts two types of input:
Images or Assets - Ideal for batch image processing, style application, and asset variation pipelines.
Text Lists - Useful for generating content from multiple prompts, keywords, or names in sequence.
Setting Up a Loop Node
Four steps to get a Loop running:
Add the Loop Node - Drag it onto the canvas. It features a defined internal area where you place the nodes that should repeat.
Define Your Input List - Connect your source (Asset Library, Image Input, or Split Text node) to the Loop node's input port.
Build Internal Logic - Place your processing nodes (e.g., Image Generator, Edit, LLM) inside the Loop node's canvas area. Each item from your list will pass through this internal pipeline.
Connect the Output - The output port delivers the full collection of results to the next stage of your workflow, such as a Merge node or batch download.
Example
Split Text produces ["cat", "dog", "bird"]. A Loop processes each item through a Prompt Builder ("A photo of a [current item]") and Image Generator. Output: 3 images.
Practical Examples
Batch Product Images - Connect twenty product photos to a Loop node. Inside, place a Background Removal node followed by an Edit with Prompts node for a consistent studio background.
Prompt-Based Variations - Use a Split Text node with fifty character names. Inside the loop, an Image Generation node references the current loop item as part of the prompt to generate fifty unique portraits.
Sprite Sheet Transformations - Apply the same color grading or style transfer to a full set of character sprites in a single run.
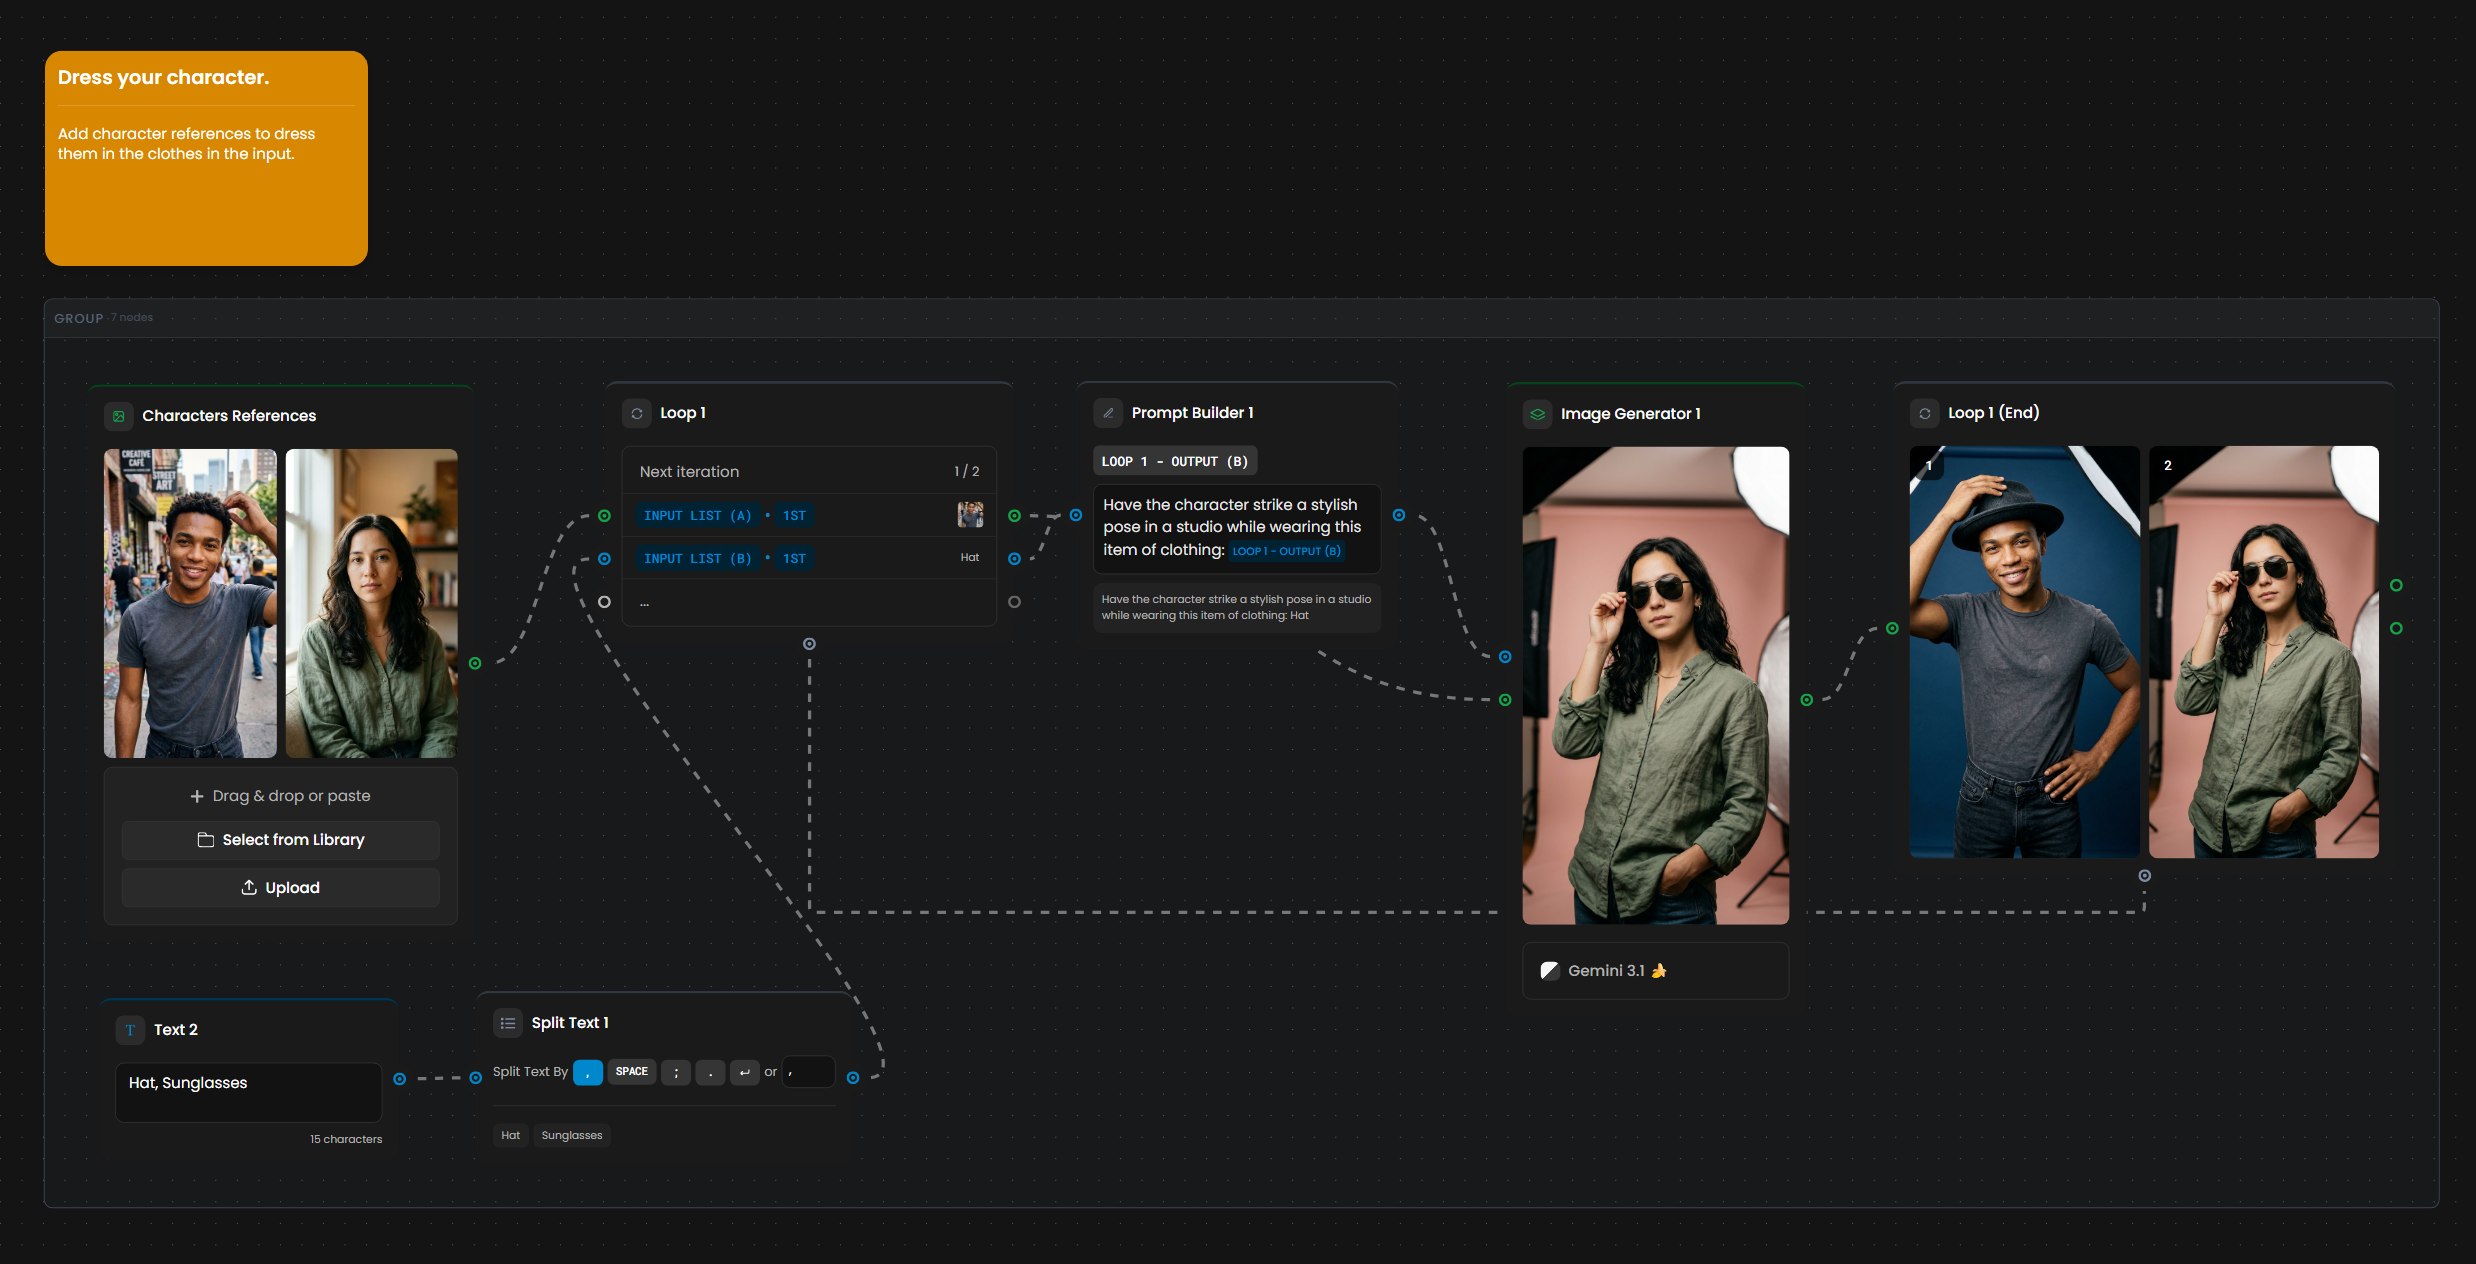
The Split Text Utility Node
The Split Text node is designed specifically for use with the Loop node. It takes a single text block and divides it (usually by line breaks) into a list. The output connects directly to the Loop node's input port. See the Split Text section above for delimiter options and details.
Loop Node and the API
In the Scenario API, the Loop node corresponds to the ForEach node. Use the List node to define your collection. Refer to the API documentation for full details.
Tips for Success
Test Small - Start with 3–5 items to confirm your internal pipeline works before running a large batch.
Keep it Lean - Simpler internal pipelines run faster and cost fewer credits.
Document - Use Sticky Notes inside the Loop node's canvas to explain the logic to teammates.
Use Slice Items for large collections - Process in batches of 10–50 to manage resources.
Keep loop bodies simple. Pre-filter or pre-process outside the loop when possible.
Approval
Pauses the workflow for human review before it continues. When a run reaches the node, it surfaces the incoming asset(s) alongside a review message you define and waits for a person to approve or reject before any downstream nodes run. This adds a human-in-the-loop quality gate inside an otherwise automated pipeline.
Inputs and Outputs
Input: the asset(s) or data to review. Output: the same items, released to the downstream nodes once you approve.
How It Works
When the run reaches an Approval node, it pauses and shows the incoming output together with a review message you write - for example, "Look 2 keyframes pass QA? Approve to continue." A reviewer then chooses:
Approve - releases the asset(s) to the downstream nodes and the run continues.
Reject - stops that branch, so no further compute is spent on a result that failed review.
Approval is a yes or no on what arrives. To pick some of several results instead, use Slice Items in Choose mode.
Notes
You set the review message on the node - use it to tell the reviewer exactly what to check.
Pair Approval with If-Else and Loop to route rejected items back for regeneration, creating a review-and-retry loop.
Use it as a QA checkpoint in high-volume or automated runs, so a person reviews the key steps instead of every output.
Runs wait at the node until someone responds, so make sure a reviewer is available to keep batches moving.
Sticky Note
Non-functional annotation node for documenting your workflow. Does not process or pass data.

Inputs and Outputs
None. Sticky Notes are documentation only.
Content
Plain text, multiline, up to ~5000 characters.
When to Use
Explain the purpose of a workflow section
Document parameter choices
Record why a particular architecture was chosen
Guide collaborators through the workflow
Note version and date information
Common Patterns
Batch generation from a list: Text Input ("cat, dog, bird") → Split Text → Loop → Prompt Builder → Image Generator → one image per subject
Conditional routing: Generate → If-Else (evaluate a property) → Route to different processing paths
Dynamic prompts: User input + LLM output → Prompt Builder (combine with template) → Generator
Pagination: Large collection → Slice Items (items 0–10) → Loop → Process → Repeat for next chunk
Multi-stage pipeline: LLM (analyze reference) → Prompt Builder → Image Generator → Tools (upscale) → Output
Human QA gate: Generator → Approval (review) → continue downstream, or reject and route back via If-Else / Loop to regenerate
Pick the best take: Generator (4 images) → Slice Items in Choose mode (keep 1) → Upscale or Video Generator
Troubleshooting
Split Text not splitting correctly? Verify delimiter matches your input format. Check for extra spaces.
Loop not processing expected items? Confirm the input collection is connected properly. Review error handling settings.
If-Else condition not triggering? Test CEL syntax in isolation. CEL is case-sensitive. Verify variable names match upstream nodes.
Slice Items returning unexpected results? Check the mode first. In Default mode, remember zero-based indexing (first item = 0). Verify From + Number doesn't exceed collection size.